Call us at 1-888-GTCOMM1


In our last article on firewall introductions, I discussed Linux Firewalls, what they are and how to configure them by adding rules. In this second feature, let’s take a look more closely at one of several hardware firewall options available: the Cisco ASA 5500 series.
Here I will cover the firewall’s capabilities as well as an example for a first time configuration. I will also give an overview of the Cisco IOS command line necessary for operating this firewall.
The Cisco ASA 5500 series has several functionalities which I will briefly detail here. While it primarily acts as a firewall, it is far more robust than that and do much more. The Cisco ASA 5500 can offer routing capabilities with support for routing protocols, VPN access to its interfaces, NATing, remote management, mixed security contexts to apply different security policies, and much more. That said, we will only go into the most basic configurations so that you can setup your Cisco ASA to work properly.
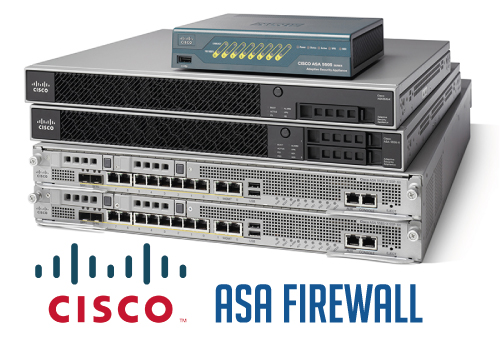
The Cisco ASA 55xx Firewall
The first thing you’ll notice when you receive your Cisco ASA 55xx, is that it’s a huge brick, with a few ports on one side. You might notice that it looks a lot like a regular datacenter switch, with the difference being that it has less ports. On the model we used for this blog(Cisco ASA 5510), you will see 4 regular Ethernet ports, 1 management port, 1 console port, 1 auxiliary port and 2 USB ports. There’s also an opening for additional flash storage. For the first setup, we will need to focus on both the console port and the management port.
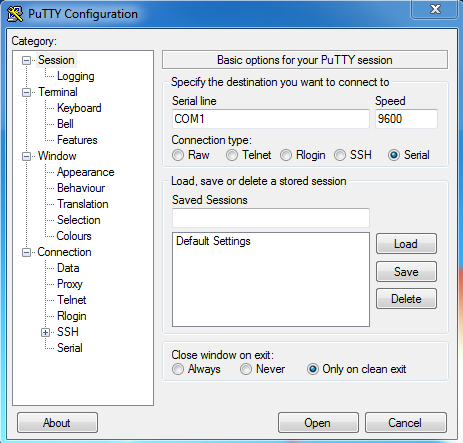
The console port is not a regular Ethernet port. While it uses a RJ45 connector, it generally requires either a serial port or USB port adapter on the other end. To do the initial setup of your hardware firewall, you will want to plug this cable into the serial or USB port of your computer. To gain access to the firewall’s console and command shell, you will need to use a program like hyper terminal or Putty. For this article, we will use Putty.
Specify the Serial Connection Type and Port
In Putty, you will need to specify the serial connection type and port for the connection. When the connection is initialized, you will have a black screen pop up. If you then press enter, the command line will appear and you’ll be able to enter commands in the firewall.
Cisco IOS commands to Use
The firewall’s OS answers to Cisco IOS commands, which is fairly different from DOS and UNIX command line. Here are a few useful commands to know:
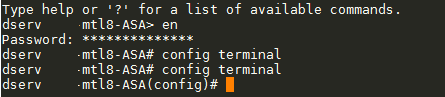
Enable – Switch to privileged mode. Generally requires a password that you can set. This is somewhat similar to root on UNIX.
Configure terminal – From Privileged mode, let’s you configure interfaces, routing behaviors, access lists and a plethora of other functionalities.
Interface – Lets you configure network interfaces. On the ASA 5510, the interfaces will be named Fastethernet 0/0 to Fastethernet 0/3. The management interface is called Management 0/0. So, the command “interface management 0/0” lets you access the management configuration.
IP address – When an interface is selected, you can configure its IP address using this command. The address should be entered in the following format: IP address [IP] [Subnet mask].
Configuring the Management Port
With this information in hand, we can start configuring the management port so that you can get access to the command line without needing direct physical access to the firewall. I will show you a list of commands and explain what they do briefly.
enable

config terminal

interface management 0/0

ip address 192.168.0.50 255.255.255.0

nameif management

security level 100

no shutdown

exit

write memory
As you can see, we first enter privileged mode, then we enter the configuration terminal in order to reach the management interface configuration. From there, we assign an IP to the management interface which should be part of our internal network, we name the interface using the Name if command and we set the security level for the interface. Please note that an interface name is mandatory for any type of connection to work. The security level is set to ensure that outside traffic doesn’t get routed to the management interface. No shutdown sets the interface as active and exit brings us back to the configuration terminal level.
Setup Access though SSH Protocol
Next, we can setup access to the command line through the SSH protocol for the management port. To do so, you will first want to set a password for the privileged mode. You can do so using the following command:
passwd [new password]
You do not need to put the brackets, simply write the password after the Passwd command. We follow up by generating an encryption key for SSH connections using this command:
crypto key generate RSA modulus 1024
In Closing the Firewall Setup
Finally, we write down the configuration in memory and then grant SSH access through the management port:
ssh [source_IP] [mask] management

write memory
The source IP can designate an IP range with the mask giving us the exact size of that range. The last word designate the port through which SSH connection should be granted. Since we named our management port “management”, I wrote its name there. Now that this is done, you should be able to connect to the firewall using SSH. The username for the connection would be “PIX” and the password is the one you set previously.
Since we can now access the Firewall remotely using SSH, we can now start configuring it. I will discuss that topic in my next piece as well as give you an overview of the more advanced capabilities of the Cisco ASA hardware firewall.