Call us at 1-888-GTCOMM1


In this tutorial, we will explain how to install and run malware scan with Maldet on CentOS 8 server.
Malware is the name of a number of malicious software including, spyware, ransomware and viruses. It was designed to cause your system, delete your personal data and gain unauthorized access to a network. Maldet stands for “Linux Malware Detect” is a malware scanner for Linux operating system. It can be used to scan your server for malicious files.
Prerequisite
- A server running CentOS 8
- Root access to the server
Install Maldet on CentOS 8
Maldet is written in Perl, so you will need to install Perl in your system. You can install it using the following command:
dnf install perl -y
Next, download the latest version of the Maldet with the following command:
wget http://www.rfxn.com/downloads/maldetect-current.tar.gz
Once downloaded, extract the downloaded file with the following command:
tar -xvzf maldetect-current.tar.gz
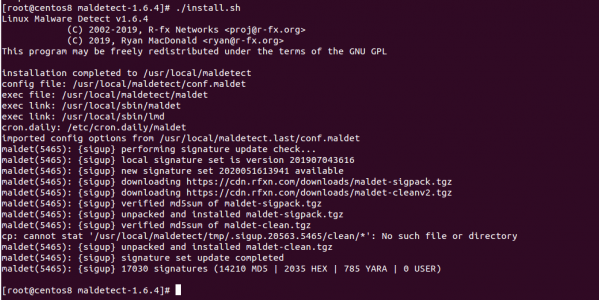
Next, change the directory to the extracted directory and install the Maldet using the following command:
cd maldetect-1.6.4 && ./install.sh
Once the Maldet has been installed, you should see the following screen:
Maldet Syntax
The basic syntax of the Maldet command as shown below:
maldet [OPTION] [Directory Path]
A brief explanation of each option is shown below:
-b : This option is used to execute operations in the background.
-u : This option is used to update malware detection signatures from rfxn.com.
-l : This option is used to view maldet log file events.
-d : This option is used to update the installed version from rfxn.com.
-a : This option is used to scan all files in the path.
-p : This option is used to clear logs, session and temporary data.
-q : This option is used to quarantine all malware from the report.
-n : This option is used to clean & restore malware hits from the report.
Configure Maldet on CentOS 8
The Maldet default configuration file is located at /usr/local/maldetect/conf.maldet.
You can edit it with the following command:
nano /usr/local/maldetect/conf.maldet
Change the following lines as per your need:
 # To enable the email notification.
 email_alert="1"

 # Specify the email address on which you want to receive an email notification.
 email_addr="user@domain.com"

 # Enable the LMD signature autoupdate.
 autoupdate_signatures="1"

 # Enable the automatic updates of the LMD installation.
 autoupdate_version="1"

 # Enable the daily automatic scanning.
 cron_daily_scan="1"

 # Allows non-root users to perform scans.
 scan_user_access="1"

 # Clean string based malware injections.
 quarantine_clean="1"
Save and close the file when you are finished.
Scan Directory with Maldet
You can scan any directory with Maldet using the -a option. For example, to scan the directory /etc, run the following command:
maldet -a /etc/
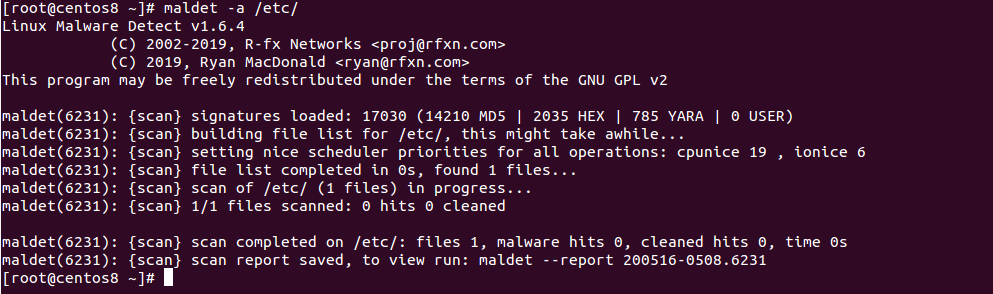
From the above screen, you will get the scan report ID. You can view the detailed report using the report ID:
maldet --report 200516-0508.6231
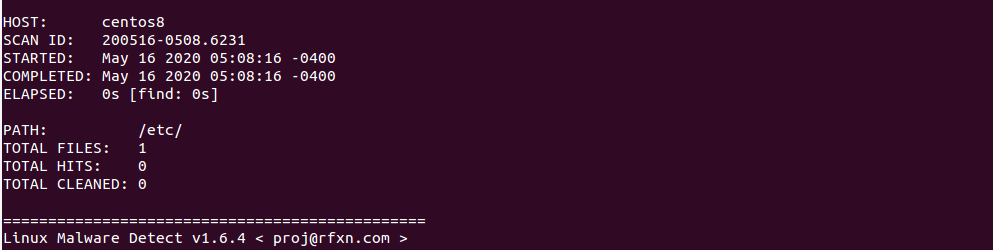
You should see the scan report in the following screen:
If you want to put the infected files to quarantine, run the following command:
maldet -q 200516-0508.6231
If you want to clean on all malware results from a previous scan, run the following command:
maldet --clean 200516-0508.6231
Scan Directory with Maldet in Background
If you want to scan a very large directory then you can use -b option to execute operations in the background.
For example, scan the root partition (/) in the background with the following command:
maldet -b -a /
You should see the following screen:

You can now check the log file with the following command:
tail -f /usr/local/maldetect/logs/event_log
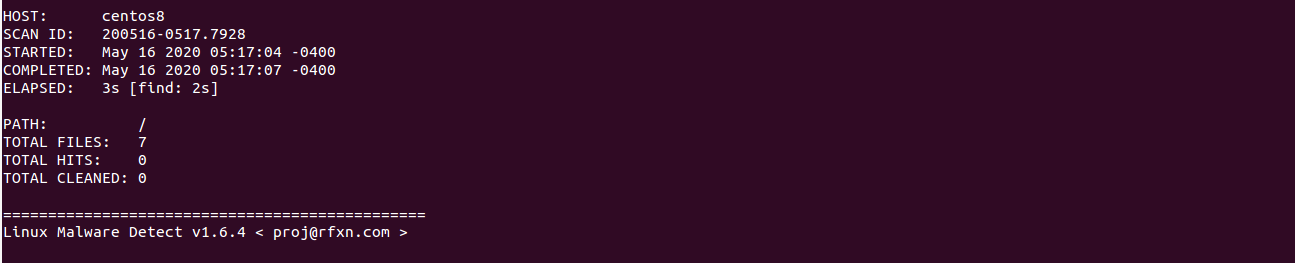
You should see the following screen along with report ID.

You can now use this report ID to see the scan report as shown below:
maldet --report 200516-0517.7928
You should see the scan report in the following screen:
Clear Logs and Temporary data
If you want to clear logs, quarantine queue, session and temporary data from the previous scan, you can use -p option as shown below:
maldet -p
You should see the following screen:

Now, verify the log data with the following command:
maldet -l
Conclusion
In the above guide, you learned how to install and run malware scan with Maldet on CentOS 8. I hope you can now scan your server with Maldet and remove the malware easily.