 Call us at 1-888-GTCOMM1
How to use ownCloud one click app
ownCloud offers flexibility and privacy, and a safe haven for calendars, files, contacts, email and more. You’ll be able to access and share on personal devices.
An enticing aspect of ownCloud is the ability to develop your own personal ownCloud server app. Even if you have no background in app development, ownCloud simplifies the process. Fortunately, with our ownCloud One Click App, you can quickly set up your cloud and leave the remaining details to us.
Creating an ownCloud One Click App
What is an OCA?
In simple terms, an OCA consists of a regular system image the same as if you were going to provision an Ubuntu server. The cool thing here is that we’ve set up special images that have your favorite applications pre-loaded into them.
The reason why you’re doing this is that it’ll speed up your setup time and make sure that the system has the right dependencies to accomodate the app.
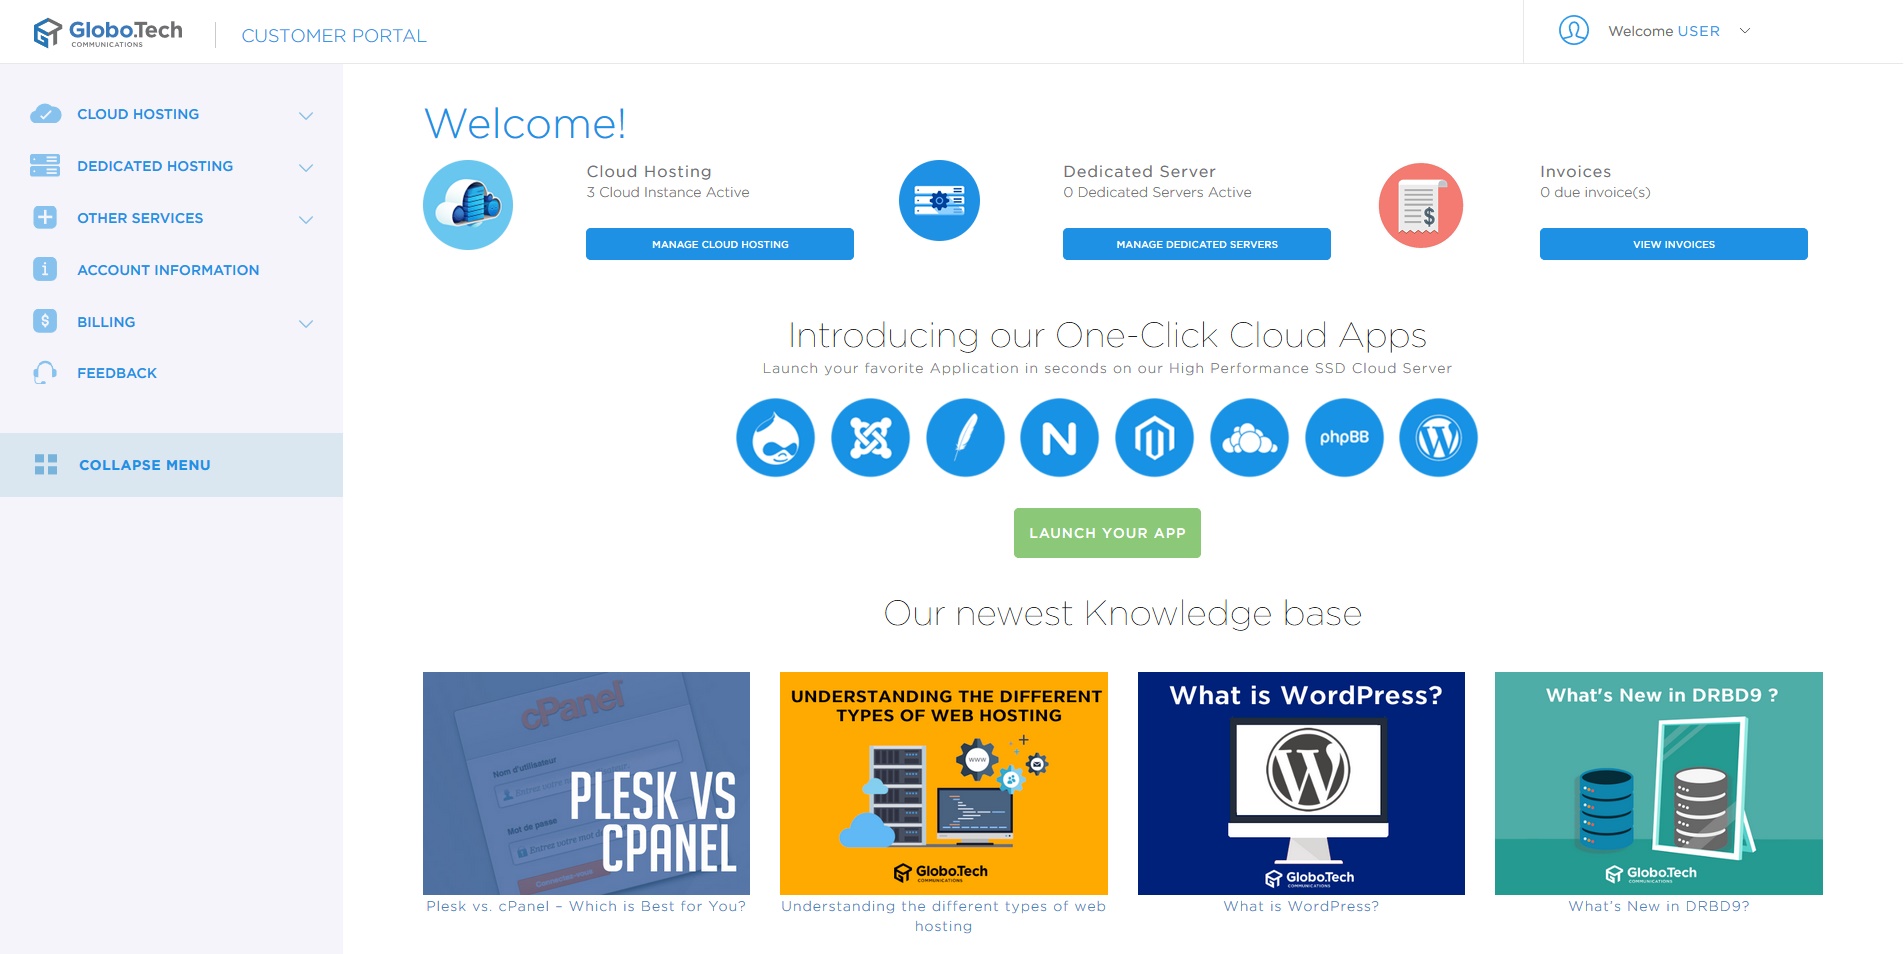
Log In
Begin by accessing your account. Once you’re logged in, you’ll see our administrative portal.
Deploy Your ownCloud OCA
An OCA quickens setup time. Like with Ubuntu server provisions, the OCA allows initiation of an image system. There is a library of images for use with any favored apps. They can be pre-loaded into apps. The feature helps ensure your system has all its proper dependencies to accommodate the application.
Creating Instances
An instance is a concrete occurrence that accomplishes a task during running programs. In the case of an ownCloud image, it’s the process of getting your selected image to show up accordingly.
First, you need to click on “Cloud Hosting” located in the navigation menu on the left side of the portal. You will open a window for active instances. Click on “Create Instance.”
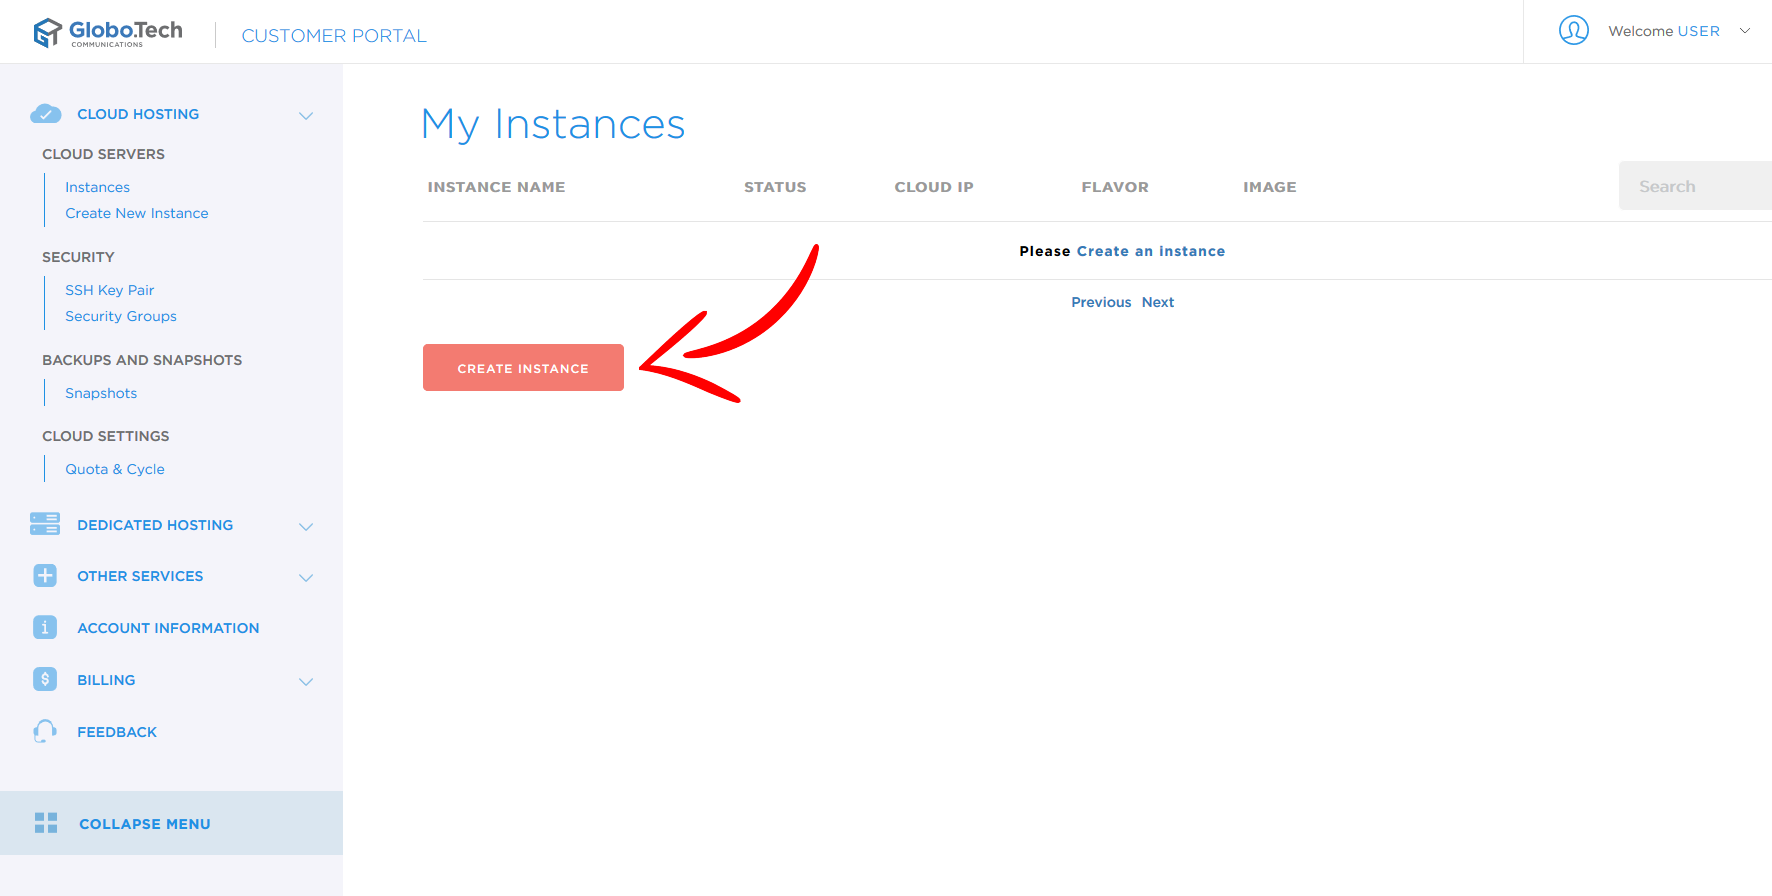
This action will take you to Instance Creation.
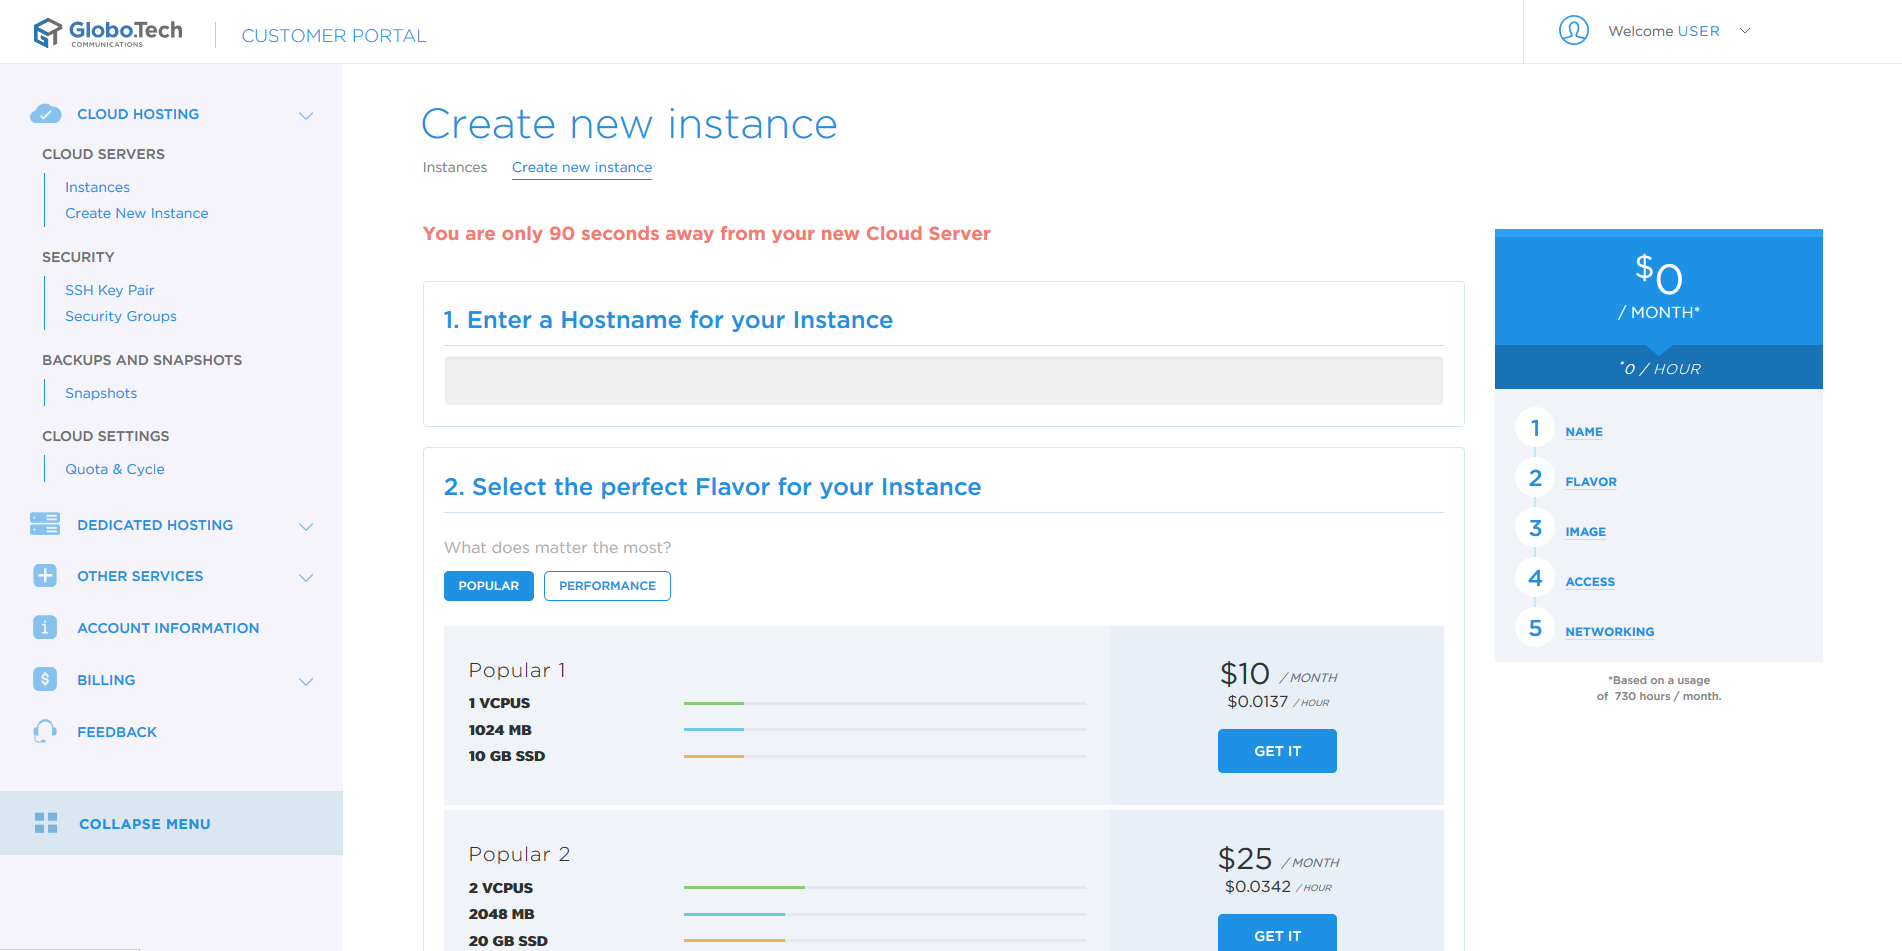
Use the dialogue box to give your new Instance a name.

Select a Flavor
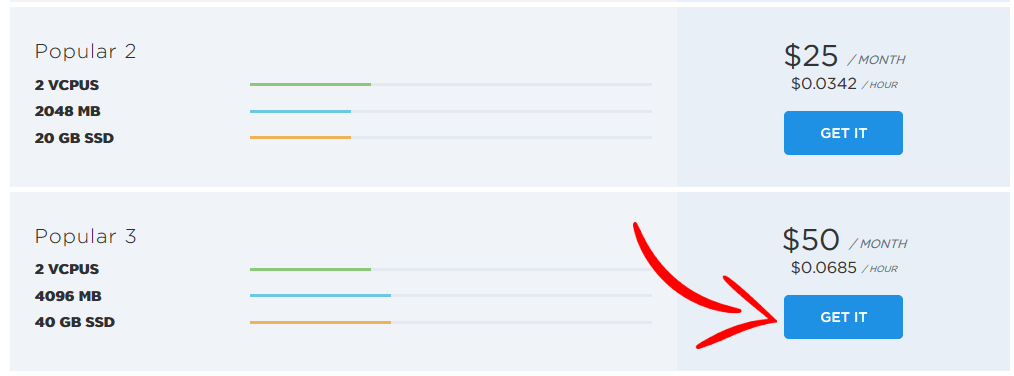
Flavors are performance packages. They are attributed to cloud orders to limit RAM, CPU and DISK usage. You have two options here: (i) Popular 2 for a small blog or (ii) Popular 3, for active user bases with an accumulation of visitors.
If you’re unsure about which is best, it’s not a problem. You always have the opportunity to upgrade the cloud server’s performance.
Once you have made a choice, select the GET IT button.
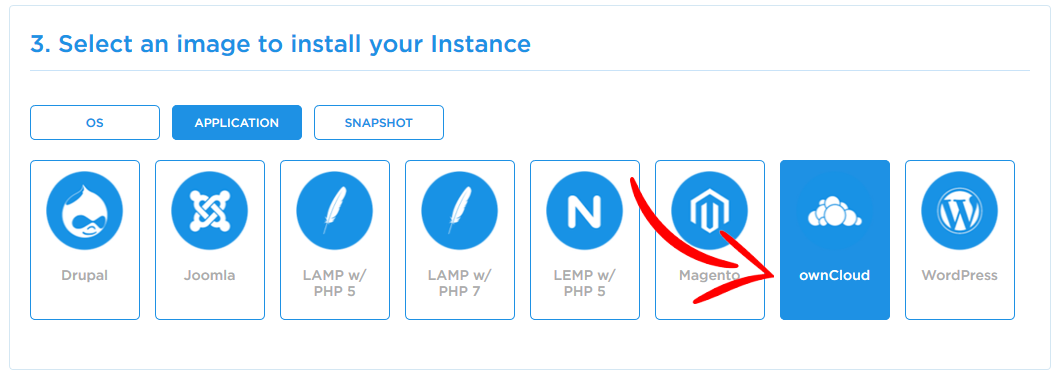
Choosing an Image
You have the option of selecting an image to apply to your cloud server. Click on the Application tab. Find and select ownCloud from the choices.
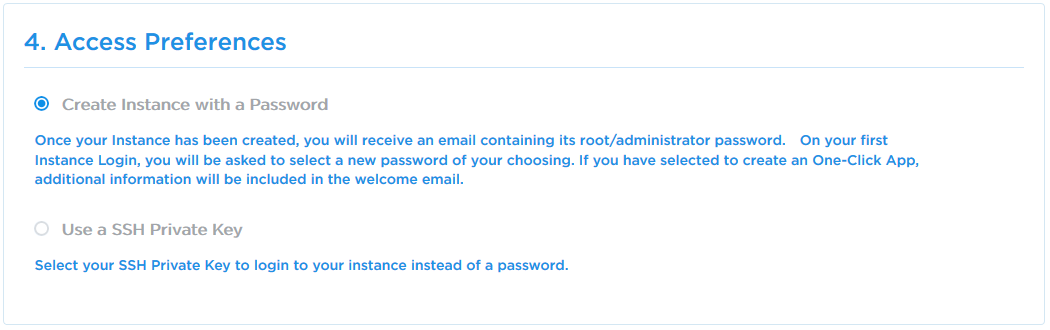
Setting Up Access Preferences
Choose to create your Instance with password security or SSH key. For the purposes of this exercise, we will use “Create Instance with a password.”
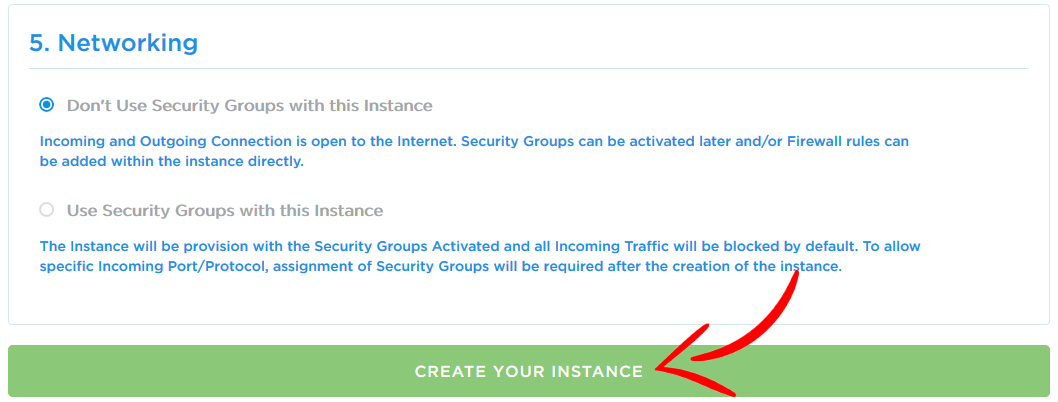
Creating Your Instance & Network Selection Options
We must now choose whether to use Security Groups. In another article, we describe how to accurately generate and use these actions. For this exercise, we will disable the feature. Now click to create an Instance to complete the task.
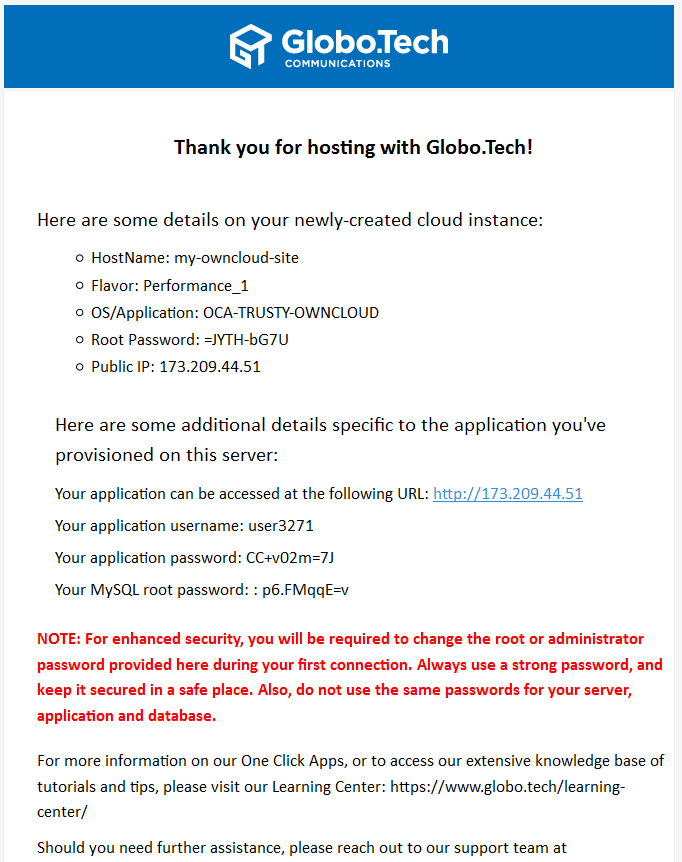
Credentials for Access
Your Instance has been created. Check the appropriate email address for server information. This will contain everything you need for your ownCloud deployment and Instance.
Testing Access to Your ownCloud
With information in hand, let’s test the ownCloud Instance.
a. Visit your site.
b. Visit provided URL: http://173.209.44.51
Login as Administrator
Access the Administrator Account. Do this utilizing the credentials received via the authorization email. You should land on the dashboard.
We will now confirm if your ownCloud Instance operates properly.
Let’s configure the Instance, adding content.
Setting DNS Records
Your ownCloud Instance is going to need a domain and DNS records. This allows users to visit the site with the domain name as opposed to needing an IP address. If you have yet to do so, purchase a domain for the site. Ask the GloboTech team whose many services include the selling of domain names.
For now, use the domain “MySuperCloud.com.”
We’re going to create two “A” records. Both will point towards your website’s IP.
As providers can use varying interfaces, your domain may be hosted on separate DNS servers. If this is the case, skip this step. Just make sure both of the following records are available:
o mysupercloud.com to point towards 173.209.44.51
o www.mysupercloud.com to point towards 173.209.44.51
Give these records time to propagate to the Internet. Though many records only take a few hours, it should take no longer than 48.
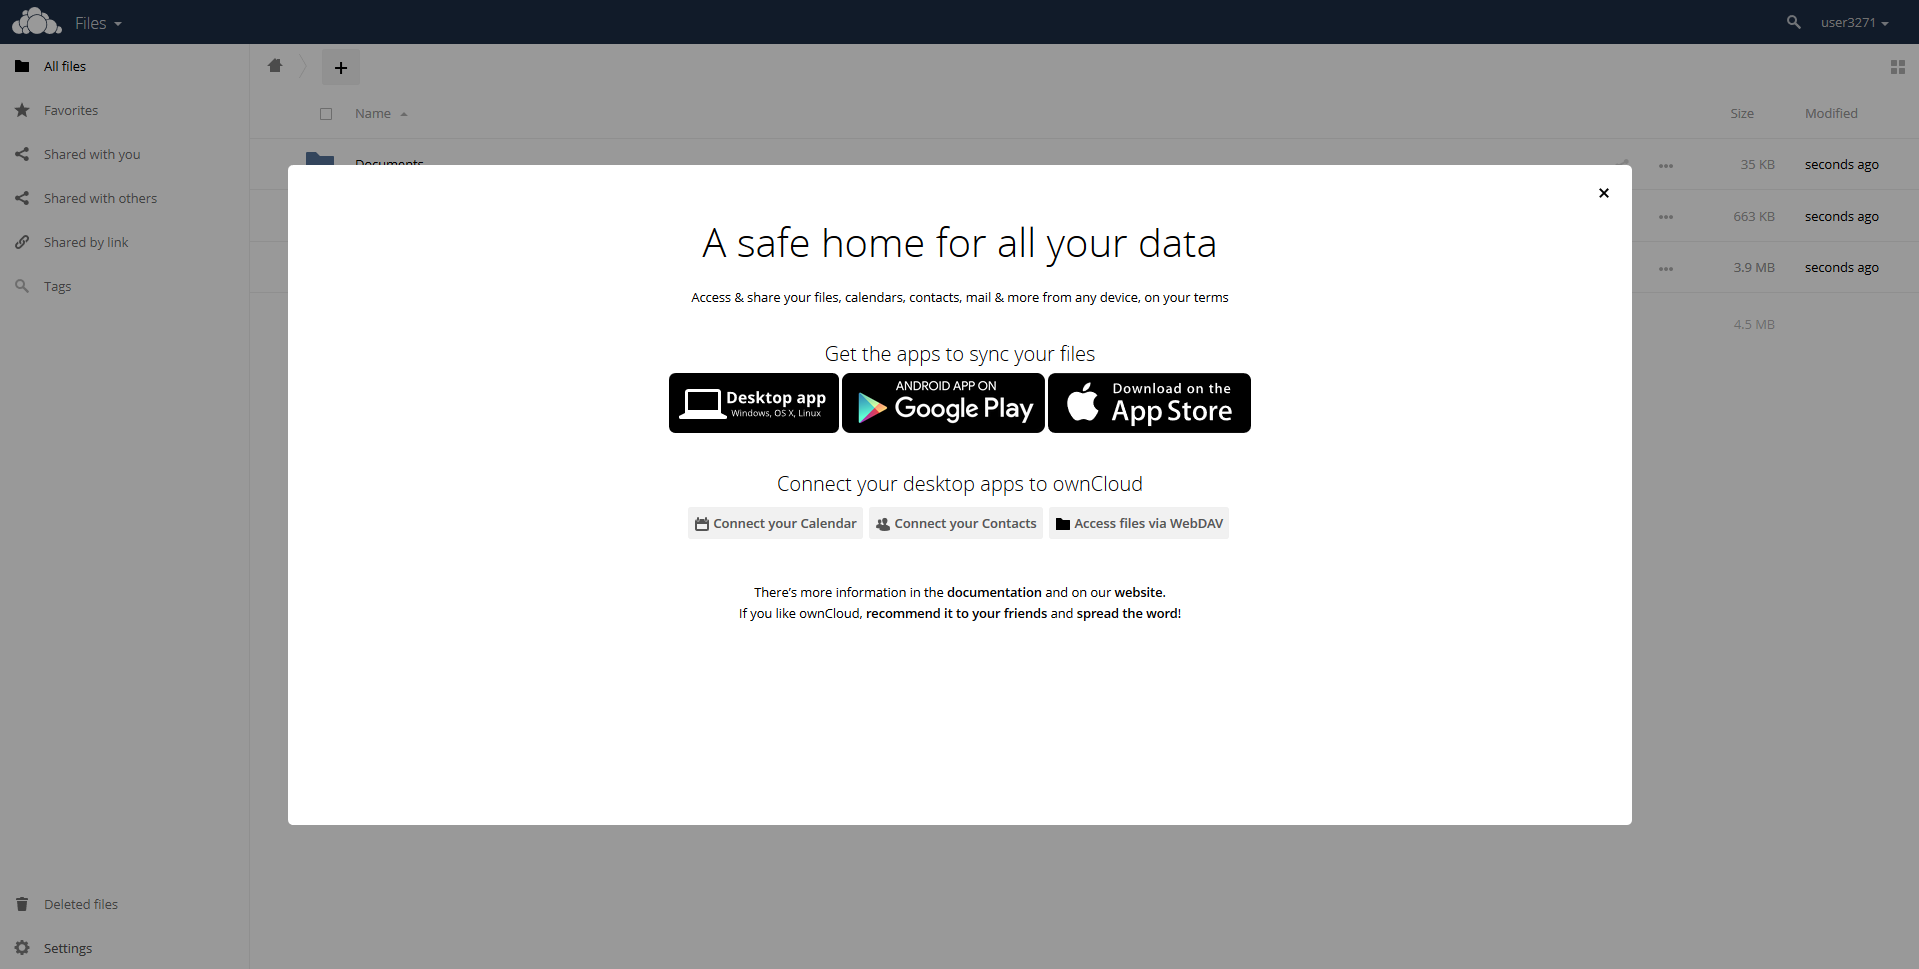
ownCloud Configuration
While there is documentation on ways to do this, we’ll stick to the initial steps.
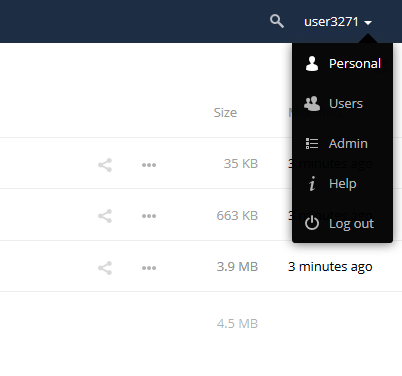
Edit Profile
When generating an ownCloud One Click application, create an empty profile. Modify the profile by placing your mouse over the link “user3271” and click on Personal.
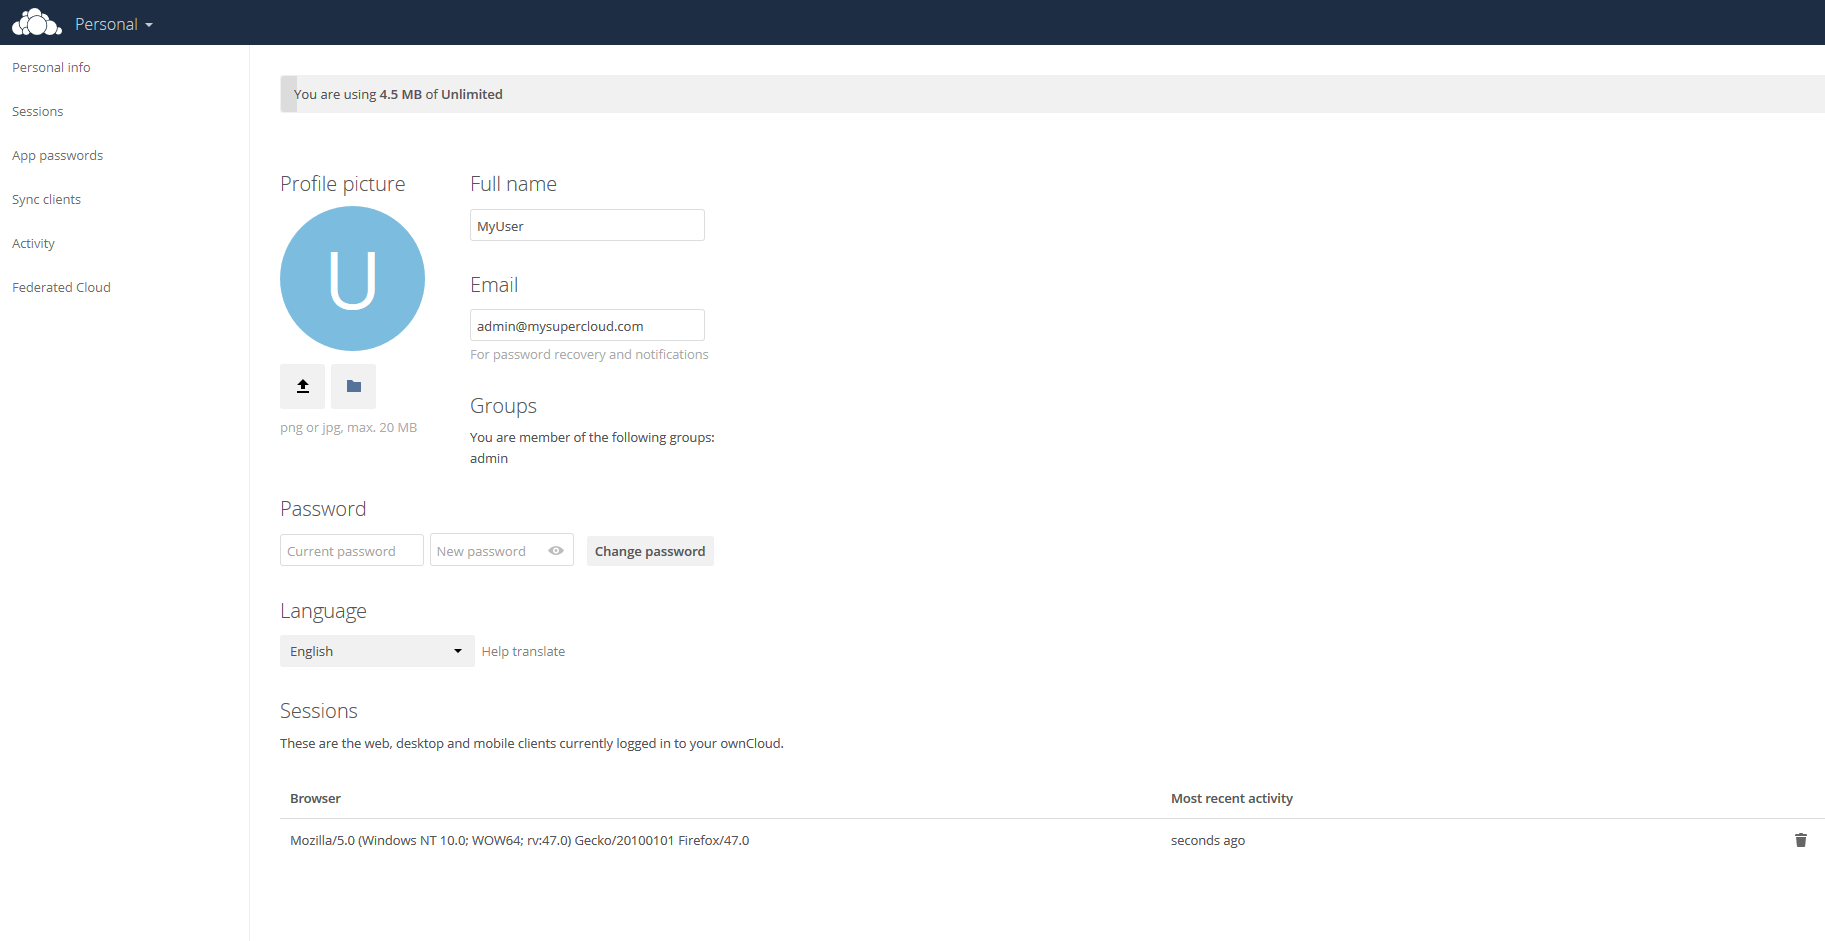
On this landing page, enter names, passwords, email addys, as well as notification settings.
Configure Site Info
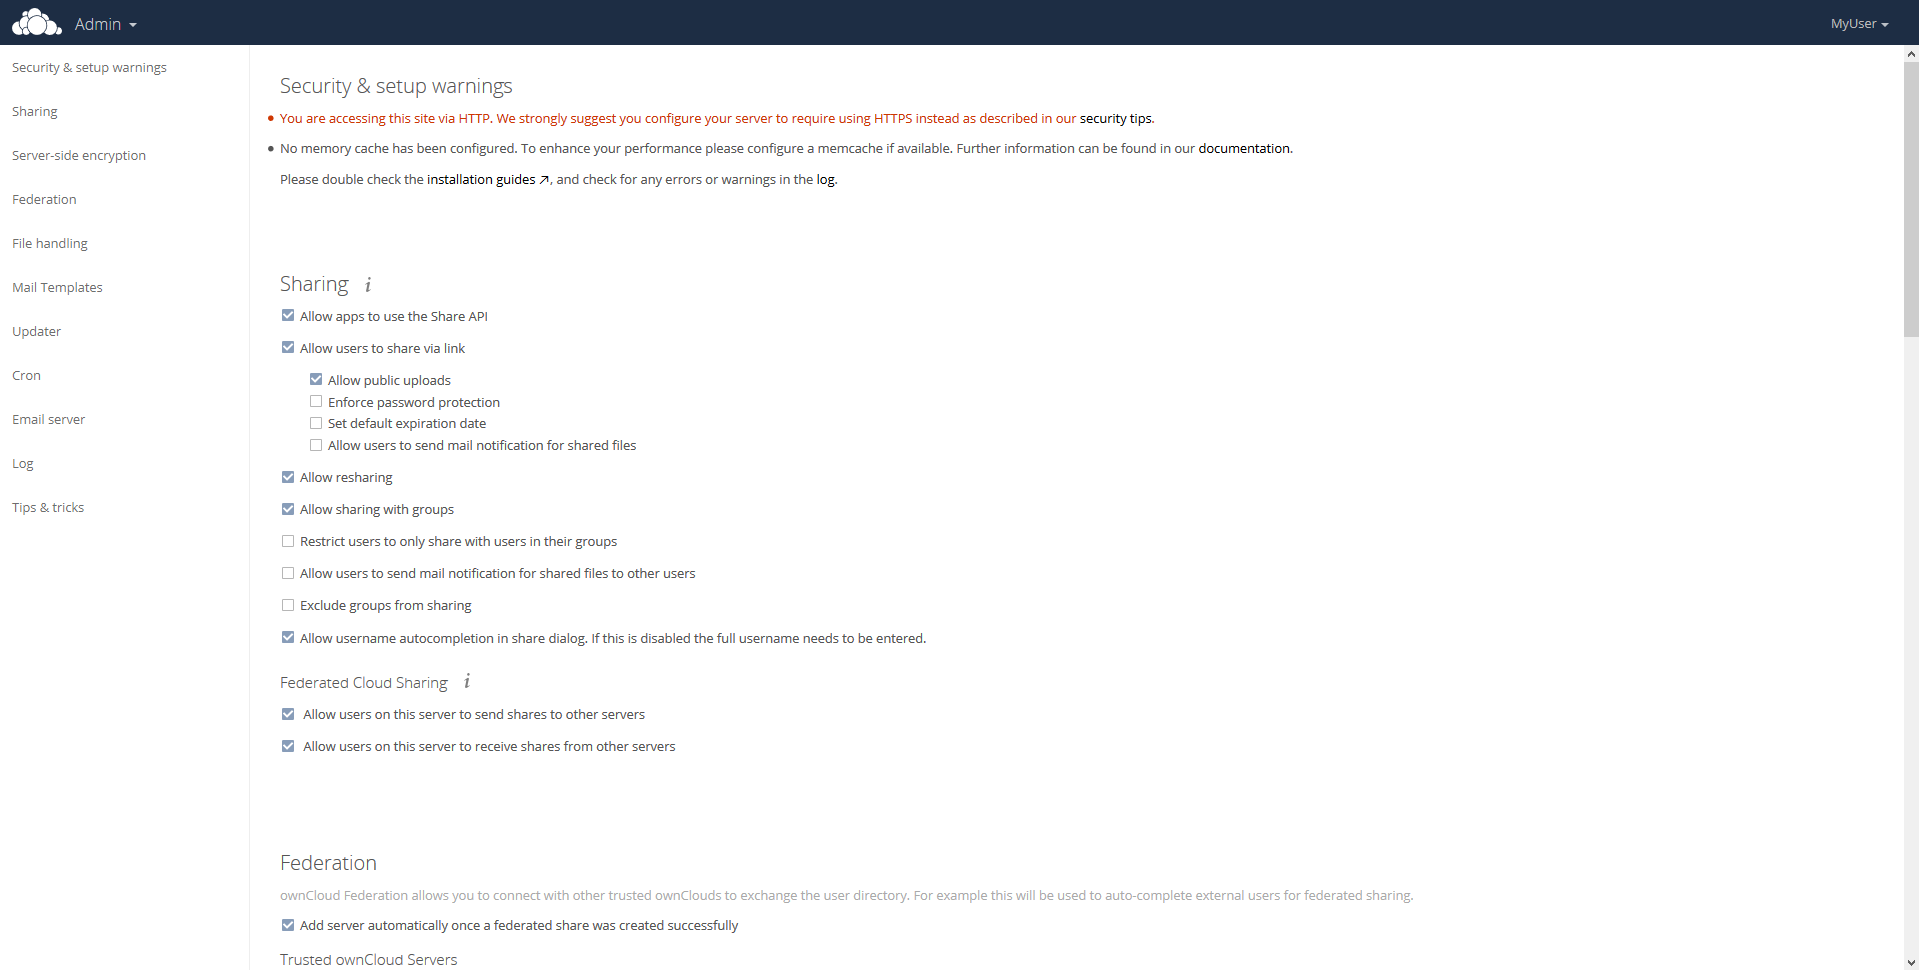
You will now review the Admin page for the entire ownCloud Instance.
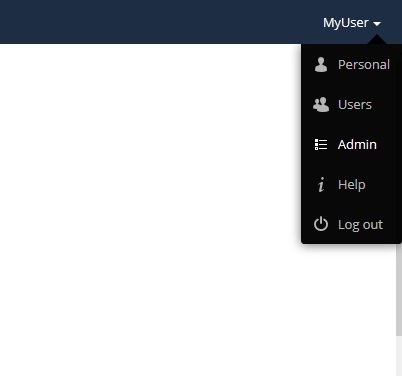
Go to the MyUser link at the top right. (It’s now MyUser as we changed the name in the last step.) Select Admin.
You are now at Main Admin. Here you have the option to establish numerous settings.
Your Instance is ready for production.

