 Call us at 1-888-GTCOMM1


A self-signed SSL certificate is an easy way to secure communication between a client and server without spending money, or without the hassle of setting up Let’s Encrypt. While it has the major disadvantage of lacking browser support, it can be set up and deployed in minutes.
Getting Started
To complete this guide, you will need the following:
• 1 Node (Cloud Server or Dedicated Server) running a clean Linux installation and cPanel.
We’ll set up a self-signed certificate so your communication with cPanel-managed domains are secure.
Tutorial
Begin by logging into your cPanel installation.
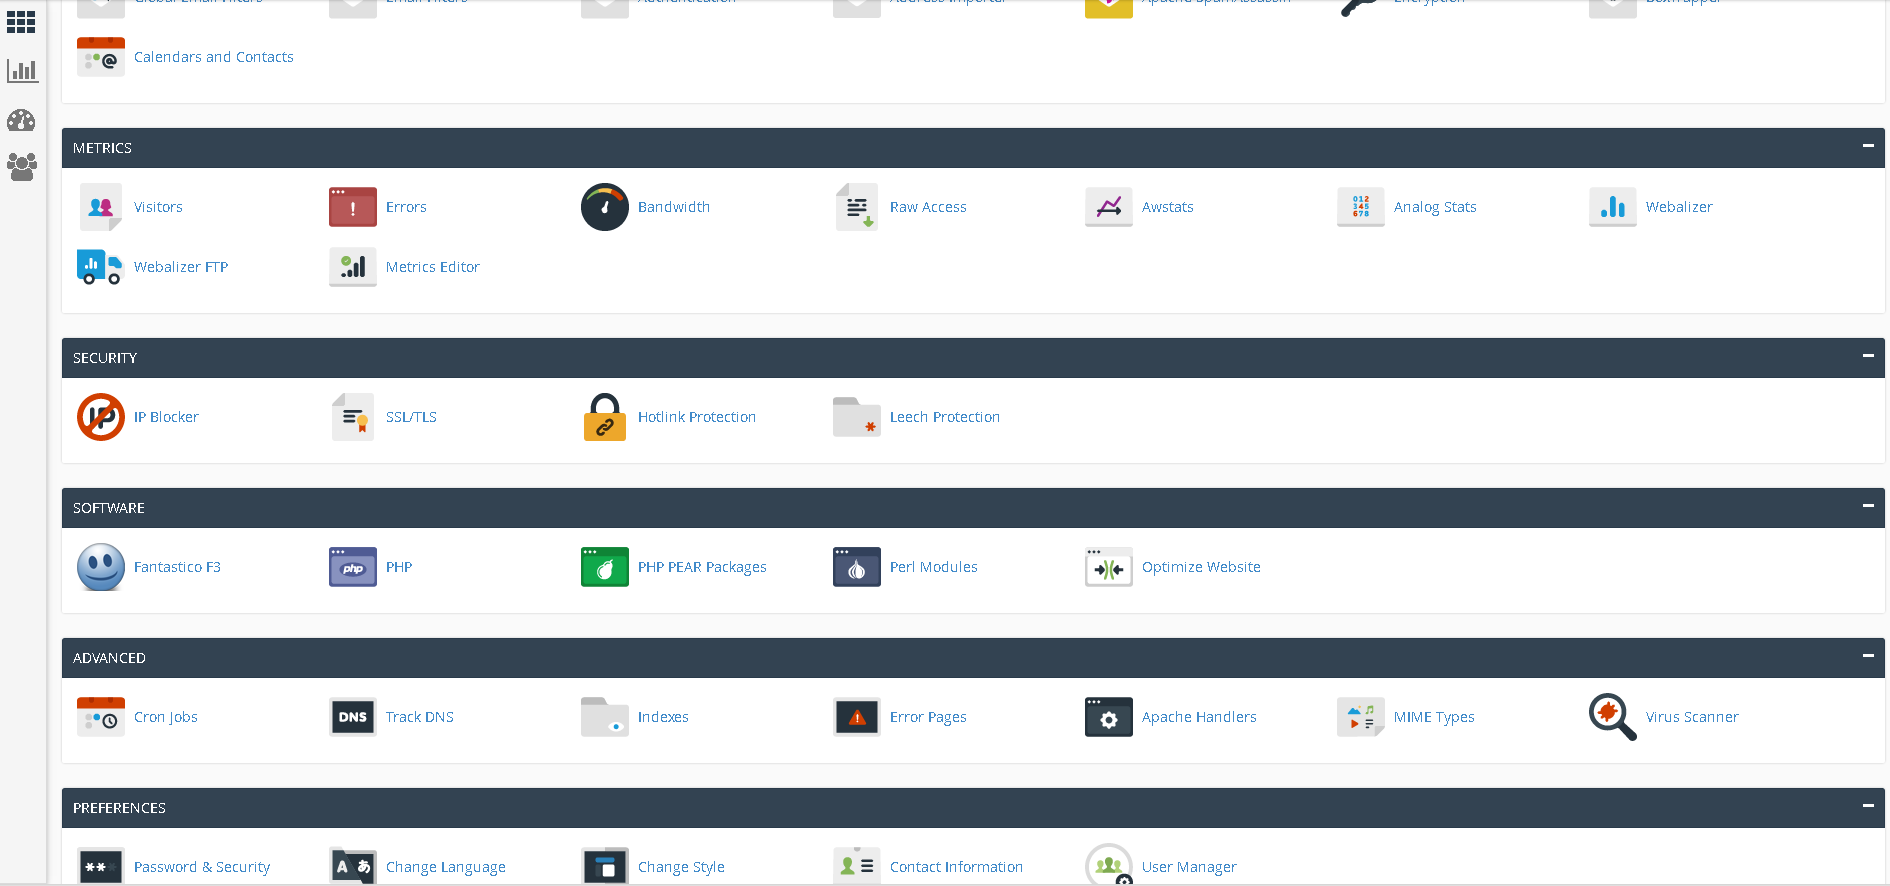
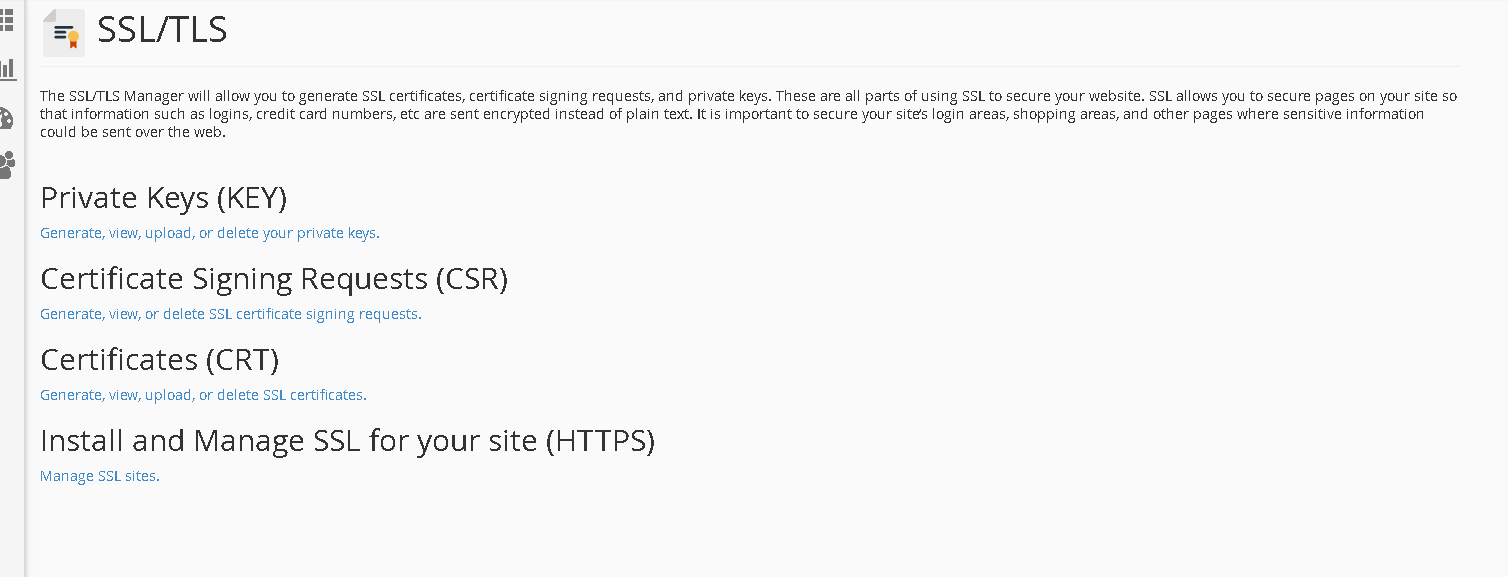
In the Security section of the cPanel home screen, click on SSL/TLS Manager.
Now look under Private Keys (KEY). Here you’ll click the button labeled Generate, view, upload, or delete your private keys. You’re now on the Private Keys page.
Confirm that the key size is set to 2048 bits under the section labeled Generate a New Private Key.
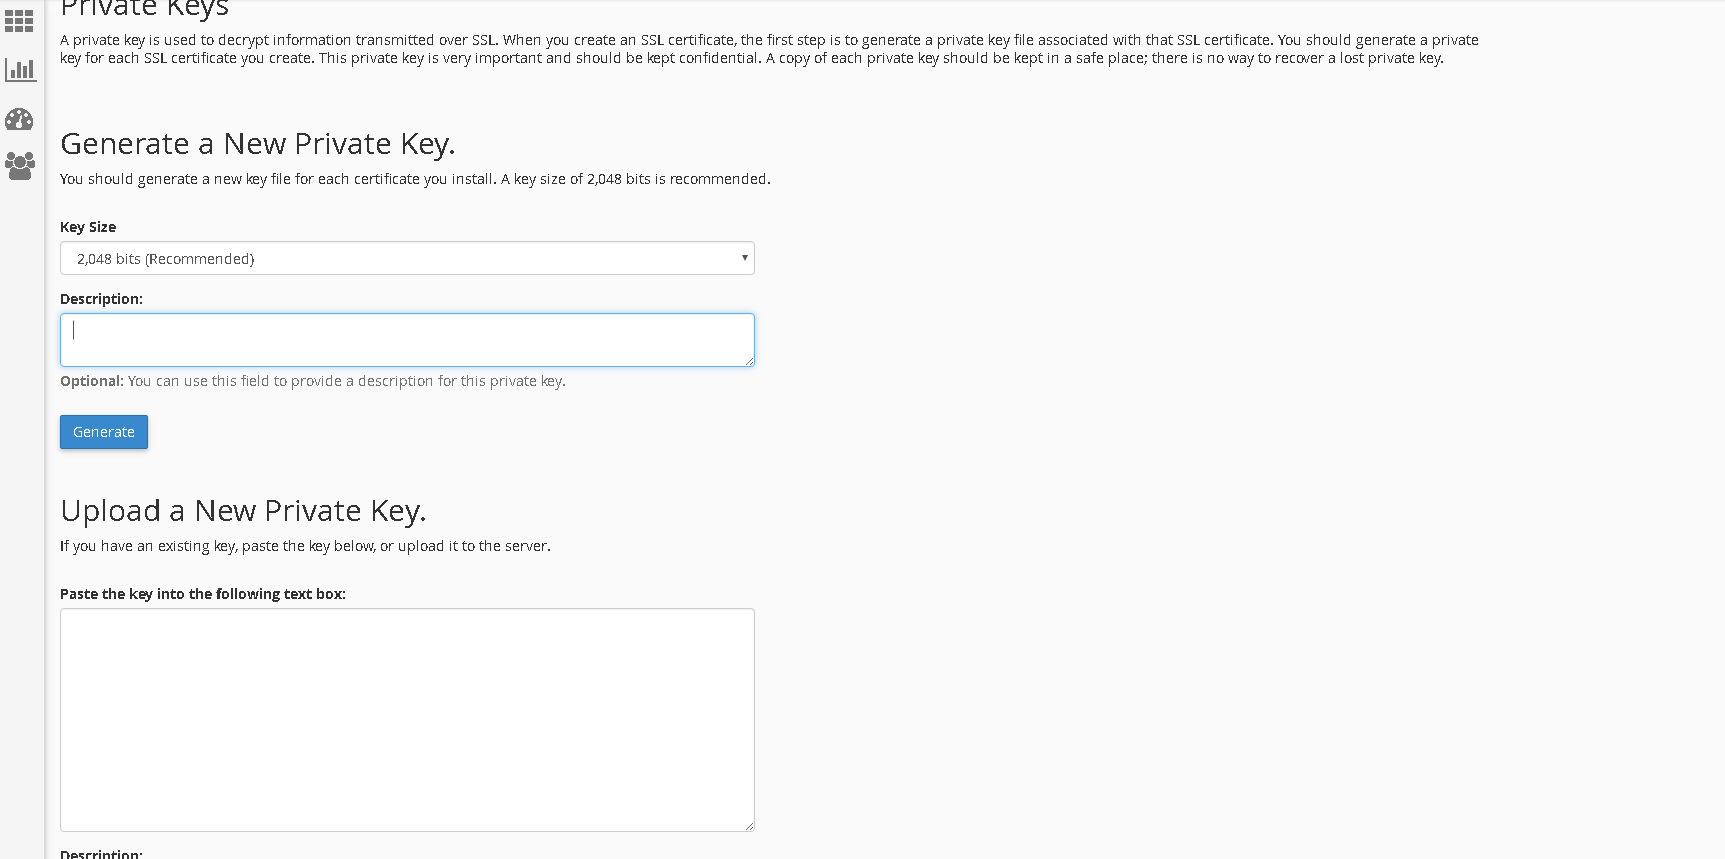
Give the key a meaningful description, like “Self-signed certificate.” You may later wish to replace this with an official certificate, so it’s helpful to know which key should be removed in that instance.
Now click Generate. You’ll be shown your certificate’s private key.
Next click the link labeled Return to SSL Manager.
We need to generate a certificate for our private key. Under the section labeled Certificates (CRT), click Generate, View, Upload or Delete SSL Certificates. You’re now on the Certificates page.
Under Generate a New Certificate, select the private key description in the key list box.
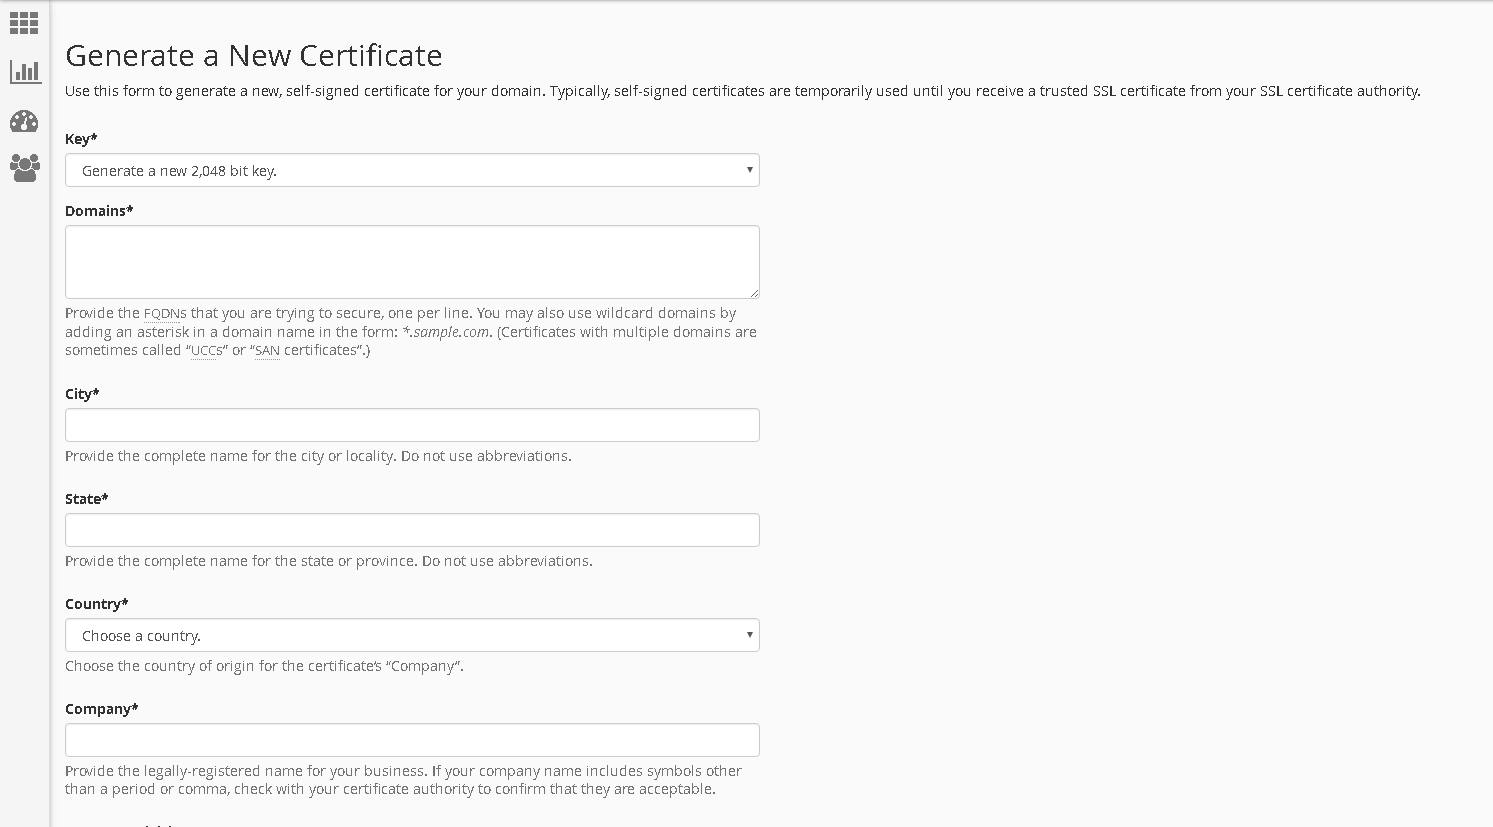
In the Domains field, type the domain you wish to secure, such as test.example.com. This must match exactly.
Complete the remaining fields on this screen.
Make sure you use the correct two-letter country code (for example, US or FR). For a complete list of these codes, please visit http://www.iso.org/iso/country_codes/iso_3166_code_lists/country_names_and_code_elements.htm
Now click Generate. cPanel will generate and display your new self-signed SSL certificate.
Now click Return to SSL Manager.
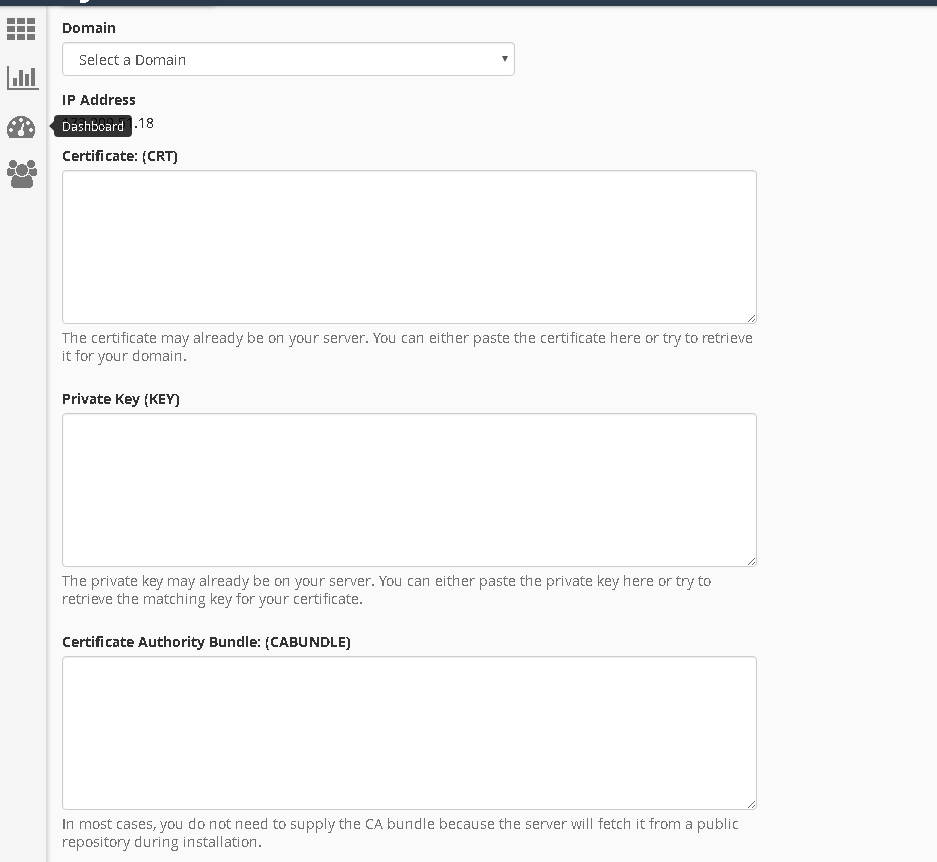
We’ve created our private key and SSL certificate. Now we need to install it on the site we wish to protect. From the SSL/TLS Manager page, under Install and Manage SSL for your site (HTTPS), click Manage SSL sites. The Manage SSL Hosts page is now displayed.
In the Install an SSL Website section, click Browse Certificates. You should see the certificate you just created. Select it and click Use Certificate. Notice that cPanel fills in the certificate details for you.
Because this is a self-signed certificate, the Certificate Authority Bundle (CABUNDLE) field remains blank.
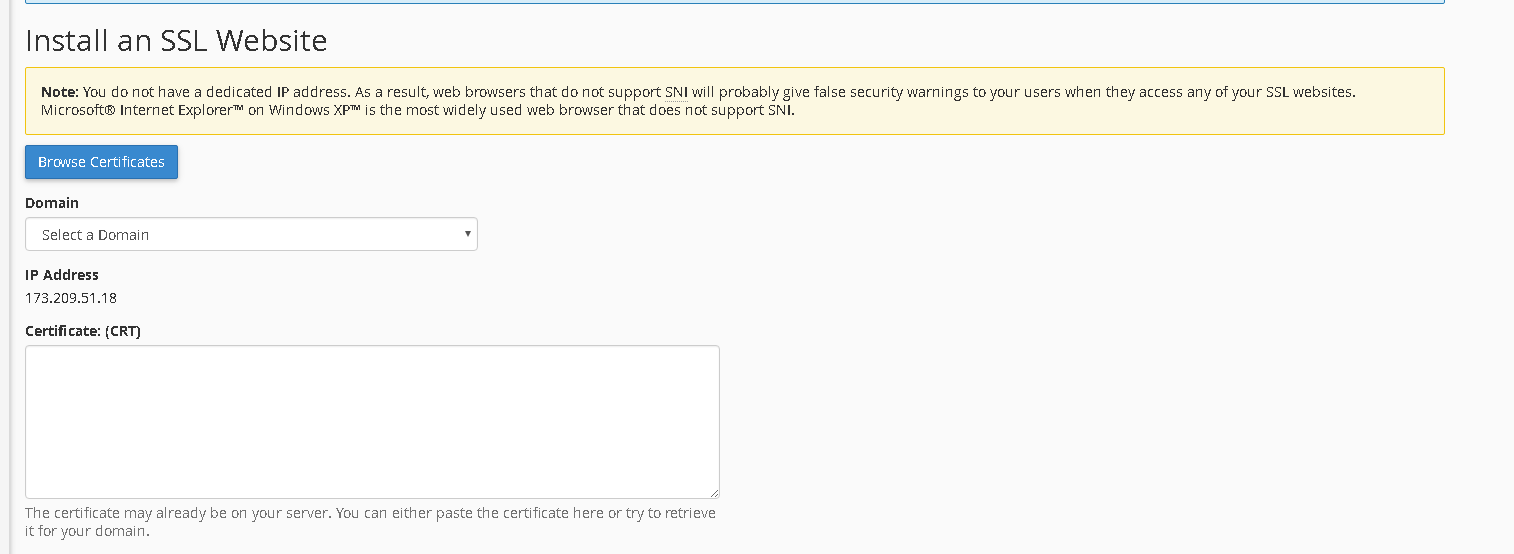
Now select the domain you wish this certificate to secure.
 >
>
Finally click Install Certificate. cPanel automatically handles this process, inserting the key and certificate correctly. When complete, you’ll receive a message telling you that the certificate was successfully installed.
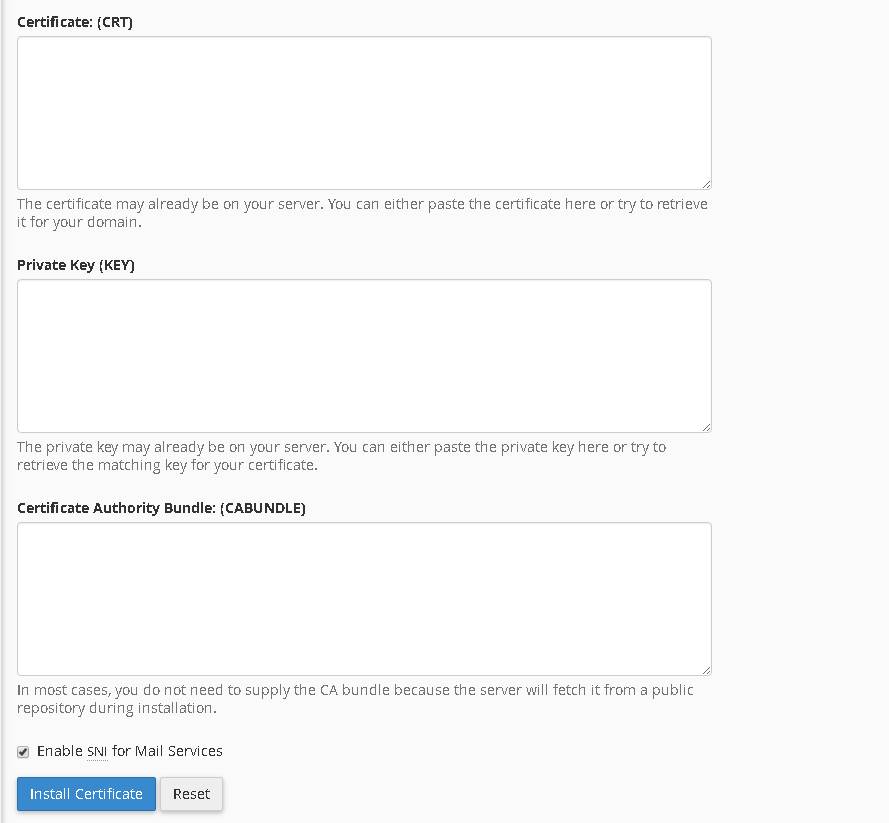
Click OK. You can now access this domain securely via an HTTPS URL, though you’ll also have to accept the self-signed certificate in your browser.
Conclusion
Despite their drawbacks, self-signed certificates are a great and quick way to secure your connections. With a self-signed certificate in place, you can safely transmit passwords and other sensitive data without worrying about interception and compromise. If this guide was helpful to you, kindly share it with others who may also be interested.
