 Call us at 1-888-GTCOMM1


How to Install and Use Laravel Under a cPanel Account
Laravel is a free web framework written in PHP. It has many features, chief among them a versatile system of modular packages called bundles used to provide extensibility. Accordingly, it’s one of the most popular web frameworks in use today. Laravel is open-source under the MIT license.
Getting started
You’ll need the following to proceed with this guide:
• 1 Node (Cloud Server or Dedicated Server) running a fresh cPanel account.
• Root access to the server
Tutorial
We’ll be using a program named Composer to install Laravel. Composer is a dependency manager for PHP, making sure that required libraries for a particular project are present and up to date.
First, download Composer. We will be installing it as root into /usr/bin. This way, any user on the system will be able to use Composer to manage the dependencies in their own project.
cd /usr/bin

wget https://getcomposer.org/installer
Using this command, check your system’s compatibility with Composer.
php installer --check
If there are no errors, then you may proceed.
Now use the script provided to install Composer.
php installer
-------------------

Downloading...

Composer successfully installed to: /bin/composer.phar

Use it: php composer.phar

-------------------
That’s it for installation. Adjust permissions as shown below. For easy access to Composer, create a symlink.
chmod +x composer.phar

ln -s composer.phar composer
Finally, delete the installation script.
rm -rf /usr/bin/installer
With Composer installed, we can begin installing Laravel to a user account of your choosing. You need to Log in via SSH into your user account. Naturally, for this step you will need to make sure that the machine hosting your account has shell access enabled for your user.
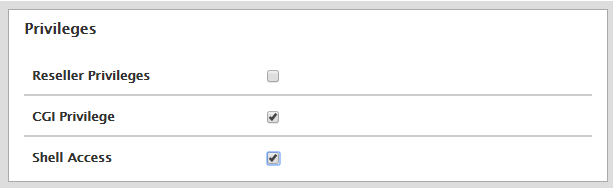
If it isn’t enabled, the server administrator can rectify this by going to List Accounts, expanding the specific account’s section by clicking on the small plus sign and then clicking on Modify Account. From there the Shell Access option can be enabled as follows and finally click Save. After Laravel is installed, the administrator is free to disable shell access again as it will no longer be needed.
Now you can install Laravel into the account
php /usr/bin/composer.phar create-project laravel/laravel --prefer-dist
Modify the public folder in relation to the Laravel folder.
rm -rf public_html

ln -s laravel/public/ public_html
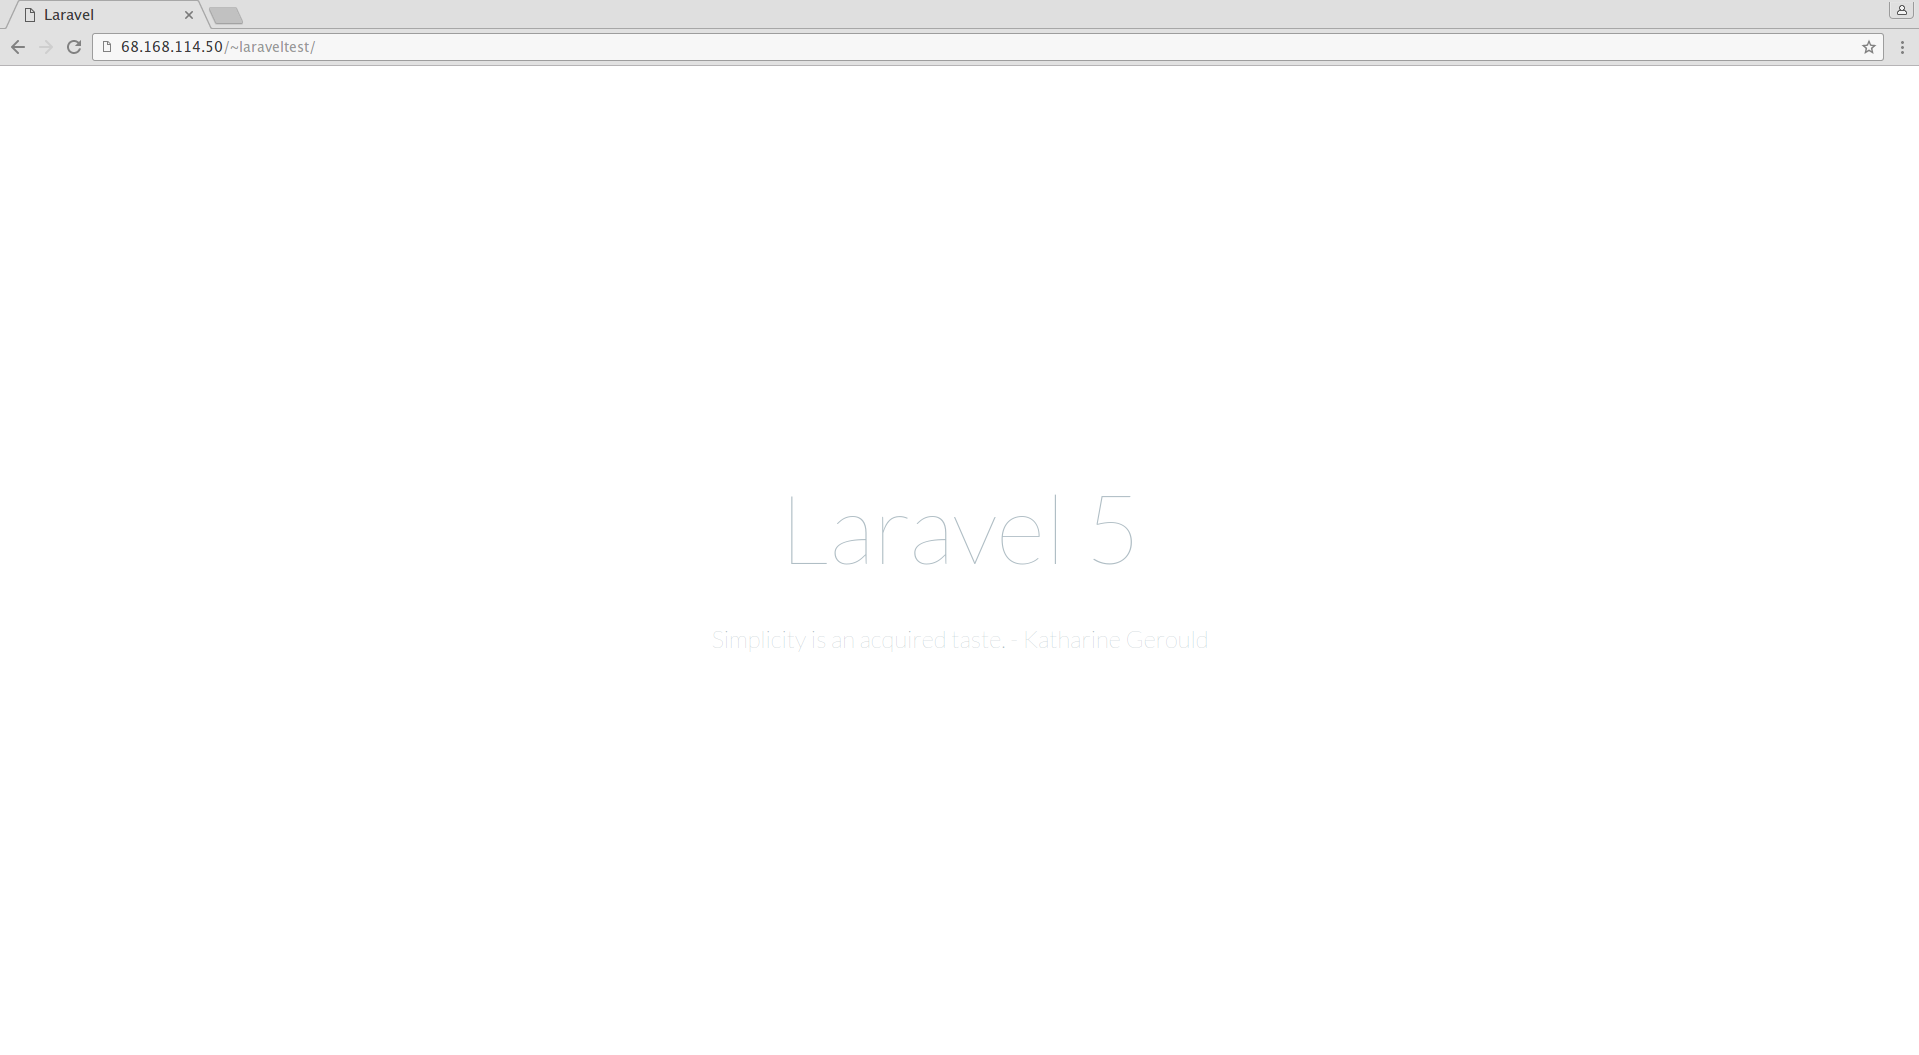
All that remains is to confirm that the installation was successful. Navigate to the domain name associated to your account. If you see the following expected output, then you are good to go.
Conclusion
With Laravel (and the ever-so-helpful Composer) installed, developing your new site should be a breeze. Don’t forget to check out all the bundles that are available to help you easily add features. If this guide was helpful to you, kindly share it with others who may also be interested.

