 Call us at 1-888-GTCOMM1
The Intelligent Platform Management Interface, or IPMI for short, allows you to connect to your dedicated server in order to manage some low level functionalities such as BIOS modification, even if the server is down. It is a set of interfaces that operate independently of the server’s operating system, firmware, and even CPU, hooking into the hardware directly over the network. This guide will walk you through using GloboTech’s IPMI service.
Tutorial
This guide will assume that you are already a GloboTech customer, and that you have credentials for the customer interface. We also strongly suggest that you have an understanding of BIOS configuration beforehand.
Login to your GloboTech account
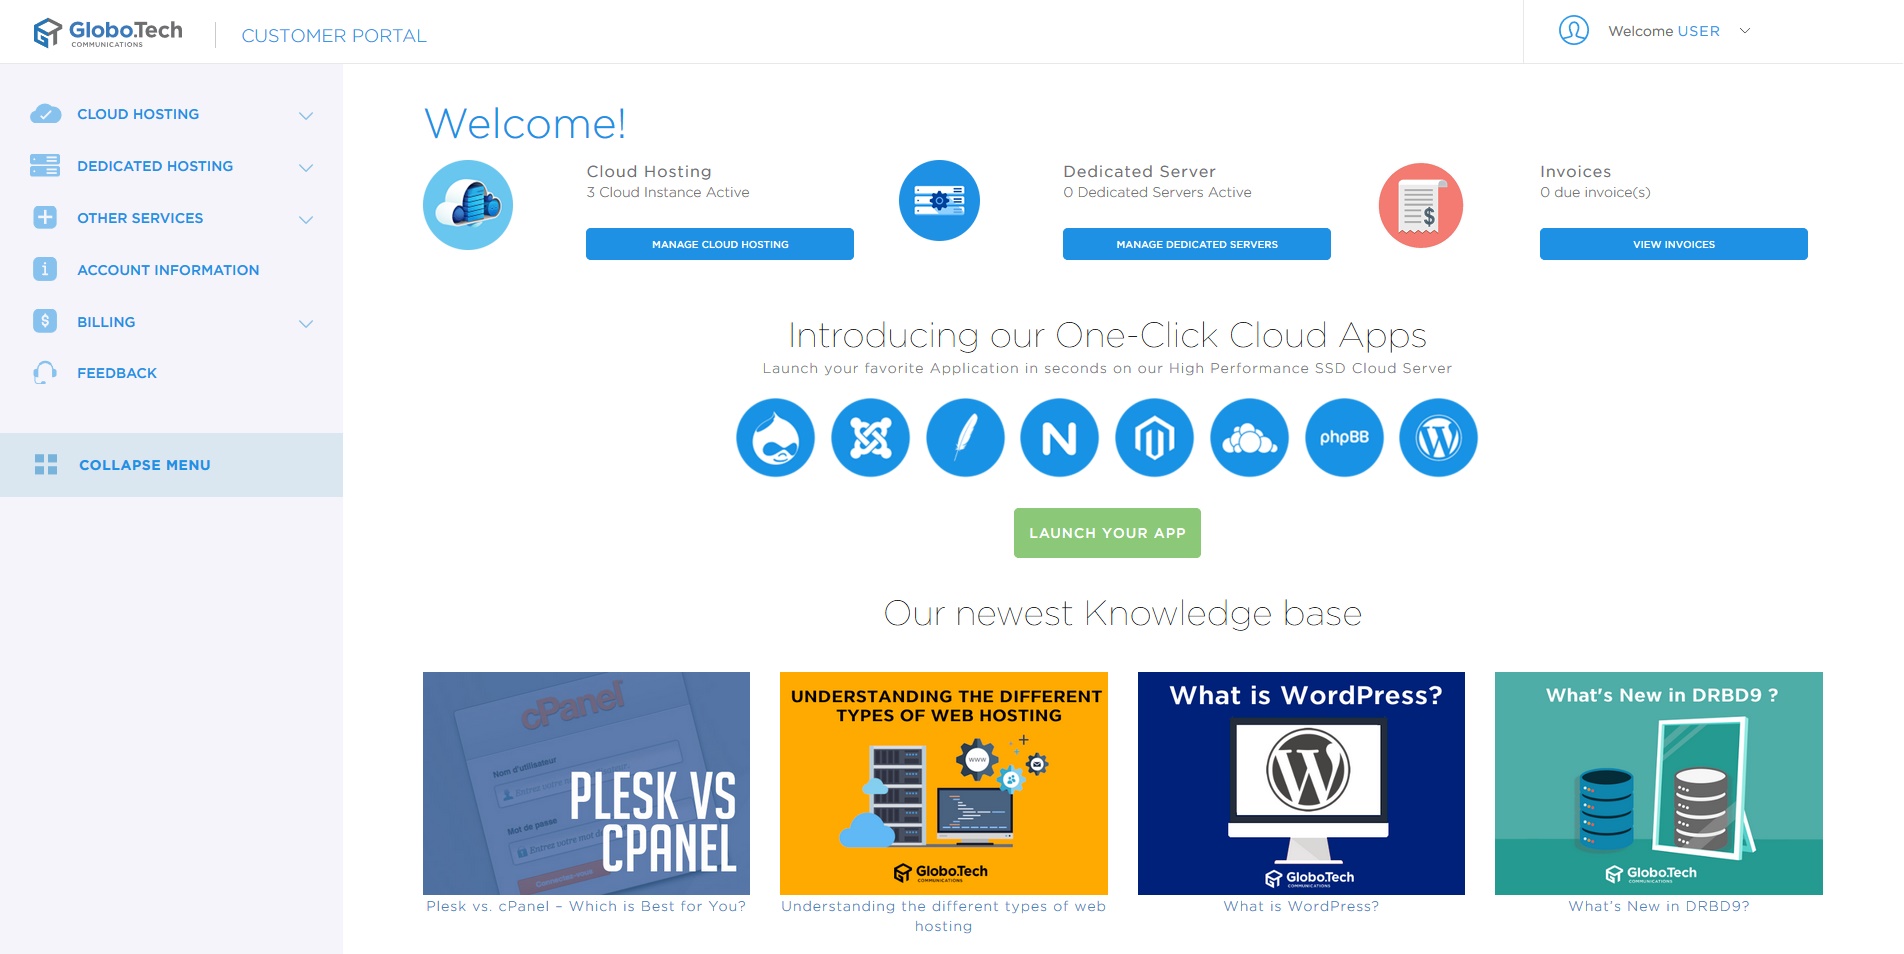
First, log in to your account at our portal: https://portal.globo.tech
Once you have logged in, you will land on a page which looks like the following screenshot:
Go to the Dedicated Hosting tab
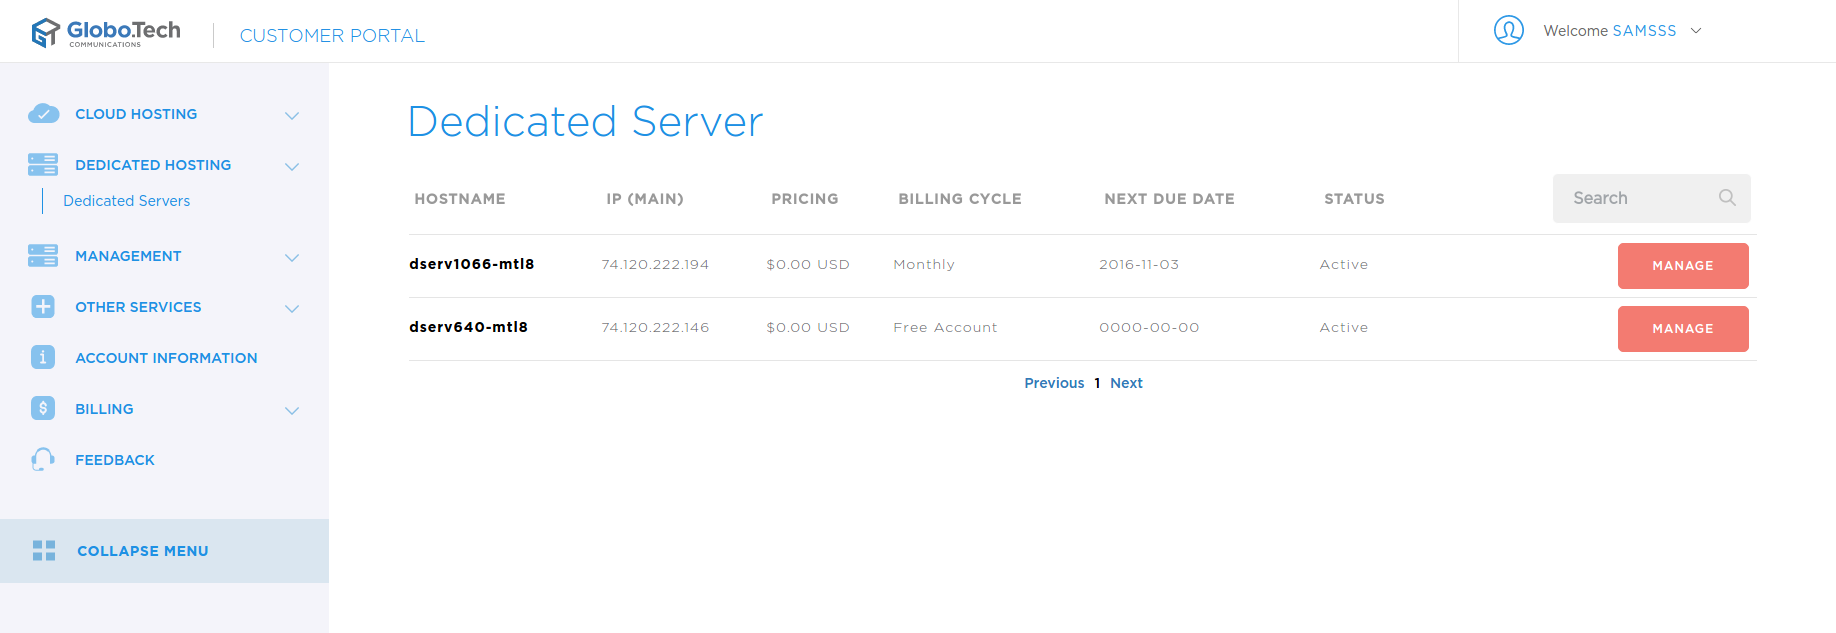
Click on the DEDICATED HOSTING option in the left-hand menu. Or, you can go directly to the Dedicated Hosting page using this url: https://portal.globo.tech/services/dedicated
You need to have at least one active Dedicated Server to see this page. If you haven’t any active Dedicated Server, don’t worry, as you can order one here. Otherwise, the page will simply list all dedicated servers in your account.
IPMI Management
Choose the Dedicated Server you want to be able to connect to by click on the MANAGE button of the server with which you want to open a IPMI connection. At the bottom of your Dedicated Server detail page, you will see a section called IPMI Management. Within this section, you will be able to manage current IPMI sessions or open new ones.
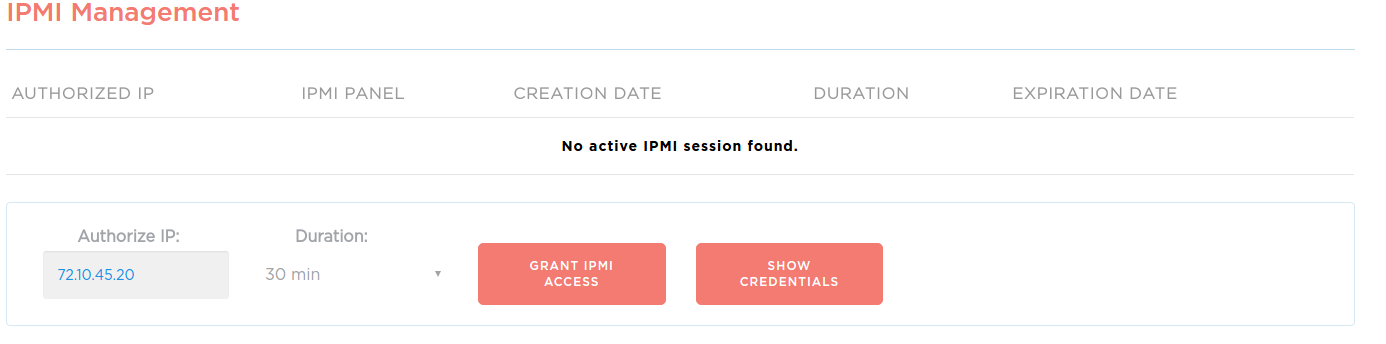
When activating your IPMI access, you will be able to specify specific IP addresses for extra security, so that only you have access to the IPMI connection. When creating your session, you will also be able to set a time range for the automatic expiration of the connection, for added security.
After inputting your IP and setting your desired session duration, click on the “GRANT IPMI ACCESS” button. At this point, you have authorized any device using the IP listed under AUTHORIZED IP to connect to the IPMI service of your Dedicated Server using the link provided under the IPMI PANEL.

Your authorized sessions will expire at the duration set time. If you would like to remove it sooner than that, you can also click on the Remove Access button and it will disable the access right away.
IPMI Username & Password
Finally, any IPMI panel you connect to will ask for a username and password. You can get those credentials by clicking on the button titled SHOW CREDENTIALS. This button will briefly display the credentials that are used by your current Dedicated Server IPMI service, as shown in the following picture:


