How to Install WordPress on Ubuntu 17
WordPress is a commonly known and popular content management system (CMS), which means it is an application used to create and modify digitally created content. While WordPress has become the most popular option among users, many CMS feature similar features, such as search engine optimized web addresses, integrated help functions, compliance with accessibility requirements and more.
WordPress and other CMS also reduce the knowledge needed to create content, since they remove the code-from-scratch mentality of traditional websites. CMS also allows users to create a simple, unified feel across multiple pages, manage user permissions easily, and even save and revert to previous versions.
Getting Started
Before we jump into how to install WordPress, you need to make sure you’ve acquired at least one node, hosted on a cloud server or a dedicated server. This node will need to have Linux Ubuntu 17.04 LTS installed.
For this installation, you also need to ensure Secure Shell (SSH) root access is setup for your server. If you’re unfamiliar, SSH is a particular network protocol that’s used when executing services over an unsecured network. When using SSH, the implemented services are performed securely even without a secure network.
Tutorial
Installing WordPress
After setting up your cloud or dedicated server node, installing Ubuntu 17.04 LTS and confirming that you have SSH root access, it’s time to learn how to install WordPress on your node.
The first step in almost any successful installation is confirming that your software, or in this case server, is up to date. We’re going to verify that your server is running the most recent version of its’ software and that any necessary repositories are current:
apt-get update && apt-get upgrade -y
Once we’ve confirmed our server is updated, we need to go through the steps to create a functional LAMP setup, which means installing Linux, Apache, MySQL, and PHP. As we’ve already verified we have Linux Ubuntu 17.04 LTS installed, we’re going to proceed with installing Apache.
Installing Apache2
The following commands will allow you to gather the necessary repositories for the Apache2 installation:
apt-get install apache2 -y
After allowing the Apache2 installation scripts to finish processing, we need to confirm that the Apache2 service is correctly installed, running properly, and enabled at startup:
systemctl status apache2.service

systemctl enable apache2.service
If you encounter an issue with Apache2 not currently running, it may be started with the following command:
systemctl start apache2.service
Installing MySQL Server
We’ve confirmed Apache2 is installed and running, so it’s time to proceed with the MySQL server setup:
apt-get install mysql-server mysql-client -y
While you proceed with the MySQL server installation process, you will receive a prompt for the MySQL root password. Please make sure you save this password someplace safe since you will need it later during the setup.
Once the installation of the MySQL server has completed, you will want to make sure you secure the server using the following command:
mysql_secure_installation
Make sure to follow the prompts you receive, using the below answers to complete each prompt:
Enter password for user root: ENTER ROOT PASSWORD

Press y|Y for Yes, any other key for No: n

Change the password for root ? n

Remove anonymous users? y

Disallow root login remotely? y

Remove test database and access to it? y

Reload privilege tables now? y
Similar to the Apache2 setup, we need to confirm that MySQL is running and ensure that MySQL is setup to start on boot:
systemctl status mysql.service

systemctl enable mysql.service
Now that the Apache2 and MySQL server is installed on your node, it’s time to configure your MySQL credentials for the future WordPress setup. This step will require your MySQL root password from a few steps earlier:
mysql -u root -p
After signing into your MySQL instance, you need to create the wordpressdb database using the following command:
mysql> CREATE DATABASE wordpressdb;
Once created, run the following command to create a new user named “wpuser” with a new password. Then grant that user access to the wordpressdb database. During setup, it’s important to replace “type_new_password_here” with your chosen password:
mysql> GRANT ALL ON wordpressdb.* TO 'wpuser'@'localhost' IDENTIFIED BY 'type_new_password_here';
When your new user has been created, it’s important to reload the privileges for MySQL before leaving the console:
mysql> FLUSH PRIVILEGES;

mysql> exit
Installing PHP and Related Modules
We’ve completed the Apache2 and MySQL installations, so it’s time to proceed with installing PHP. Utilizing the below command, initiate the PHP installation:
apt-get install php libapache2-mod-php php-mysql php-curl php-gd php-pear php-imagick php-imap php-mcrypt php-recode php-tidy php-xmlrpc wget -y
Setting Up WordPress
Now that we’ve finished installing Apache2, MySQL, and PHP, it’s time to install the latest version of WordPress to your server:
cd /tmp/ && wget http://wordpress.org/latest.tar.gz
Once this completes, we need to extract the archive and then install the extracted archive under the apache vhost folder:
tar -xzvf latest.tar.gz

cp -R wordpress/* /var/www/html
After installing the extracted archive, it’s important to remove the default index page from Apache2:
rm -rf /var/www/html/index.html
Configuring WordPress
We’re getting close to finalizing your WordPress setup. Now we will copy the default configuration file example that’s provided by WordPress:
Once you’ve copied the default configuration file, you need to edit it to match the below setup:
nano /var/www/html/wp-config.php
According to what was created in the MySQL setup earlier, these are the areas that need modification:
define(‘DB_NAME’ => The database name we have created for this purpose, in our case: wordpressdb
define(‘DB_USER’ => The database user we have created to access this wordpressdb database
define(‘DB_PASSWORD’ => The database password we have created for this user (during: mysql> GRANT ALL ON wordpressdb.* TO ‘wpuser’@’localhost’ IDENTIFIED BY ‘type_new_password_here’; )
// ** MySQL settings - You can get this info from your web host ** //

/** The name of the database for WordPress */

define('DB_NAME', 'wordpressdb');

/** MySQL database username */

define('DB_USER', 'wpuser');

/** MySQL database password */

define('DB_PASSWORD', 'type_new_password_here');

/** MySQL hostname */

define('DB_HOST', 'localhost');

/** Database Charset to use in creating database tables. */

define('DB_CHARSET', 'utf8');

/** The Database Collate type. Don't change this if in doubt. */

define('DB_COLLATE', '');
Then you may save and close the editor.
Now that you’ve edited the WordPress config file with new settings, it’s time to change the Apache2 directory permissions and enable Apache-Modules, which allows WordPress to function properly:
chown -R www-data:www-data /var/www/html/

chmod -R 755 /var/www/html/

a2enmod headers

a2enmod rewrite

a2enmod env

a2enmod dir

a2enmod mime
Once the permissions have been changed and modules enabled, it’s time to restart Apache2:
systemctl restart apache2
Final Steps
The server part of your setup is complete. Now you’ll open your internet browser and access your server’s IP address.
For example, if the IP address for your server were 1.2.3.4, then you would open your browser and go to the following link: http://1.2.3.4
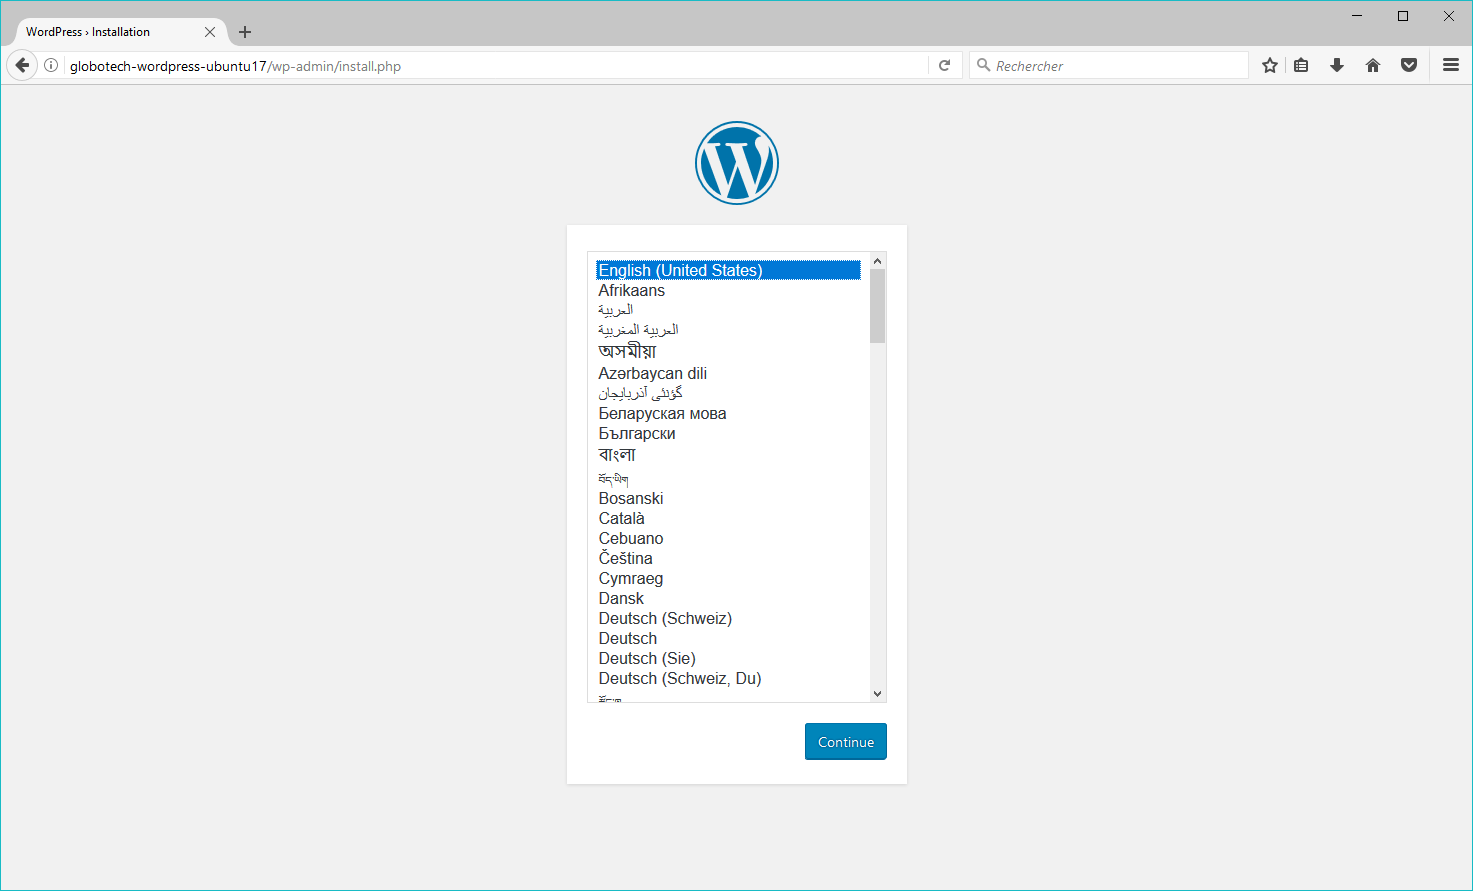
You will see the WordPress default setup page at this point, prompting you for the language of your WordPress setup and then prompting you to create an administrative account.

Congratulations! You’ve just completed your WordPress setup on Ubuntu 17.04 LTS.
Conclusion
You’ve successfully moved through every step necessary to install WordPress on your dedicated node running Ubuntu 17.04 LTS. You are not able to begin using the WordPress CMS and exploring the features and benefits it provides when operated from a dedicated server. If you had success following this guide and found it helpful, please share it with other individuals that may be setting up their WordPress server.

 Call us at 1-888-GTCOMM1


