 Call us at 1-888-GTCOMM1


How to install an SSL Certificate on Windows Server 2019 Using IIS
An SSL Certificate is a small data file that creates a secure link between a website and a visitor’s browser. See how to install an SSL certificate on Microsoft Windows server 2019 using IIS.
SSLs has a public and private key that can be used to establish an encrypted connection between a web browser and a web server. The main reason for using SSL Certificates is to protect your sensitive information and your website.
In this tutorial, we will show you how to install an SSL certificate on Windows server 2019 with IIS.
Create Certificate Signing Request Using IIS
When you are applying or Ordering an SSL certificate, you will need to create CSR (Certificate Signing Request) on your server and send it to a Certificate Authority. The CSR validates the information the CA requires to issue a certificate. After validating the CSR, the Certificate Authority will use this data to generate and issue the SSL certificate.
You can create a CSR by following the below steps:
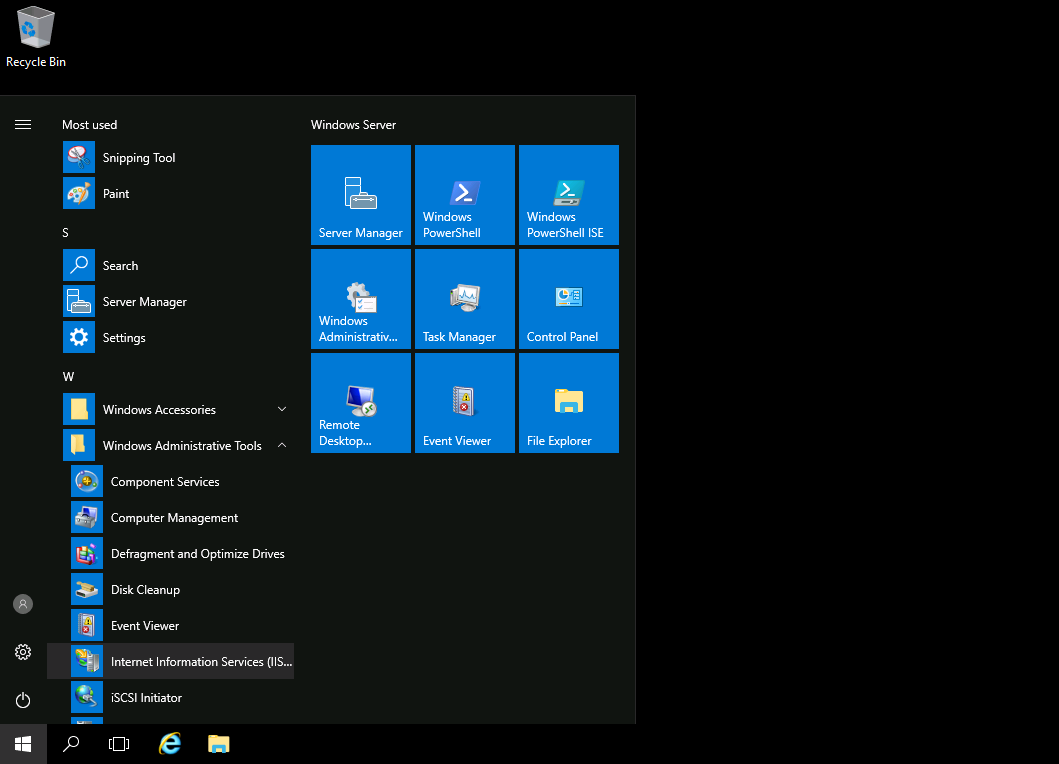
Step 1 – Go to Start > Administrative Tools > Internet Information Services (IIS) Manager, as shown below:
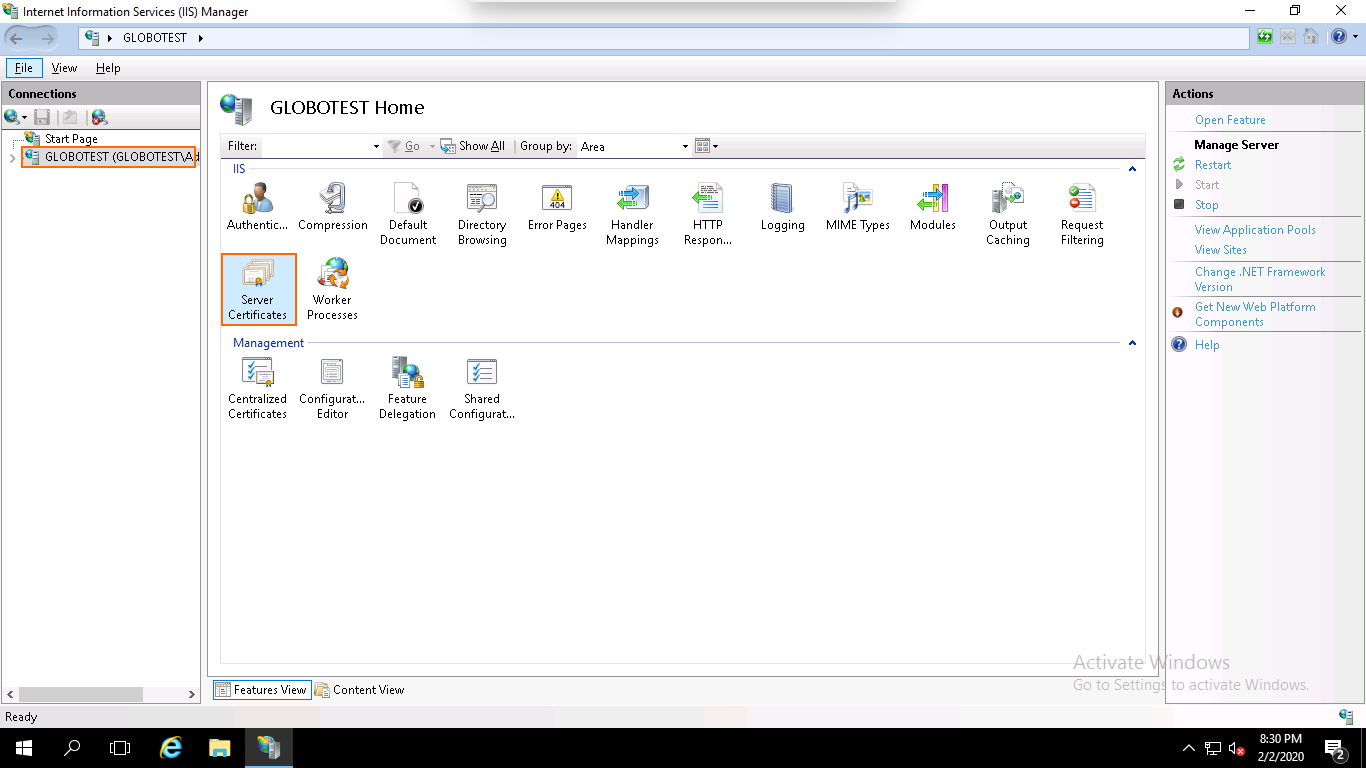
Step 2 – In the left pane, click on the server name and double click on the Server Certificates. You should see the following page:
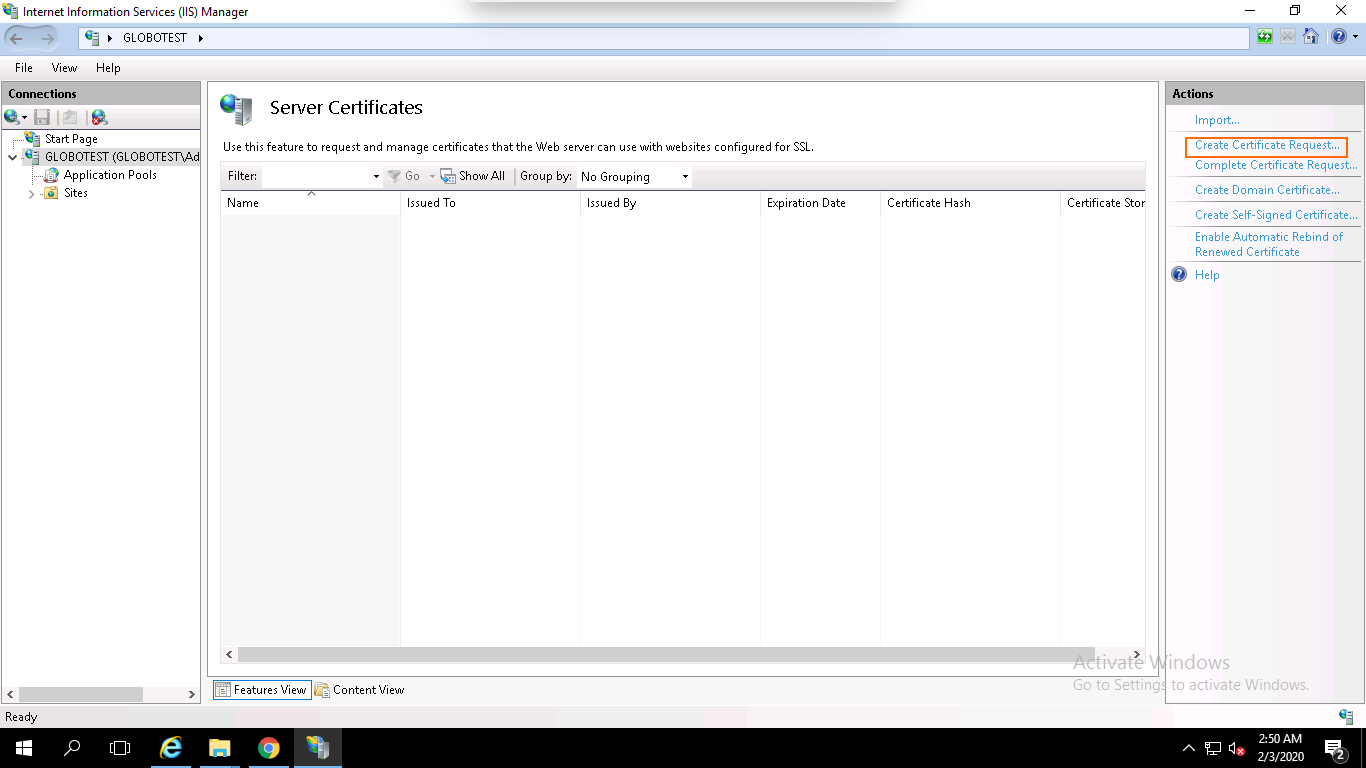
Step 3 – In the right pane, click on the Create Certificate Request. You should see the following page:
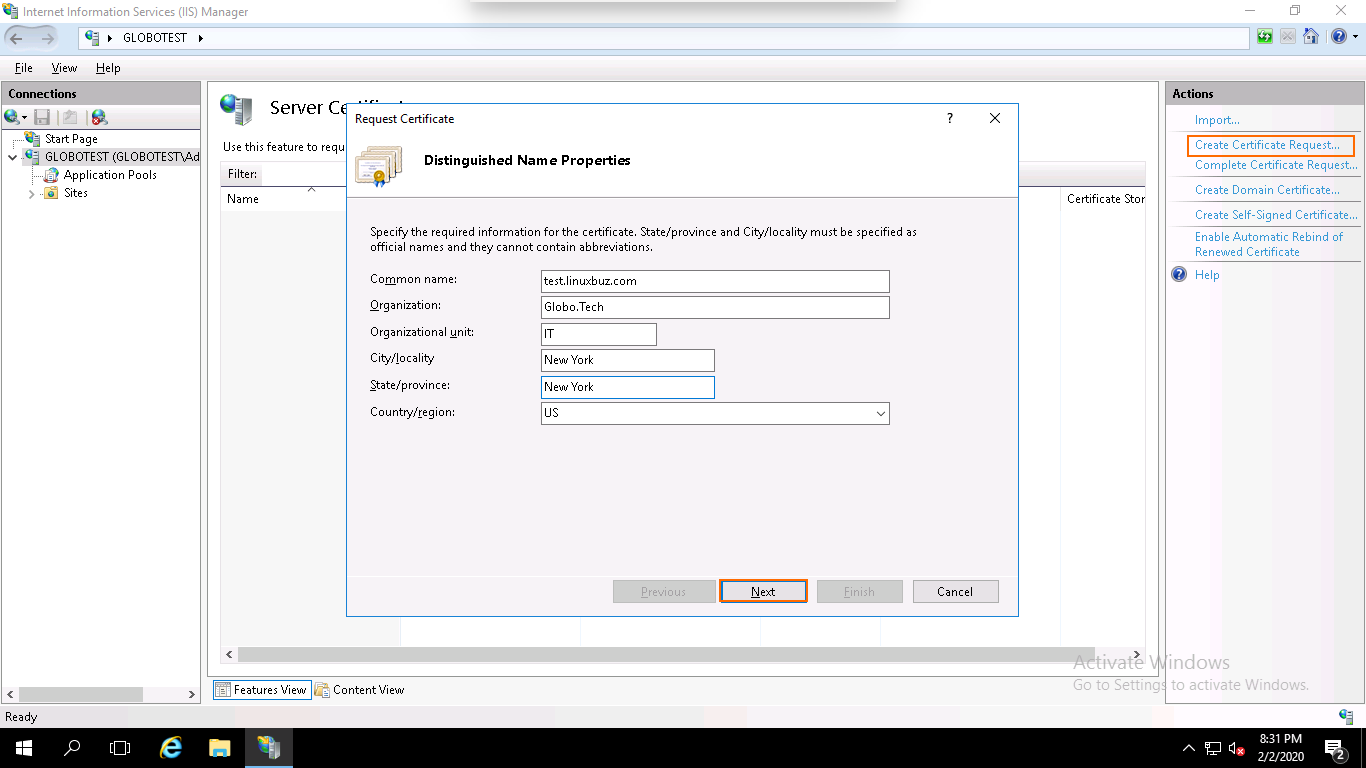
Step 4 – Provide your domain name, company name, department name, city, state, country name and click on the Next button. You should see the following page:
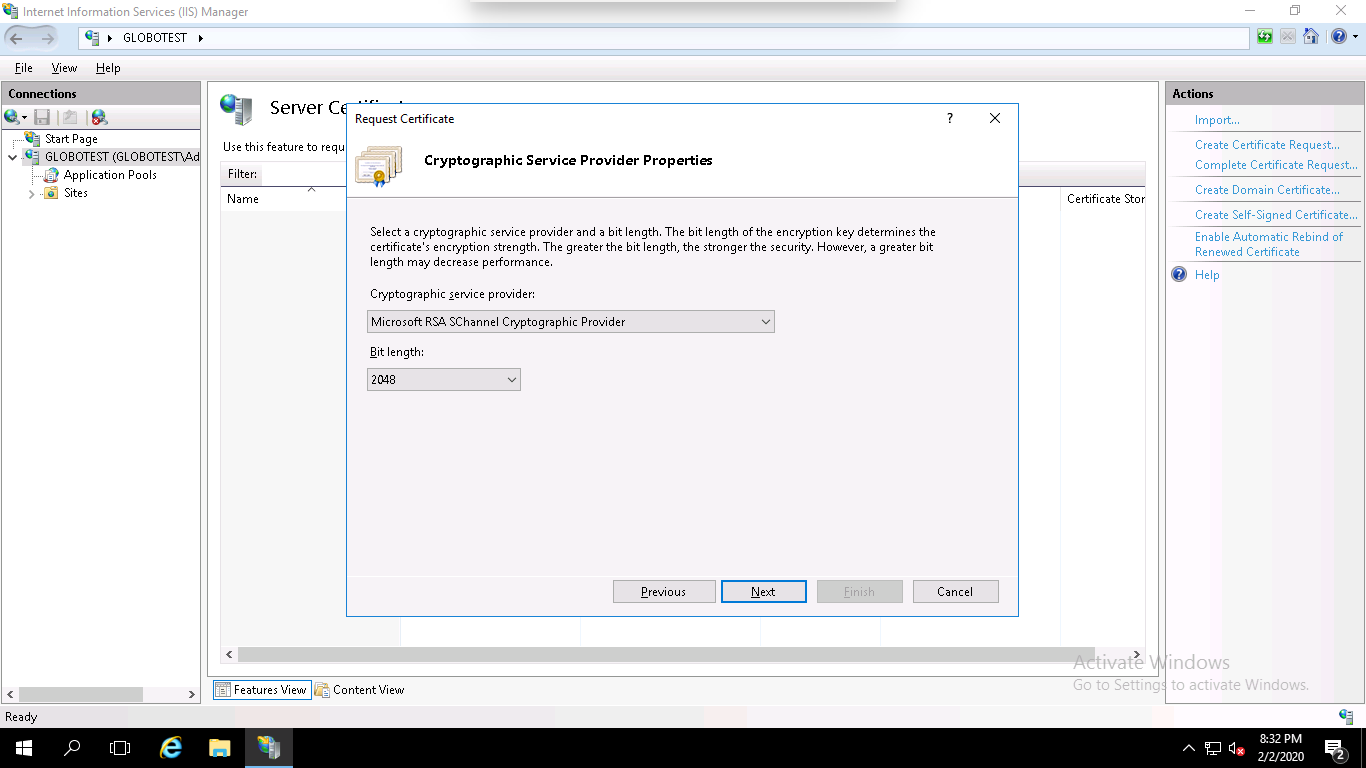
Step 5 – Select the Cryptographic Service Provider, 2048 as a bit length and click on the Next button. You should see the following page:
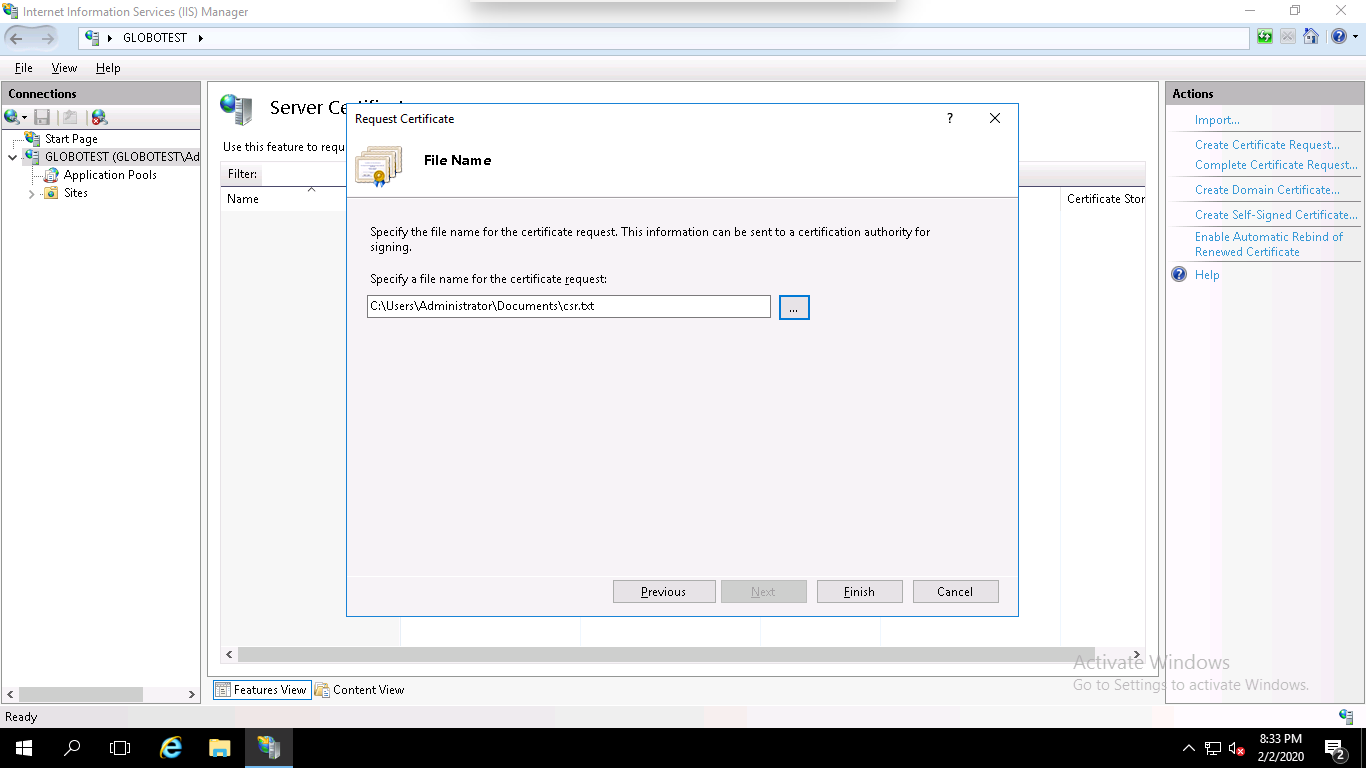
Step 6 – Specify the filename and the location where you want to save the CSR, and click on the Finish button to create a CSR certificate.
Step 7 – After generating the CSR, you will need to give this CSR file to the Certificate Provider in order to purchase the new SSL certificate.
Make sure that you get an SSL certificate in P7B or CER format. Once you received the SSL certificate file from the Certificate Authority save it on the server where you created the CSR.
Install the SSL on IIS Website
Next, you will need to install the SSL certificate on your IIS website. You can install it by following the below steps:
Step 1 – Go to Start > Administrative Tools > Internet Information Services (IIS) Manager as shown below:

Step 2 – In the left pane, click on the server name and double click on the Server Certificates. You should see the following page:
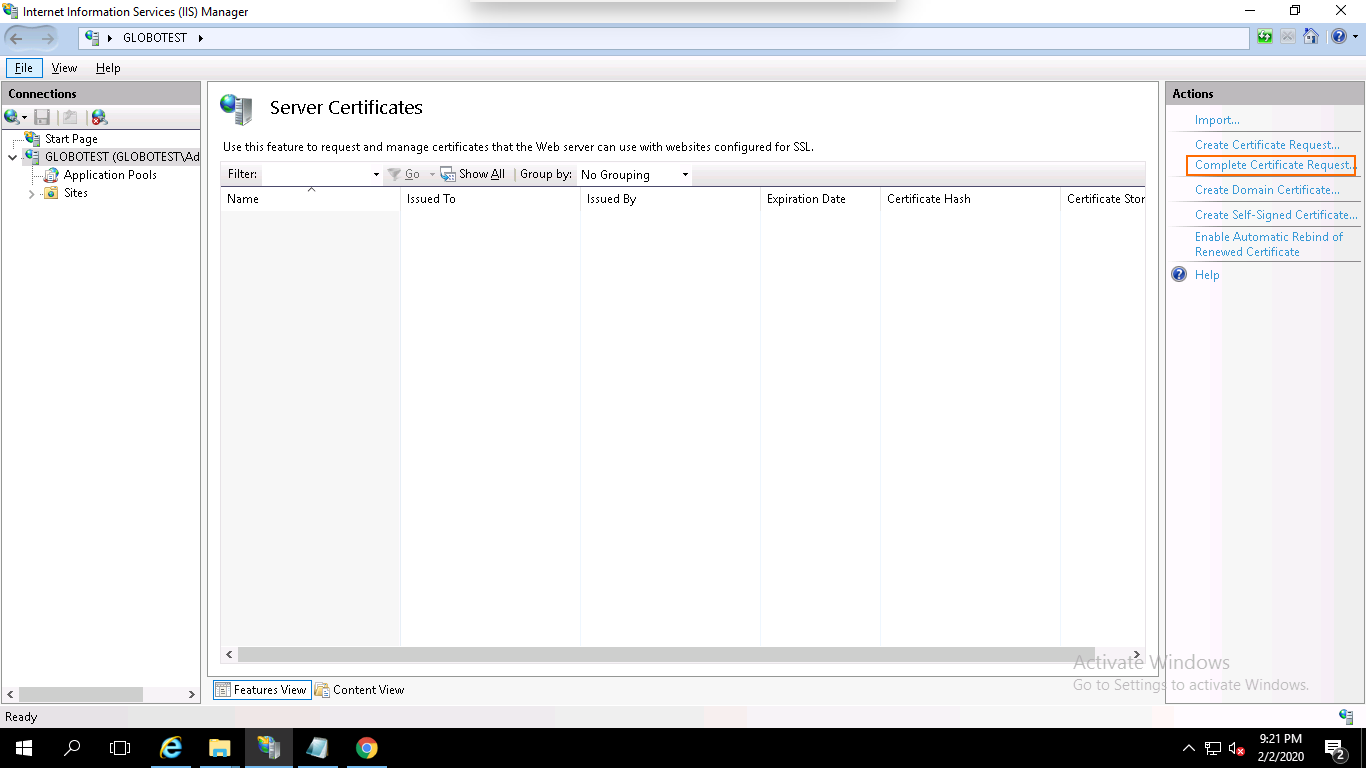
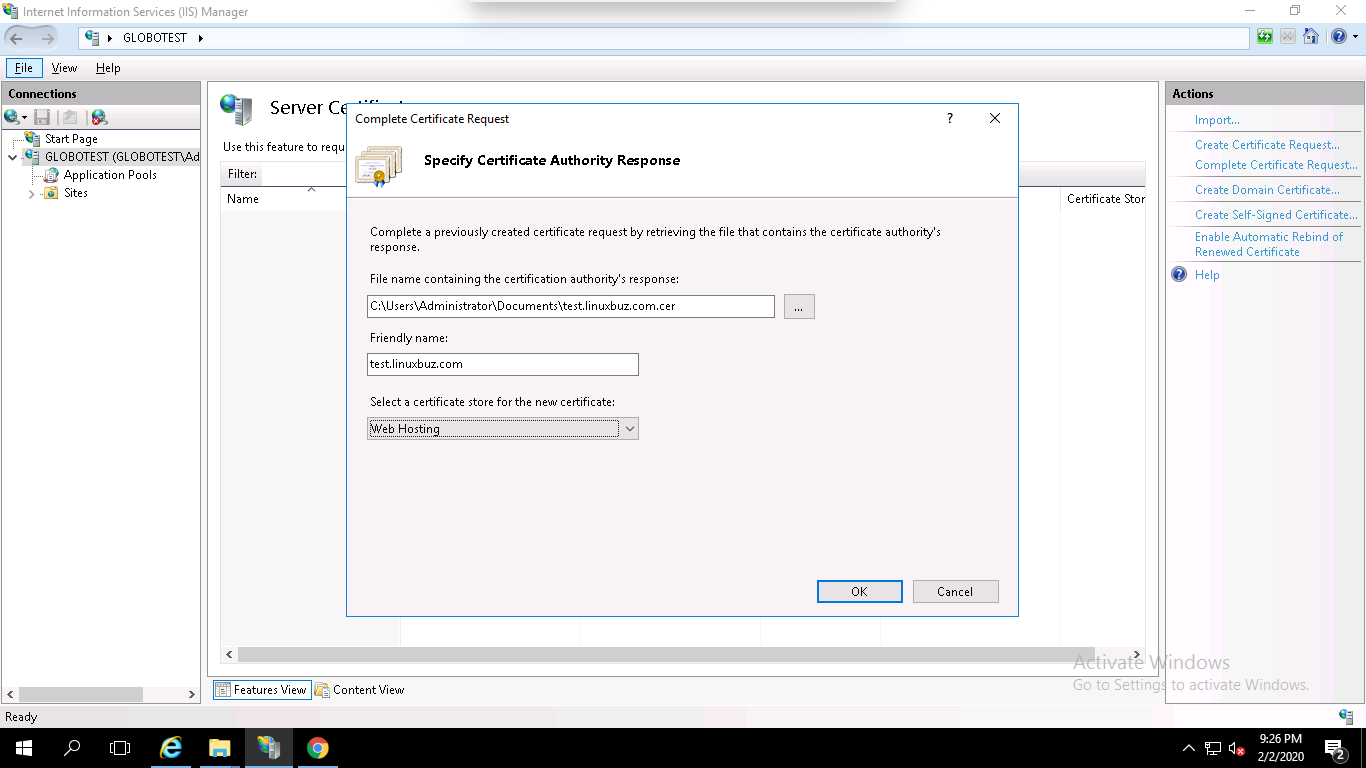
Step 3 – In the right pane, click on Complete Certificate Request. You should see the following page:
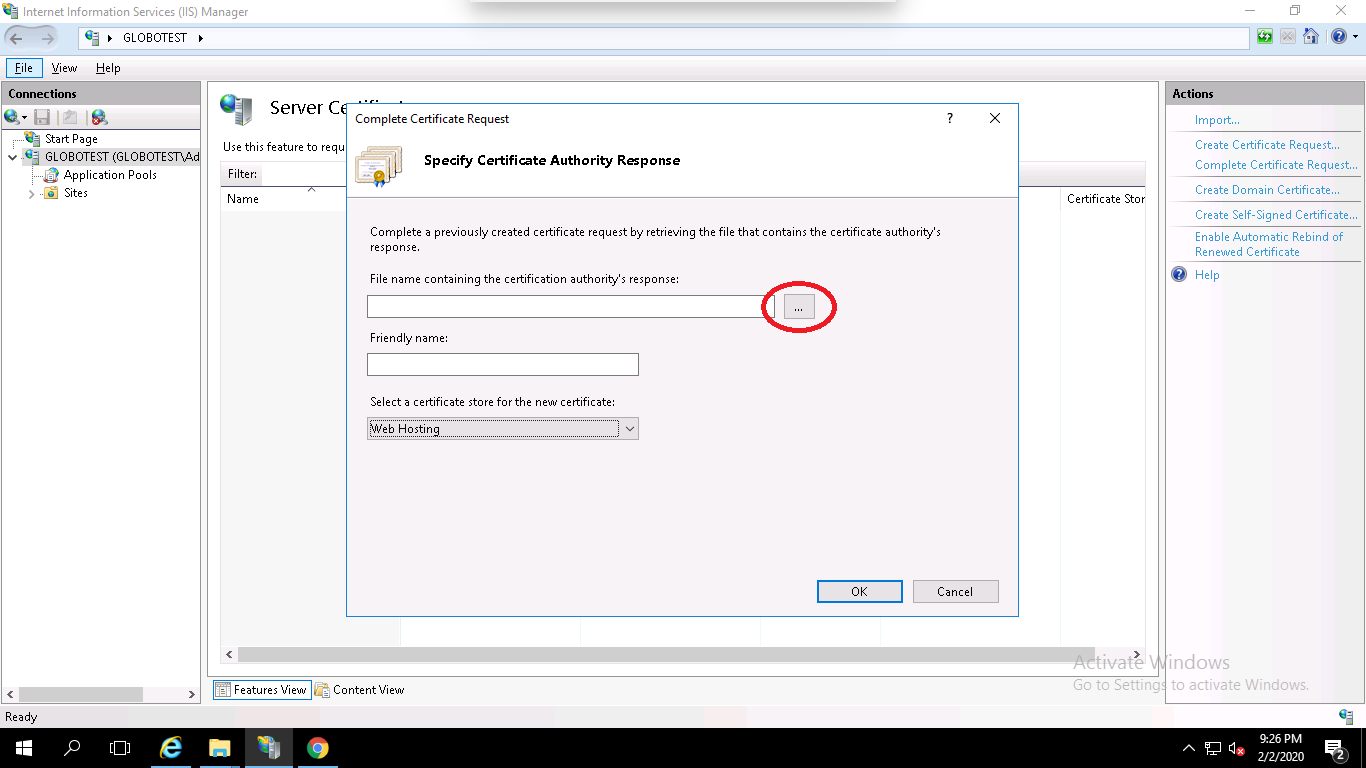
Step 4 – Browse the certificate file (.cer), provide your domain name, select Web Hosting in the certificate store option and click on the OK button.
At this point, you have successfully installed your SSL certificate. Next, you will need to assign the certificate to your website.
You can assign the certificate by following the below steps:
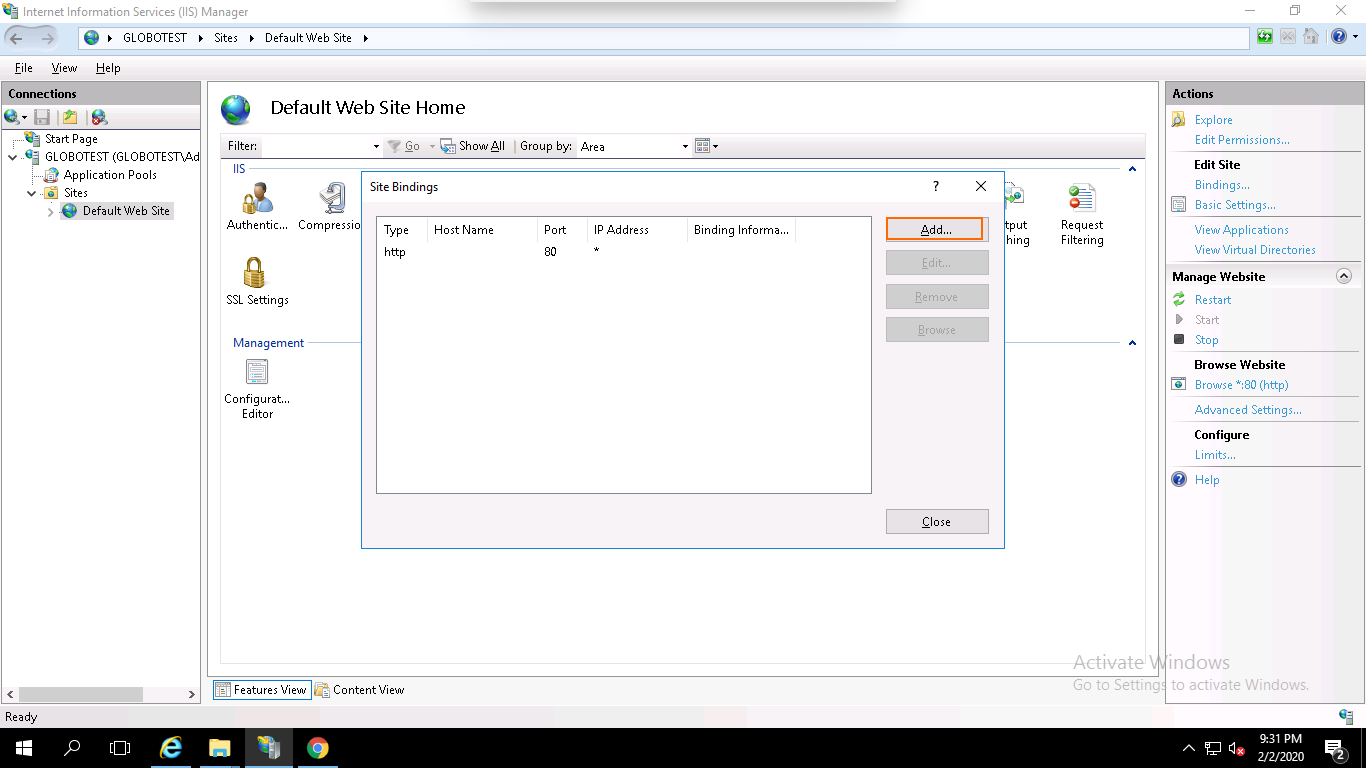
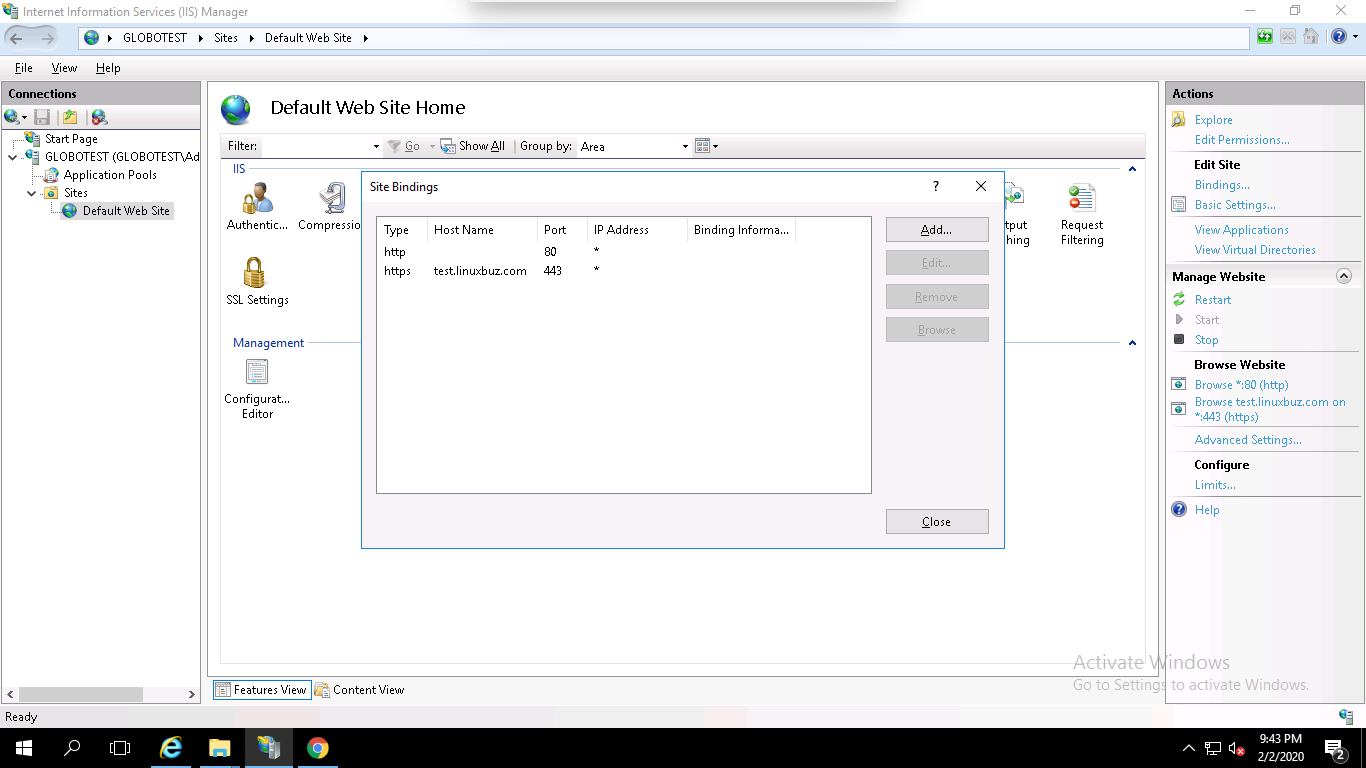
Step 1 – Open the IIS Manager, expand the server name and click on the Default Website then click on the Bindings in the right pane. You should see the following page:

Step 2 – Click on the Add button. You should see the following page:
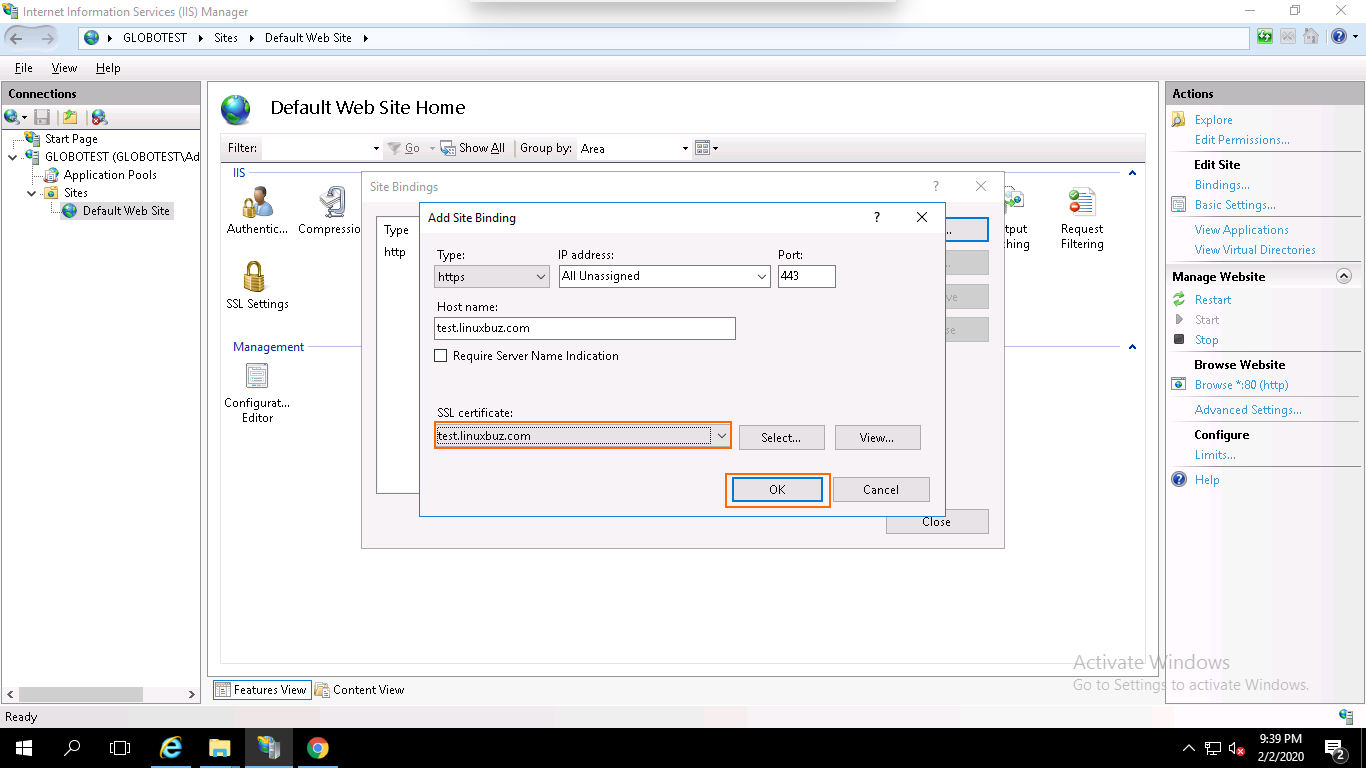
Step 3 – Select https, select the IP address of your website or leave it unassigned, type port 443, type your domain name, select the domain name on which you want to install SSL and click on the OK button to install the certificate.
Your SSL certificate is now installed and the website configured to accept secure connections as shown below:
Conclusion
Congratulations! you have successfully installed an SSL certificate on Windows server 2019 using IIS. Your website is now secured with an SSL certificate.
