 Call us at 1-888-GTCOMM1


How to install CentOS WebPanel on CentOS 7
CentOS, short for Community Enterprise Operating System, is a Linux distribution that is free, community-supported, and enterprise-class; CentOS is designed to be usable in organizations or enterprises. CentOS 7, the operating system being used in this guide, was released in 2015 and is the current major release of this software.
To help manage the different web servers an organization may use that have CentOS installed the CentOS WebPanel was created. Web Panel offers a free control panel that provides easy supervision of dedicated and virtual private servers; Web Panel removes the need for users to use the ssh (secure shell) console for each action, providing a more user-friendly interface with a variety of options.
Getting Started
In this guide, we are using CentOS 7, which was first released in August of 2015. You will need a node running on a cloud server or dedicated server, and it needs to have CentOS 7 already installed.
Additionally, you will need at least one (1) dedicated IP address and a valid domain name to function as your hostname during the installation. A dedicated IP address is a unique address that is assigned to a single hosting account; using a dedicated address allows you to view the site via the IP address and provides faster response times even during high traffic loads.
Once you have a virtual or dedicated installation of CentOS 7, an IP address, and a valid domain name, you’re ready to start installing CentOS WebPanel.
Installing the CentOS WebPanel on CentOS 7
The first step to installing Web Panel is verifying that your CentOS 7 installation is updated and running the most recent version of the software. The CentOS Project website provides additional details about current releases, upcoming changes, and release notes; you can verify your CentOS version number with the current release listed on the project website.
To verify that your operating system is current, you can run the following command:
yum update -y && sleep 5 && reboot
Once you’ve run any necessary updates, it’s time to set your hostname and verify that the hostname resolves to your dedicated IP address:
hostnamectl set-hostname server.example.com
After assigning the hostname and verifying it resolves to your IP address, make sure that you meet the requirements for the installation script with the following command:
yum install wget -y
When verification is complete, you can proceed with the Web Panel installation script:
cd /usr/local/src

wget http://centos-webpanel.com/cwp-el7-latest

sh cwp-el7-latest
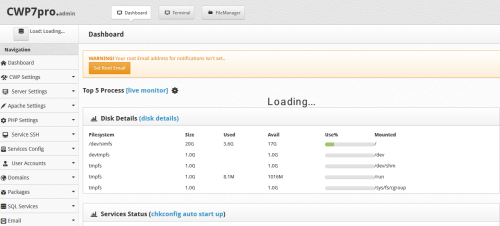
Wait for the installation to complete, and then it’s time to check the success of your Web Panel install. You can access the control panel at http://SERVER-IP:2030/, replacing “SERVER-IP” with your IP address.
Your username will be “root,” and your password will be your selected root password.
Username: root

Pass: Your root password.
Conclusion
Congratulations, you’re installed the CentOS 7 WebPanel and are ready to start using your control panel instead of an ssh console. In this guide, we’ve walked through the steps to install the Web Panel on your node running CentOS 7. If you found this guide helpful during the process, please share it with other users walking through the same process.

