 Call us at 1-888-GTCOMM1


WordPress is the most widely used and the leading Content Management System (CMS) that powers more than 30% of the website around the world. How to “decrease page load time” and “speed up the WordPress site” are one of the hot topic these days. The owner of every website will want their websites and blogs to be the fastest. As per Google algorithm, a slow loading site can damage your SEO rankings. So optimizing the WordPress site for better performance is very challenging part of any webmaster.
In this tutorial, we will explain some tips and tricks on how to optimize your WordPress site for better performance.
Requirements
- A server running Ubuntu 18.04 with WordPress installed.
- A root password is configured on your server.
Update WordPress
It is very important for any webmasters to update the WordPress and its plugins and themes to the latest version. This will increase your site performance and decrease the vulnerabilities.
To do so, log in to your WordPress admin, go to the Dashboard > Updates. You should see the following page:
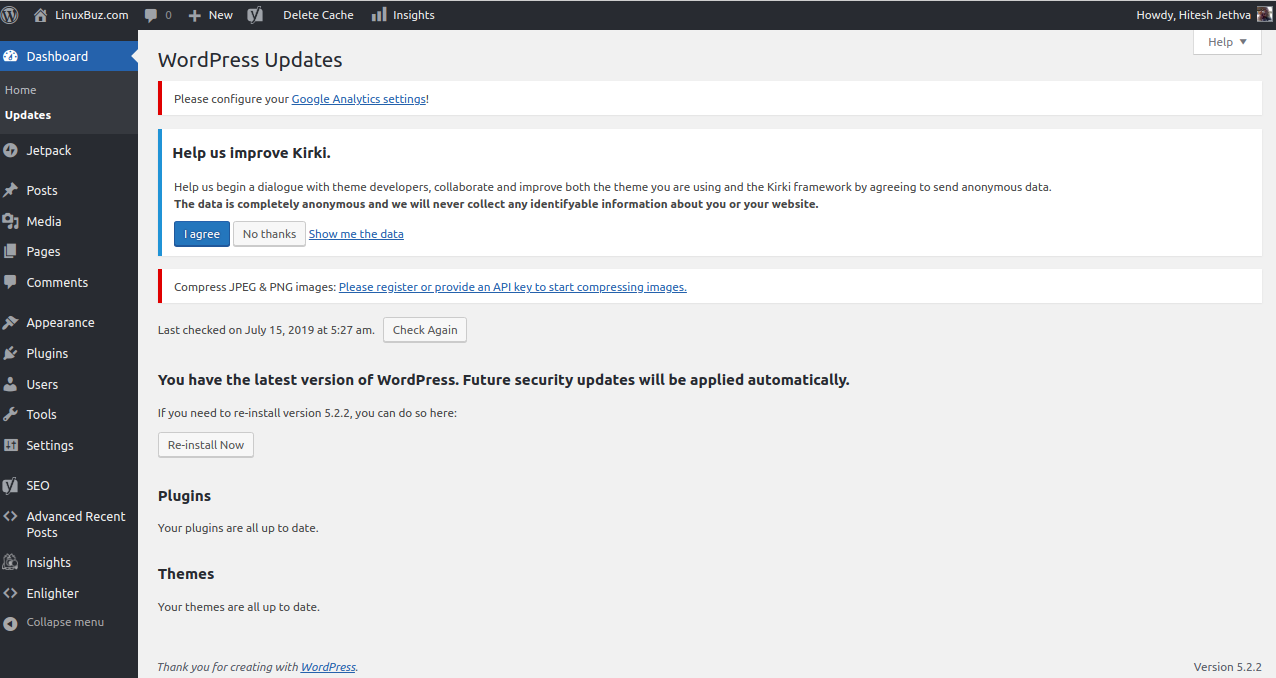
In the above page, you should see that WordPress and all your plugins and themes are up-to-date. If any updates are available, you should see the message “An updated version of WordPress is available” in the above page.
Clean Up WordPress Database
WordPress database accumulates a lot of extra data including, trashed comments, spam comments, unused plugins data and many unnecessary data. It is recommended to clean up your WordPress database regularly to remove all unnecessary data to improve your website performance. Regular clean-ups reduce your database size and speed up your backup process. It is a good way to optimize your WordPress site.
To clean up your database, you will need to install and activate WP-Sweep plugin. After installing WP-Sweep plugin, go to the Tool > Sweep. You should see the following page:
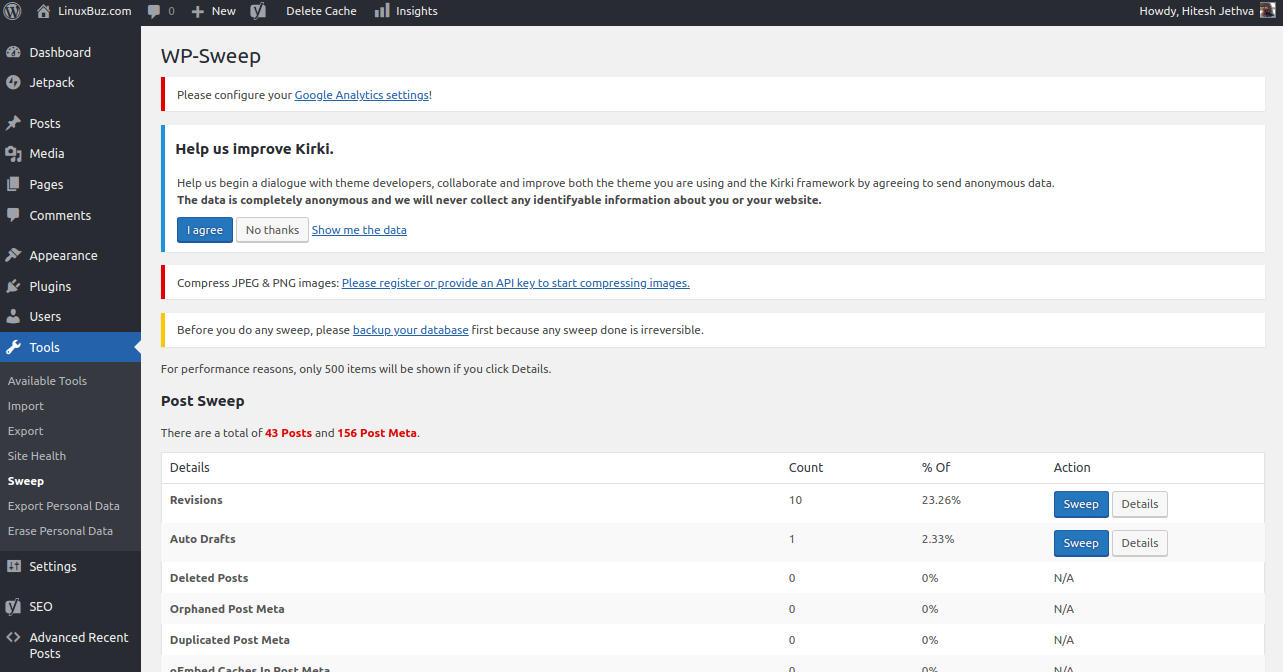
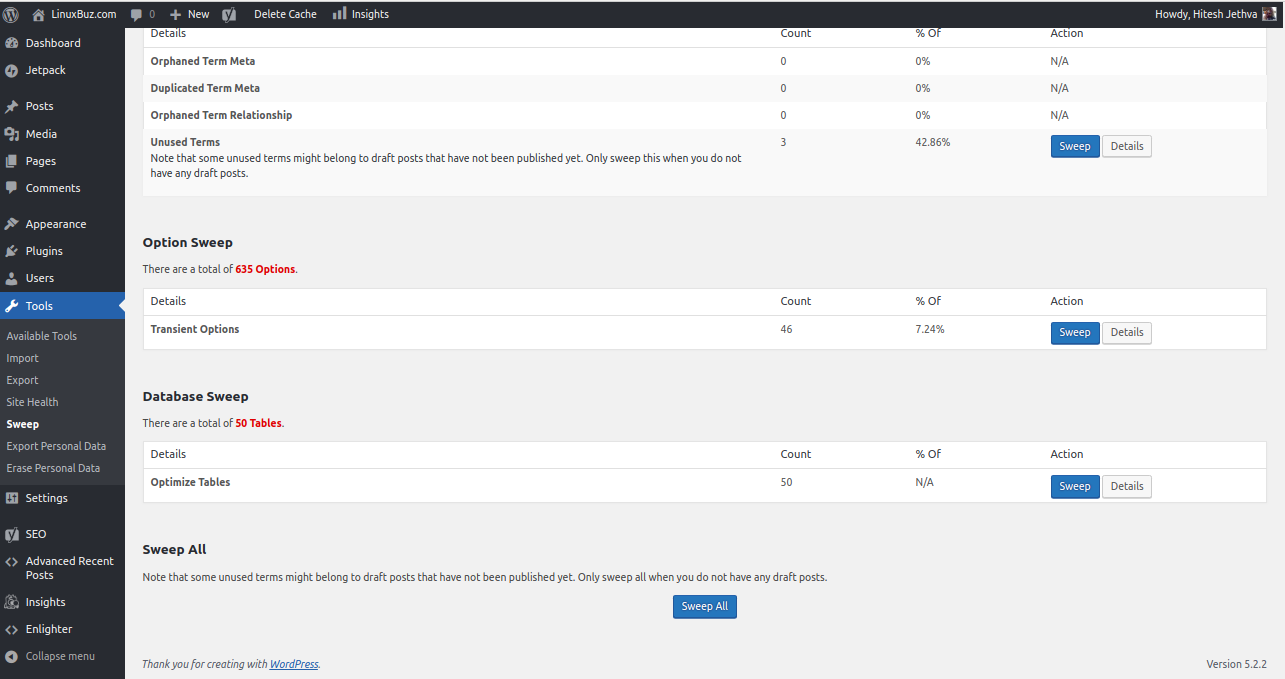
You can clean up your data one by one or click on the sweep all button on the bottom of the page to clean up all the data in your WordPress database.
Enable Gzip Compression
Enabling Gzip compression in WordPress will reduce server response time and volume of data sent by the server to a web browser. GZIP is a file format and application that can be used for file compression and decompression. GZIP compression allows you to reduce the size of your HTML, stylesheets, and JavaScript files. This will significantly reduce the amount of time to download the resource, reduce data usage and improve the page load time.
You can enable Gzip compression by editing .htaccess file from your WordPress root directory. Enabling Gzip compression in WordPress using .htaccess file will reduce server response time and volume of data sent by the server to a web browser.
Go to the WordPress root directory and Open your .htaccess file with the following command:
nano .htaccess
Add the following lines for WordPress running with Apache web server:
<IfModule mod_gzip.c>
mod_gzip_on Yes
mod_gzip_dechunk Yes
mod_gzip_item_include file \.(html?|txt|css|js|php|pl)$
mod_gzip_item_include handler ^cgi-script$
mod_gzip_item_include mime ^text/.*
mod_gzip_item_include mime ^application/x-javascript.*
mod_gzip_item_exclude mime ^image/.*
mod_gzip_item_exclude rspheader ^Content-Encoding:.*gzip.*
</IfModule>
Or, add the following lines for WordPress running with Nginx web server:
gzip on;
gzip_comp_level 2;
gzip_http_version 1.0;
gzip_proxied any;
gzip_min_length 1100;
gzip_buffers 16 8k;
gzip_types text/plain text/html text/css application/x-javascript text/xml application/xml application/xml+rss text/javascript;
gzip_disable "MSIE [1-6].(?!.*SV1)";
gzip_vary on;
Save and close the file, when you are finished.
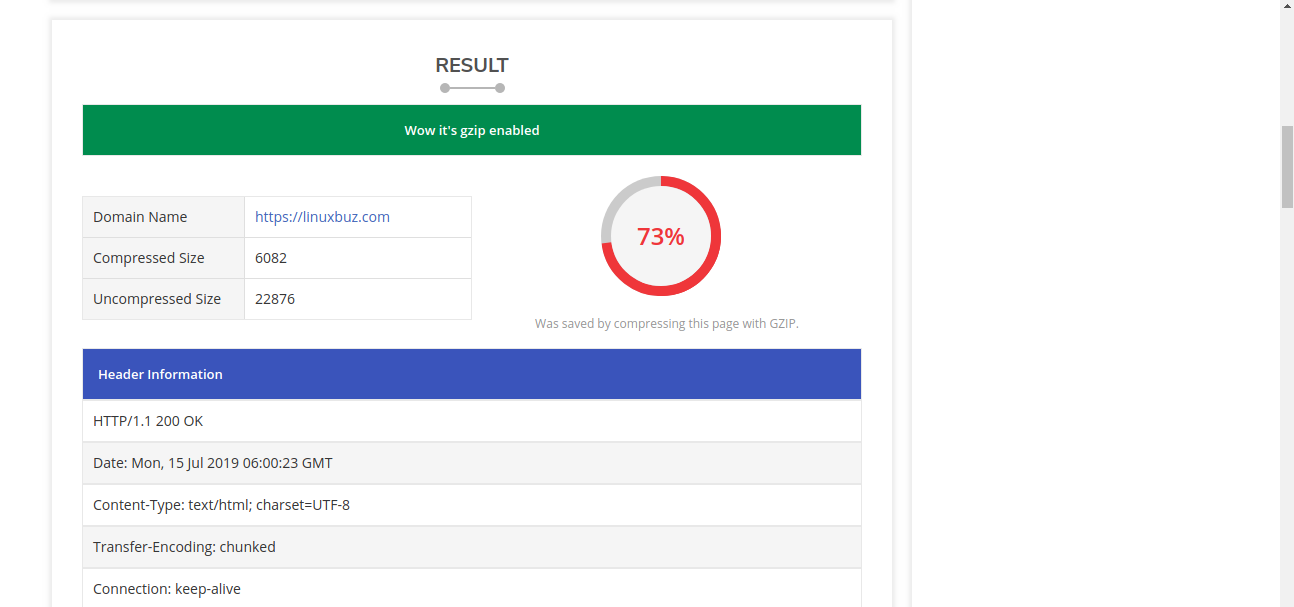
After enabling Gzip Compression, you can check whether the compression is enabled or not by visiting the website https://smallseotools.com/check-gzip-compression/
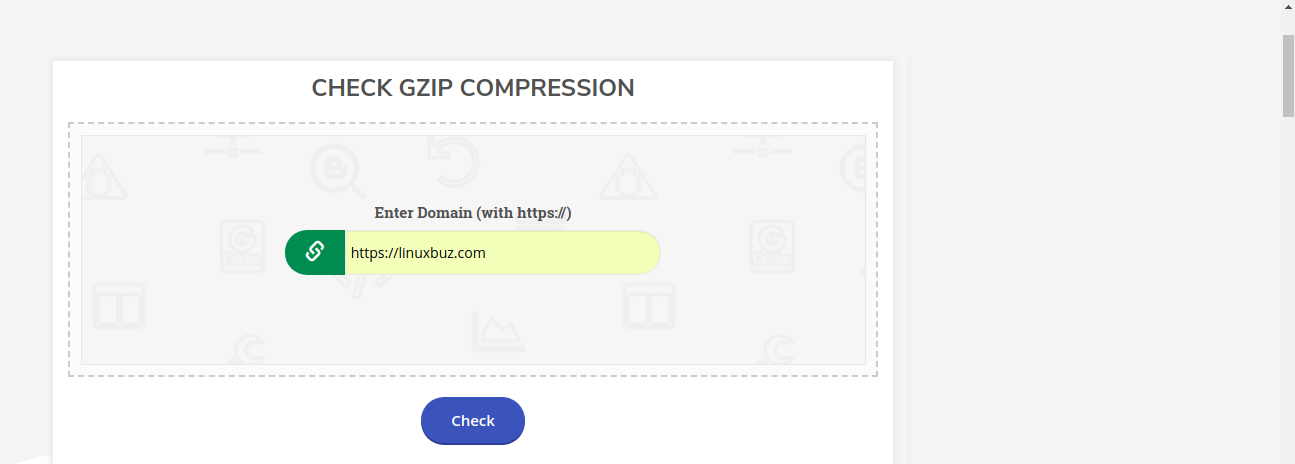
Provide your website URL and click on the Check button. You should see the following page:
Split Comments Into Pages
If your blog is getting a lot of comments, this can be causing page leg. The blog posts with a lot of comments load slower than other posts. Many comments increase your server load time and also decrease your SEO rankings. So it is recommended to break the comment section into pages to save off the time it takes for them to load.
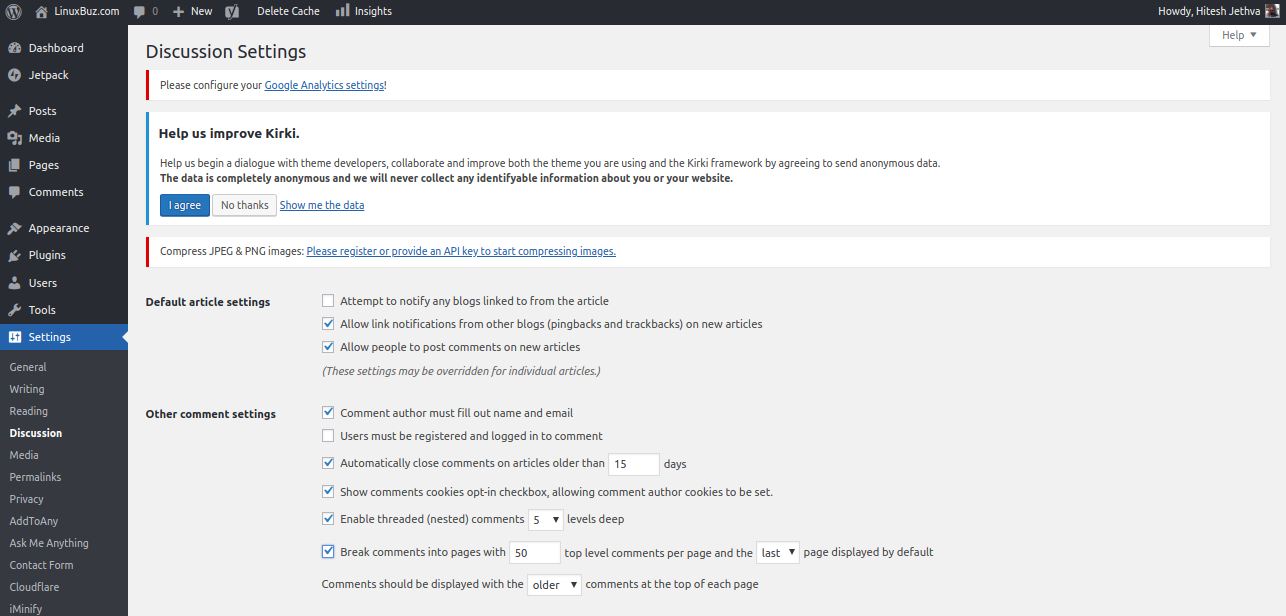
To split the comments, go to Settings > Discussions. Then, choose the number of comments you want per page.
Use a CDN
A content delivery network (CDN) is a geographically distributed servers and data centers. CDN provides high availability and high performance by delivering pages and other web content to a user based on the user’s geographic locations. The users visit your site from the different locations around the world. The website loading speed will differ if the users are located far away from where your site is hosted. Content Delivery Networks (CDN) keeps a copy of your website in different data centers located in different locations and serve the web page to a user from the nearest location.
So it is recommended to add your website to CDN like, Cloudflare, MaxCDN, Rackspace and Cachefly.
In the above tutorial, we have learned some tips and tricks to optimize your WordPress site. I hope you have now enough knowledge to boost your WordPress performance. This will also increase your rankings in the SERPs and improve the experience of your visitors. Feel free to ask me if you have any questions.

