 Call us at 1-888-GTCOMM1


How to Install MySQL in Windows Server 2016
If you are using the Windows server to host your website, you may use the MsSQL database server as a database backend. But, MsSQL is Microsoft’s commercial product and you will need to purchase license to use MsSQL will all features. So it is very difficult for small businesses to pay license costs.
To resolve this, you could try open-source database servers like, MySQL database server and use it as a database backend to save a license cost. You should install MySQL in your Windows Server 2016.
MySQL is a part of the Linux-based server and specially designed for LAMP/LEMP stack. It is also available for the Windows operating system. So you should use MySQL to manage and host your application.
In this tutorial, we will show you how to install and upgrade MySQL server on Windows Server 2016.
Prerequisites
- A server running Windows Server 2016.
Download MySQL Installer
MySQL Server is available for Microsoft Windows 64-bit operating systems only. Before installing MySQL Server, it is recommended to see https://www.mysql.com/support/supportedplatforms/database.html for supported Windows platform.
The simple and easiest way to install MySQL server in Windows Server 2016 system is to install it using MySQL installer. MySQL installer provides a simple and user-friendly wizard to install MySQL on Windows.
At the time of writing this article, the latest available version of MySQL is MySQL 8.0.19.
You can download the latest version of MySQL installer from the MySQL Community Download page as shown below.
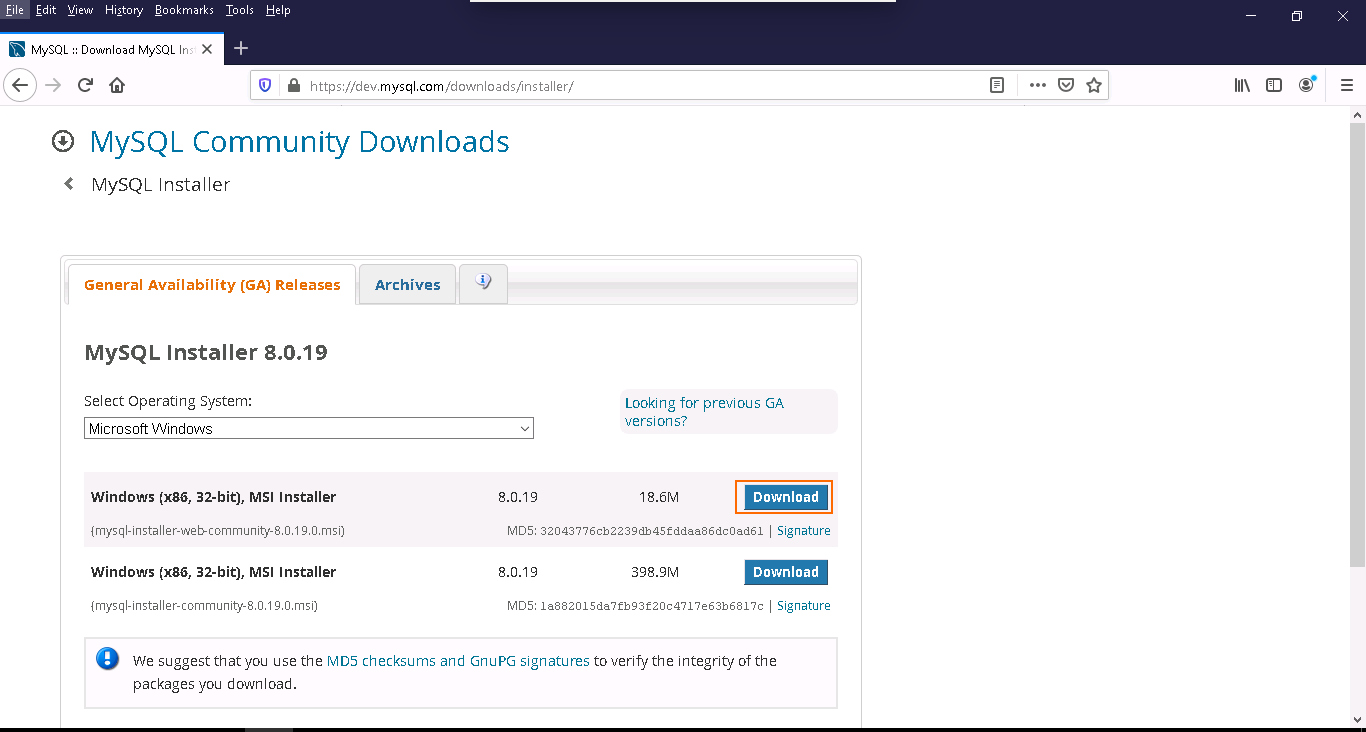
As you can see, there is two option available for download:
1- If you are connected to the internet, you can choose the online installation version mysql-installer-web-community-8.0.19.0.msi.
2- If you are not connected to the internet and want to install MySQL offline, you can choose the offline installation version mysql-installer-community-8.0.19.0.msi.
Click on the Download button to download the MySQL MSI installer.
You can install the following components using the MySQL installer:
- MySQL Server
- MySQL Workbench
- MySQL Notifier
- MySQL Shell
- MySQL Router
- ODBC Connector
- C++ Connector
- J Connector
- Net Connector
- MySQL Documentation
- Samples and Examples
Once you are done, you can proceed to the next step.
Install MySQL Server
You can follow the below steps to install the MySQL server on Windows server 2016:
Step 1 – Double click on the downloaded mysql-installer-web-community-8.0.19.0.msi file. You should see the MySQL Installer wizard in the following page:
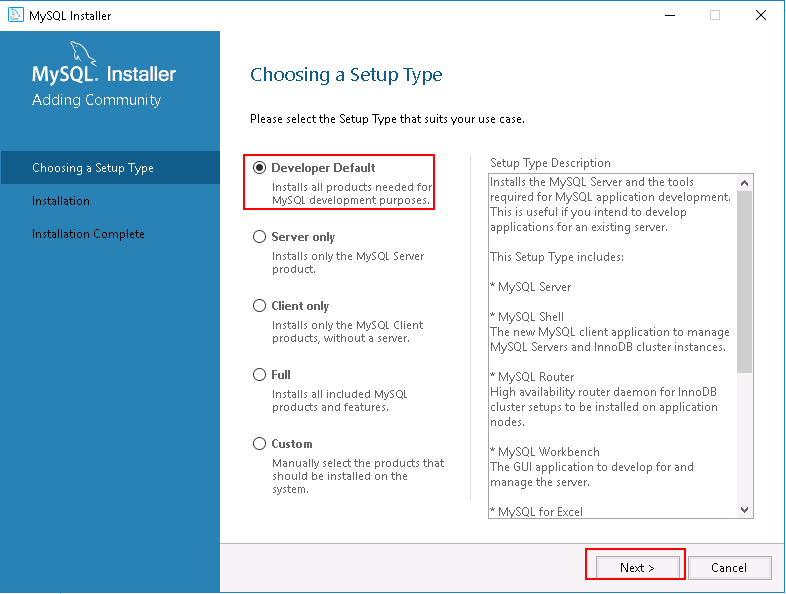
Developer Default option will install the selected version of MySQL Server with other MySQL tools required for MySQL development.
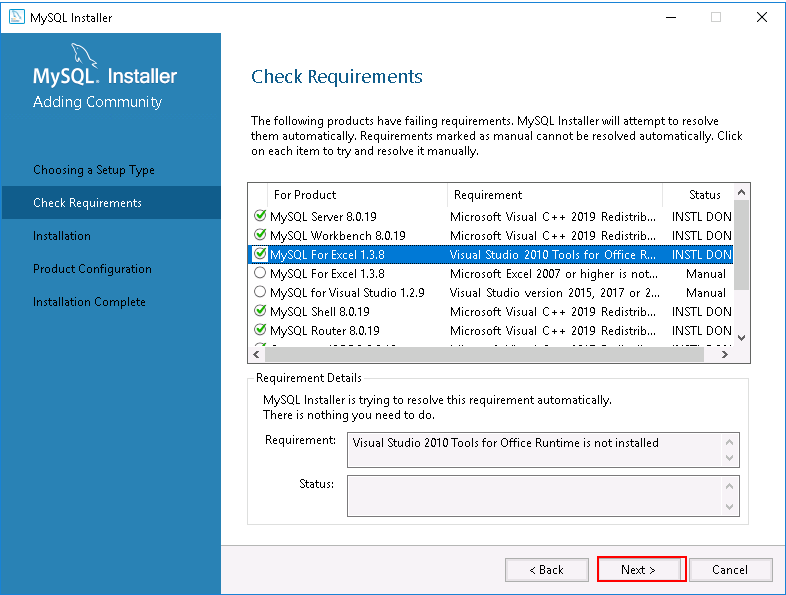
Step 2 – Choose your desired setup type and click on the Next button. You should see the list of all dependencies required to install MySQL server:
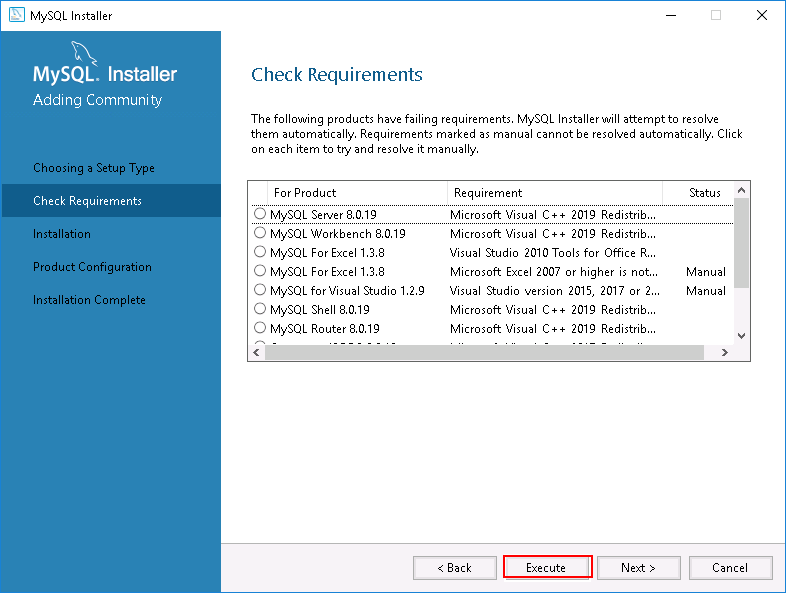
Step 3 – Click on the Execute button to install all dependencies. Once all the dependencies are installed, you should see the following page:
Step 4 – Click on the Next button to start the installation. You will be asked to install the MySQL server with some missing dependencies:
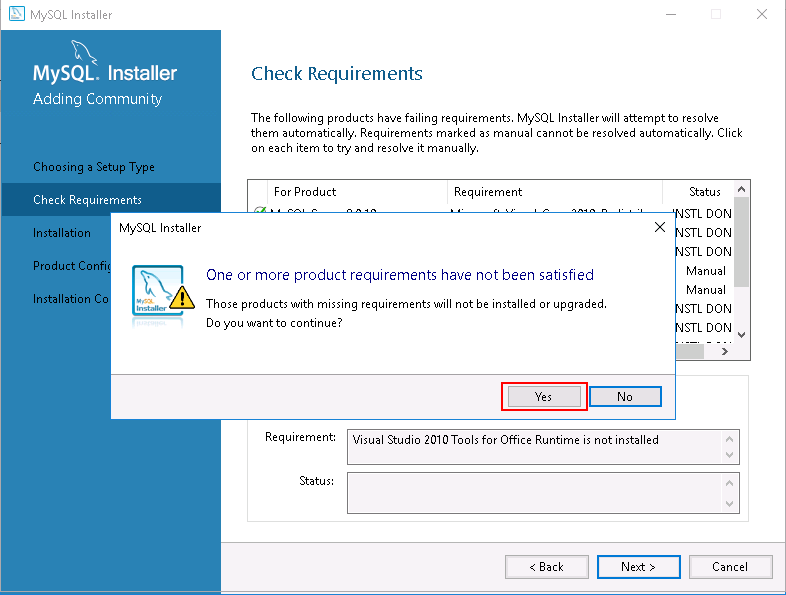
Step 5 – Click on the Yes button. You should see the following page:

Step 6 – Click on the Execute button to download and install the MySQL server with all required dependencies. Once the installation has been completed, you should see the following page:
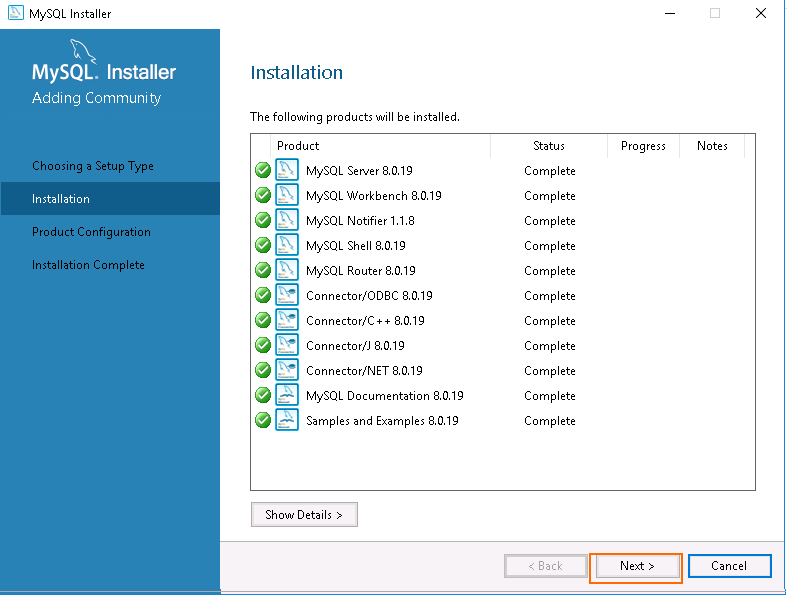
Step 7 – Click on the Next button. You should see the product configuration page:

Step 8 – Click on the Next button. You should see the following page:
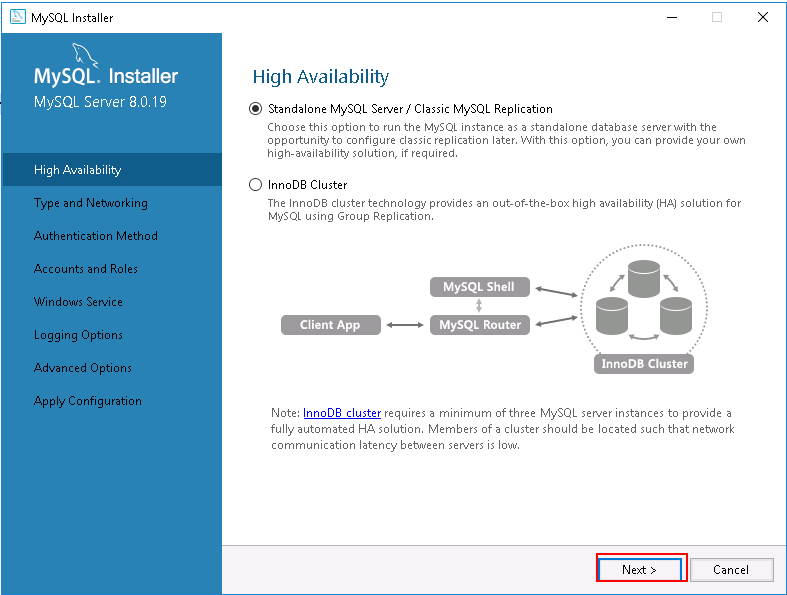
Step 9 – Select the Standalone MySQL server and click on the Next button. You should see the following page:
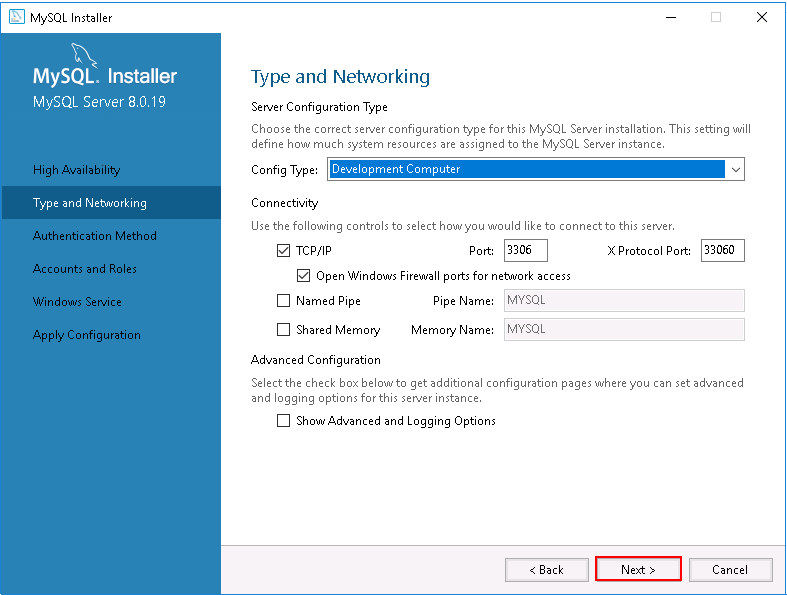
Step 10 – Choose the server configuration type and click on the Next button. You should see the following page:
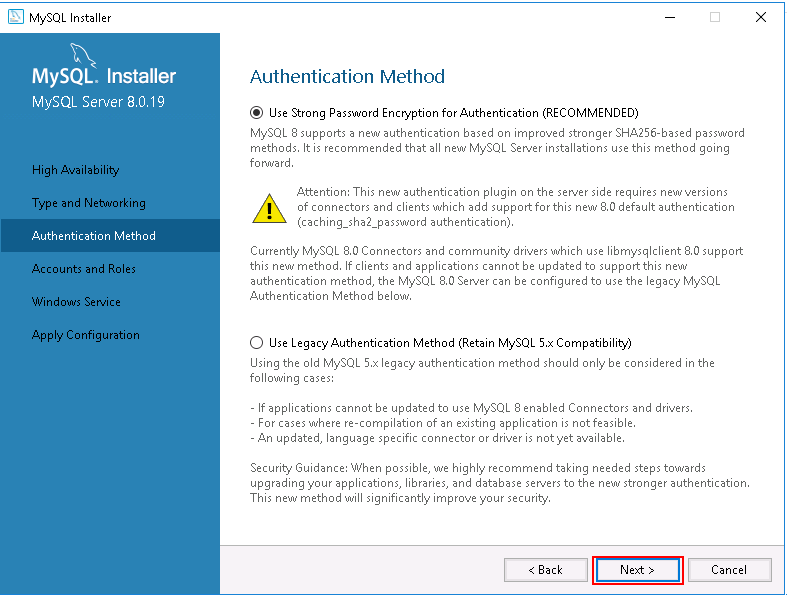
Step 11 – Select the authentication method and click on the Next button. You should see the following page:
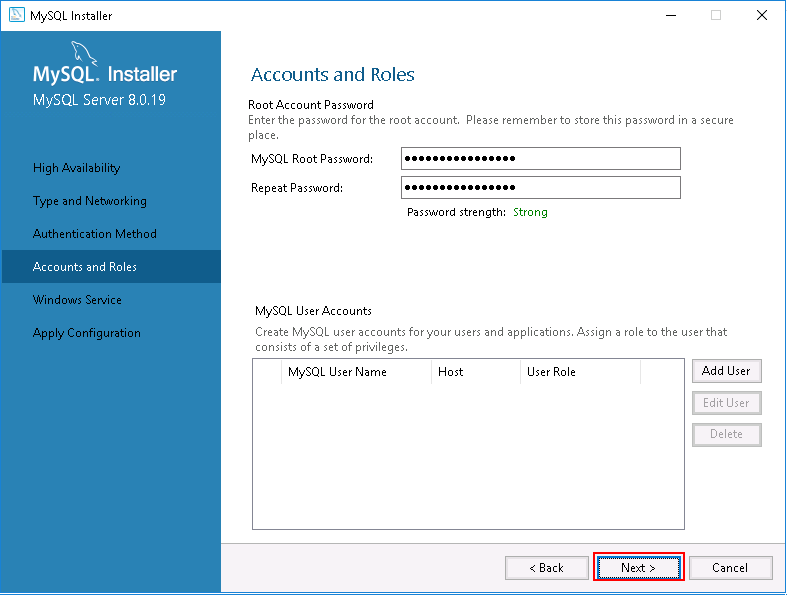
Step 12 – Set your root password and click on the Next button. You should see the following page:
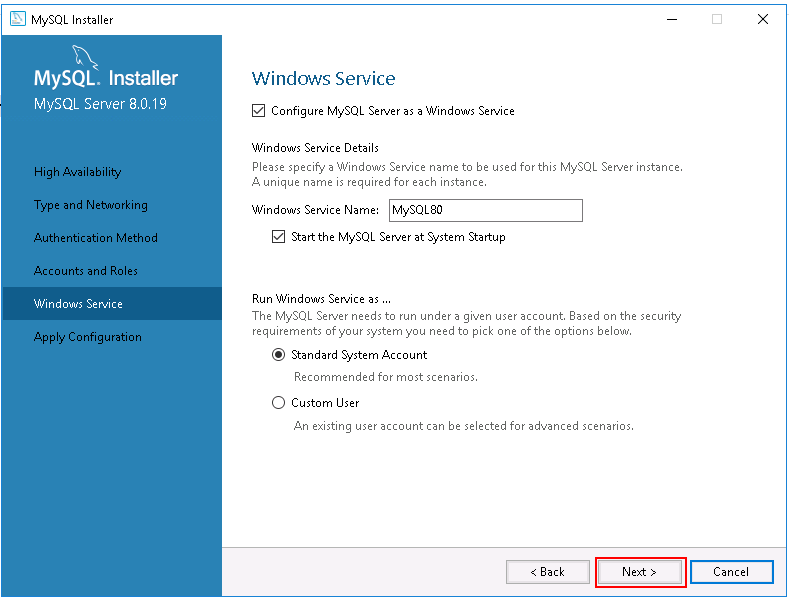
Step 13 – Configure MySQL service and click on the Next button. You should see the following page:
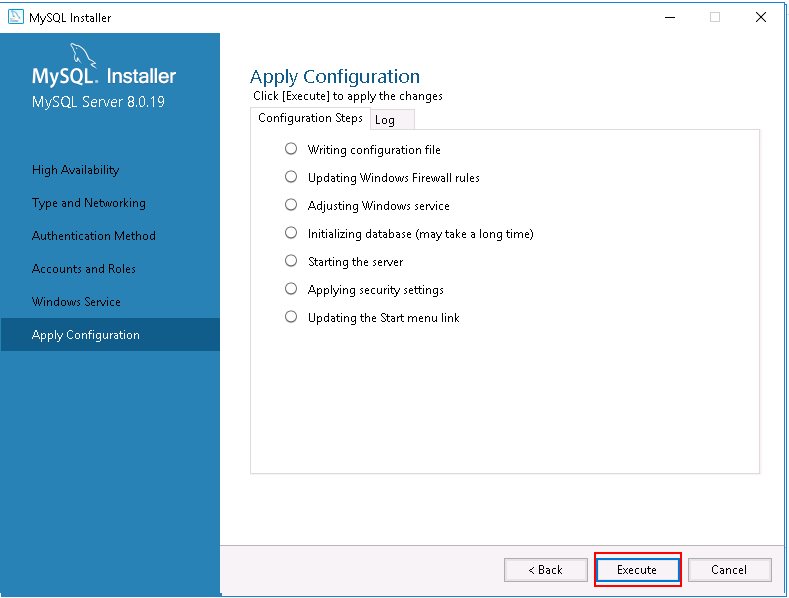
Step 14 – Click on the Execute button to apply the changes. You should see the following page:
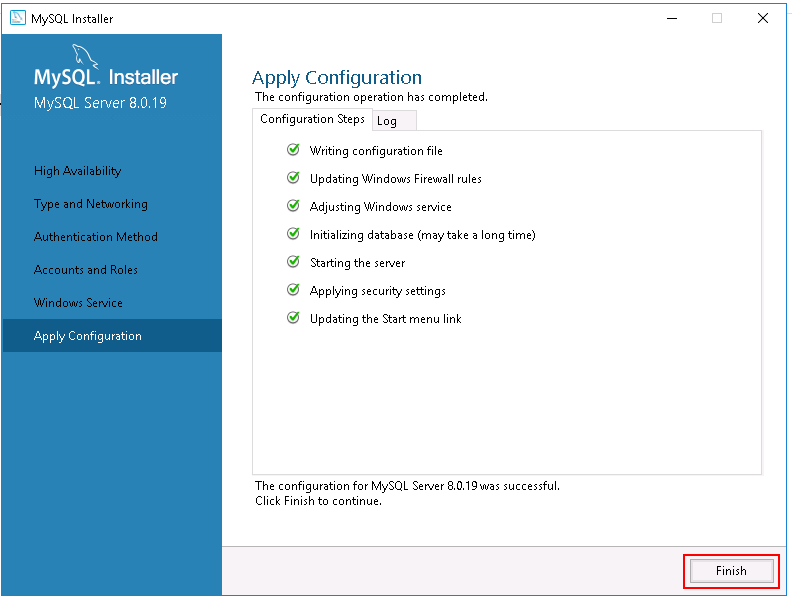
Step 15 – Click on the Finish button to complete the MySQL server configuration. You should see the following page:
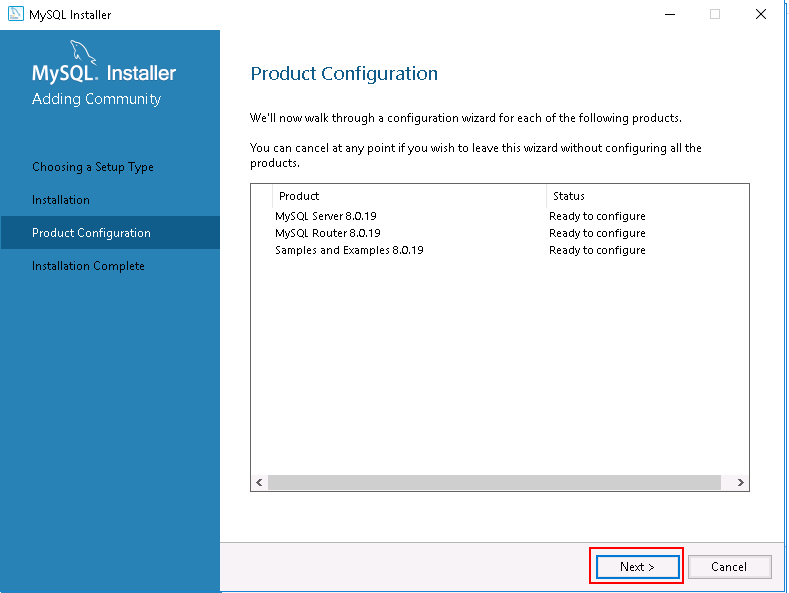
Step 16 – Click on the Next button to configure MySQL Router. You should see the following page:
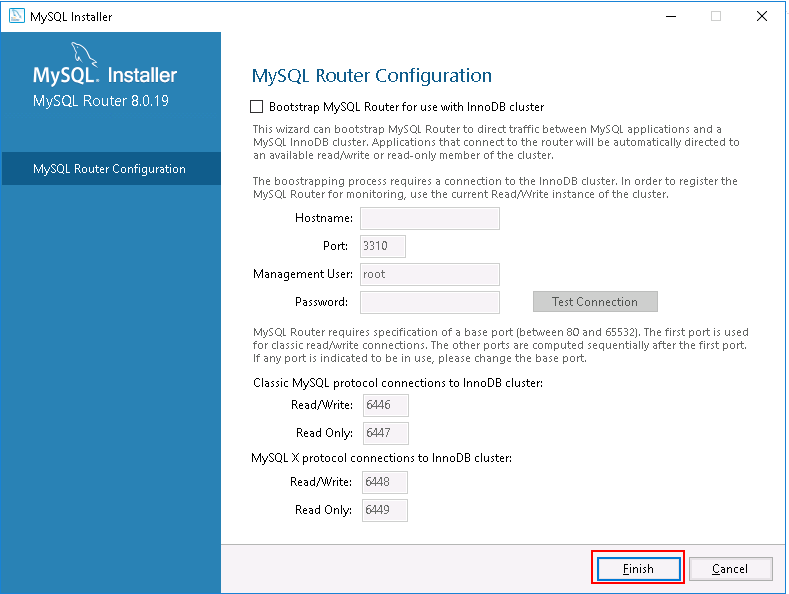
Step 17 – Click on the Finish button to complete the Router configuration. You should see the following page:

Step 18 – Click on the Next button to configure Samples and Examples. You should see the following page:
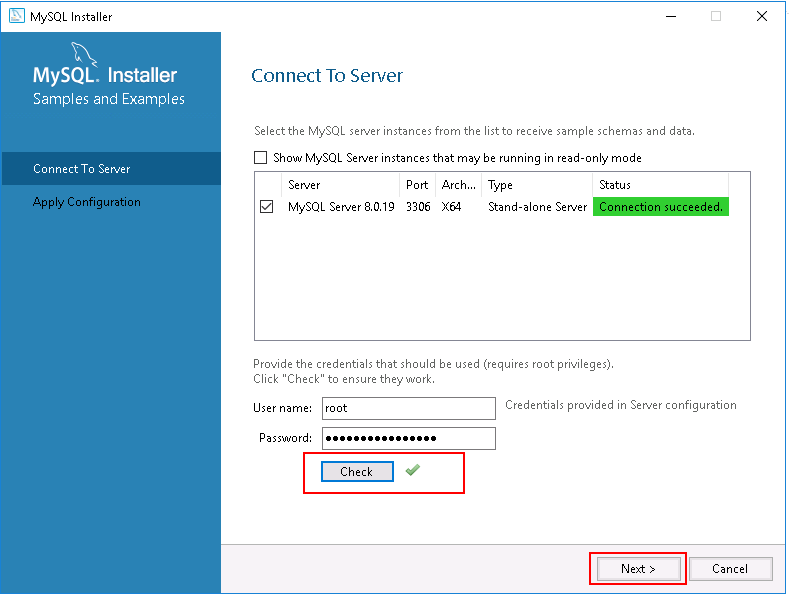
Step 19 – Select the MySQL server to receive sample schemas and data, click on the Check button and click on the Next button. You should see the following page:

Step 20 – Click on the Execute button to apply the changes. You should see the following page:
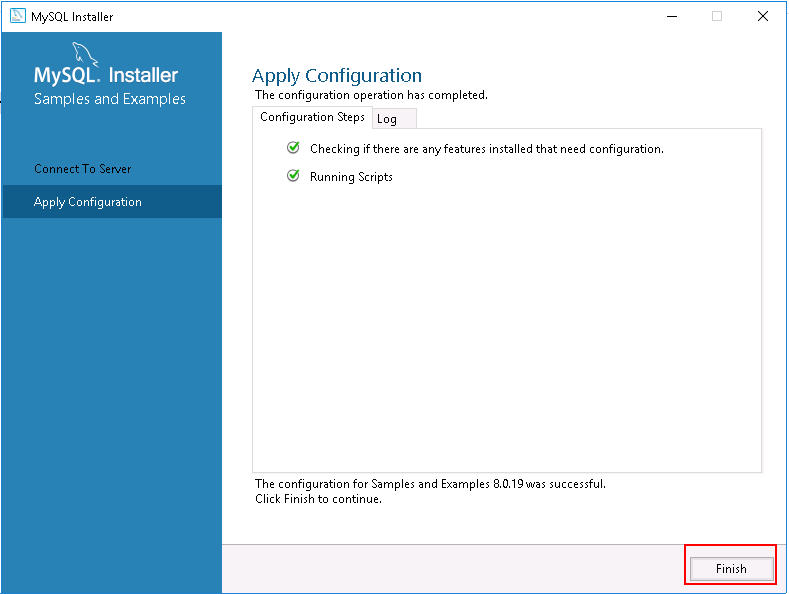
Step 21 – Click on the Finish button to complete the configuration. You should see the following page:
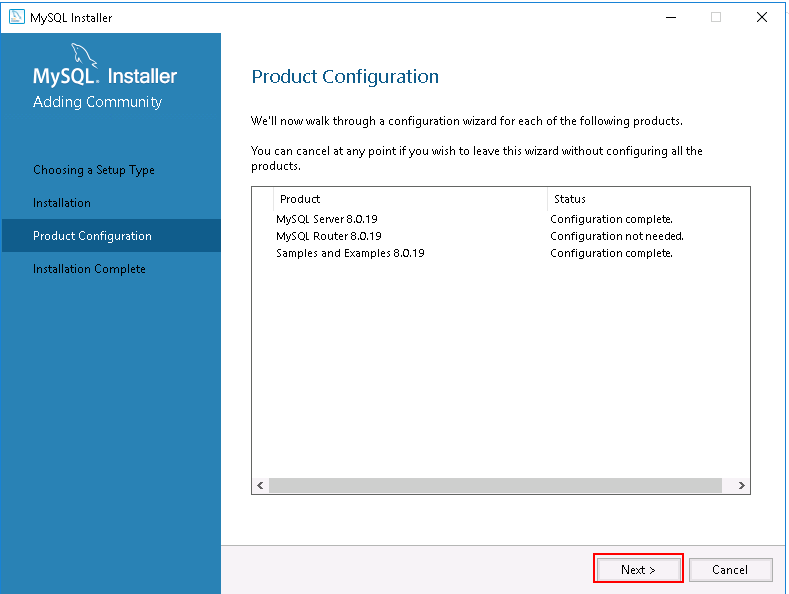
Step 22 – Click on the Next button. You should see the following page:
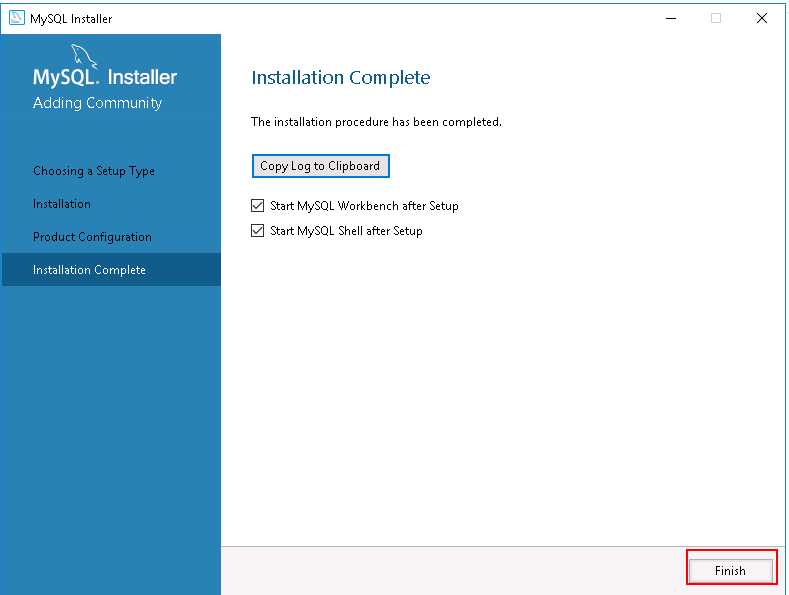
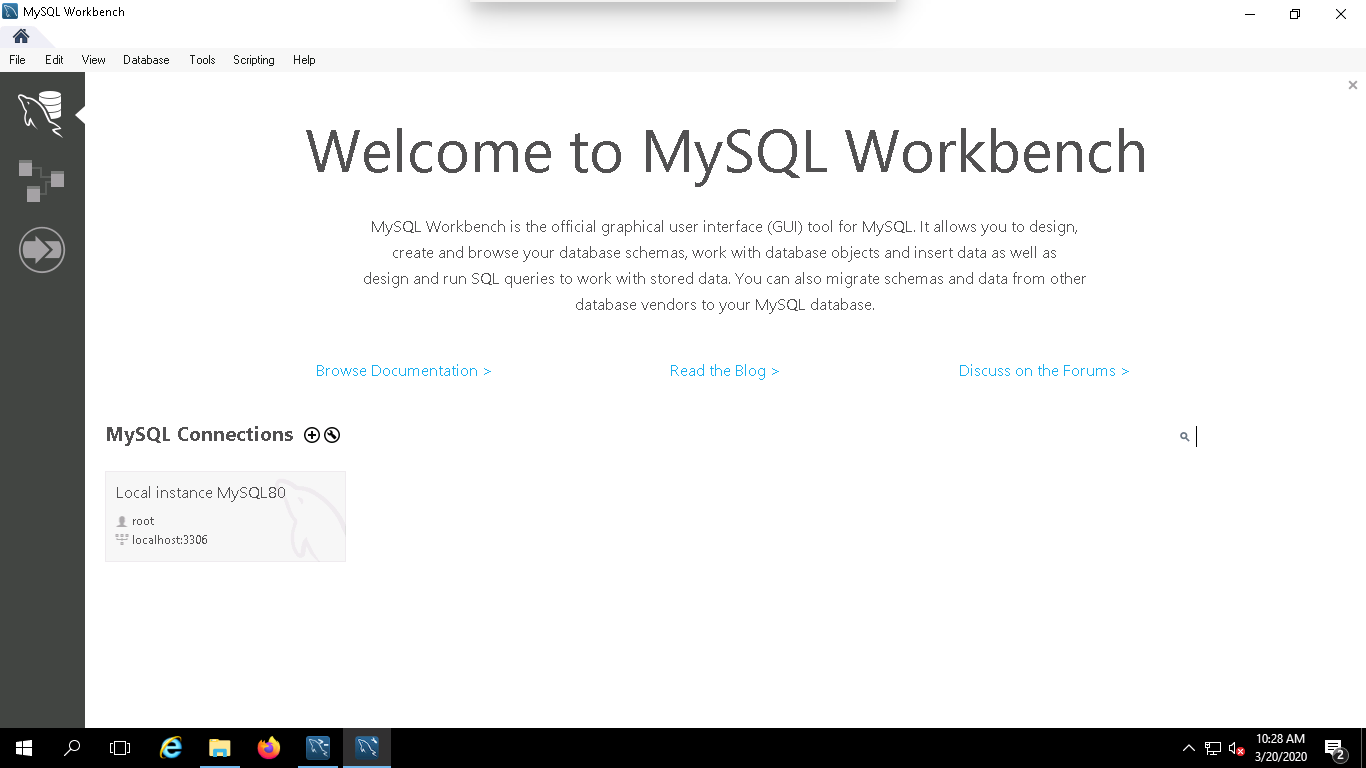
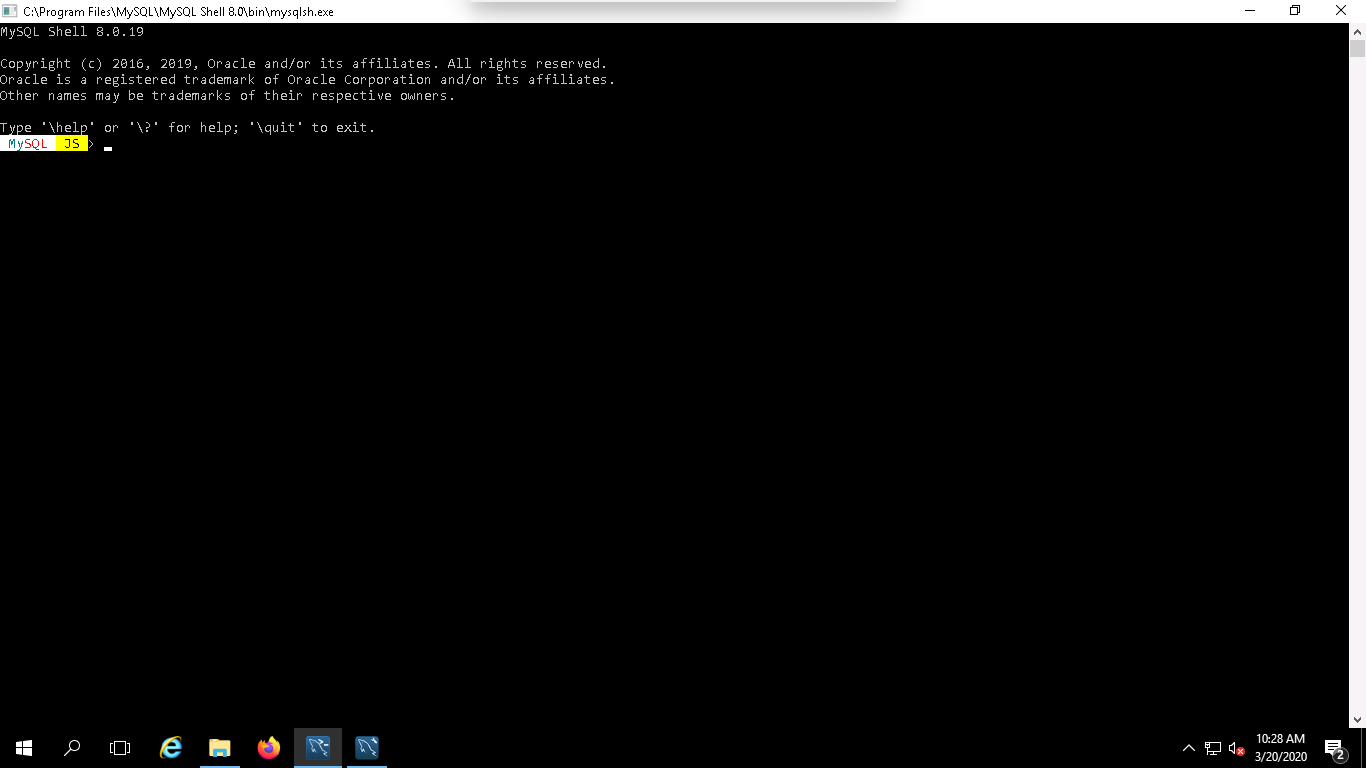
Step 23 – Click on the Finish button to complete the installation and launch MySQL Workbench and MySQL Console. You should see the following page:
MySQL Workbench:
MySQL Console:
Once you are done, you can proceed to the next step.
Upgrade MySQL Server
If you have MySQL Server already installed on your Windows server and want to upgrade it to the latest version, follow the below steps:
Step 1 – Download the latest version of MySQL installer from the MySQL Community Download page.
Step 2 – Double click on the downloaded mysql-installer-web-community-8.0.19.0.msi file. You should see the following page:
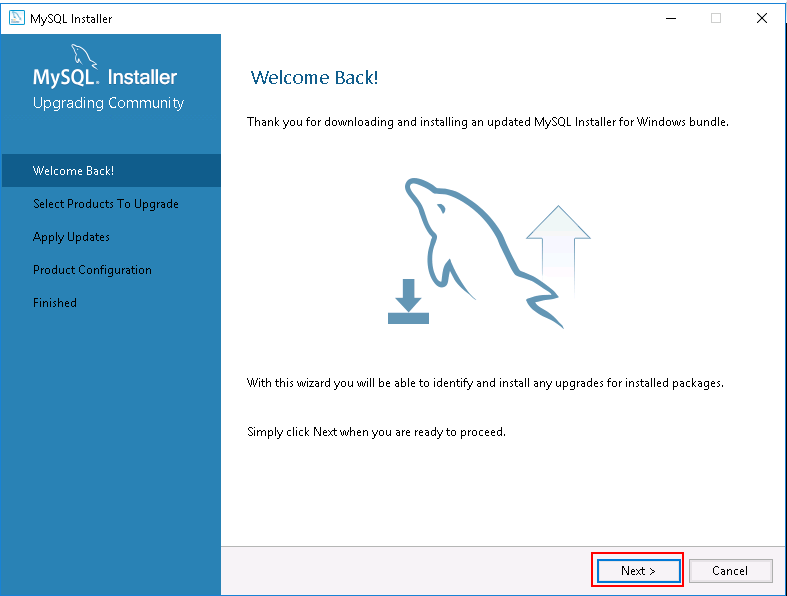
Step 3 – Click on the Next button. You should see the installed version and available upgrade version of MySQL server with other products are shown in the following page:
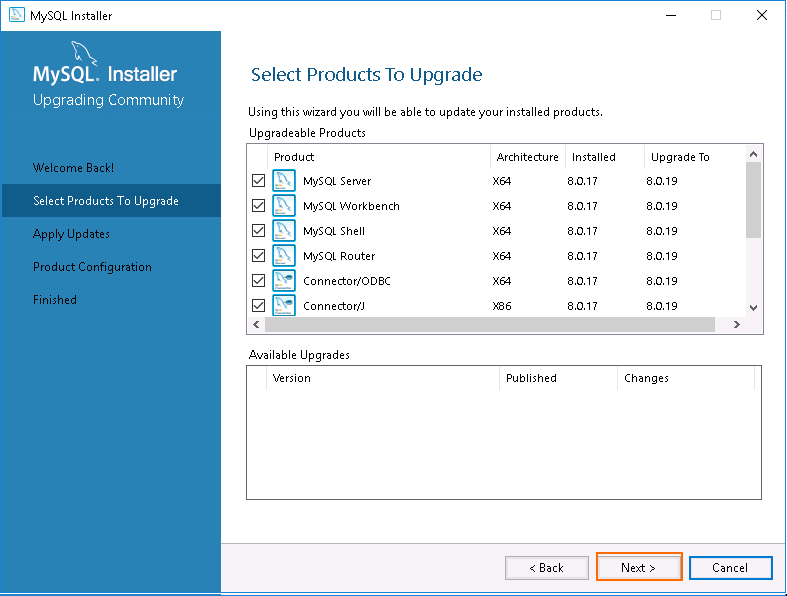
As you can see, MySQL server 8.0.17 is already installed and you will need to upgrade this to version 8.0.19.
Step 4 – Click on the Next button. You should see the following page:
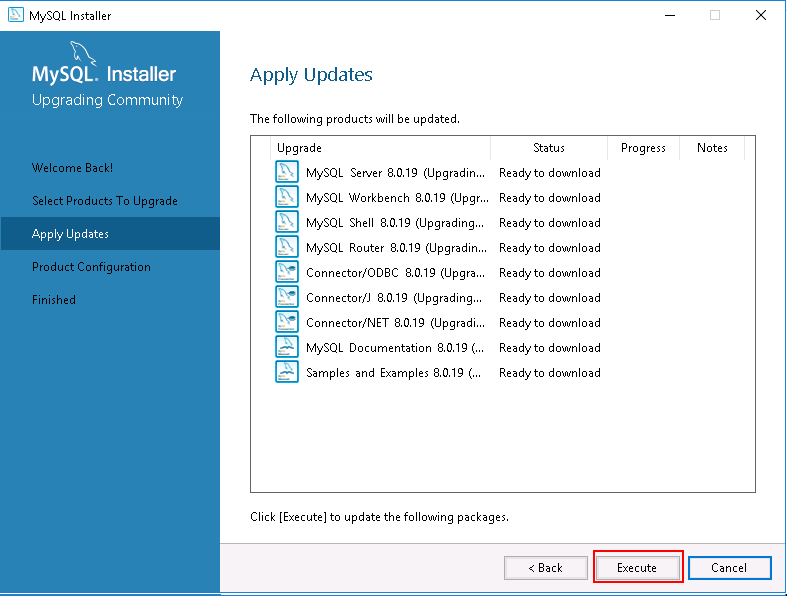
Step 5 – Click on the Execute button to download and upgrade the MySQL server.Once MySQL server with all products is upgraded, you should see the following page:
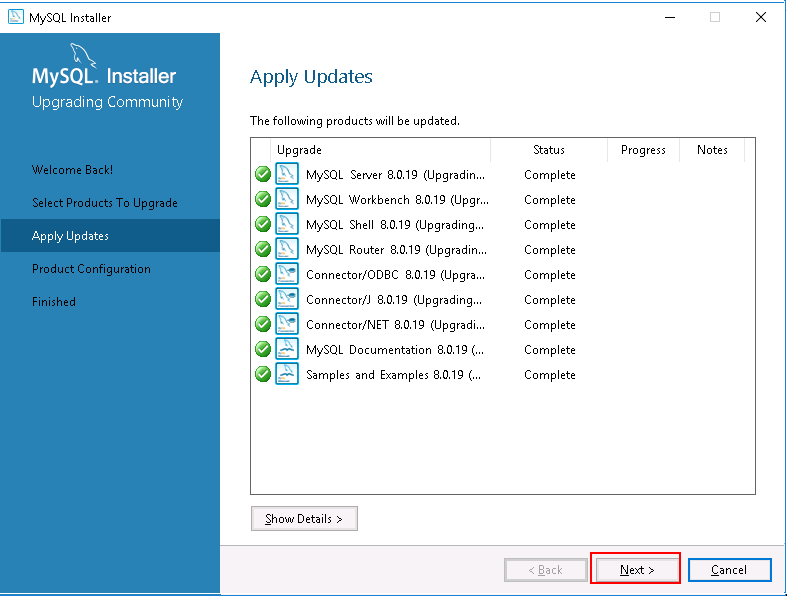
Step 6 – Next, click on the Next button and complete the remaining process to configure the MySQL server.
Conclusion
In the above guide, we learned how to install and upgrade the MySQL server on Windows server 2016. I hope you can now easily install MySQL server on any fresh Windows server.
For more information about MySQL for Windows, visit the MySQL Windows documentation at https://www.mysql.com/why-mysql/windows/.

