Call us at 1-888-GTCOMM1


Copy WordPress Website for Staging
Owning a WordPress will for sure require some updates from time to time. Since the uptime of a website is important, it is recommended to update your staging environment before changing your website into a production website. This will help to avoid having to fix issues on your production website, and to have it down for an extended time. This article explains how to turn your staging website into a production website.
To achieve this, you will need:
– Access to cPanel account
– Shell access
– MySQL or MariaDB database
– A backup of your site and database in case of manipulation error
This article is for users who do not have WHM access. By having access to WHM, it would be easier to create a new cPanel user for the staging environment, than having it created into a sub-domain.
Prepare Staging Environment
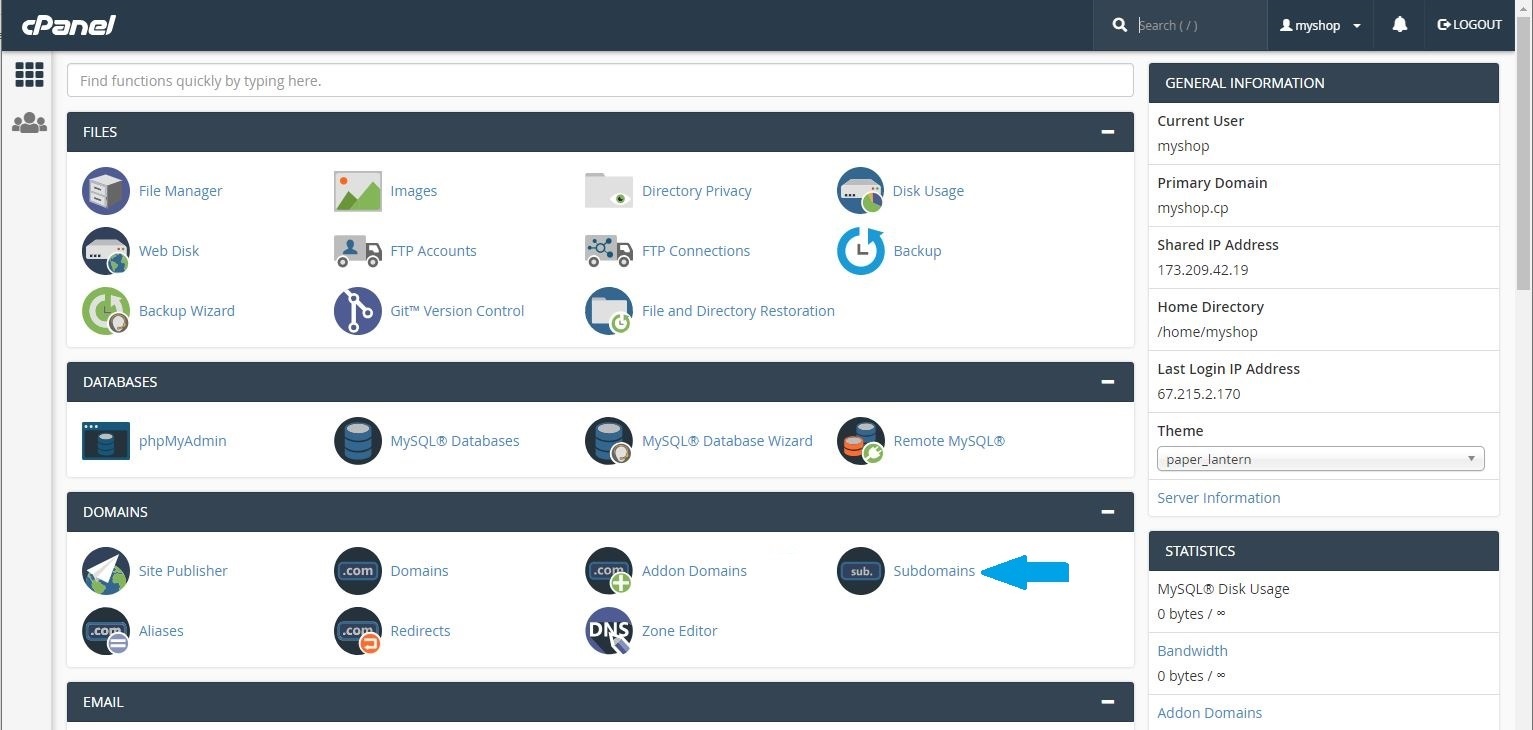
1. Create a sub-domain into your cPanel account. To do this, log into your cPanel account, and click on “Subdomain“, which is found in the “DOMAINS” menu.
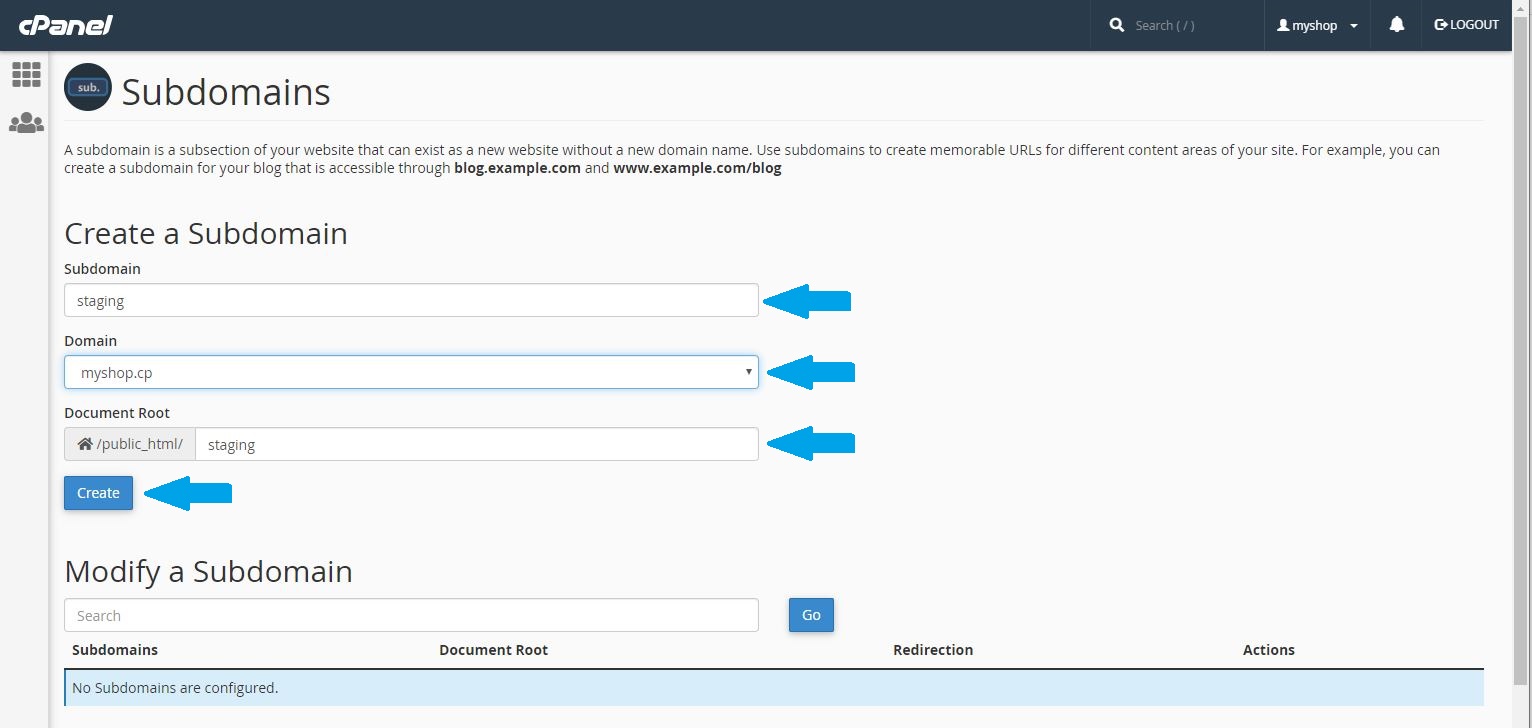
2. Under “Create a Sub-domain”, enter the desired sub-domain name, but do not specify the domain it self; that part will be filled automatically. Once done, click “Create“.
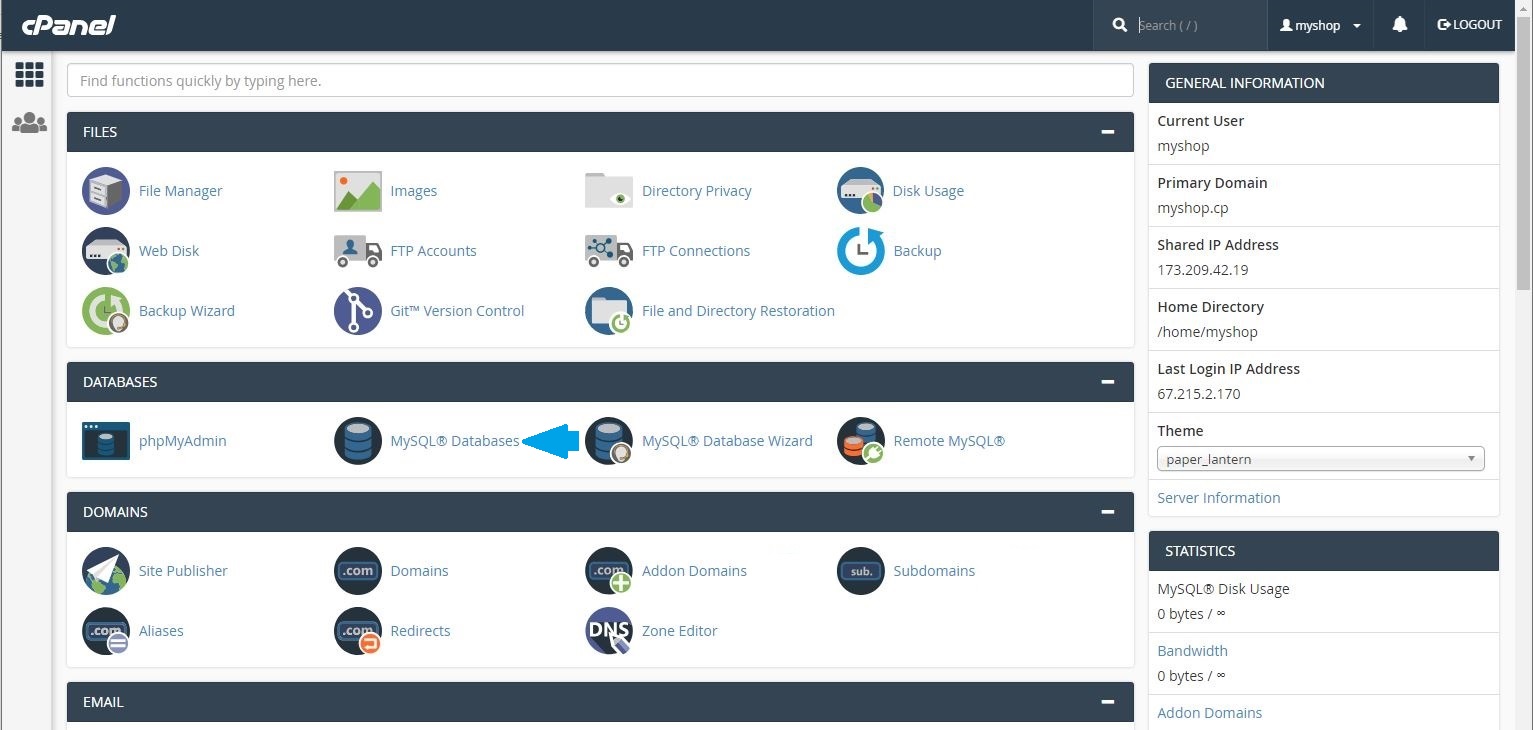
3. Go to MySQL Databases by clicking on cPanel Home > MySQL Databases.
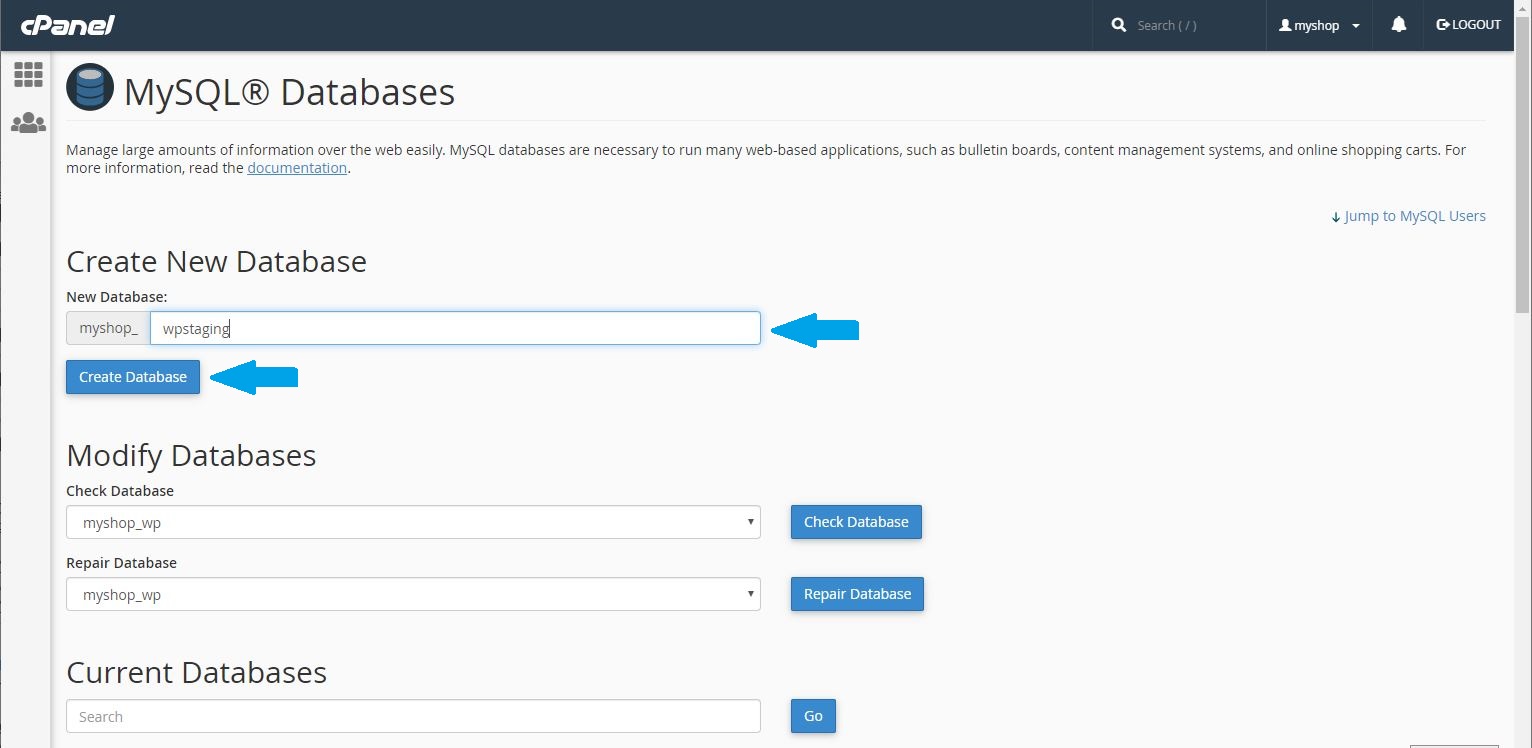
4. Under “Create New Database”, enter the new database name, and click “Create Database” to create the sub-domain database.
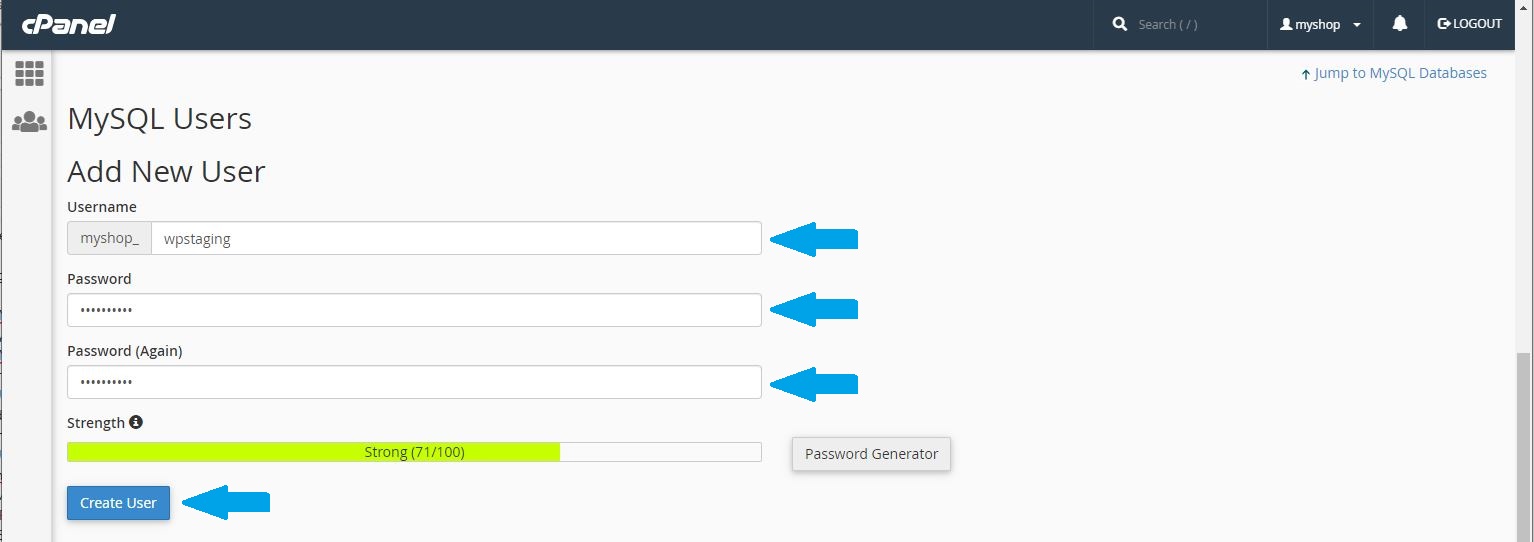
5. Once the new database is created, click on “Go Back” and scroll to MySQL Users. Select “Add New User”, specify the username and password, and then click “Create User“.
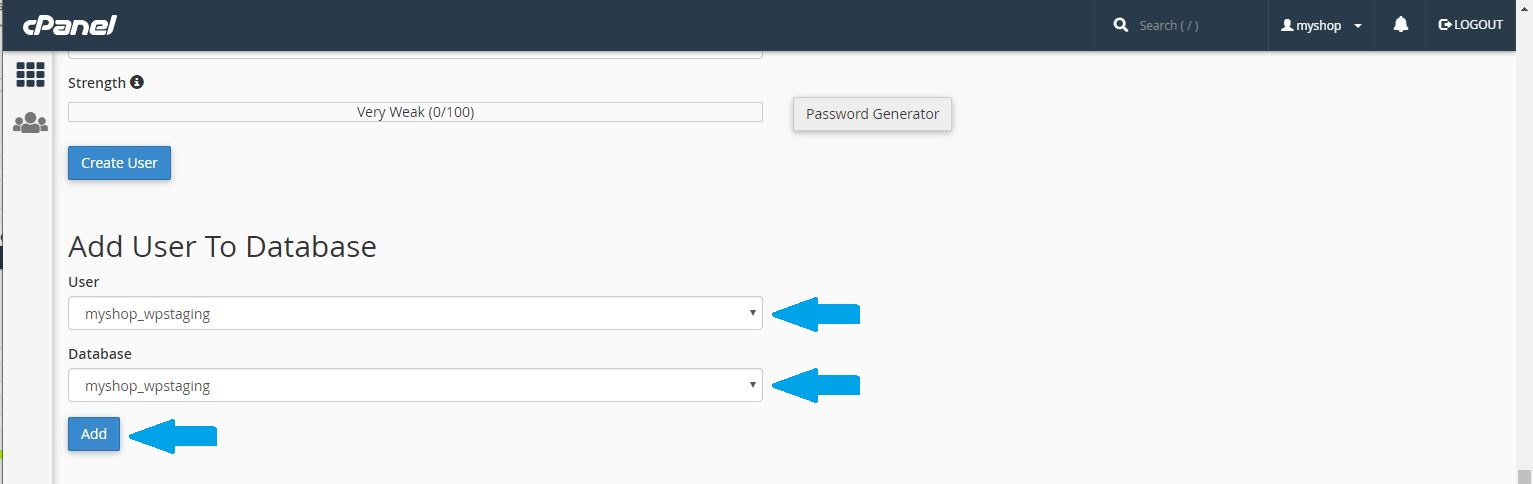
6. Once the new username and password are created, click on “Go Back“, and scroll to “Add User To Database“. Select the corresponding user and database, and click “Add“
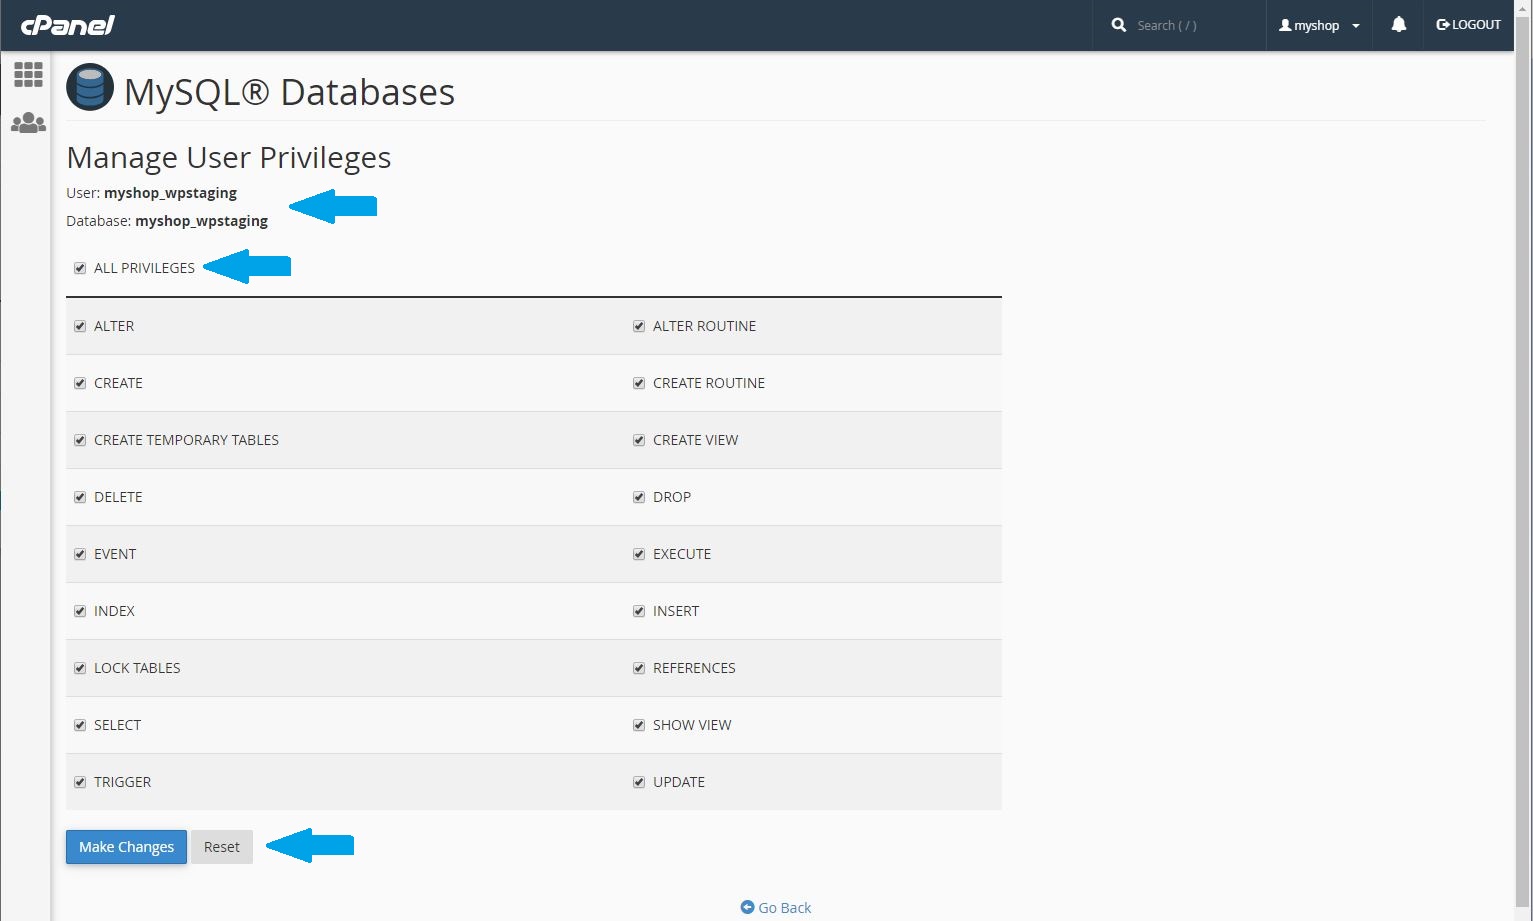
7. Give the “Full Access” privileges to the new database using the new user, go to “Manage User Privileges” review the user and database, check “ALL PRIVILEGES”, and then click “Make Changes”.
Migrate Your Data
Now that the sub-domain environment has been configured and is ready, it’s now time to do a data migration.
1. Log into the shell access using SSH and do a copy of the current website you’re using. The copy will be done out of the public_html folder, and in this case, you will do the copy using sync. To do so, use the following syntax:
# rsync -a /home/CPANEL_USER/public_html/ /home/CPANEL_USER/SUBDOMAIN_PREFIX/
2. Move the website copy into the right directory of the new sub-domain.
# rsync -a /home/CPANEL_USER/SUBDOMAIN_PREFIX/ /home/CPANEL_USER/public_html/SUBDOMAIN_PREFIX/
3. Do a dump of your current site database. To find the databasename, database user, and password, check in the wp-config.php file.
# mysqldump -u DB_USER -p DATABASE_NAME > DUMP_FILE_NAME.sql
4. Restore the dump of the database onto the new sub-domain WP database.
# mysql -u NEW_DB_USER -p NEW_DATABASE_NAME < DUMP_FILE_NAME.sql
5. Update the file wp-config.php located in the sub-domain folder, to match the new database name, database user, and password. Look for the following lines :
define( 'DB_NAME', 'NEW_DB_NAME_HERE' );
define( 'DB_USER', 'NEW_DB_USER_HERE' );
define( 'DB_PASSWORD', 'NEW_DB_PASSWORD_HERE' );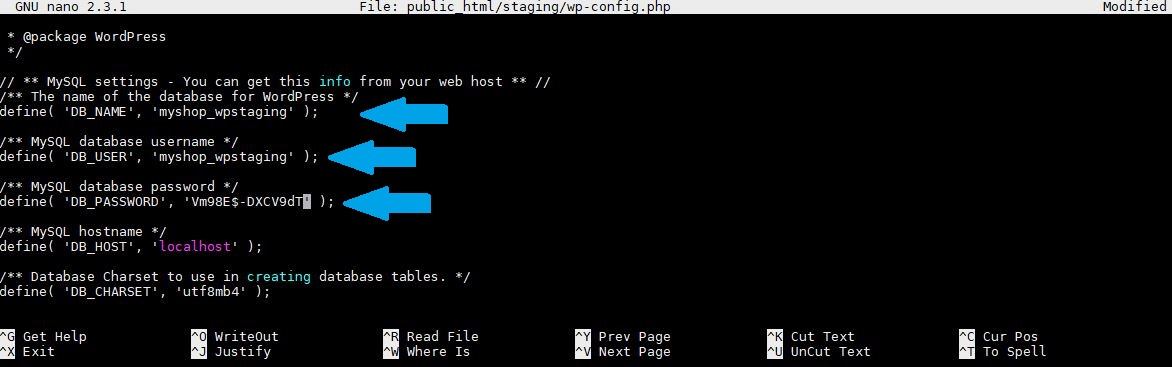
6. At this point, the database in the newly installed sub-domain WordPress still has the original site URL hard-coded into it. This has to be updated with the sub-domain URL. The fastest way to do it would be to change it into the database directly. You will need to first determine your WordPress database prefix, which can be found into the wp-config.php file.
$table_prefix = 'wp_';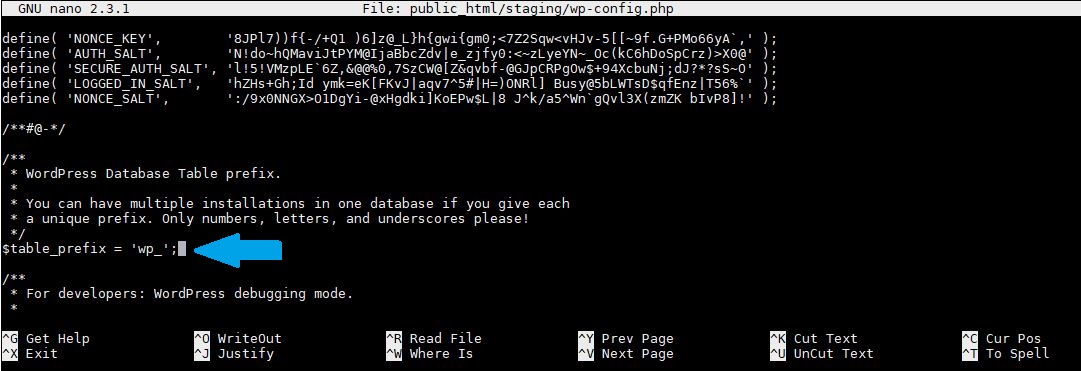
7. Update the site URL into the sub-domain WordPress database.
# mysql -u NEW_DB_USER -p NEW_DATABASE_NAME
* Enter the database password

# mysql> UPDATE wp_options SET option_value = replace(option_value, 'ORIGNAL.DOMAIN', 'SUBDOMAIN-PREFIX.ORIGNAL.DOMAIN') WHERE option_name = 'home' OR option_name = 'siteurl';
Query OK, 0 rows affected (0.00 sec)
Rows matched: 2 Changed: 0 Warnings: 0

# mysql> UPDATE wp_posts SET guid = replace(guid, 'ORIGNAL.DOMAIN', 'SUBDOMAIN-PREFIX.ORIGNAL.DOMAIN');
Query OK, 0 rows affected (0.02 sec)
Rows matched: 964 Changed: 0 Warnings: 0

# mysql> UPDATE wp_posts SET post_content = replace(post_content, 'ORIGNAL.DOMAIN', 'SUBDOMAIN-PREFIX.ORIGNAL.DOMAIN');
Query OK, 0 rows affected (0.05 sec)
Rows matched: 964 Changed: 0 Warnings: 0

# mysql> UPDATE wp_postmeta SET meta_value = replace(meta_value, 'ORIGNAL.DOMAIN', 'SUBDOMAIN-PREFIX.ORIGNAL.DOMAIN');
Query OK, 0 rows affected (0.01 sec)
Rows matched: 686 Changed: 0 Warnings: 0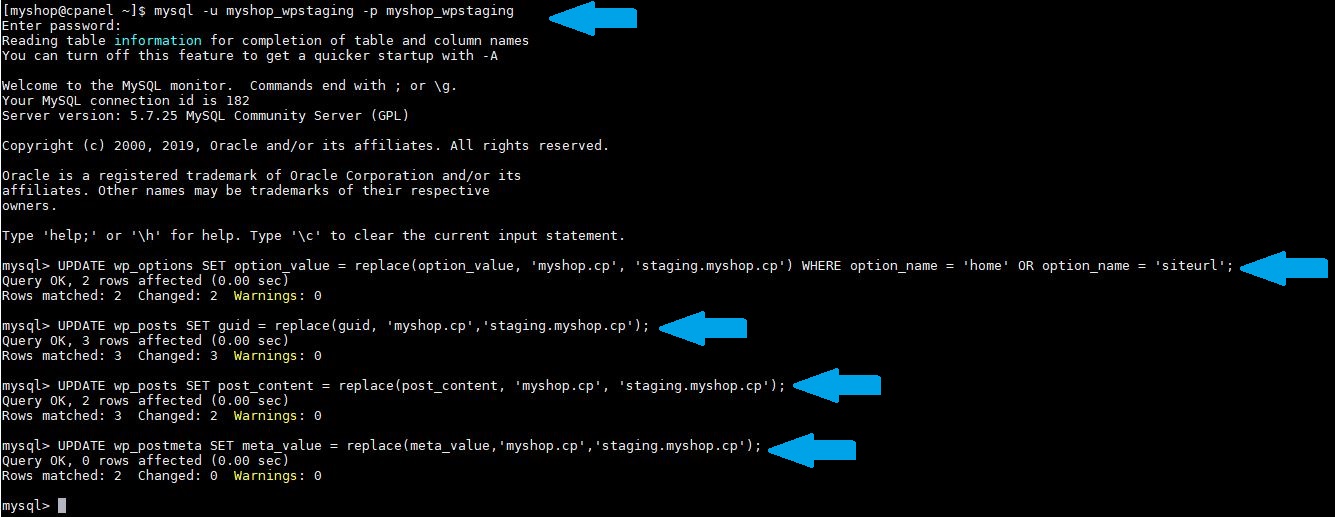
Test Your Sub-domain Website
Having migrated the data, it’s now time to test your site for any errors. Take a look at php.ini, .user.ini, or any other files of that kind, which may have a hard-coded path. At this point, the WordPress site under the sub-domain may be working already. If it is not working, then any of the following two major things may be the cause:
1. Some URL are hard coded into the files into directory /home/CPANEL_USER/SUBDOMAIN_PREFIX/. This can be fixed by doing a replace into all files that are into that specific directory. The following command syntax may be used to do so:
# find /home/CPANEL_USER/SUBDOMAIN_PREFIX/ -type f -exec sed -i 's#ORIGNAL.DOMAIN#SUBDOMAIN-PREFIX.ORIGNAL.DOMAIN#g' {} +
2. Some PATH are hard coded into the files into directory /home/CPANEL_USER/SUBDOMAIN_PREFIX/. This can be fixed by doing a replace into all files that are into that specific directory. The following command syntax may be used to do so:
# find /home/CPANEL_USER/SUBDOMAIN_PREFIX/ -type f -exec sed -i 's#/home/CPANEL_USER/public_html#/home/CPANEL_USER/public_html/SUBDOMAIN_PREFIX#g' {} +
Hopefully, after all this hard work, the WordPress that has been copied into the sub-domain should be working correctly, just as the original site. If you’re still experiencing issues, check the error_log file in the sub-domain directory; it may give more details about any errors.
Need help with the above kind of operation? Being a customer of Globo.Tech, you can contact our support department for just that. Our highly technical staff would be glad to assist you.