 Call us at 1-888-GTCOMM1


How to Create an OpenVZ VPS Server on CentOS 6
Open Virtuozzo, often abbreviated as OpenVZ, is a technology for Linux systems that allows users to run isolated operating system instance, referred to as containers, virtual private servers (VPS), or a virtual environment (VE). Similar to other virtualization technology providers, OpenVZ runs multiple operating systems. However, OpenVZ uses a single Linux kernel; this means OpenVZ can only run Linux-based operating system virtualization.
Getting Started
Before we start with creating the OpenVZ VPS server and installing the web panel, make sure you have root access to your CentOS 6 server. The setup will not work properly if root access is not utilized.
Creating an OpenVZ VPS Server
Preparing the Server
Now that you’re running root access on your CentOS server, it’s time to verify that your server is up-to-date by running the following command:
yum -y update
Once you’ve confirmed that your server is current, you need to disable SELinux:
sed -i 's|enabled|disabled|' /etc/sysconfig/selinux
Installing OpenVZ
After disabling SELinux, we can start installing OpenVZ on your CentOS system. The first step for this is adding the OpenVZ repository:
wget -P /etc/yum.repos.d/ http://ftp.openvz.org/openvz.repo

rpm --import http://ftp.openvz.org/RPM-GPG-Key-OpenVZ
When the installation of the repository has completed, you can proceed with installing the OpenVZ kernel:
yum install vzkernel
Configuring the Kernel Parameters
Now it’s time to work on configuring some parameters for your server by editing the sysctl.conf file. The parameters listed below may already exist in the file, but the values should be adjusted to the illustrated values. Any parameters that are not included should be added:
nano /etc/sysctl.conf
Once you’ve adjusted the sysctl.conf file, confirm that each of the required parameters is included:
net.ipv4.ip_forward = 1

net.ipv6.conf.default.forwarding = 1

net.ipv4.conf.default.proxy_arp = 0

net.ipv4.conf.default.send_redirects = 1

net.ipv4.conf.all.send_redirects = 0

net.ipv6.conf.all.forwarding = 1

net.ipv4.conf.all.rp_filter = 1

kernel.sysrq = 1
After confirming the values are listed, save the file and then reload the sysctl parameters for your server:
sysctl -p
The final configuration step, now that you’ve reloaded the parameters, is to install the OpenVZ utilities:
yum -y install vzctl vzquota ploop
Reboot the Server
Now that the OpenVZ kernel has been installed, the parameters have been adjusted, and the OpenVZ utilities have been added, it’s time to reboot your server. Usually your server will reboot into the OpenVZ kernel automatically. If that is not the case, you may need to edit the grub menu and comment out the other entries.
Additionally, you can choose to enable neighbor devices using different subnets between the OpenVZ host and guests:
nano /etc/vz/vz.conf
Find out the following entry in the vz.conf file:

#NEIGHBOUR_DEVS=detect

Change it for:

NEIGHBOUR_DEVS=all
Installing the OpenVZ Web Panel
First, we need to install the web panel dependencies:
yum install rubygems ruby ruby-sqlite3.x86_64 git
Once completed, collect the installation script and hotfix it:
cd /root

wget https://raw.githubusercontent.com/sibprogrammer/owp/master/installer/ai.sh

sed -i 's|http://ovz-web-panel.googlecode.com/files/|https://storage.googleapis.com/google-code-archive-downloads/v2/code.google.com/ovz-web-panel/|' ai.sh
That installation script should be run after completing the previous step:
sh ai.sh
After the installation script has completed running, it’s time to adjust the firewall rules:
nano /etc/sysconfig/iptables
The following line needs to be added to the existing iptables configuration file:
-A INPUT -m state --state NEW -m tcp -p tcp --dport 3000 -j ACCEPT
Once you’ve added the line to the iptables configuration file, the iptables service needs to be restarted for the change to take effect:
service iptables restart
Configuring the OpenVZ Web Panel
Now that OpenVZ has been installed and the web panel has been installed, it’s time to start the initial configuration of the environment. Shortly we’ll discuss acquiring virtual machine templates and setting up your web panel.
Access the OpenVZ Web Panel Interface
To begin our configuration of the web panel, use your web browser to access the following address: http://server.ip:3000
The default login credentials for http://server.ip:3000 are:
Login: admin

Password: admin
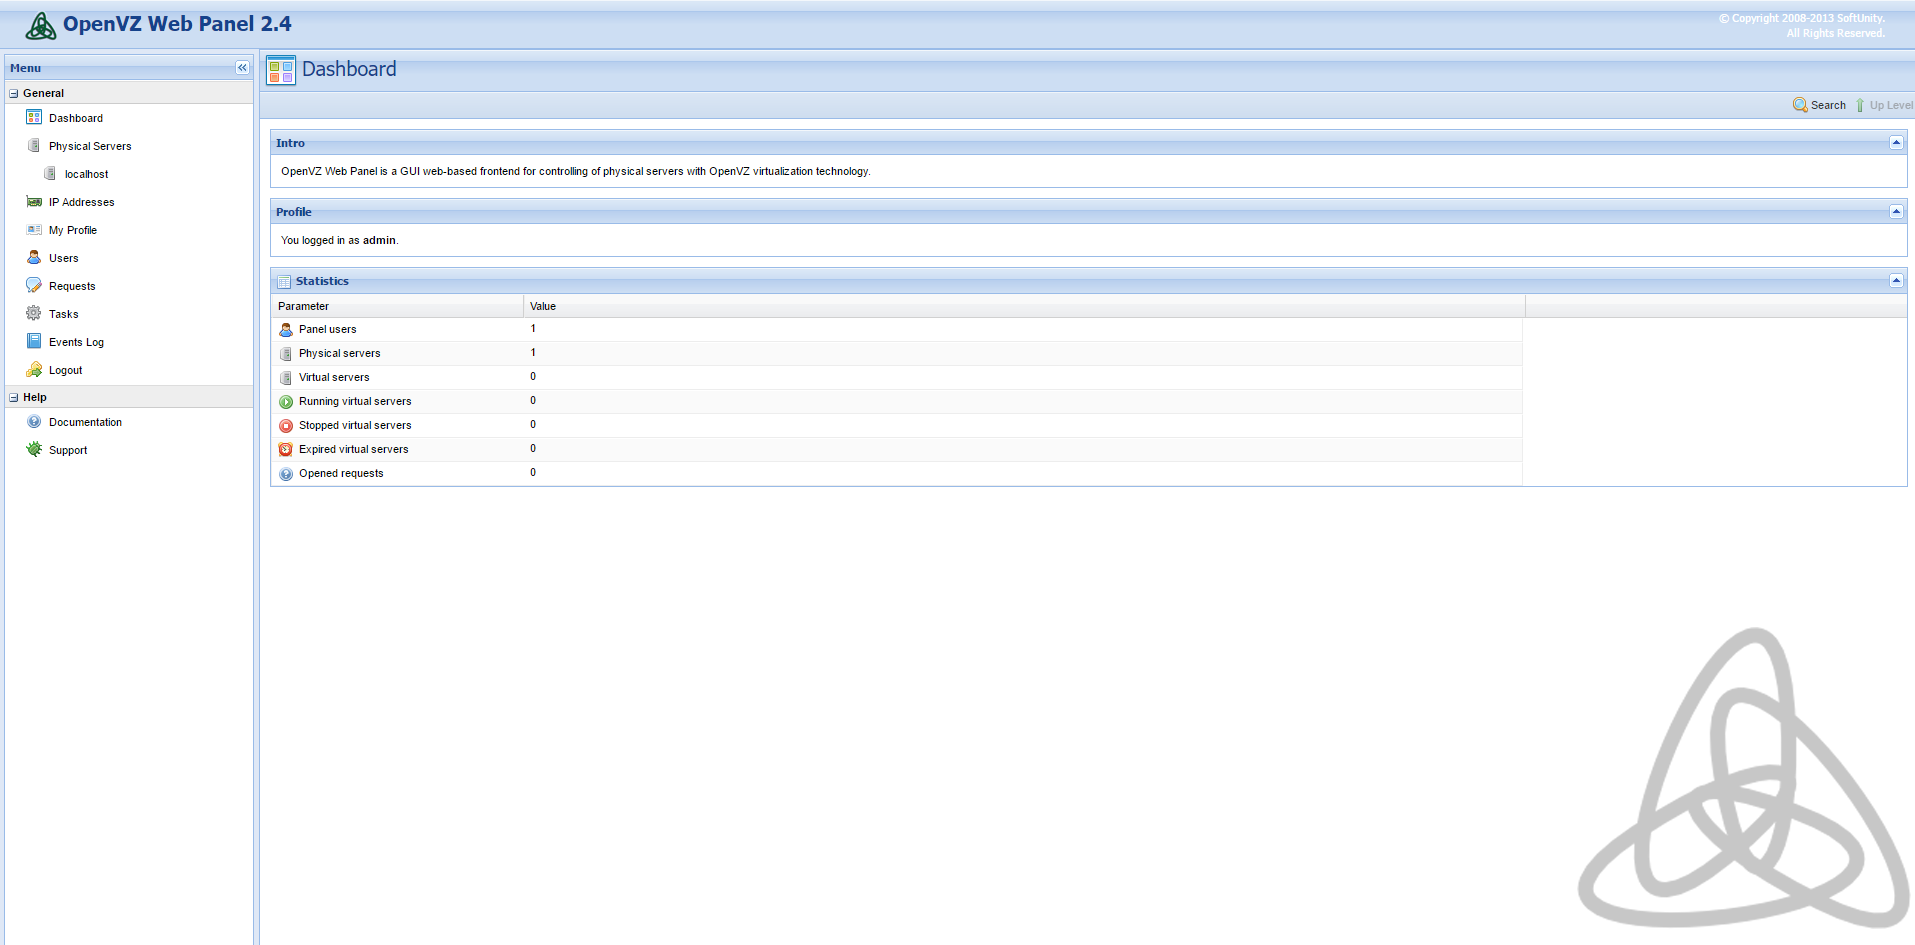
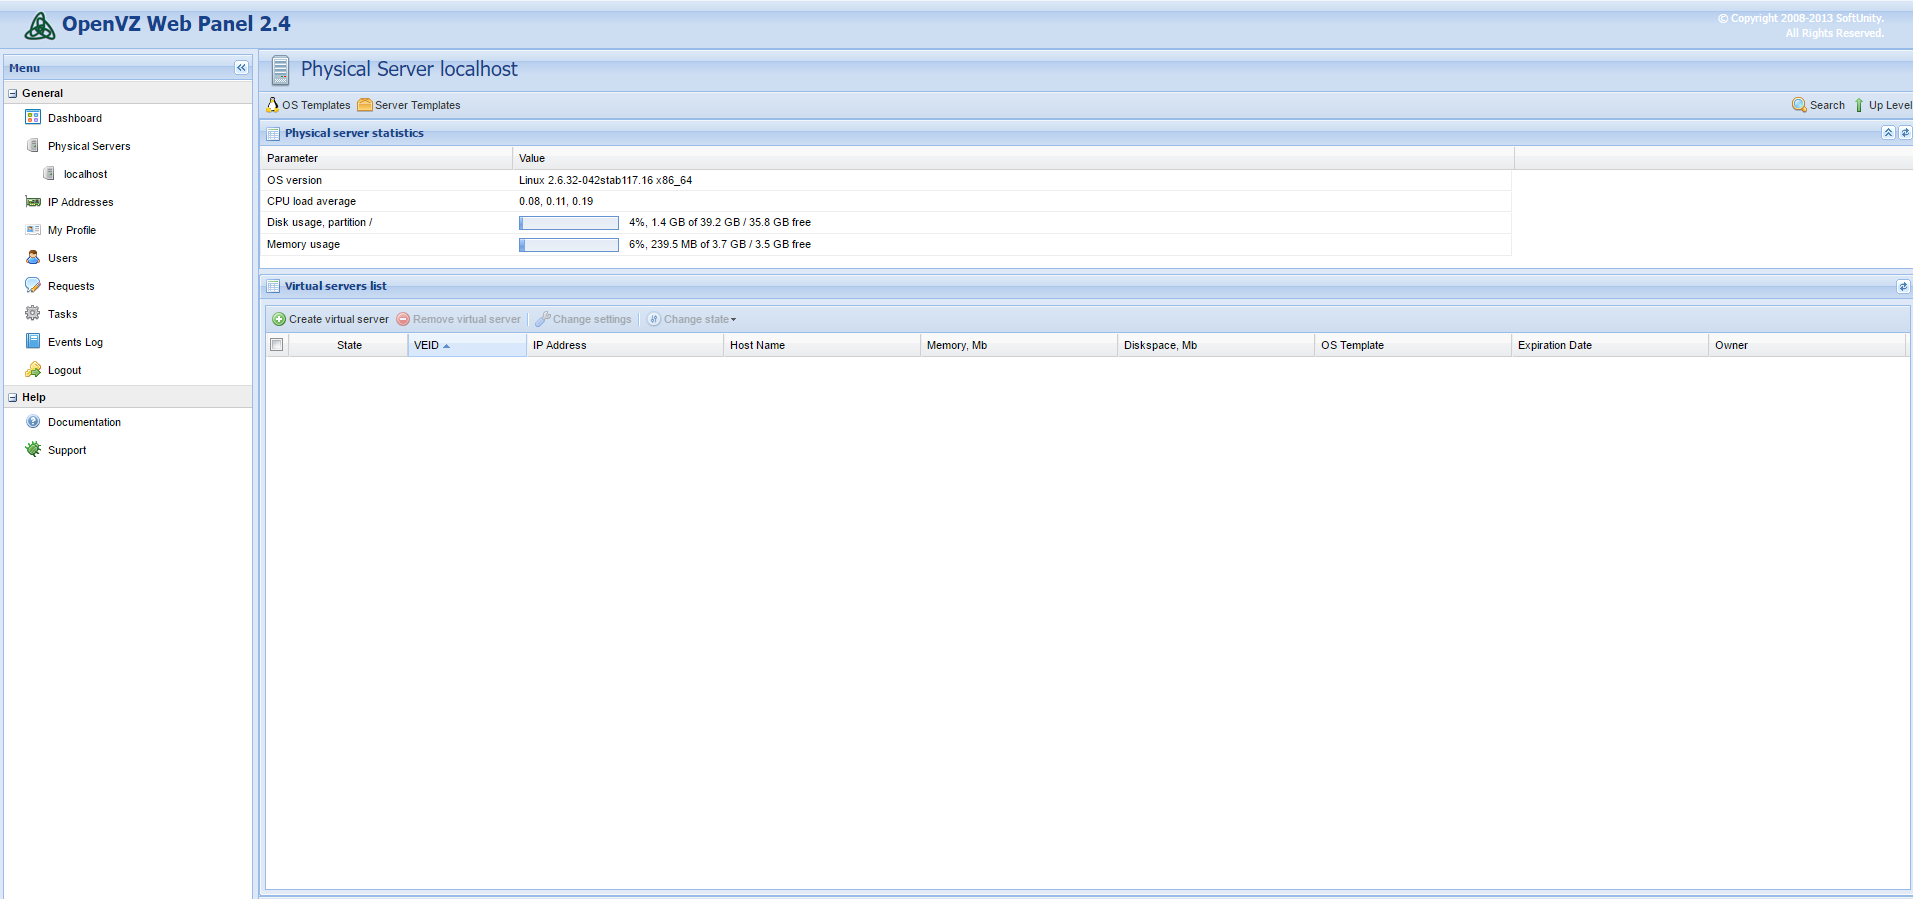
Once you’ve logged in, the default interface should resemble the following screenshot:
Change the Administrator Password
Changing the administrator account password is essential since the default password is “admin.” This generic password makes changing the default administrator password a priority.
To modify the password, click on ![]() . During this step, you can also specify an email address and name for your account:
. During this step, you can also specify an email address and name for your account:
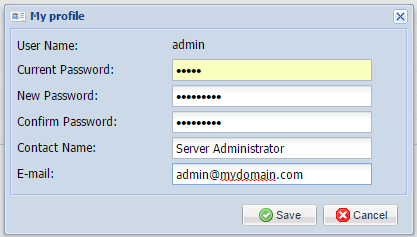
Once you’ve changed your password and included any optional details, you can click save to complete the reset.
Configure Your IP Addresses
Now we’re moving on to set up the IP addresses for your web panel. On the left menu click on ![]()
There are currently no IP addresses configured by default, so we need to add a new “IP Pool” by clicking on ![]()
To provide an example, we’re going to imagine the server was assigned a few IP addresses in the form of a single subnet. For this example, we’re going to say it is 67.215.1.0/28.
We would then select 67.215.1.2 to be our new server’s primary address while keeping 67.215.1.3 through 67.215.1.14 for our virtual machines. We would populate that information in the IP Pool selection like in the below picture:
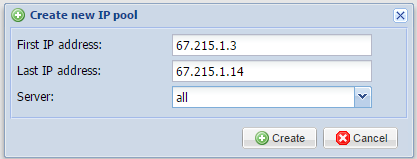
Once you’ve similarly filled in your addresses, press the create icon. This then creates your IP address pool that can be attributed to virtual machines in the future.
Configuring Operating System Templates
To correctly provision our virtual machines, we need to make sure to add operating system templates to the system.
The web panel allows you to download them in a convenient manner directly from the interface, so follow the below steps to configure these easily.
On the left navigation panel, click on ![]()
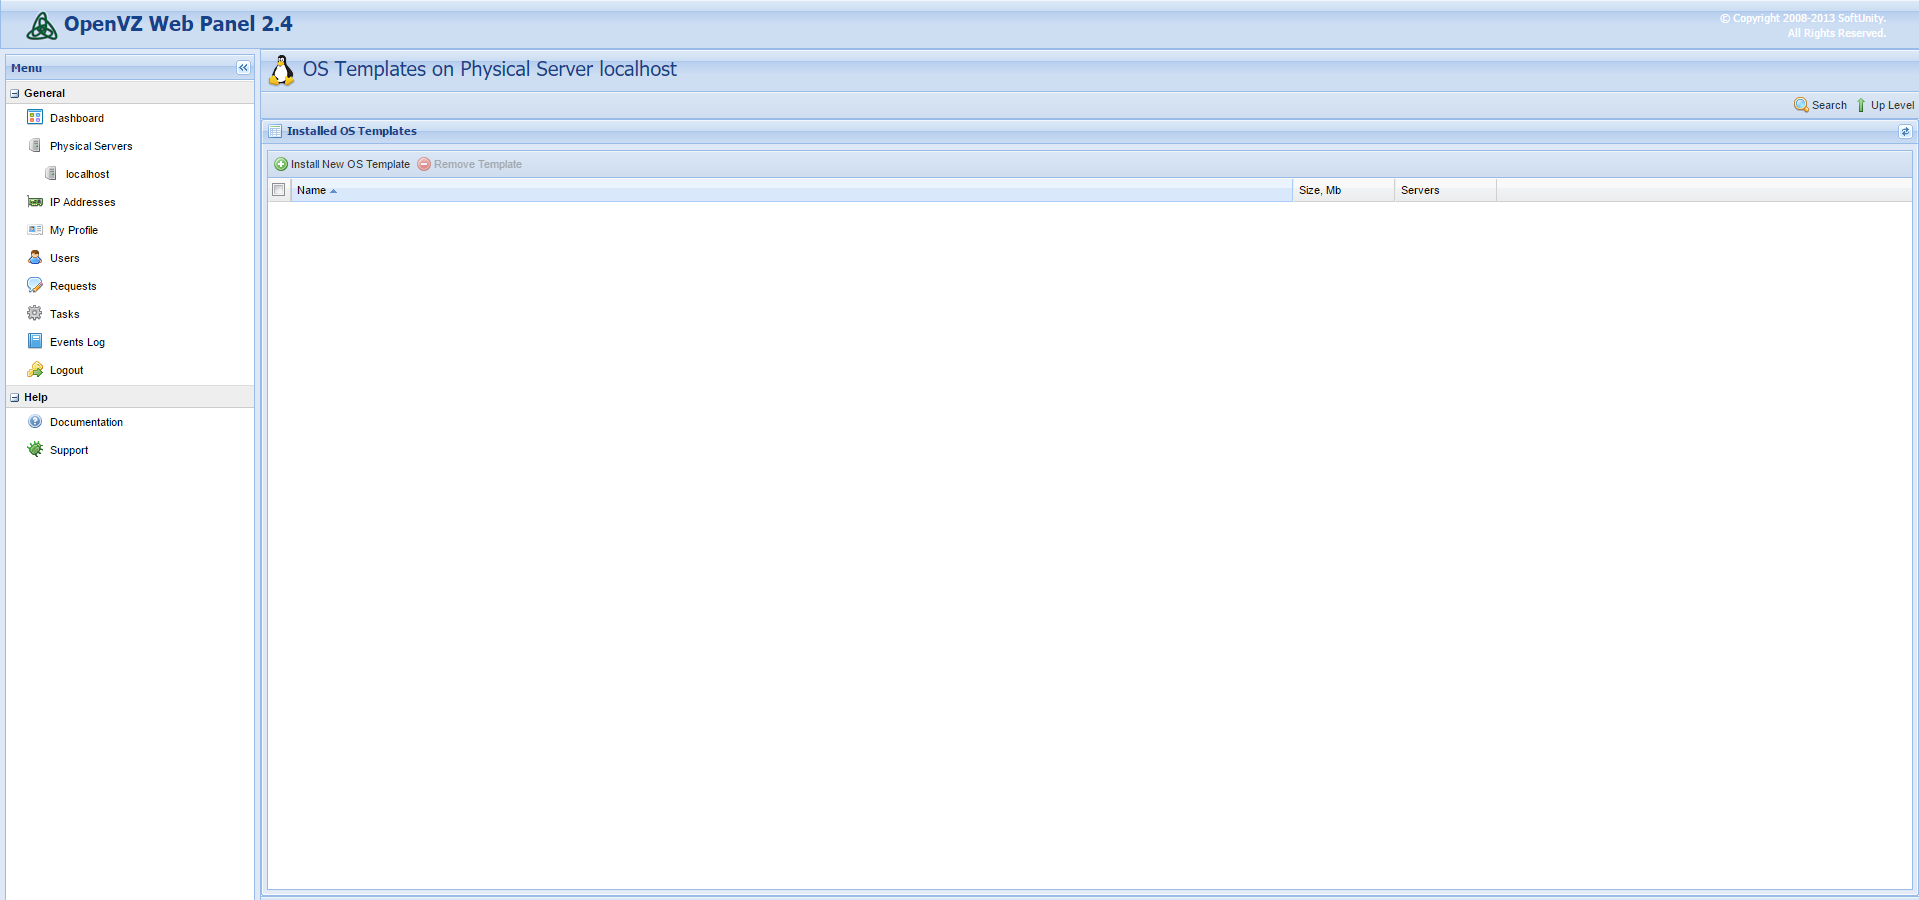
This option will open the host’s server page. Click on ![]() and you’ll be taken to the templates section, which will resemble the following screenshot:
and you’ll be taken to the templates section, which will resemble the following screenshot:
To open the selection menu, click on ![]()
A menu will open that gives you the option to select different templates to download. After making your selections, press the install icon to begin the download:
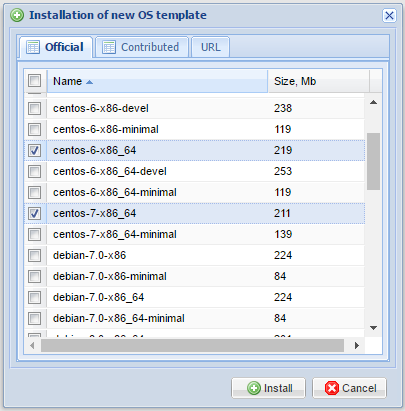
Allow the system to run for a few minutes while the images download. The base templates are small, so the installation process should be quick. Once the download completes, you can begin creating your first virtual machine.
Create Your First Virtual Machine
You’ve completed your deployment of your OpenVZ server and web panel, configured your IP addresses, and downloaded operating system templates, so now it’s time to deploy your first virtual machine.
To start setting up your first virtual machine, click on ![]() and we’ll be taken here:
and we’ll be taken here:
Click through ![]() to continue setting up your virtual machine. Dialog boxes will open, prompting you to fill in details for your new machine.
to continue setting up your virtual machine. Dialog boxes will open, prompting you to fill in details for your new machine.
During this process, you will select the operating system template you would like to use, as well as any resources you’d like to attribute to your virtual machine. You will also need to select an IP address and assign a root password to your virtual machine. The below screenshot is an example:
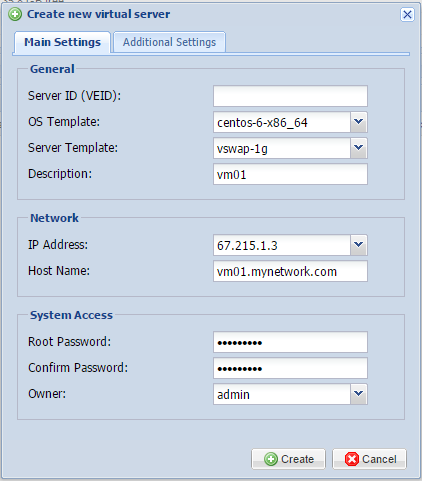
After filling in this information and documenting it someplace safe, press the create icon, and your virtual machine will generate shortly.
Congratulations! You’ve completed configuring your new OpenVZ VPS server, installed the management panel, and created your first virtual machine on your CentOS 6 server.
Conclusion
You’ve successfully created an OpenVZ VPS Server and installing the Web Panel on CentOS 6. You’re now ready to move your VPS server into production and get started with your virtual operating system desktop. If you found this guide helpful during your setup process, please share it with other users that are going through the same process or may be interested.

