 Call us at 1-888-GTCOMM1
-

- Dedicated Hosting
- Cloud hosting
- Services
- Support
- Learning Center
- Referral Program
- Français
-
Why globotech
- Log in

Website performance and uptime are very crucial for heavy websites nowadays. Setup HAProxy Load Balancer on Debian 10 would be a good way to achieve your website loading goal. HAProxy is an open-source load balancer and proxy server that can be used to distribute web applications across multiple hosts. It is specially designed for very high traffic websites for better performance, availability, and redundancy. HAProxy works by distributing the server load to multiple backend servers using the load balancing algorithm. It is used by many companies including, Twitter, Tumblr, GoDaddy and Amazon.
In this tutorial, we will show you how to setup HAProxy load balancing with two web servers on Debian 10.
Before starting the setup HAProxy Load Balancer on Debian 10, update your server with the latest version by running the following command:
apt-get update -y && apt-get upgrade -y
Once your server is up-to-date. Restart it to apply the changes, if needed.
By default, HAProxy package is not available in the Debian 10 default repository. So you will need to add the repository for that.
First, install curl and download the GPG key for HAProxy with the following command:
apt-get install curl -y

curl https://haproxy.debian.net/bernat.debian.org.gpg | apt-key add -
Next, add the HAProxy repository to APT with the following command:
echo "deb http://haproxy.debian.net $(lsb_release -cs)-backports-2.0 main" | tee /etc/apt/sources.list.d/haproxy.list
Then, update the repository and install HAProxy with the following command:
apt-get install haproxy=2*
Once installed, you can check the version of HAProxy with the following command:
haproxy -v
It should show the following output:
HA-Proxy version 2.0.5-1~bpo10+1 2019/08/22 - https://haproxy.org/
You can also check the HAProxy service using the following command:
systemctl status haproxy
Then you should see the following output:
@page { size: 8.5in 11in; margin: 0.79in } p { margin-bottom: 0.1in; direction: ltr; color: #000000; line-height: 120%; text-align: left; orphans: 0; widows: 0; background: transparent } p.western { font-family: "Liberation Serif", serif; font-size: 12pt; so-language: en-IN } p.cjk { font-family: "Droid Sans Fallback"; font-size: 12pt; so-language: zh-CN } p.ctl { font-family: "FreeSans"; font-size: 12pt; so-language: hi-IN } a:link { color: #000080; so-language: zxx; text-decoration: underline }
 ● haproxy.service - HAProxy Load Balancer
   Loaded: loaded (/lib/systemd/system/haproxy.service; enabled; vendor preset: enabled)
   Active: active (running) since Mon 2019-09-09 01:15:46 EDT; 8min ago
     Docs: man:haproxy(1)
           file:/usr/share/doc/haproxy/configuration.txt.gz
 Main PID: 2088 (haproxy)
    Tasks: 2 (limit: 1138)
   Memory: 1.9M
   CGroup: /system.slice/haproxy.service
           ├─2088 /usr/sbin/haproxy -Ws -f /etc/haproxy/haproxy.cfg -p /run/haproxy.pid -S /run/haproxy-master.sock
           └─2089 /usr/sbin/haproxy -Ws -f /etc/haproxy/haproxy.cfg -p /run/haproxy.pid -S /run/haproxy-master.sock


 Sep 09 01:15:46 debian systemd[1]: Starting HAProxy Load Balancer...
 Sep 09 01:15:46 debian haproxy[2088]: [NOTICE] 251/011546 (2088) : New worker #1 (2089) forked
 Sep 09 01:15:46 debian systemd[1]: Started HAProxy Load Balancer.
Next, you will need to Setup HAProxy Load Balancer on Debian 10 for load balancing. You can achieve this by editing file /etc/haproxy/haproxy.cfg.
nano /etc/haproxy/haproxy.cfg
First, you will need to add the Frontend section to defines the IP addresses and ports that clients can connect to. You can add your HAProxy server IP address and port 80 as shown below:
 frontend Local_Server

  bind 192.168.0.4:80

  mode http

  default_backend Web_Servers
Then, you will need to add Backend web servers that will be load balanced and assigned to handle requests. You can add your web servers IP as shown below:
 backend Web_Servers

  mode http

  balance roundrobin

  option forwardfor

  http-request set-header X-Forwarded-Port %[dst_port]

  http-request add-header X-Forwarded-Proto https if { ssl_fc }

  option httpchk HEAD / HTTP/1.1rnHost:localhost

  server webserver1.example.com  192.168.0.10

  server webserver2.example.com  192.168.0.11
Next, add the following lines to enable Haproxy statistics to monitor HAProxy from the web browser.
 listen stats

  bind 192.168.0.4:8181

  stats enable

  stats hide-version

  stats refresh 30s

  stats show-node

  stats auth admin:admin@123

  stats uri  /stats
Save and close the file when you are finished. Then, restart the HAProxy service to apply the configuration changes:
systemctl restart haproxy
Now, open your web browser and type the URL http://192.168.0.4:8181/stats. You will be redirected to the HAProxy statistics login page as shown below:
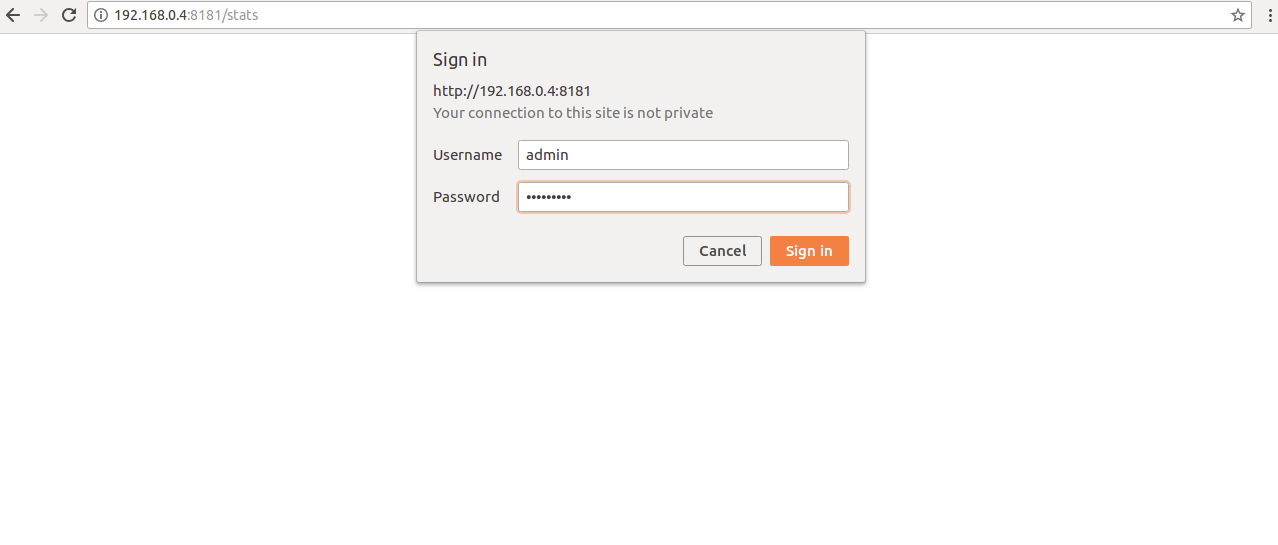
Provide username and password which you have defined in HAProxy configuration file and click on the Sign in button. It will log you into the HAProxy statistics dashboard in the following screen:

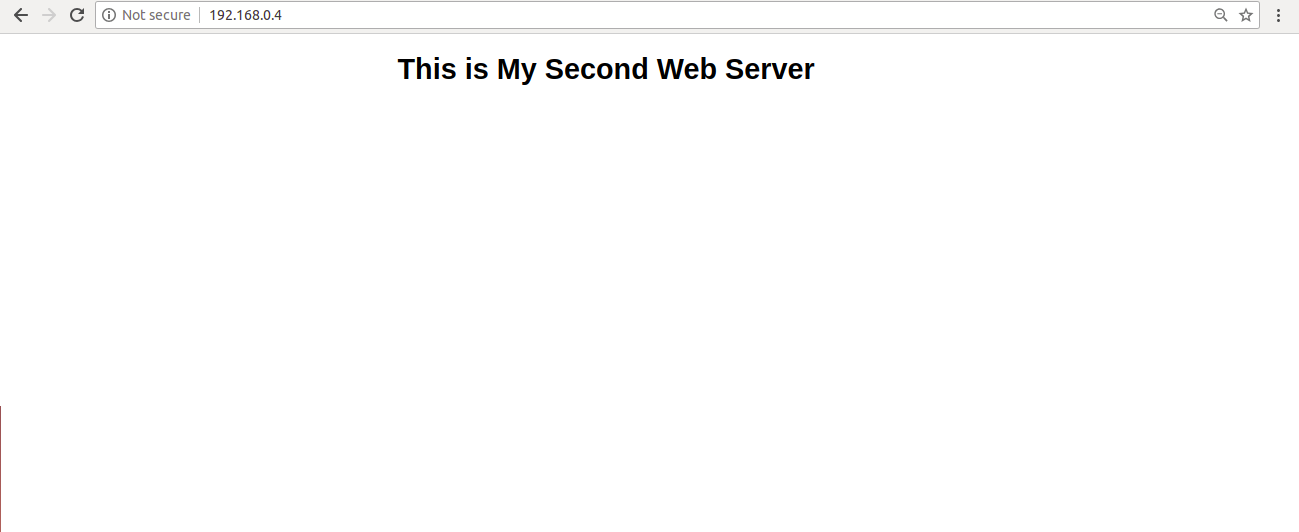
You can now also access your web servers by typing the URL http://192.168.0.4 in your web browser and refresh the page. You should see your backend web servers one by one as shown below:
First Web:

Second Web server:
Congratulations! You have successfully configured HAProxy load balancing server on Debian 10. You can now increase your web server performance by experimenting with different configurations.
For more information, you can visit the HAProxy documentation at HAProxy.
Galera is a shortened name for Galera Cluster, which is a multi-master database cluster that provides synchronous replication for MySQL or MariaDB. With Galera in use, the read and write requests can be directed to different nodes based on need; this allows a node to be compromised or lost without experiencing an interruption in normal operation. Galera provides improvements for high levels of availability in MySQL and MariaDB; Galera manages to offer robust data integrity and performance in ways that previous solutions have failed to accomplish.

To get started installing Galera on CentOS 7, you will need to have three nodes that already have Linux CentOS 7 installed, up to date, and running with root access. The nodes you choose can be on a cloud server or a dedicated server, whichever you prefer.
Mentioned previously, the first thing to do is to ensure that you have root access to your node and the CentOS 7 operating system.
First, you will need to disable SELinux on each of the three CentOS 7 nodes you have running:
Local IP :

node1 : 10.0.0.7

node2 : 10.0.0.8

node3 : 10.0.0.9
Once the nodes have SELinux disabled, it’s time to create the MariaDB repository to install Galera on each of the three nodes:
nano /etc/yum.repos.d/mariadb.repo

[mariadb]

name = MariaDB

baseurl = http://yum.mariadb.org/10.0/centos7-amd64

gpgkey=https://yum.mariadb.org/RPM-GPG-KEY-MariaDB

gpgcheck=1
After the repository has been created, it’s time to install Galera and any software requirements on each of the three nodes:
yum install MariaDB-Galera-server MariaDB-client rsync galera socat -y
Now you can start MySQL and secure MySQL on each node:
systemctl start mysql

mysql_secure_installation

systemctl stop mysql
When MySQL is secured, you can add the Galera configuration to each node:
nano /etc/my.cnf.d/server.cnf
[mariadb-10.0]

binlog_format=ROW

default-storage-engine=innodb

innodb_autoinc_lock_mode=2

innodb_locks_unsafe_for_binlog=1

query_cache_size=0

query_cache_type=0

datadir=/var/lib/mysql

innodb_log_file_size=100M

innodb_file_per_table

innodb_flush_log_at_trx_commit=2

wsrep_provider=/usr/lib64/galera/libgalera_smm.so

wsrep_cluster_address="gcomm://10.0.0.7,10.0.0.8,10.0.0.9"

wsrep_cluster_name='galera_cluster'

wsrep_node_address='10.0.0.7'

wsrep_node_name='node1'

wsrep_sst_method=rsync

wsrep_sst_auth=db_user:admin
There are changes that need to be made to the second and third node.
The change to node 2:
wsrep_node_address='10.0.0.8'

wsrep_node_name='node2'
The change to node 3:
wsrep_node_address='10.0.0.9'

wsrep_node_name='node3'
After completing the changes, start the cluster on node 1 only:
/etc/init.d/mysql start --wsrep-new-cluster
When complete, it’s time to log into MySQL on each node to verify the cluster is functioning correctly:
systemctl start mysql
Now you can create a database to test the cluster on node 1:
mysql -u root -p

 MariaDB [(none)]> show status like 'wsrep%';
| wsrep_local_state_comment    | Synced                                    |

| wsrep_incoming_addresses     | 10.0.0.7:3306,10.0.0.8:3306,10.0.0.9:3306 |

| wsrep_cluster_size           | 3                                         |
It’s time to log into node 2 and node 3, checking if the database created in node 1 exists:
MariaDB [(none)]> create database globotech;

MariaDB [(none)]> show databases;

+--------------------+

| Database           |

+--------------------+

| globotech          |

| information_schema |

| mysql              |

| performance_schema |

+--------------------+

4 rows in set (0.00 sec)
Congratulations, you’ve successfully completed the installation of Galera on your nodes running CentOS 7. Now you can move your database cluster into production. If you found this tutorial helpful, please share it with other users setting up Galera on CentOS as well.
Heartbeat and DRBD can be used effectively to maintain high availability for MySQL databases on Ubuntu 16.04. Heartbeat is a network-oriented tool for maintaining high availability and managing failover. With heartbeat, you can make sure that a shared IP address, is active on one and only one server at a time in your cluster. DRBD (Distributed Replicated Block Device) synchronizes data between two nodes by writing the data to the primary server first and then writing to the secondary server. When used to provide high availability for MySQL databases, heartbeat and DRBD allow for a seamless transition from the primary to the secondary server when the primary server fails. This guide will take you through the steps necessary to create and initiate such a setup.
In order to follow this guide you will need to have the following in place:
• Two nodes (Cloud Server or Dedicated Server) on a single LAN with Ubuntu 16.04 installed. We will call these servers DB1 and DB2 below
• Three network cards on each server to allow for the establishment of all required IP addresses
• A second unpartitioned drive on each server to serve as the DRDB device
• Root access to the nodes
Throughout the tutorial, ALL commands must be done on both servers unless otherwise specified.
IP Assignment
You will need to assign public and private IP addresses to the servers, a floating IP address through which your MySQL databases will be accessed, and IP addresses for DRBD traffic. In this guide, we assume that the IP range for your public network is 173.209.49.66/29 and the IP range for your private network (LAN) is 10.119.0.0/24. We also assume you have a third network card on both servers with a cross-connect between servers for DRBD traffic. The LAN subnet for this cross-connect presumably covers the IP range 192.168.5.0/24.
The networking required for such a setup may be configured in a number of ways. We chose to use the easiest to understand. In the setup described below, the first LAN will be used for floating IP’s and heartbeat while the third network will be reserved for DRBD.
We have assigned the following IP addresses to the components we will use in this tutorial.
Server eth0 (wan) eth1 (lan) eth1 (drbd)
DB1 173.209.49.66 10.119.0.1 192.168.5.1
DB2 173.209.49.67 10.119.0.2 192.168.5.2
Floating None 10.119.0.10 None
Always makes sure your system is up to date before you install any software.
apt-get update

apt-get -y upgrade
Disable Ubuntu’s firewall (if it is installed) before you assign the above IP addresses.
ufw disable
Configure the hostnames for your servers. To do so run the following commands on
On DB1:
echo "db1.mydomain.com" > /etc/hostname

hostname db1.mydomain.com
On DB2:
echo "db2.mydomain.com" > /etc/hostname

hostname db2.mydomain.com
Add the hostnames you have created as entries in the host file:
nano /etc/hosts
Next, add the following entries on both servers. This will bind hostnames to the DRBD IP’s in the 192.168.5.0/24 range:
192.168.5.1 db1.mydomain.com

192.168.5.2 db2.mydomain.com
Your network is now set up.
Install and Configure DRBD and Heartbeat
With your network configuration in place, install DRBD and heartbeat. Configure your nodes so that both DRDB and heartbeat start when the servers boot:
apt-get -y install drbd8-utils heartbeat

systemctl enable drbd

systemctl enable heartbeat
You will need to set up a DRDB device for each server. Check that your second unpartitioned drive is available to use as your DRBD device:
fdisk -l
Below, we can see that we have a 16GB /dev/sdb drive in our setup. We will use this drive for DRBD.
Disk /dev/sda: 16 GiB, 17179869184 bytes, 33554432 sectors

Units: sectors of 1 * 512 = 512 bytes

Sector size (logical/physical): 512 bytes / 512 bytes

I/O size (minimum/optimal): 512 bytes / 512 bytes

Disklabel type: dos

Disk identifier: 0xcda6f1d3

Device     Boot   Start      End  Sectors  Size Id Type

/dev/sda1  *       2048   976895   974848  476M 83 Linux

/dev/sda2        976896  4976639  3999744  1.9G 82 Linux swap / Solaris

/dev/sda3       4976640 33552383 28575744 13.6G 83 Linux

Disk /dev/sdb: 16 GiB, 17179869184 bytes, 33554432 sectors

Units: sectors of 1 * 512 = 512 bytes

Sector size (logical/physical): 512 bytes / 512 bytes

I/O size (minimum/optimal): 512 bytes / 512 bytes
The second drive can easily be partitioned using the simple formula below. This formula will create a single partition that occupies the whole disk.
echo -e 'n\np\n1\n\n\nw' | fdisk /dev/sdb
With the DRBD devices in place, it is time to configure DRBD on both nodes. First, create the DRBD configuration file on each node:
echo "" > /etc/drbd.d/global_common.conf

nano /etc/drbd.d/r0.res
Add the following into both DRBD configuration files:
global {

    usage-count no;

}

resource r0 {

    protocol C;

    startup {

        degr-wfc-timeout 60;

    }

    disk {

        on-io-error detach;

    }

    syncer {

        rate 100M;

    }

    net {

        cram-hmac-alg sha1;

        shared-secret "wXE8MqVa";

    }

    on db1.mydomain.com {

        device /dev/drbd0;

        disk /dev/sdb1;

        address 192.168.5.1:7789;

        meta-disk internal;

    }

    on db2.mydomain.com {

        device /dev/drbd0;

        disk /dev/sdb1;

        address 192.168.5.2:7789;

        meta-disk internal;

    }

}
We will now edit the various files used to configure our servers for high availability. Remember to edit the files on both servers in exactly the same way except where we indicate there need to be differences.
The first file we will edit is the configuration file /etc/ha.d/ha.cf on both nodes. You may open the file like so:
nano /etc/ha.d/ha.cf
Enter the following parameters in the file. The bcast parameter line is of critical importance. In our case, we have 3 network interfaces. We need to put eth2 on this line. If you are using an existing network setup that is designed differently than our simple example you may need to enter a different value here:
# Check Interval

keepalive 1

# Time before server declared dead

deadtime 10

# Secondary wait delay at boot

initdead 60

# Auto-failback

auto_failback off

# Heartbeat Interface

bcast eth2

# Nodes to monitor

node db1.mydomain.com

node db2.mydomain.com
The next file to edit is the resources file /etc/ha.d/haresources
nano /etc/ha.d/haresources
We will enter only one line in this file. Inspect this entry carefully. It should include the hostname of your main active node (db1), the floating IP (10.119.0.10), the device (/dev/drbd0) and its mount point (/var/lib/mysql):
db1.mydomain.com 10.119.0.10/24 drbddisk::r0 Filesystem::/dev/drbd0::/var/lib/mysql::ext4::noatime
To secure your high availability setup you will need to define and store identical authorization keys on both nodes. To do so, open and edit /etc/ha.d/authkeys
nano /etc/ha.d/authkeys
This file should only contain the two lines below. Use the same password on both nodes. The password is the text immediately after the “sha1” statement.
auth1

1 sha1 e86b38f5075de0318548edad9566436423ada422
Using the partitions created above, create the DRBD disks. Start by entering the following command on DB1:
drbdadm create-md r0

systemctl restart drbd

drbdadm outdate r0

drbdadm -- --overwrite-data-of-peer primary all

drbdadm primary r0

mkfs.ext4 /dev/drbd0

chmod 600 /etc/ha.d/authkeys

mkdir /var/lib/mysql
If you get an error message along the following lines, “The file /dev/drbd0 does not exist and no size was specified,” check that your hostnames have been set properly.
Once the DRBD disk is created on DB1, you may create the DRBD disk on DB2:
drbdadm create-md r0

systemctl restart drbd

chmod 600 /etc/ha.d/authkeys

mkdir /var/lib/mysql
With both disks in place, you may now verify that the DRBD disk is connected and is properly syncing
cat /proc/drbd
The above command should yield the below output. In this output, you should see Primary/Secondary. This output indicates that the DB1 node is the master while the other node is the slave. It also shows that everything is syncing as expected.
root@db1:~# cat /proc/drbd

version: 8.4.5 (api:1/proto:86-101)

srcversion: D496E56BBEBA8B1339BB34A

 0: cs:SyncSource ro:Primary/Secondary ds:UpToDate/Inconsistent C r-----

    ns:550488 nr:0 dw:135424 dr:416200 al:35 bm:0 lo:0 pe:11 ua:0 ap:0 ep:1 wo:f oos:16233752

        [>....................] sync'ed:  3.3% (15852/16380)M

        finish: 0:16:45 speed: 16,136 (16,932) K/sec
With properly configured synchronization in place between the primary and secondary nodes, it is time to enable the failover portion of our setup. To do so, we will simply start heartbeat on both nodes
systemctl start heartbeat
The DRBD partition should be mounted on DB1 only. Verify that this is so:
root@db1:/etc/ha.d# mount | grep drbd

/dev/drbd0 on /var/lib/mysql type ext4 (rw,noatime,data=ordered)
Once you verify that the floating IP is only bound to DB1 with the following command, you are ready to install your MySQL-type database service.
root@db1:/etc/ha.d# ip addr show | grep 10.119.0.10

    inet 10.119.0.10/24 brd 10.119.0.255 scope global secondary eth1:0
Install MariaDB Database Service
Now is the time to install our database service on both servers. There are several variants of MySQL that were created as forks of the original MySQL source code. In the following, we have opted to install MariaDB because of its performance and good track record.
apt-get install mariadb-server
Percona DB and MySQL are two other options you might choose.
The database service on a given node should only start if that node is designated as the primary node at the time. To assure you don’t end up with MySQL running on both nodes simultaneously, disable auto-start for the MariaDB service on both nodes
systemctl disable mysql
By design, DB1 is primary when our setup is initiated. No database service should be running on DB2. So long as DB1 is primary, databases on DB2 should be created and populated through synchronization with DB1. Therefore, on DB2, you need to stop the MariaDB service and empty /var/lib/mysql. Perform this command ON DB2 ONLY:
systemctl stop mysql

rm -rfv /var/lib/mysql/*
Before you proceed further, configure the root password on DB1. To do so, simply run the wizard. Set a new root password and allow all other options to retain their default values for now:
root@db1:/var/lib# mysql_secure_installation

NOTE: RUNNING ALL PARTS OF THIS SCRIPT IS RECOMMENDED FOR ALL MariaDB

      SERVERS IN PRODUCTION USE!  PLEASE READ EACH STEP CAREFULLY!

In order to log into MariaDB to secure it, we'll need the current

password for the root user.  If you've just installed MariaDB, and

you haven't set the root password yet, the password will be blank,

so you should just press enter here.

Enter current password for root (enter for none):

OK, successfully used password, moving on...

Setting the root password ensures that nobody can log into the MariaDB

root user without the proper authorisation.

Set root password? [Y/n] y

New password:

Re-enter new password:

Password updated successfully!

Reloading privilege tables..

 ... Success!

By default, a MariaDB installation has an anonymous user, allowing anyone

to log into MariaDB without having to have a user account created for

them.  This is intended only for testing, and to make the installation

go a bit smoother.  You should remove them before moving into a

production environment.

Remove anonymous users? [Y/n] Y

 ... Success!

Normally, root should only be allowed to connect from 'localhost'.  This

ensures that someone cannot guess at the root password from the network.

Disallow root login remotely? [Y/n] Y

 ... Success!

By default, MariaDB comes with a database named 'test' that anyone can

access.  This is also intended only for testing, and should be removed

before moving into a production environment.

Remove test database and access to it? [Y/n] Y

 - Dropping test database...

 ... Success!

 - Removing privileges on test database...

 ... Success!

Reloading the privilege tables will ensure that all changes made so far

will take effect immediately.

Reload privilege tables now? [Y/n] Y

 ... Success!

Cleaning up...

All done!  If you've completed all of the above steps, your MariaDB

installation should now be secure.

Thanks for using MariaDB!
Copy the MySQL Maintenance configuration file from DB1 to DB2
rsync -av /etc/mysql/debian.cnf root@192.168.5.2:/etc/mysql/debian.cnf
Now we will create a root user for remote management of and access to the databases on the highly available MySQL instance. We will make use of wildcards to do so.
Our cluster architecture is set up so that all other servers on our LAN can reach the database at the floating IP 10.119.0.10. If you wish to enable users outside your LAN to access your highly available database you may bind a public IP in /etc/ha.d/haresources for database access as well, following the pattern set above in editing that file.
In our case, we have set up our high availability database servers to be accessible from other servers on the LAN that share the IP range 10.119.0.0/24.
mysql -u root -p
Enter the following commands to create the root user. Replace “my-password” with the MySQL root password you wish to assign to the remote access user:
MariaDB [(none)]> CREATE USER 'root'@'10.119.0.%' IDENTIFIED BY 'my-password';

MariaDB [(none)]> GRANT ALL PRIVILEGES ON *.* TO 'root'@'10.119.0.%' WITH GRANT OPTION;

MariaDB [(none)]> FLUSH PRIVILEGES;

MariaDB [(none)]> QUIT;
Set the bind address for MySQL on both servers
sed -i 's/127.0.0.1/0.0.0.0/g' /etc/mysql/mariadb.conf.d/*.cnf
Initiate Heartbeat for MySQL Service
Add support for the MySQL service in our heartbeat instances on both servers. First, open the configuration file:
nano /etc/ha.d/haresources
Then, simply add mysql at the end of the line and save the file
db1.mydomain.com 10.119.0.10/24 drbddisk::r0 Filesystem::/dev/drbd0::/var/lib/mysql::ext4::noatime mysql
Once heartbeat is configured we need to restart it on both servers. heartbeat must be started on the primary server (DB1) first. Once heartbeat has started on DB1 allow at least 20 seconds before you restart heartbeat on DB2.
The command sequence is as follows. ON DB1 enter:
systemctl restart heartbeat
Wait 20 seconds or more and then enter the following on DB2:
systemctl restart heartbeat
The delay between initiating the heartbeat stack on DB1 and DB2 will prevent heartbeat from inadvertently initiating failover to DB2 upon startup.
Testing redundancy of our setup
Our goal throughout this tutorial has been to tie together our servers such that MySQL service will not be interrupted if the active server fails. Now that our setup is complete, we will perform a series of tests to verify that heartbeat will actually trigger a transfer from the active server to the passive server when the active server fails in some way. We will also verify that DRBD is properly syncing the data between the two servers.
Tests to Perform on DB1
First, we will verify that DB1 is the primary drbd node
root@db1:~# cat /proc/drbd
version: 8.4.5 (api:1/proto:86-101)

srcversion: D496E56BBEBA8B1339BB34A

 0: cs:Connected ro:Primary/Secondary ds:UpToDate/UpToDate C r-----

    ns:22764644 nr:256 dw:529232 dr:22248299 al:111 bm:0 lo:0 pe:0 ua:0 ap:0 ep:1 wo:f oos:0
Next, we will verify that the DRBD disk is mounted
root@db1:~# mount | grep drbd
/dev/drbd0 on /var/lib/mysql type ext4 (rw,noatime,data=ordered)
The floating IP must be bound correctly for the setup to function properly
root@db1:~# ip addr show | grep 10.119.0.10
inet 10.119.0.10/24 brd 10.119.0.255 scope global secondary eth1:0
Check to make sure that MariaDB is running
root@db1:~# ps -ef | grep mysqld
root      7472     1  0 05:52 ?        00:00:00 /bin/bash /usr/bin/mysqld_safe

mysql     7617  7472  0 05:52 ?        00:00:00 /usr/sbin/mysqld --basedir=/usr --datadir=/var/lib/mysql --plugin-dir=/usr/lib/mysql/plugin --user=mysql --skip-log-error --pid-file=/var/run/mysqld/mysqld.pid --socket=/var/run/mysqld/mysqld.sock --port=3306

root      7618  7472  0 05:52 ?        00:00:00 logger -t mysqld -p daemon error
Use the remote access root user to test the MySQL connection directly on the floating (failover) IP and create a test database.
mysql -h 10.119.0.10 -u root -p
MariaDB [(none)]> create database failtest;

MariaDB [(none)]> quit
Restart heartbeat on DB1.
systemctl restart heartbeat
Heartbeat will interpret this restart as a failure of DB1 and should trigger failover to make DB2 the primary server. Ensure that DRBD is now treating DB1 as the secondary server:
root@db1:~# cat /proc/drbd
version: 8.4.5 (api:1/proto:86-101)

srcversion: D496E56BBEBA8B1339BB34A

 0: cs:Connected ro:Secondary/Primary ds:UpToDate/UpToDate C r-----

    ns:22764856 nr:388 dw:529576 dr:22248303 al:112 bm:0 lo:0 pe:0 ua:0 ap:0 ep:1 wo:f oos:0
Having triggered the failover, we will now test that our setup is fully functional with DB2 acting as the primary server.
Tests to perform on DB2
Verify that DB2 is now the primary drbd node
root@db2:~# cat /proc/drbd
version: 8.4.5 (api:1/proto:86-101)

srcversion: D496E56BBEBA8B1339BB34A

 0: cs:Connected ro:Primary/Secondary ds:UpToDate/UpToDate C r-----

    ns:412 nr:20880892 dw:20881304 dr:11463 al:7 bm:0 lo:0 pe:0 ua:0 ap:0 ep:1 wo:f oos:0
Verify that the DRBD disk is mounted on DB2
root@db2:~# mount | grep drbd
/dev/drbd0 on /var/lib/mysql type ext4 (rw,noatime,data=ordered)
Verify the floating IP is now bound to DB2 correctly
root@db2:~# ip addr show | grep 10.119.0.10
inet 10.119.0.10/24 brd 10.119.0.255 scope global secondary eth1:0
Check to make sure that MariaDB is running on DB2
root@db2:~# ps -ef | grep mysqld
root      7568     1  0 06:13 ?        00:00:00 /bin/bash /usr/bin/mysqld_safe

mysql     7713  7568  0 06:13 ?        00:00:00 /usr/sbin/mysqld --basedir=/usr --datadir=/var/lib/mysql --plugin-dir=/usr/lib/mysql/plugin --user=mysql --skip-log-error --pid-file=/var/run/mysqld/mysqld.pid --socket=/var/run/mysqld/mysqld.sock --port=3306

root      7714  7568  0 06:13 ?        00:00:00 logger -t mysqld -p daemon error
Use the remote access user to connect to the MySQL instance at the floating (failover) IP. If your setup is working properly, the following commands should enable you to view the test database we created earlier while DB1 was the primary server.
mysql -u 10.119.0.10 -u root -p
MariaDB [(none)]> show databases;

+--------------------+

| Database           |

+--------------------+

| failtest           |

| information_schema |

| lost+found         |

| mysql              |

| performance_schema |

+--------------------+

5 rows in set (0.04 sec)

MariaDB [(none)]> exit
Restart Heartbeat.
systemctl restart heartbeat
As it did before, this restart should trigger failover. To check that it has done so, ensure that DRBD is now secondary on DB2
root@db2:~# cat /proc/drbd
version: 8.4.5 (api:1/proto:86-101)

srcversion: D496E56BBEBA8B1339BB34A

 0: cs:Connected ro:Secondary/Primary ds:UpToDate/UpToDate C r-----

    ns:508 nr:20881012 dw:20881520 dr:11475 al:7 bm:0 lo:0 pe:0 ua:0 ap:0 ep:1 wo:f oos:0
Provided your tests yielded the expected results, your high availability MySQL setup should now be fully operational.
Congratulations, the high-availability MySQL setup you have created on your Ubuntu 16.04 servers will make your databases more reliable for mission critical functions. This frees you to create content while your users get nearly continuous data access.
Load balancing is a way to distribute workloads across multiple computing resources such that large, resource-intensive tasks may be safely and reliable completed with more efficiency and speed than if just one machine were to perform the tasks.
Keepalived is a free and open source load balancing solution for Linux systems. This guide will go over the installation process for Keepalived on Ubuntu 14.04 and how you can use it for load balancing on your Linux clusters.
Before you begin to follow the steps in this guide, make sure that you meet these requirements:
• Two servers (Cloud Server or Dedicated Server), each running a fresh installation of Ubuntu 14.04. We will call these servers LB1 and LB2 below
• Both servers connected to the same LAN
• Root access to both servers
For the purposes of this guide, we’ll be working with a public network of 173.209.49.66/29 and a class A private network, or LAN, of 10.119.0.0/24.
For your reference, here are the servers, or load balancers, we’ll be working with, along with their respective public and private IP addresses. Where necessary, remember to replace with the IP addresses for your own servers.
LB1
Public:173.209.49.66
Private:10.119.0.1
LB2
Public:173.209.49.67
Private:10.119.0.2
The load balancers will make use of a “floating IP”, and we’ll configure active and passive redundancy as well.
Floating
Public:173.209.49.70
Private:10.119.0.10
The first task is to ensure that the systems of both servers are fully up to date.
apt-get update

apt-get -y upgrade
If it’s installed, disable Ubuntu’s default firewall.
ufw disable
The next step is to install Keepalived and all necessary dependencies.
apt-get install linux-headers-$(uname -r) keepalived
Use this command to activate Keepalived on boot. We’ll also enable the ipvsadm kernel module.
update-rc.d keepalived defaults

modprobe ip_vs
Now we’ll have to configure Keepalived for our setup.
echo "" > /etc/keepalived/keepalived.conf

nano /etc/keepalived/keepalived.conf
Here’s the alterations for the LB1 server.
vrrp_instance VI_LOCAL {

        interface eth1

        state MASTER

        virtual_router_id 51

        priority 101

        virtual_ipaddress {

                10.119.0.10

        }

        track_interface {

                eth0

                eth1

        }

}

vrrp_instance VI_PUB {

        interface eth0

        state MASTER

        virtual_router_id 52

        priority 101

        virtual_ipaddress {

                173.209.49.70

        }

        track_interface {

                eth0

                eth1

        }

}

virtual_server 173.209.49.70 443 {

        delay_loop 4

        lb_algo sh      # source hash

        lb_kind NAT

        protocol TCP

        real_server 10.119.0.100 443 {

                weight 1

                TCP_CHECK {

                        connect_timeout 15

                        nb_get_retry 3

                        delay_before_retry 2

                }

        }

        real_server 10.119.0.101 443 {

                weight 1

                TCP_CHECK {

                        connect_timeout 15

                        nb_get_retry 3

                        delay_before_retry 2

                }

        }

}

virtual_server 173.209.49.70 80 {

        delay_loop 4

        lb_algo wrr      # weighted round robin

        lb_kind NAT

        protocol TCP

        real_server 10.119.0.100 80 {

                weight 1

                TCP_CHECK {

                        connect_timeout 15

                        nb_get_retry 3

                        delay_before_retry 2

                }

        }

        real_server 10.119.0.101 80 {

                weight 1

                TCP_CHECK {

                        connect_timeout 15

                        nb_get_retry 3

                        delay_before_retry 2

                }

        }

}
And these alterations will be applied to the LB2 server.
vrrp_instance VI_LOCAL {

        interface eth1

        state BACKUP

        virtual_router_id 51

        priority 100

        virtual_ipaddress {

                10.119.0.10

        }

        track_interface {

                eth0

                eth1

        }

}

vrrp_instance VI_PUB {

        interface eth0

        state BACKUP

        virtual_router_id 52

        priority 100

        virtual_ipaddress {

                173.209.49.70

        }

        track_interface {

                eth0

                eth1

        }

}

virtual_server 173.209.49.70 443 {

        delay_loop 4

        lb_algo sh      # source hash

        lb_kind NAT

        protocol TCP

        real_server 10.119.0.100 443 {

                weight 1

                TCP_CHECK {

                        connect_timeout 15

                        nb_get_retry 3

                        delay_before_retry 2

                }

        }

        real_server 10.119.0.101 443 {

                weight 1

                TCP_CHECK {

                        connect_timeout 15

                        nb_get_retry 3

                        delay_before_retry 2

                }

        }

}

virtual_server 173.209.49.70 80 {

        delay_loop 4

        lb_algo wrr      # weighted round robin

        lb_kind NAT

        protocol TCP

        real_server 10.119.0.100 80 {

                weight 1

                TCP_CHECK {

                        connect_timeout 15

                        nb_get_retry 3

                        delay_before_retry 2

                }

        }

        real_server 10.119.0.101 80 {

                weight 1

                TCP_CHECK {

                        connect_timeout 15

                        nb_get_retry 3

                        delay_before_retry 2

                }

        }

}
The “virtual_router_id” setting must be unique for each of the defined VRRP instances, and it should also be unique within your VLAN. Make sure you’re not using the same ID on any two clusters connected via the same physical switch or VLAN. Naturally, this ID needs to match on both LB1 and LB2 for the same VRRP instance. Valid values are from 0 to 255.
Now, enable nf_conntrack and we can proceed to sysctl configuration.
modprobe nf_conntrack

nano /etc/sysctl.conf
Alter the configuration so it matches the below:
net.ipv4.ip_forward = 1

net.ipv4.ip_nonlocal_bind = 1

net.nf_conntrack_max = 1000000
Now, apply the changes.
sysctl -p
Finally, we can start up Keepalived.
service keepalived start
Let’s verify that Keepalived is running in the expected manner. First we should verify that both of the floating IPs are assigned to the first keepalived instance.
Using the command ip addr show, you can see if the IPs are present:
root@lb1:/etc# ip addr show
1: lo:
link/loopback 00:00:00:00:00:00 brd 00:00:00:00:00:00
inet 127.0.0.1/8 scope host lo
valid_lft forever preferred_lft forever
inet6 ::1/128 scope host
valid_lft forever preferred_lft forever
2: eth0:
link/ether 00:50:56:8e:e4:2f brd ff:ff:ff:ff:ff:ff
inet 173.209.49.66/29 brd 173.209.49.71 scope global eth0
valid_lft forever preferred_lft forever
inet 173.209.49.70/32 scope global eth0
valid_lft forever preferred_lft forever
inet6 fe80::250:56ff:fe8e:e42f/64 scope link
valid_lft forever preferred_lft forever
3: eth1:
link/ether 00:50:56:8e:ea:2d brd ff:ff:ff:ff:ff:ff
inet 10.119.0.1/24 brd 10.119.0.255 scope global eth1
valid_lft forever preferred_lft forever
inet 10.119.0.10/32 scope global eth1
valid_lft forever preferred_lft forever
inet6 fe80::250:56ff:fe8e:ea2d/64 scope link
valid_lft forever preferred_lft forever
If everything’s been set up correctly, you’ll see 173.209.49.70 and 10.119.0.10 on LB1. If you shut down keepalived on LB1, those same IP addresses will appear on the second server.
root@lb1:/etc# systemctl stop keepalived
After shutting down keepalived on LB1, go on the second server and see if it indeed has those IP addresses assigned:
root@lb2:~# ip addr show
1: lo:
link/loopback 00:00:00:00:00:00 brd 00:00:00:00:00:00
inet 127.0.0.1/8 scope host lo
valid_lft forever preferred_lft forever
inet6 ::1/128 scope host
valid_lft forever preferred_lft forever
2: eth0:
link/ether 00:50:56:8e:ae:b8 brd ff:ff:ff:ff:ff:ff
inet 173.209.49.67/29 brd 173.209.49.71 scope global eth0
valid_lft forever preferred_lft forever
inet 173.209.49.70/32 scope global eth0
valid_lft forever preferred_lft forever
inet6 fe80::250:56ff:fe8e:aeb8/64 scope link
valid_lft forever preferred_lft forever
3: eth1:
link/ether 00:50:56:8e:ed:ba brd ff:ff:ff:ff:ff:ff
inet 10.119.0.2/24 brd 10.119.0.255 scope global eth1
valid_lft forever preferred_lft forever
inet 10.119.0.10/32 scope global eth1
valid_lft forever preferred_lft forever
inet6 fe80::250:56ff:fe8e:edba/64 scope link
valid_lft forever preferred_lft forever
Finally, make sure that the backends are well specified within keepalived’s config:
root@lb1:/etc# ipvsadm
IP Virtual Server version 1.2.1 (size=4096)

Prot LocalAddress:Port Scheduler Flags

  -> RemoteAddress:Port           Forward Weight ActiveConn InActConn

TCP  173.209.49.70:http wrr

  -> 10.119.0.100:http            Masq    1      0          0

  -> 10.119.0.101:http            Masq    1      0          0

TCP  173.209.49.70:https sh

  -> 10.119.0.100:https           Masq    1      0          0

  -> 10.119.0.101:https           Masq    1      0          0
Now that you’ve completed this guide, you should be able to set up Keepalived on your own clusters. Keepalived is scalable, so you can try it out on clusters of any size. If you found this article helpful, feel free to share it with your friends and let us know in the comments below!
Keepalived is a daemon that can be used to drive a number of load balancing processes on Linux Virtual Servers (LVS) to maintain high availability. Load balancers enable two or more identical servers to provide service through a single floating IP address or set of IP addresses. When one or more of the servers is not functioning optimally, keepalived can shift more of the load to those servers that are more healthy. Perhaps the simplest configuration for the keepalived load balancer uses the daemon to maintain high availability by implementing the failover service. During failover, the entire load is shifted from a primary server to a secondary server upon failure of the primary. The present tutorial describes the implementation of such a highly-available load balancer setup based on Ubuntu 16.04 and keepalived. In this tutorial, we will configure the load balancers using a “floating IP” and an active/passive redundancy.
In order to follow this guide you will need to have the following in place:
• Two servers (Cloud Server or Dedicated Server), each running a fresh installation of Ubuntu 16.04. We will call these servers LB1 and LB2 below
• Root access to the nodes
For your reference, here are the servers, or load balancers, we’ll be working with, along with their respective public and private IP addresses. Where necessary, remember to replace with the IP addresses for your own servers.
LB1
Public:173.209.49.66
Private:10.119.0.1
LB2
Public:173.209.49.67
Private:10.119.0.2
The load balancers will make use of a “floating IP”, and we’ll configure active and passive redundancy as well.
Floating
Public:173.209.49.70
Private:10.119.0.10
Your first step when you install any software is to make sure your system is up to date by executing the following commands.
apt-get update

apt-get -y upgrade
The update ensures you will install the most recent (stable) packages available. The upgrade will install the most recent security patches and fixes.
Ubuntu’s firewall will have to be re-configured to allow for the configuration changes made to run keepalived. So, once your system has been updated disable Ubuntu’s firewall.
ufw disable
You are now ready to install keepalived and the necessary dependencies:
apt-get install linux-headers-$(uname -r) keepalived
Startup Keepalived on Boot
With keepalived installed, configure the server so that the daemon activates on boot. You will also need to enable the ipvsadm kernel module, which provides key underlying functionality keepalived uses for load balancing.
systemctl enable keepalived

modprobe ip_vs
Configure Keepalived
Create the keepalived configuration file folder on both servers:
echo "" > /etc/keepalived/keepalived.conf

nano /etc/keepalived/keepalived.conf
We will now set up keepalived so that it will use the Virtual Router Redundancy Protocol (VRRP) to determine when LB1 or LB2 should be the active router based on the health of LB1. To implement this step you will need to create and save the following script to your keepalived folder on LB1:
vrrp_instance VI_LOCAL {

        interface eth1

        state MASTER

        virtual_router_id 51

        priority 101

        virtual_ipaddress {

                10.119.0.10

        }

        track_interface {

                eth0

                eth1

        }

}

vrrp_instance VI_PUB {

        interface eth0

        state MASTER

        virtual_router_id 52

        priority 101

        virtual_ipaddress {

                173.209.49.70

        }

        track_interface {

                eth0

                eth1

        }

}

virtual_server 173.209.49.70 443 {

        delay_loop 4

        lb_algo sh      # source hash

        lb_kind NAT

        protocol TCP

        real_server 10.119.0.100 443 {

                weight 1

                TCP_CHECK {

                        connect_timeout 15

                        nb_get_retry 3

                        delay_before_retry 2

                }

        }

        real_server 10.119.0.101 443 {

                weight 1

                TCP_CHECK {

                        connect_timeout 15

                        nb_get_retry 3

                        delay_before_retry 2

                }

        }

}

virtual_server 173.209.49.70 80 {

        delay_loop 4

        lb_algo wrr      # weighted round robin

        lb_kind NAT

        protocol TCP

        real_server 10.119.0.100 80 {

                weight 1

                TCP_CHECK {

                        connect_timeout 15

                        nb_get_retry 3

                        delay_before_retry 2

                }

        }

        real_server 10.119.0.101 80 {

                weight 1

                TCP_CHECK {

                        connect_timeout 15

                        nb_get_retry 3

                        delay_before_retry 2

                }

        }

}
and create and save the following script to your keepalived folder on LB2:
vrrp_instance VI_LOCAL {

        interface eth1

        state BACKUP

        virtual_router_id 51

        priority 100

        virtual_ipaddress {

                10.119.0.10

        }

        track_interface {

                eth0

                eth1

        }

}

vrrp_instance VI_PUB {

        interface eth0

        state BACKUP

        virtual_router_id 52

        priority 100

        virtual_ipaddress {

                173.209.49.70

        }

        track_interface {

                eth0

                eth1

        }

}

virtual_server 173.209.49.70 443 {

        delay_loop 4

        lb_algo sh      # source hash

        lb_kind NAT

        protocol TCP

        real_server 10.119.0.100 443 {

                weight 1

                TCP_CHECK {

                        connect_timeout 15

                        nb_get_retry 3

                        delay_before_retry 2

                }

        }

        real_server 10.119.0.101 443 {

                weight 1

                TCP_CHECK {

                        connect_timeout 15

                        nb_get_retry 3

                        delay_before_retry 2

                }

        }

}

virtual_server 173.209.49.70 80 {

        delay_loop 4

        lb_algo wrr      # weighted round robin

        lb_kind NAT

        protocol TCP

        real_server 10.119.0.100 80 {

                weight 1

                TCP_CHECK {

                        connect_timeout 15

                        nb_get_retry 3

                        delay_before_retry 2

                }

        }

        real_server 10.119.0.101 80 {

                weight 1

                TCP_CHECK {

                        connect_timeout 15

                        nb_get_retry 3

                        delay_before_retry 2

                }

        }

}
The “virtual_router_id” needs to be unique for each VRRP instance defined. This ID must also be unique within the VLAN. The same ID should not be used on two clusters using the same physical switch or VLAN. The ID needs to match on both LB1 and LB2 for the same VRRP instance. Valid values are from 0 to 255.
Netfilter can use nf_conntrack to track the connections among your servers. Kernel parameters, such as IP addresses, can be immediately modified with the sysctl command. Once nf_conntrack is enabled and sysctl is configured as follows
modprobe nf_conntrack

nano /etc/sysctl.conf
keepalived will be able to track the connections between the servers and re-assign the floating IP addresses between LB1 and LB2 as necessary, depending on which should be active and which should be passive at the time.
To complete the configuration of the servers to run keepalived for high availability enter the following tweaks:
net.ipv4.ip_forward = 1

net.ipv4.ip_nonlocal_bind = 1

net.nf_conntrack_max = 1000000
Once you apply the tweaks as follows:
sysctl -p
your configuration should be complete and you can start keepalived.
systemctl start keepalived
Verify Keepalived’s Status
Now we need to ensure our keepalived instance is operating as expected. First, we’ll check that both floating IP addresses are assigned to the first keepalived instance. To do so, execute ip addr show and see if the floating IP addresses are present:
root@lb1:/etc# ip addr show
1: lo:
link/loopback 00:00:00:00:00:00 brd 00:00:00:00:00:00
inet 127.0.0.1/8 scope host lo
valid_lft forever preferred_lft forever
inet6 ::1/128 scope host
valid_lft forever preferred_lft forever
2: eth0:
link/ether 00:50:56:8e:e4:2f brd ff:ff:ff:ff:ff:ff
inet 173.209.49.66/29 brd 173.209.49.71 scope global eth0
valid_lft forever preferred_lft forever
inet 173.209.49.70/32 scope global eth0
valid_lft forever preferred_lft forever
inet6 fe80::250:56ff:fe8e:e42f/64 scope link
valid_lft forever preferred_lft forever
3: eth1:
link/ether 00:50:56:8e:ea:2d brd ff:ff:ff:ff:ff:ff
inet 10.119.0.1/24 brd 10.119.0.255 scope global eth1
valid_lft forever preferred_lft forever
inet 10.119.0.10/32 scope global eth1
valid_lft forever preferred_lft forever
inet6 fe80::250:56ff:fe8e:ea2d/64 scope link
valid_lft forever preferred_lft forever
Verify that 173.209.49.70 and 10.119.0.10 are assigned to LB1. The presence of these addresses indicates that LB1 is active and LB2 is passive. Now, if we shut down keepalived on LB1 those IP addresses should appear on the second server.
root@lb1:/etc# systemctl stop keepalived
Switch to LB2 and check the IP addresses:
root@lb2:~# ip addr show
1: lo:
link/loopback 00:00:00:00:00:00 brd 00:00:00:00:00:00
inet 127.0.0.1/8 scope host lo
valid_lft forever preferred_lft forever
inet6 ::1/128 scope host
valid_lft forever preferred_lft forever
2: eth0:
link/ether 00:50:56:8e:ae:b8 brd ff:ff:ff:ff:ff:ff
inet 173.209.49.67/29 brd 173.209.49.71 scope global eth0
valid_lft forever preferred_lft forever
inet 173.209.49.70/32 scope global eth0
valid_lft forever preferred_lft forever
inet6 fe80::250:56ff:fe8e:aeb8/64 scope link
valid_lft forever preferred_lft forever
3: eth1:
link/ether 00:50:56:8e:ed:ba brd ff:ff:ff:ff:ff:ff
inet 10.119.0.2/24 brd 10.119.0.255 scope global eth1
valid_lft forever preferred_lft forever
inet 10.119.0.10/32 scope global eth1
valid_lft forever preferred_lft forever
inet6 fe80::250:56ff:fe8e:edba/64 scope link
valid_lft forever preferred_lft forever
Verify that the floating IP addresses are now assigned to the second node. If so, LB2 is now active. The outwardly visible portion of the configuration has now been verified.
As a last quick check, confirm that the backends are well specified within keepalived:
root@lb1:/etc# ipvsadm
IP Virtual Server version 1.2.1 (size=4096)

Prot LocalAddress:Port Scheduler Flags

  -> RemoteAddress:Port           Forward Weight ActiveConn InActConn

TCP  173.209.49.70:http wrr

  -> 10.119.0.100:http            Masq    1      0          0

  -> 10.119.0.101:http            Masq    1      0          0

TCP  173.209.49.70:https sh

  -> 10.119.0.100:https           Masq    1      0          0

  -> 10.119.0.101:https           Masq    1      0          0
Provided all IP addresses show up as expected, keepalived should now work as expected.
Keepalived is now installed on your LVS cluster of two servers. Following the basic principles above, you can increase the size of your cluster if you wish to achieve even higher availability. Even with just two servers, your keepalived instance should make major downtime a thing of the past. If you found this article helpful, feel free to share it with your friends and let us know in the comments below!
Memached is an open-source distributed memory caching system commonly used to speed up dynamic websites by, as the name suggests, caching data objects in RAM. By caching the data in RAM, Memcached is able to reduce the number of times that the database or API must be read when performing operations on the website. Memcached is free to use and runs on Linux, OS X, and Microsoft Windows. Available under the Revised BSD license, it is possible to install the Memcached host-client infrastructure on your own Ubuntu 16 servers.
This tutorial will cover the process of PHP session saving and replication for Ubuntu 16 on multiple Memcached servers.
For completing this tutorial, you will need the following setup for a landscape with three servers running Ubuntu 16:
• 1 Small Server/Cloud Instance (to be used for HAProxy)
• 2 Web Servers/Cloud Instances (to run Apache, PHP and Memcached)
Kindly note that before proceeding, you are able to act as the root user on all three servers. All commands in this tutorial, unless otherwise specified, must be executed as the root user or using the command sudo (when possessing superuser privileges) to act as root.
Throughout the tutorial, we will refer to the servers in our landscape using the following information in the table below. This information includes the hostname for each server, its Public IP, LAN IP, and the services that should be running on it. Make sure to refer back to this table whenever you may need to confirm which server an instruction should be executed on for a quick overview of the landscape.
Server Hostname Public IP LAN IP Services Running

LB1 173.209.44.220 10.0.0.96 Haproxy

WEB1 173.209.44.221 10.0.0.97 Apache, PHP, Memcached

WEB2 173.209.44.230 10.0.0.98 Apache, PHP, Memcached
We will begin the process with the preparation steps that must be executed on all three servers. During this preparation, you will have to ensure that the system is up to date, the firewall is disabled, and the servers are running with the latest kernel.
As root, on each node execute the following command using the native Ubuntu package manager apt to update the local package index with the latest information concerning available packages and package versions:
apt-get update
After fetching the new package information, apt must then be used again in order to upgrade the installed packages with available updates:
apt-get upgrade
Your Ubuntu server comes equipped with a firewall known as the Uncomplicated Firewall, or ufw. While it is disabled by default, likely you have enabled it as some prior point. For this tutorial, we will need to disable the firewall. This is done easily with the ufw command:
ufw disable
To know whether the kernel version will need to be updated, check the current version of the kernel using the uname command:
uname -r
The output of this command will look somewhat like the following (depending on which version is installed):
4.4.0-22-generic
The latest version at this time of writing is 4.7. If you have any other version, you can update your kernel by downloading the required packages from the Ubuntu website. First, make sure you have the web utility wget, which will allow you to download files. Install wget if you do not have it using apt:
apt-get install

apt-get upgrade
Finally, reboot the server for the changes to take into effect.
reboot
Verify that you are now running the new kernel version using uname a second time:
uname -r
Don’t forget to run all the steps in this section on all three servers before proceeding to the next section.
This section will concern itself with the configuration of the node that you will use for your HAProxy load-balancer. HAProxy is a free open-source software that provides load-balancing, high-availability, and proxying services for both TCP and HTTP applications. For the purposes of this guide, we will provide a basic HAProxy configuration that should be suitable out of the box for the majority of applications.
On your dedicated HAProxy server, begin by installing the HAProxy package as root:
apt-get install haproxy
After the package finishes installing, you will need to enable HAProxy with the following command as it is disabled by default:
sed -i "s/ENABLED=0/ENABLED=1/g" /etc/default/haproxy
You can start the HAProxy service after enabling it by executing:
/etc/init.d/haproxy start
However, you must complete some further configuration steps for HAProxy before you can use it. Open up the configuration file haproxy.cfg in the text editor vi:
vi /etc/haproxy/haproxy.cfg
Remove all the contents from the open configuration file. Next, insert the following code to create the new configuration file. This will add a listener on port 80 on localhost for HTTP and port 443 for HTTPS:
global

log 127.0.0.1 local2

chroot /var/lib/haproxy

pidfile /var/run/haproxy.pid

maxconn 4096

user haproxy

group haproxy

daemon

stats socket /var/run/haproxy.cmd

defaults

mode http

log global

option httplog

option dontlognull

option httpclose

option forwardfor except 127.0.0.0/8

option redispatch

retries 3

timeout http-request 10s

timeout queue 1m

timeout connect 10s

timeout client 45s

timeout server 45s

timeout check 10s

maxconn 4096

listen http :80

mode http

balance roundrobin

option forwardfor

option httpclose

option http-server-close

timeout http-keep-alive 3000

http-request del-header Proxy

server web1 10.0.0.94:80 weight 1 check inter 3000 rise 2 fall 1

server web2 10.0.0.95:80 weight 1 check inter 3000 rise 2 fall 1
Save and close the configuration file once you are done editing it. Restart HAProxy for your changes to take into effect:
/etc/init.d/haproxy restart
To enable the HAProxy service to start on boot (recommended), use the update-rc.de command as shown:
update-rc.d haproxy defaults
You can check the status of HAProxy at any time to verify it is working by checking the output of the following:
service haproxy status
Once you have set up your dedicated HAProxy node, you will now have to configure your two remaining web servers. The steps in this section will need to be executed twice, once on each server.
Begin by installing the packages for the Apache web server, PHP, and Memcached using apt. We will also install some PHP extensions as well the PHP-Memcache extension. This package provides integration functions for Memcached into your applications as well as activating Memcached support in other existing applications. Be careful when typing the name of the PHP-Memcache extension. There is another library that is not suitable for the purposes of this guide that is named php-memcached. Double check that you are instead typing the name of the extension we need, which is php-memcache (without the letter “d”). This package is lighter and has less dependencies than php-memcached.
apt-get -y install apache2 php libapache2-mod-php php-mcrypt memcached php-memcache libmemcached-devel php-pecl-memcache httpd
When the installation of the packages completes, you will need to configure the Apache web server, particularly the ServerName directive. You can do this by opening the following file using the text editor vi:
vi /etc/httpd/conf/httpd.conf
Modify this file to include the following line with the a server name of your choice, which can represent the site or infrastructure. This will be used in order to easily and quickly identify the server.
ServerName mysite.com
Save and close the file to proceed. Next, you will need to verify that PHP has been properly installed and that the Memcached library is present. You can do this by checking the output of the following command, which will call PHP with the -m option to show compiled modules, before passing the output to grep using a pipe (“|”). grep will search the output it receives for the term “memcache” and return successfully if it is found.
php -m | grep memcache
After verifying that PHP and PHP-Memcache have been installed, the Memcached module will need to be configured in order to allow distributed PHP sessions. Open the memcache.ini file in the text editor vi:
vi /etc/php/7.0/mods-available/memcache.ini
You will need to again remove everything that is already in this file by default. Replace the contents with the following:
extension=memcache.so

memcache.maxreclevel=0

memcache.maxfiles=0

memcache.archivememlim=0

memcache.maxfilesize=0

memcache.maxratio=0

memcache.hash_strategy = consistent

memcache.allow_failover = 1

memcache.session_redundancy = 3
Be careful that the memcache.session_redundancy parameter has a value that corresponds to one plus the sum of your configured Memcached instances. This means that if you have two Memcached servers, you will need to enter 3 as the value. Interestingly enough, this PHP bug has never been fixed despite being widely known.
With the Memcached configuration complete for now, we will move on to configuring PHP to store its user sessions. Open the php.ini file for editing with vi:
vi /etc/php.ini
Search this file for the line session.save_handler = files. When you find this line, delete it. In the same space as the deleted line was previously, insert the following two lines:
session.save_handler = memcache

session.save_path = "tcp://10.0.0.94:11211, tcp://10.0.0.95:11211"
You will also need to repeat this process for the CLI-related php.ini file. Open the file for editing, delete the session.save_handler = files line, and replace it with the two lines specified above. This will be useful if you have cron (a task scheduler) jobs running PHP scripts that require session access.
Please ensure that you have repeated the above steps for the two servers before proceeding to the following section.
Both of the Memcached servers will need to be configured in order to allow Memcached to listed on their private LAN IPs. You will also need to modify the amount of memory that is allocated to each instance in this section.
The goal of this guide will be to set both the servers to accept 1024 connections coming from Apache processes with a cache size of 256MB per server. Such a cache size is large enough in order to store thousands of PHP sessions in RAM and works for most applications. Note that for a heavy usage scenario, it will be necessary to increase the size.
To begin, open the Memcached configuration file with vi:
vi /etc/sysconfig/memcached
You will need to modify the file contents so that they match the following. Note that the IP listed must be the respective machine’s LAN IP that you are currently working on. Remember to change it when you repeat these steps for the second server.
PORT="11211"

USER="memcached"

MAXCONN="1024"

CACHESIZE="256"

OPTIONS="-l 10.0.0.95"
Restart Memcached and Apache to accept the new changes:
systemctl restart httpd.service

systemctl restart memcached.service
To enable these two services to run on boot, which is recommended, execute additionally the following lines:
systemctl enable httpd.service

systemctl enable memcached.service
Remember again that all of the above steps must be executed on both servers in order for Memcached to run before proceeding.
To ensure that our landscape has been successfully configured to the correct state, we will place a script on both the web servers that will help test the sessions and load balancing. More particularly, we will need to ensure that sessions are being created in the first place, and then that the sessions are being balanced between the two web servers. All the steps in this section must be executed on both the servers.
First, navigate to the default Apache webroot located in /var/www/html. This repository is the source of what is being hosted on the server, and where we will create the test script. Use the following commands to change directories using cd and create the script file:
cd /var/www/html

vi session.php
With the file open for editing in the text editor vi, insert the following code to form the session PHP script:
<?php

header('Content-Type: text/plain');

session_start();

if(!isset($_SESSION['visit']))

{

echo "Welcome from GloboTech! Thank you for visiting this server.\n";

$_SESSION['visit'] = 0;

}

else

echo "You have visited this server ".$_SESSION['visit'] . " times. \n";

$_SESSION['visit']++;

echo "Server IP: ".$_SERVER['SERVER_ADDR'] . "\n";

echo "Client IP: ".$_SERVER['REMOTE_ADDR'] . "\n";

print_r($_COOKIE);

?>
After saving and closing the file, we now need to visit this script using the load balancer IP address. By using the load balancer IP address (the HAProxy server), some visits will end up on the WEB1 server, while others will access the WEB2 server instead. Open the script at the following URL in your browser:
http://173.209.44.220/session.php
When the page is open, the output should look as follows:
Welcome from GloboTech! Thank you for visiting this server.

This server has seen you 30 times.

Server IP: 10.0.0.95

Client IP: 10.0.0.93

Array

(

[PHPSESSID] => aeoj7s47i7ke2l0fr7b534v684

)
Check the session ID that is output to ensure that is remains the same for each load, and that the total amount of visits increases by one upon refresh as it should. Keep refreshing until you end up on the other web server, at which point the visitor counter should still be increasing and the PHPSESSID should be the same. The output should look like the following sample:
Welcome from GloboTech! Thank you for visiting this server.

This server has seen you 31 times.

Server IP: 10.0.0.94

Client IP: 10.0.0.93

Array

(

[PHPSESSID] => aeoj7s47i7ke2l0fr7b534v684

)
If all looks correct, we can now confirm that the session is persisting across different web servers. With a second browser open to the same page, refresh a couple of times so that a session ID is created.
Switch to the load balancer node. To test the Memcached servers, you will need to install the additional netcat utility that will allow you to query the servers for their statistics. Install it with:
apt-get install netcat
Use netcat to see the statistics of any given server by executing:
echo 'stats' | nc 10.0.0.94 11211
This will check the statistics of the first web server. The output should look as follows:
STAT pid 28882

STAT uptime 39

STAT time 1471052900

STAT version 1.4.15

STAT libevent 2.0.21-stable

STAT pointer_size 64

STAT rusage_user 0.016870

STAT rusage_system 0.020244

STAT curr_connections 5

STAT total_connections 104

STAT connection_structures 6

STAT reserved_fds 20

STAT cmd_get 1

STAT cmd_set 195

STAT cmd_flush 0

STAT cmd_touch 0

STAT get_hits 0

STAT get_misses 1

STAT delete_misses 0

STAT delete_hits 0

STAT incr_misses 1

STAT incr_hits 0

STAT decr_misses 0

STAT decr_hits 0

STAT cas_misses 0

STAT cas_hits 0

STAT cas_badval 0

STAT touch_hits 0

STAT touch_misses 0

STAT auth_cmds 0

STAT auth_errors 0

STAT bytes_read 10212

STAT bytes_written 2598

STAT limit_maxbytes 268435456

STAT accepting_conns 1

STAT listen_disabled_num 0

STAT threads 4

STAT conn_yields 0

STAT hash_power_level 16

STAT hash_bytes 524288

STAT hash_is_expanding 0

STAT bytes 202

STAT curr_items 2

STAT total_items 195

STAT expired_unfetched 0

STAT evicted_unfetched 0

STAT evictions 0

STAT reclaimed 0

END
Next, you can execute the same command as above in order to check the statistics of the second server:
echo 'stats' | nc 10.0.0.95 11211
This will also provide output like the following:
STAT pid 28117

STAT uptime 50

STAT time 1471052915

STAT version 1.4.15

STAT libevent 2.0.21-stable

STAT pointer_size 64

STAT rusage_user 0.013569

STAT rusage_system 0.039201

STAT curr_connections 5

STAT total_connections 103

STAT connection_structures 6

STAT reserved_fds 20

STAT cmd_get 97

STAT cmd_set 291

STAT cmd_flush 0

STAT cmd_touch 0

STAT get_hits 96

STAT get_misses 1

STAT delete_misses 0

STAT delete_hits 0

STAT incr_misses 1

STAT incr_hits 96

STAT decr_misses 0

STAT decr_hits 0

STAT cas_misses 0

STAT cas_hits 0

STAT cas_badval 0

STAT touch_hits 0

STAT touch_misses 0

STAT auth_cmds 0

STAT auth_errors 0

STAT bytes_read 21822

STAT bytes_written 8479

STAT limit_maxbytes 268435456

STAT accepting_conns 1

STAT listen_disabled_num 0

STAT threads 4

STAT conn_yields 0

STAT hash_power_level 16

STAT hash_bytes 524288

STAT hash_is_expanding 0

STAT bytes 202

STAT curr_items 2

STAT total_items 291

STAT expired_unfetched 0

STAT evicted_unfetched 0

STAT evictions 0

STAT reclaimed 0

END
These statistics for the servers show that activity has occurred on this instance, as expected. Both Memcached servers should have had activity and stored content. Still, it is important to note that while Memcached does utilize replication, it is not 100% fail proof. This means that if one of the two Memcached servers were to shut down, for any reason, we would not be able to guarantee that both servers did in fact contain the same exact sessions. However, if such a case were to occur, it is no cause for worry as the affected users would only need to login again to their accounts.
To test the failover, shutdown Memcached on any of the two web servers (but not both!) with the command:
systemctl stop memcached.service
Refresh the browser page you have open and observe the behavior. Does the visit counter continue to increase when you refresh the page? If so, then the failover setup is working as it should.
If the counter did not increase, but rather stayed the same, we will need to make an additional test to confirm that replication is working correctly. Restart Memcached on the instance you stopped it on:
systemctl restart memcached.service
Now, you will have to go onto the other server and kill the Memcached instance there instead. On the second server (web1 for example), kill Memcached using:
systemctl stop memcached.service
Go to your webpage again. If the counter increases upon refresh, then you can safely confirm that your Memcached PHP session setup works correctly with both failover and replication.
Congratulations! While setting up PHP session replication on multiple Memcached Ubuntu 16 servers is a lengthy process, it pays off in terms of the speed boost it gives to dynamic web applications you may be running such as WordPress or Moodle. Share this tutorial with your friends if you found it useful!
Backups are a critical facet of any IT infrastructure for many reasons. Unfortunately, there are many ways to take a good backup, and it is not safe or efficient to simply copy your server’s content to a new location. Further, some services cannot be backed up simply by copying their data, and must instead use custom logic to ensure that their persistent storage is securely snapshotted. To address this complex use case, a variety of server backup tools have been created. R1Soft is a premier solution targeted at multi-tenant hosting environments. Hosting environments are among the most challenging to back up, as it is impossible to predict the individual backup needs for every service being run by every user. Further, backups must be coordinated in an off-site location, and centralized manipulation and monitoring is essential. Read on to learn how to set up an R1soft agent on an Ubuntu 14.04 LTS server.
To complete this guide, you will need the following:
• 1 Node (Cloud Server or Dedicated Servers) with Ubuntu 14 installed.
• All commands should be run as the root user
The R1Soft packages are shipped in their own Ubuntu package repository, making installation and upgrades a snap. Here we add this repository so the packages can be installed via apt-get.
echo "deb http://repo.r1soft.com/apt stable main" > /etc/apt/sources.list.d/r1soft.list

wget http://repo.r1soft.com/r1soft.asc

apt-key add r1soft.asc
With the new repository in place, Ubuntu’s package cache must be updated so the new packages can be found.
apt-get update
Next we install the package for the R1Soft backup agent.
apt-get install r1soft-cdp-enterprise-agent
You’ll now need the R1Soft key from your backup manager. In this example, we use the IP address 192.168.10.10. Substitute the appropriate IP from your infrastructure in the following command:
r1soft-setup --get-key http://192.168.10.10
Here we’ll install the R1Soft driver for your distribution. In this case, you’ll use the hcp driver.
r1soft-setup --get-module
With all the necessary pieces in place, we’ll need to restart the R1Soft agent so your changes are detected.
/etc/init.d/cdp-agent restart
Your Ubuntu server is now running the R1Soft agent. You can now integrate it into your larger R1Soft infrastructure for reliable, centralized backups. Share this article with anyone needing a good backup solution for their servers. Backups are important, and anyone not performing them regularly will eventually regret not having done so. Don’t forget, feel free to share this tutorial with others who may be interested if you found it useful!
Windows Server 2012 provides the option of mirrored volumes to improve data protection and recovery. A mirrored volume is simply a copy of an existing volume, termed a ‘shadow volume’. Accordingly, using mirrored volumes results in half the disk capacity of the volumes in question, but with the benefit of there being a copy of your data in the case that the original volume becomes corrupted.
We’ve put together this simple guide on mirrored volumes that will walk you through setup.

In order to follow the steps of this guide, this is what you’ll need:
• Two storage devices of the same size . It’s good practice to use the same device model if you’re using physical hardware as opposed to virtualization.
• Root access to your server (Cloud Server or Dedicated Server) is required.
The first step that you’ll need to take is to open an administrative session on your Windows 2012 server. In order to do this, first click on the Start button. Next, type compmgmt.msc into the input form and execute it.
This command should open the Computer Management window. Within this window, browse to Storage, and then Disk Management. You’ll see before you a Disk 0 partition. Right click on this and then click on the “Add mirror…” option in the menu.
This will open up a dialog box. Select which disk you’d like to use to mirror that partition, and then click the “Add Mirror” button.
Warning! It's necessary that Windows converts the storage device to which you're adding the mirrored volume to dynamic disk. This is necessary for processing the modifications.

This will unfortunately break dual boot if you have more than one operating system on your server.
Before conversion, a dialog box will show up to warn you that the two disks will be converted to dynamic disk, unless they were configured as dynamic already. Upon clicking “Yes”, Windows will create the shadow volume.
Note that the shadow volume will be the same size as the original one. While the data is being copied to the new volume, you’ll see a small warning sign next to the new volume.
Now that you know how to make a mirrored volume in Server 2012, disk failure is no longer something to fear. Enjoy the improved recovery times and convenience that comes with savvy mirrored volume usage.
cPanel is one of the most popular web hosting control panels out there, being commonly used by shared hosting webmasters who want a safe, secure solution for their administrators to log in and their users to set up their sites.
If you’re an experienced webmaster, then you doubtlessly are familiar with the importance of regular backups. Luckily, using cPanel you can easily set up backups and schedule them to your liking. We’ve compiled this guide to show you the steps for arranging your regular backups.
In order to follow this guide, make sure you have prepared:
• A server (Cloud Server or Dedicated Server) with cPanel
• A secondary drive or separate server on which to store your backup. Note: Never store backups on your primary drive!
• Root Access
The very first step is to enable the backups in your configuration. To do this, log into WHM, where the setting is stored in “Home > Backup > Backup Configuration”. Here, simply change “Backup Status” to “Enable” to enable backups.
There are a number of backup types that you may choose from:
• Compressed – This option will create a compressed archive. The compression takes more time and use more system resources than uncompressed, but will also take up less disk space.
• Uncompressed – As you can guess, this option Will create an uncompressed archive. This is a faster option that’s easier on your system, but it’ll take up more disk space.
• Incremental – This also creates an uncompressed archive. However, at every backup it copies and deletes only the files that changed. One caveat is that using this method, you cannot restore days in the past, as files in the backup will be constantly overwritten as they change.
The “Maximum destination timeout” and “Maximum restore timeout” settings can be modified as your needs demand. The default settings should be suitable for most users.
Now enter the “Scheduling and Retention” menu. Here you can select your preferences as to when and how often to perform automated backups. Change the “Retain Daily Backup” value if you want to have more than 1 day of data retention.
In the “Files” menu, you can select your preferences on what data to backup. The “Backup System Files” option, when selected, will make server disaster recovery easier, as it will arrange for all the server configuration settings to be saved. In the case that your OS must be reinstalled, it will be much easier to restore your server to its previous state.
The “Databases” menu contains options for determining how you want your databases to be saved.
Next, in the “Configure Backup Directory” menu you can tell WHM which path you’d like to use for backup storage. The default is /backup. We suggest leaving this at the default setting. Keep the “Retain backups in the default backup directory” option enabled in order to make sure that no backup get deleted from you server in case the remote backup server fails to receive the backup.
WHM will also let you copy your backup to a second location. A good habit for every webmaster is to keep a copy of your backup on an entirely separate server. Barring that, a secondary drive can be suitable for storing backups. This is to protect your backups in the event that a hard drive or server fails catastrophically.
Once you have completed the above steps, make sure to click “Save Configuration” so that WHM will remember your settings.
A quick note: cPanel/WHM offers 2 ways to do backup. The way we showed you was the “Backup Configuration” menu, but you can also use the “Legacy Backup Configuration”. We strongly suggest not using the latter option, as cPanel/WHM plans to remove it in a future release.
Now that you know how to set up backups using cPanel, there’s no excuse for not making regular backups. It will save you a lot of time when a server fails, and your users will thank you for being able to get their systems back up and running with as little downtime as possible. If you found this article helpful, feel free to share it with your friends and let us know in the comments below!
The R1Soft Server Backup Manager is a backup application for Linux and Windows machines that runs nearly continuously and is developed by R1Soft. This application allows users to schedule disk-based backups of their server that essentially create a virtual disk image, which is then stored online. New agents, which are servers to be backed up, are easily added using the Backup Manager and allow you to have full control of your system in the case that you need to restore it to the original server, or even another server.
This tutorial will show you how to setup your CentOS 7 server with an R1Soft Agent so that you can start taking advantage of the security of near-continuous backups.
To complete this guide, you will need the following:
• 1 Node (Cloud Server or Dedicated Servers) with CentOS 7 installed.
• All commands should be run as the root user
Before you can install the R1Soft Backup Agent on your server, you must go through several steps to ensure compatibility.
First, check the current kernel version using the uname command. This command is extremely useful as it provides basic information concerning the software and hardware of your server. Remember this version number for later, we will need it when compiling the R1Soft module. We can use the uname command to check the current kernel version as such:
uname -r
Next, you must add the R1Soft repository as a yum repository. yum, short for Yellowdog Updater Modified, and is the primary CentOS 7 (and all other RedHat-based distros) package installer and manager. To be able to install packages that are not from the built-in Linux package repository, you must have the necessary repository for where the package is located configured for yum to use. For R1Soft, we will configure yum to possess the correct repository by adding its information to a file in the /etc/yum.repos.d directory. Using the text editor nano, we can create a new file named r1soft.repo in this directory with the following command:
nano -w /etc/yum.repos.d/r1soft.repo
With the r1soft.repo file open, enter the following configuration details as they appear below. These details tell yum where to look for the R1Soft Server Backup Manager package so that we can install it:
[r1soft]

name=R1Soft Repository Server

baseurl=http://repo.r1soft.com/yum/stable/$basearch/

enabled=1

gpgcheck=0
Save and close the file. To double check that the file looks as it should, use the command cat to print the contents of the file to terminal:
cat /etc/yum.repos.d/r1soft.repo
Be careful at this step. The contents of the r1soft.repo file must look exactly as specified above before you can proceed so that the package can be installed! If everything looks as it should, you can now install the R1Soft Server BackupManager package, known as serverbackup-enterprise-agent, using yum:
yum install serverbackup-enterprise-agent
Enter y when prompted for “yes” during the installation process. When it completes, it will output some basic information about the installation as well as how to assign a username and password to the Idera Server Backup Manager. This manager module can then be used to compile the R1Soft Agent to run on your CentOS 7 server, as we will show in the next stops.
The installed R1Soft Server Backup Device Driver is a loadable Linux kernel module. As a side note, loadable modules must be enabled as a kernel feature to be able to use the Server Backup Device Driver, however this is standard on all popular Linux distributions such as CentOS 7. To compile the module from source, you can use the kernel headers with the serverbackup-setup command to obtain all the information needed to compile modules from your kernel. To do this, your CentOS 7 server must have internet connectivity to the R1Soft host at krnlbld.r1soft.com, TCP port (HTTPS) 443. You can easily and quickly test your connection to make sure it is working with this command:
serverbackup-setup --test-connection
If you see the message “Connected successfully to krnlbld.r1soft.com,” then you can proceed. If not, verify your internet settings. Next, install the kernel-devel package if you do not have it. This package allows you to compile a module, which is also known as a kernel driver. Enter y for “yes” at the prompt.
yum install kernel-devel
If you do have the package already, double check its version using yum:
yum info kernel-devel
The version of the kernel-devel package must match your kernel version from the first step in order to be able to compile the module correctly. To install the correct version if your versions do not match, use this command as it will install the latest version matching your kernel automatically:
yum install "kernel-devel-uname-r == $(uname -r)"
Next, run the following command using serverbackup-setup to build the kernel module for R1Soft:
serverbackup-setup --get-module
The output should contain text such as the following if all went correctly:
Saving kernel module to ‘/lib/modules/r1soft/hcpdriver-cki-2.6.32-279.14.1.el6.i686.ko’
Kernel module is now installed.
Use ‘/etc/init.d/cdp-agent restart’ to load the new driver
For reasons of security, the R1Soft Backup Agent is configured to only accept connections from known Backup Managers. You can authorize a Backup Manager to the Backup Agent by adding the BackUp Manager public key to the configuration of the Agent. To download the key using the serverbackup-setup tool, replace the text “Manager_URL” with the information of your manager:
serverbackup-setup --get-key Manager_URL
For example, you may write something like this if you want to add a Backup Manager with the IP address 192.168.0.200 to the list of Backup Managers known to the Backup Agent:
serverbackup-setup --get-key http://192.168.0.200
You can then check that the key has been added correctly using the command:
serverbackup-setup --list-keys
Make sure that the key is in the list output from above. Next, to restart the newly installed driver, use the command suggested during the compilation process:
/etc/init.d/cdp-agent restart
Finally, for the sake of convenience, enable the backup service to start on boot:
systemctl enable cdp-agent
Having completed this tutorial, your CentOS 7 server is now protected from unexpected events thanks to the stability guaranteed by the almost-constant backups thanks to R1Soft. For more information about how the agent works, you can look on the R1Soft wiki online. If this guide on installing R1Soft on your machine was useful, why not share it with your friends?