 Call us at 1-888-GTCOMM1
-

- Dedicated Hosting
- Cloud hosting
- Services
- Support
- Learning Center
- Referral Program
- Français
-
Why globotech
- Log in
Short for Internet Protocol address, an IP address is a number that is assigned to every device on a network, allowing the device to communicate inside and outside the network while providing identification. There are different types of IP addresses. The most commonly used are static and dynamic addresses.
Static IP addresses mean the IP address for the specific device does not change when prompted by the client/server protocols; static IP addresses are named as such because they remain the same. Conversely, dynamic IP addresses change when prompted by the client/server protocol.
Static IP addresses are useful when a device on the network needs to be assigned a consistent address that data can be sent to, without concern about the address changing or losing data transmission.
In a previous tutorial, we’ve covered how to assign a static IP address to your node running Windows Server 2016. If you’re looking to assign another static IP, this tutorial will help guide you through the process.
To start assigning an additional static IP on your Windows Server 2016 instance, you will need a node that’s either on a Dedicated or a Cloud Server. You can choose whichever node type you’re more comfortable with or have available.
When you’ve selected your node, make sure to update the Windows Server 2016 software, as well as any hardware required for your node. Additionally, make sure you have administrative access to your node, you will need this to set the additional static IP address.
The steps to assign an additional static IP address are very similar to assigning the first static IP address, though the process will not work if there is not a static IP address already in place.
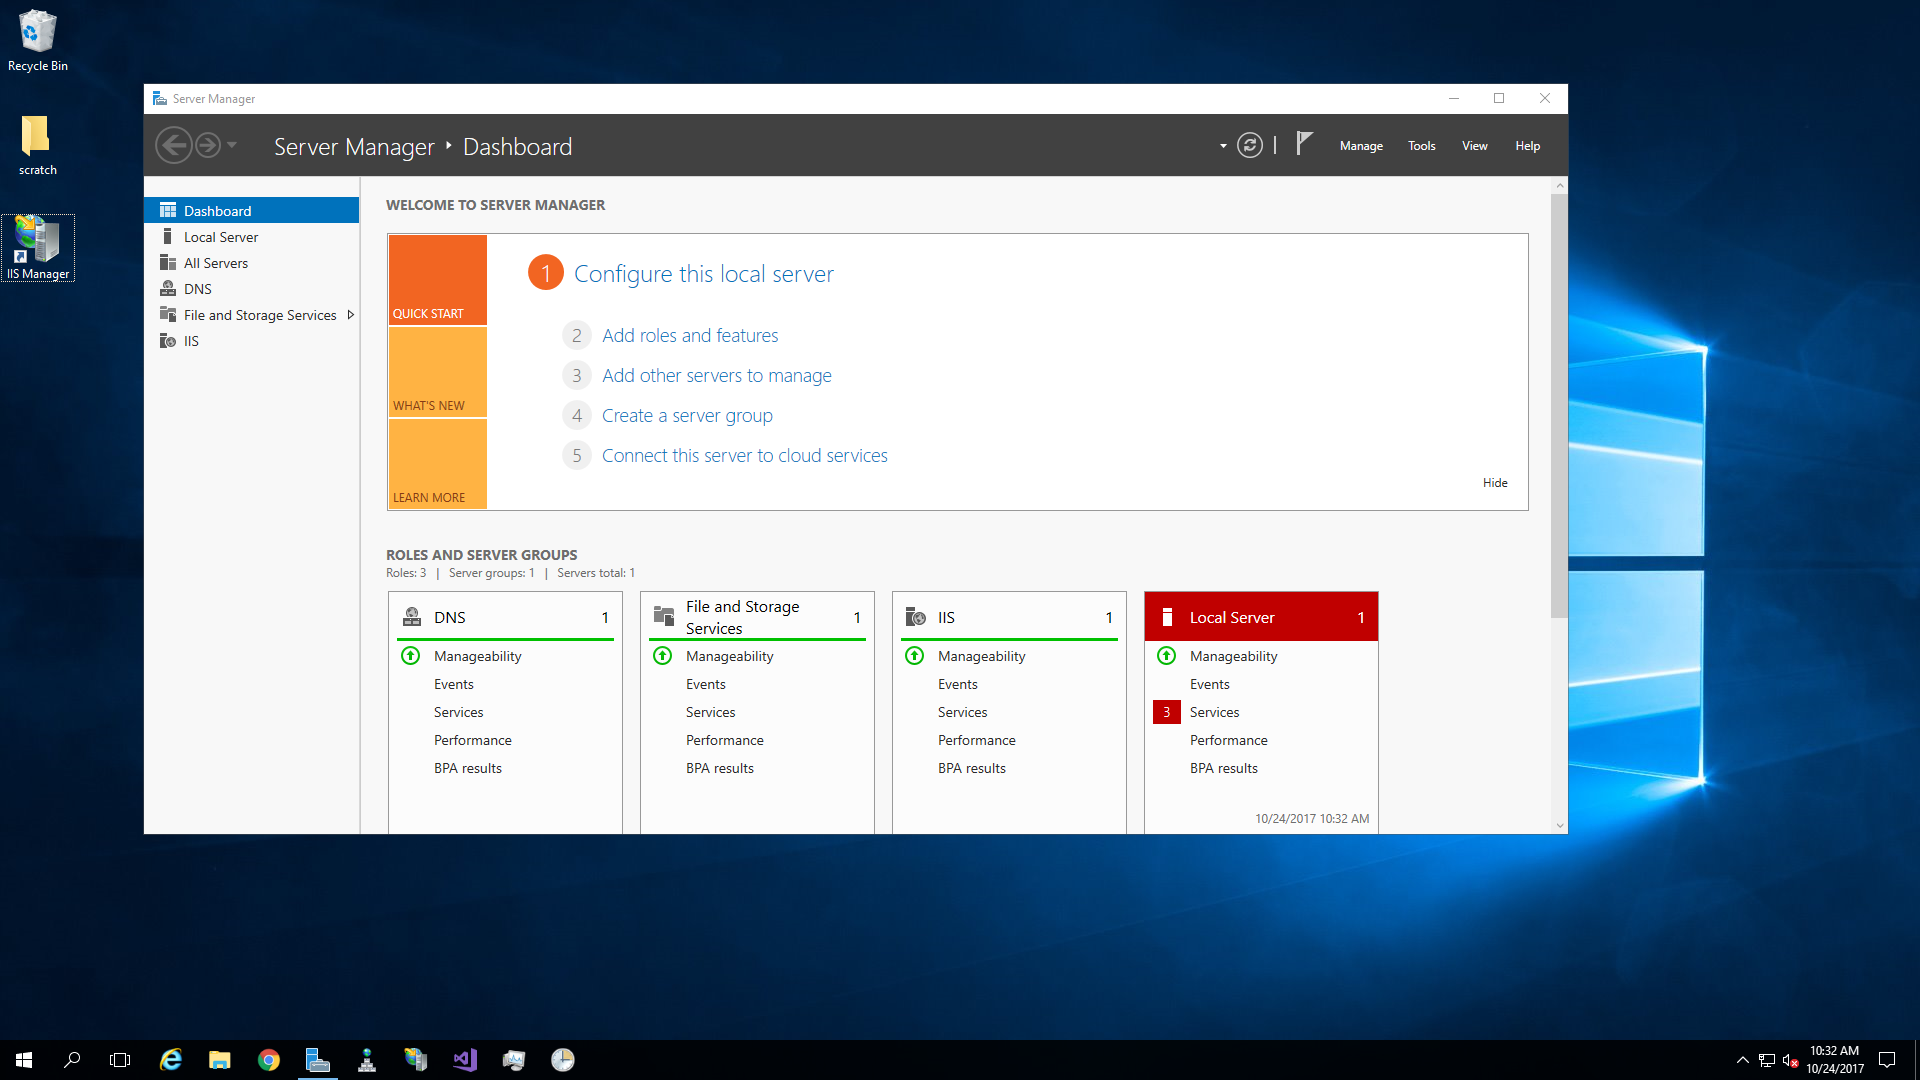
Your first step to assigning this additional address is connecting to your node, which can happen through the console or a remote desktop connection.
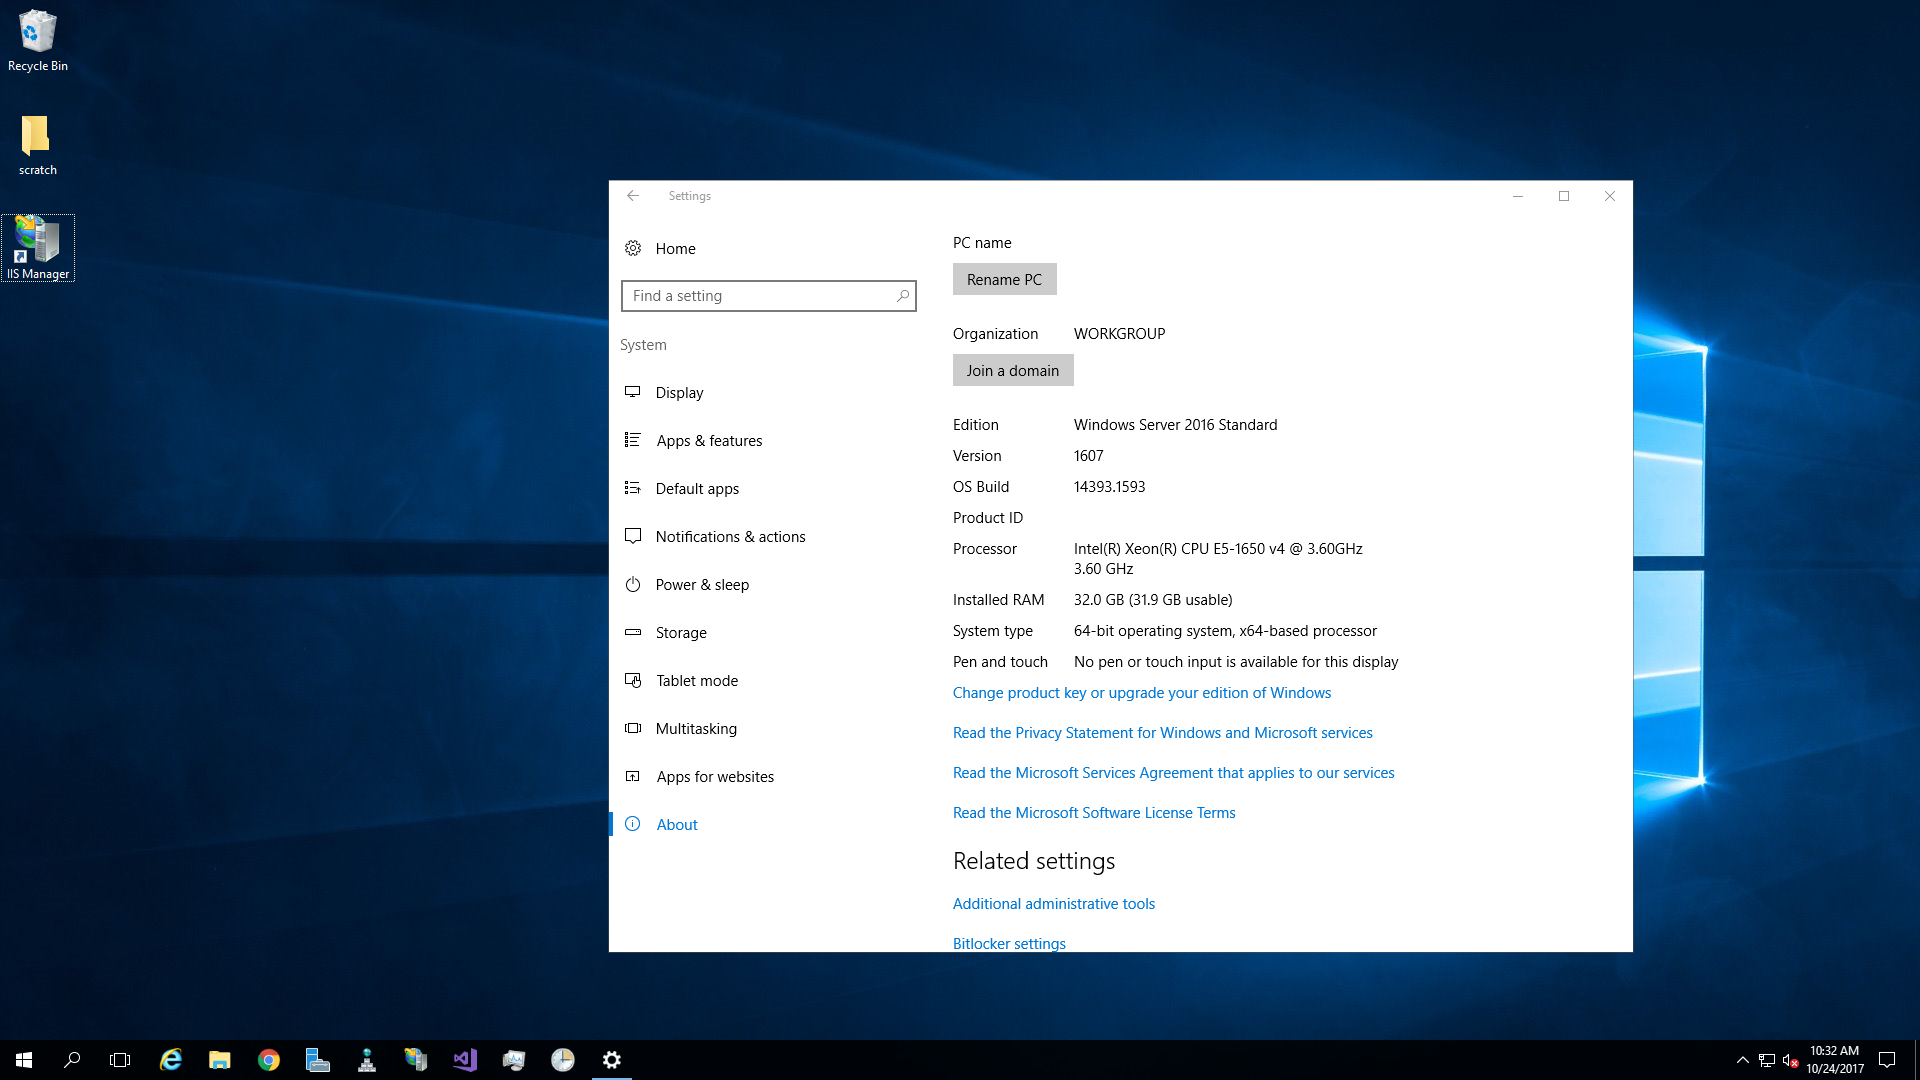
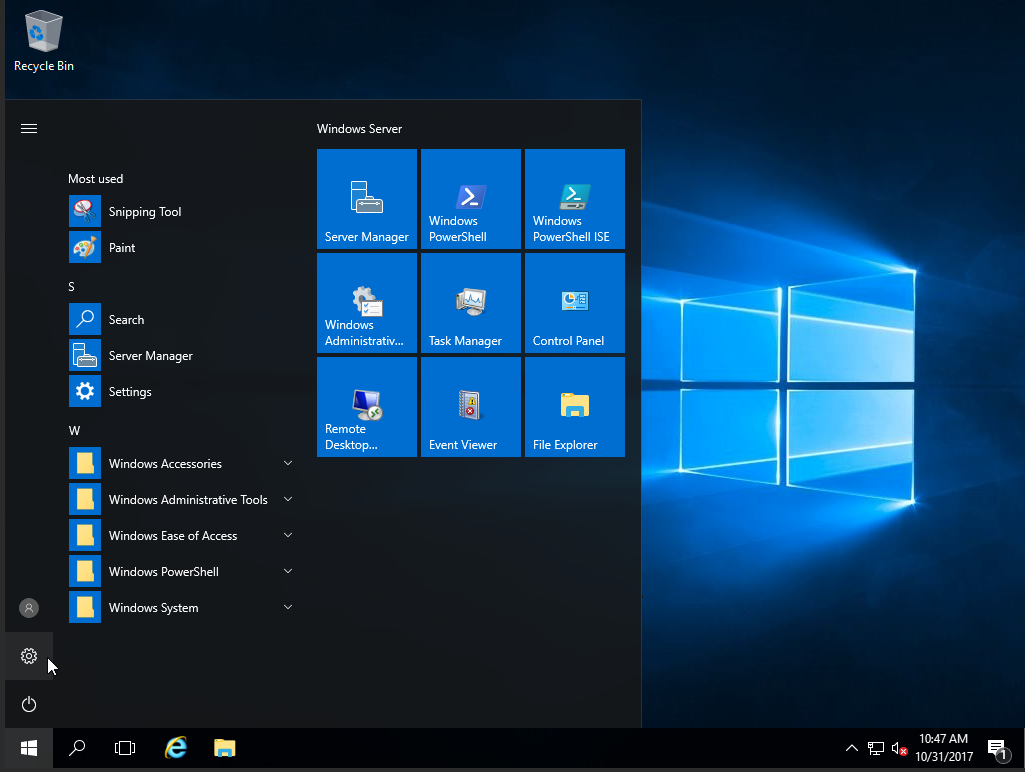
Once the console or remote connection is open, you will need to open the settings:

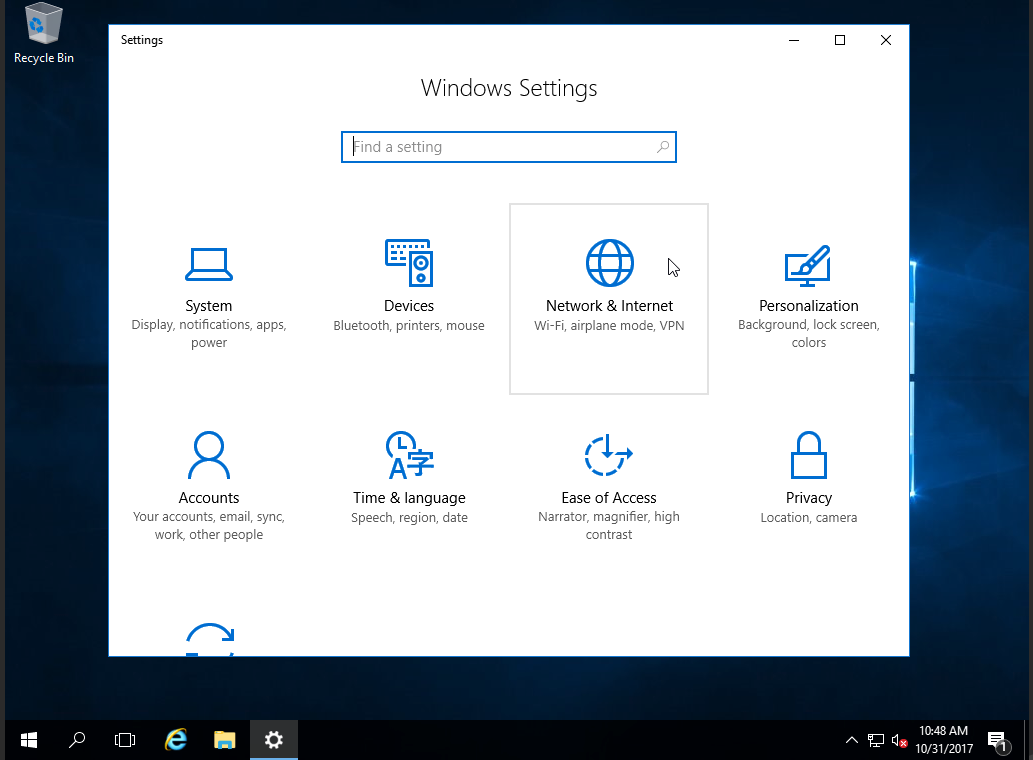
In the settings option, select network and internet settings:

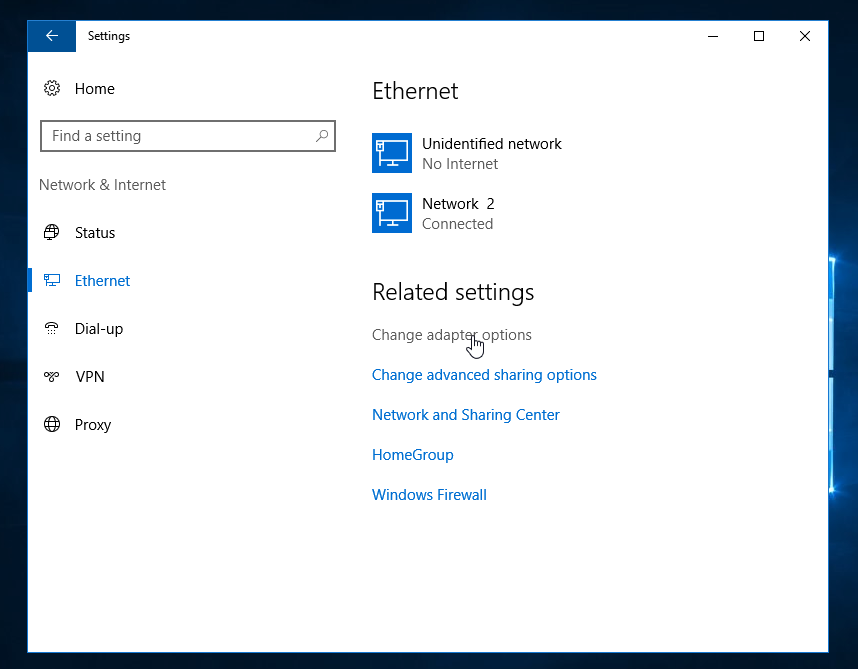
When these settings open, you will need to choose the Ethernet option:
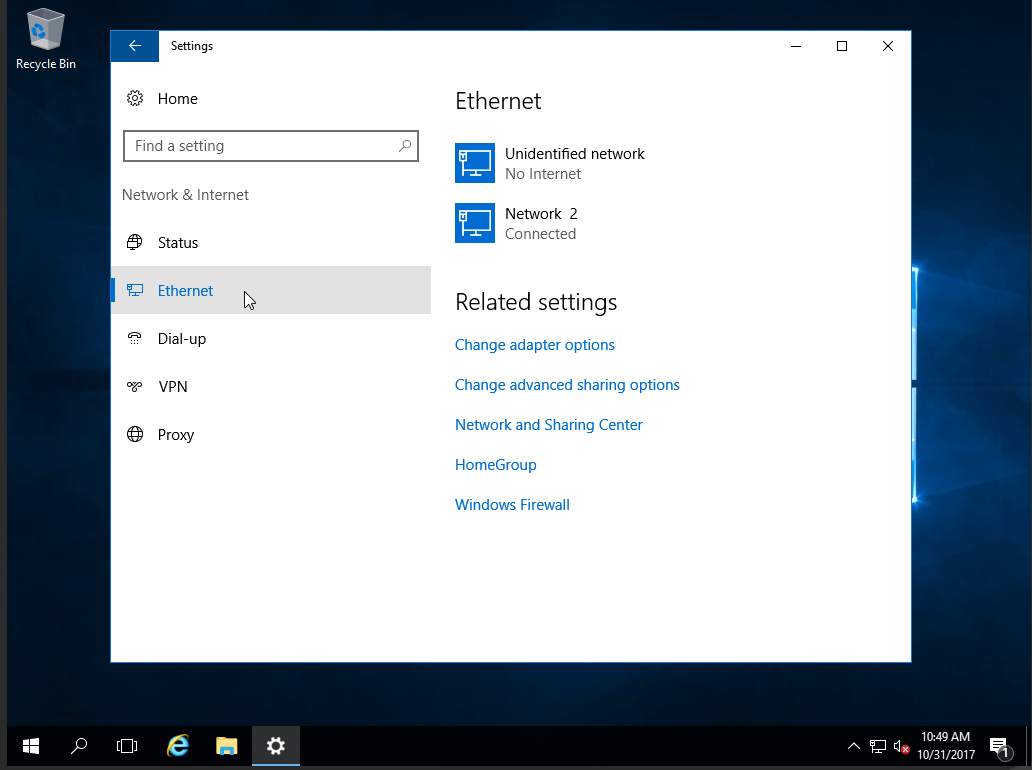
After choosing Ethernet, select the Change Adapter option:

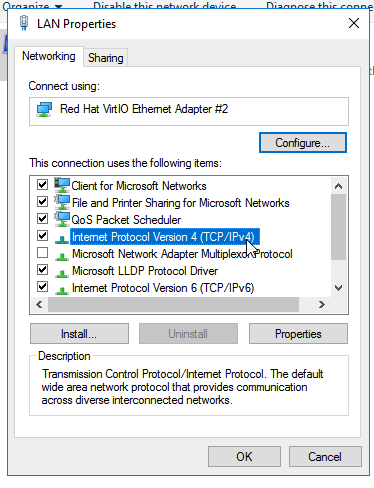
When the options load, right click on the interface you’re configuring (this is usually the network connection you’re configuring) and then choose properties:
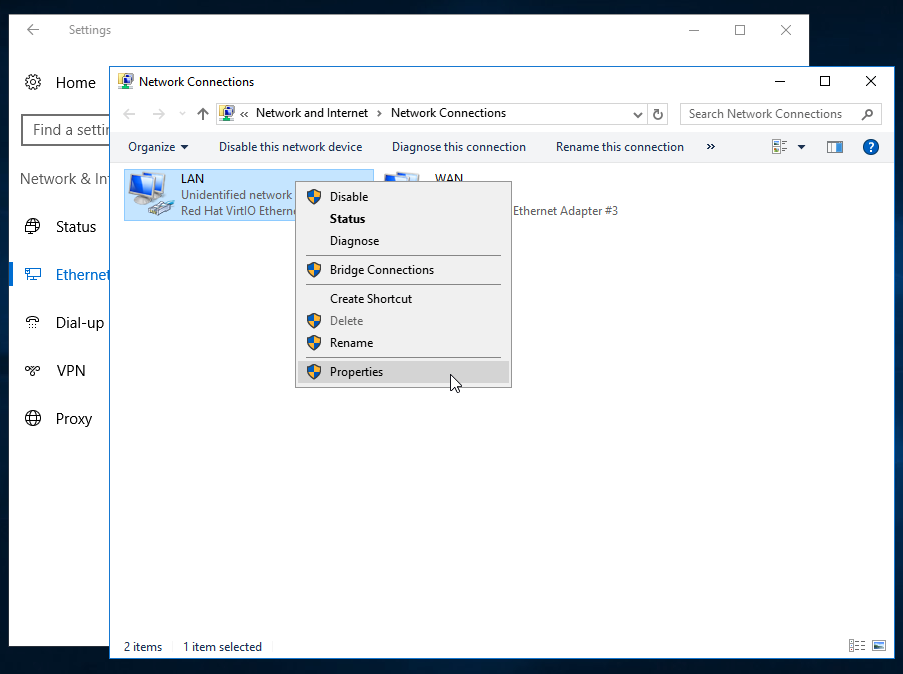
Now that you’ve selected the correct interface, choose Internet Protocol Version 4 (TCP/IPv4) and click on properties again:

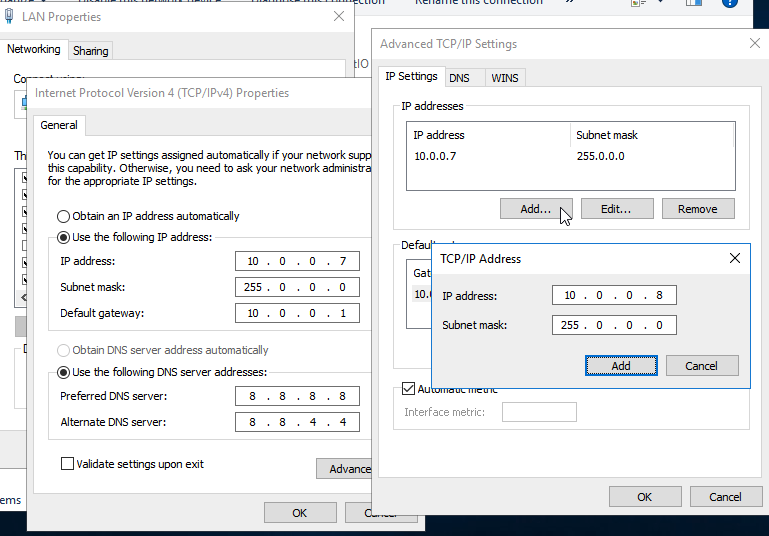
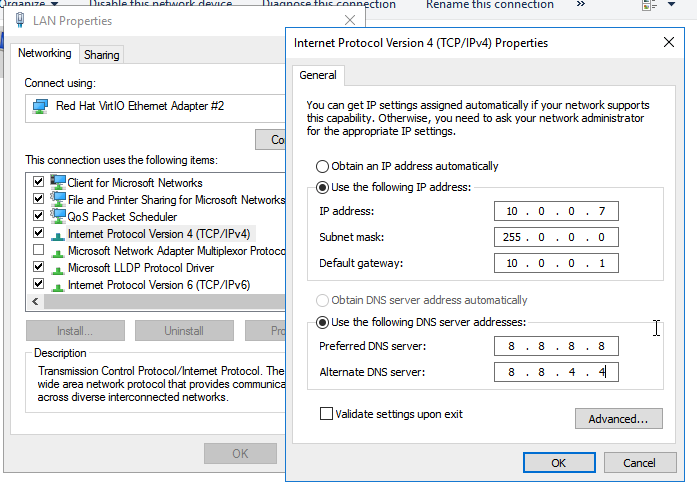
This will prompt you to fill in some information, including the Network Mask, Default Gateway, and the DNS IP. However, it’s important to have the first static IP address in place; otherwise, the options will not be present:

After filling in the required information, click on the advanced option. Inside the IP section of the new window, add your additional static IP address:
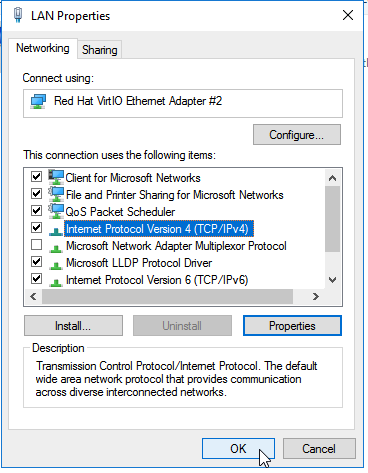
Click OK after completing this information, as well as OK on the next two windows.
Congratulations, you’ve successfully given your node running Windows Server 2016 an additional static IP address. Your node will no longer be provided a dynamic address whenever prompted by the client/server protocols. If you found this guide useful during the setup of your additional address, please share it with other users going through the same process.
Windows Server is an operating system created by Microsoft and created to run servers. Servers are specialized computers that usually operate within the client-server network; servers handle requests from the clients on the network. The use of a server operating system can allow other applications to run on the server’s hardware, and this can help fill different server job functions, such as a mail server or print server.
With Microsoft’s 2016 Windows Server release, there have been some changes made to what the operating system can handle; this is classified into ways, Standard Edition and Datacenter Edition. One of the most significant differences between previous versions of Windows Server and the 2016 version is the licensing based on CPU cores instead of CPU sockets.
The Standard Edition of Windows Server is a functional server operating system for users that need a robust system; this system includes virtualization but imposes limits. The Standard Edition installation allows the user to create two virtual machines and one Hyper-V host.
The Standard Edition can also host containers, which allows the user to deploy different applications; these containers share the server resources, but there is not a level of security between them. In addition to an unlimited number of Windows containers, two Hyper-V containers may be implemented. Containers are helpful when deploying cloud-born applications that have smaller, disposable parts that do not require complex customization.
Windows Server Standard Edition does not provide storage replicas, which are blocks of data that are gathered and stored to protect from data loss; since files are not the backed up information, files can be in use while replication occurs.
The Standard Edition allows for inherited activation as a guest, which occurs when the server is hosted at a data center.
The Datacenter Edition of Windows Server offers the features of the Standard Edition with increased virtualization options, software-defined networking and storage, and Shielded Virtual Machines. Some of the features that are limited in the Standard Edition are more expansive in the Datacenter Edition.
The Datacenter Edition provides the user with an unlimited amount of virtual machines; each license also comes with a Hyper-V host. This server edition can also function as a network controller, which allows the network controller to communicate with devices, services, and other components on the network. The user then is provided an application programming interface (API) that allows management of the network controller for configuration and monitoring.
This edition also provides support for Shielded Virtual Machines, which provides additional protection and encryption options for the user. Similar to the Standard Edition, containers can be used on this server option. However, the limitations do not exist, allowing the user to create an unlimited number of Windows containers and Hyper-V containers.
With the implementation of Shielded Virtual Machines, the need for a service that can run these machines is necessary. The Host Guardian provides support for Hyper-V hosts and the use of Shielded Virtual Machines. The Host Guardian is just one portion of the components needed to make the Shielded Virtual Machine function.
One massive benefit added to the Datacenter Edition is the storage replica function, which creates backups of the data in blocks instead of by file, which allows the use of the files while data backup occurs. Additionally, storage replication allows services to be migrated to another location if needed, when a potential disaster may occur.
A unique feature that’s not available in the Standard Edition is the use of Software-Defined Networking (SDN), which helps create and manage policy-enabled automation, usually through the use of workflows. The technology used in SDN architecture provides better resource utilization, reduced infrastructure needs, and on-demand application delivery to the user.
The Datacenter Edition also supported inherited activation, just like the Standard Edition, but without any limitations on where it must be hosted.+
For server operations, the 2016 edition of Windows Server can be a great solution, delivering a user-friendly, seamless experience. This recent release utilizes different modern infrastructure, cloud-based services, and commonly used technology like Active Directory.
The Standard Edition comes with a wealth of server operating system features that can be the perfect fit for users with smaller needs. The Datacenter Edition provides all the value of the Standard Edition, but with a higher amount of available virtualization, Shielded Virtual Machines, and software-defined networking and storage.
IP addresses, short for Internet Protocol addresses, are numbered labels that each device on a network receives; the IP address allows for the device to communicate while assigning identification and addressing. A static IP address is a specific classification that of address that is assigned or configured for a specific device; this means the address is not assigned by the client/server protocols used for automatically assigning IP addresses. These addresses are considered static since the IP address does not change; a static address may be used to provide a stable address for a device in your network, allowing requests to be forwarded consistently to a designated address without worrying about an IP address change.
In this tutorial, we’re assigning a static IP address in Windows Server 2016. To do that, you will need one node that already has Windows Server 2016 installed; the node you choose may be hosted on a cloud server or a dedicated server. A cloud server is a shared resource that hosts a virtual server environment while a dedicated server is a hardware server that’s been configured to be used by one party.
When you’ve chosen your node, make sure to run any updates necessary for your Windows Server 2016 instance; running updates on the system is a good first step for any changes or installations.
It’s important to note that you will need access to the administrator account or an administrative login for your server before you can set a static IP address.
The first step to assigning your new IP address is to connect to the node through the console or a remote desktop connection, if accessible:
Once accessed, you need to open the settings:
In the settings, open the network and internet settings:
When opened, click on the Ethernet option:

Then you can select the Change Adapter options:
After the options are open, right click on the interface you’re attempting to configure (this usually is your network connection) and then click on properties:

Then choose the Internet Protocol Version 4 (TCP/IPv4) option, click on the properties option:
Once opened, you can then fill in the information that’s required to make the change to a static IP, making sure to update the Network Mask, Default Gateway, and DNS IP address as necessary:
After updating the necessary information, click OK, then click OK again when the interface page comes up:
Once complete, your IP address has been configured to static, meaning it will not change or be assigned a new address.
Congratulations, you’ve successfully updated your node running Windows Server 2016 with a static IP address. Your IP address will no longer be assigned by the client/server protocols, instead of remaining the same each time. If you found this guide helpful when making changes to your Windows Server instance, please share this guide with other users attempting the same process.