 Call us at 1-888-GTCOMM1
-

- Dedicated Hosting
- Cloud hosting
- Services
- Support
- Learning Center
- Referral Program
- Français
-
Why globotech
- Log in
Joomla! is a content management system (CMS), which is a system used for web publishing similar to other products like WordPress. Similar to other CMS, Joomla! is used to create a usable framework that encompasses page caching, printable page versions, news feeds, RSS feeds, blogs, search functions, and more; these are all functions used for standard web browsing.
After WordPress, Joomla! is considered the second most used CMS online, and has over 80 million downloads and roughly 7% of the market share for CMS. Joomla! was initially released in 2005, and is currently a free, open-source CMS that functions across multiple operating systems and platforms.

When you’re ready to install Joomla 3.7, you will need to have a node available; your node can be on a Dedicated or a Cloud Server, whichever you choose or are comfortable using. This node should have Linux Ubuntu 17.04 installed, which is the operating system we’re using during this tutorial.
During this tutorial, Joomla! will be written as “Joomla” when referring to the specific release, Joomla 3.7. In other instances, Joomla! is the appropriate spelling.
The first step in almost any successful installation is updating the operating system, making sure recent patches or bug fixes are installed. You can update your Ubuntu 17.04 using the following command:
apt-get update && apt-get upgrade -y
After confirming your node is running the updated version of Ubuntu 17.04, it’s time to install the Apache web server:
apt-get install apache2 -y
Once installed, you can start the Apache service and then enable the Apache service on boot:
systemctl start apache2.service

systemctl enable apache2.service
Now that Apache has been installed and enabled during the system boot, you can proceed with installing the MySQL server and client:
apt-get install mysql-server mysql-client -y
When complete, you can then start the process to install Joomla 3.7 by creating the database and then the user for Joomla.
During this process, you will be creating the database “dbjoomla” for use during your installation:
mysql -u root -p

create database dbjoomla;

grant all on dbjoomla.* to 'userjoomla'@'localhost' identified by 'passjoomla';

flush all privileges;

exit
Now it’s time to install PHP on your node and then install the required modules for use with your Joomla 3.7 instance:
apt-get install php libapache2-mod-php php-mysql php-curl php-gd php-pear php-imagick php-imap php-mcrypt php-pspell php-tidy php-xmlrpc php-xml -y
After that completes, it’s finally time to download and install Joomla 3.7. You can start by downloading the Joomla files and then unzipping the files:
apt-get install unzip -y

wget https://downloads.joomla.org/cms/joomla3/3-7-5/Joomla_3-7.5-Stable-Full_Package.zip

rm -rf /var/www/html/index.html

unzip Joomla* -d /var/www/html
Once the download and unzip have completed, it’s time to change the permissions of the directory for the web server:
chown -R www-data:www-data /var/www/html

chmod -R 755 /var/www/html
When the permissions have been updated, it’s time to restart the web server:
systemctl restart apache2
You’re almost done, it’s time to finish the installation with information for the database, including the user and password information:
http://your_ip
Congratulations! You’ve completed the installation of Joomla 3.7 on your cloud server or dedicated server node running Ubuntu 17.04. In this tutorial, you’ve updated your operating system, installed an Apache web server, MySQL server and client, PHP modules, and then completed a Joomla installation; you’re ready to move your node into production. If you found this guide helpful, please share it with others pursuing the same setup.
GloboTech Communications is not affiliated with or endorsed by The Joomla! Project™. It is not supported or warranted by The Joomla Project or Open Source Matters. The Joomla!® name and logo is used under a limited license granted by Open Source Matters the trademark holder in the United States and other countries.
 Exim is a popular mail transfer agent (MTA) originally designed for use at the University of Cambridge to replace the existing mail systems in place. Although based on an older MTA design, Exim has since grown and splintered off into a unique concept; Exim aims at being flexible and working with a variety of Unix-like systems.
Exim has become exceptionally popular due to the straightforward setup configuration as well as its’ ability to manage multiple tasks simultaneously. Exim releases occur frequently and are listed on the Exim homepage, which encourages users to update to the newest version when possible.
Before you can get started installing your new Exim mail server on Ubuntu 17.04, you will need to confirm you have one node available, a Cloud Server or Dedicated Server; this server should have Ubuntu 17.04 installed.
You will also need to have Secure Shell (SSH) root access for your server after it’s running Ubuntu 17.04. If you are not familiar, SSH is a type of network protocol used when services are performed over an unsecured network. Using SSH, you can engage in these activities knowing they are being performed securely even over an unsecured connection.
Installing the Mail Server
Now that you’ve acquired your cloud server or dedicated server node, installed Ubuntu 17.04, and confirmed SSH root access to your node, we can begin setting up your Exim mail server.
Our first step is to confirm that your server is running the most recent software version and any repositories are up to date:
apt-get update && apt-get upgrade -y
After confirming your server is running current software, we can proceed with installing the mail server from Exim:
apt-get install exim4 -y
Once the installation has completed, it’s time to start configuring the Exim server using the following commands:
dpkg-reconfigure exim4-config
During the configuration process, the following answers should be used when you are prompted:
1- General type of mail configuration: Internet site; mail is sent and received directly using SMTP

2- System mail name: (please enter your server DNS hostname name)

3- IP-addresses to lsiten on for incoming SMTP connections: 127.0.0.1 ; ::1 (validate with ENTER)

4- Other destinations for which mail is accepted: [EMPTY]

5- Domains to relay mail for: [EMPTY]

6- Machines to relay mail for: [EMPTY]

7- Keep number of DNS-queries minimal (Dial-on-Demand)?:

8- Delivery method for local mail: mbox format in /var/mail/

9- Split configuration into small files?:
When the configuration process completes, it’s time to check that Exim is running correctly and the installation was successful:
systemctl status exim4
After confirming that Exim was installed successfully, make sure to force the startup of the Exim service whenever your system boots:
systemctl enable exim4
Congratulations! You’ve installed your Exim mail server on Ubuntu 17.04, enjoy!
You’ve successfully gone through the process of installing your own Exim server on a dedicated node running Ubuntu 17.04. You can now move your Exim server into production and begin using your new mail server. If you were able to follow this guide and found it useful, please share it with other users that may be searching for a simple guide on setting up an Exim server.
WordPress is a commonly known and popular content management system (CMS), which means it is an application used to create and modify digitally created content. While WordPress has become the most popular option among users, many CMS feature similar features, such as search engine optimized web addresses, integrated help functions, compliance with accessibility requirements and more.
WordPress and other CMS also reduce the knowledge needed to create content, since they remove the code-from-scratch mentality of traditional websites. CMS also allows users to create a simple, unified feel across multiple pages, manage user permissions easily, and even save and revert to previous versions.
Before we jump into how to install WordPress, you need to make sure you’ve acquired at least one node, hosted on a cloud server or a dedicated server. This node will need to have Linux Ubuntu 17.04 LTS installed.
For this installation, you also need to ensure Secure Shell (SSH) root access is setup for your server. If you’re unfamiliar, SSH is a particular network protocol that’s used when executing services over an unsecured network. When using SSH, the implemented services are performed securely even without a secure network.
Installing WordPress
After setting up your cloud or dedicated server node, installing Ubuntu 17.04 LTS and confirming that you have SSH root access, it’s time to learn how to install WordPress on your node.
The first step in almost any successful installation is confirming that your software, or in this case server, is up to date. We’re going to verify that your server is running the most recent version of its’ software and that any necessary repositories are current:
apt-get update && apt-get upgrade -y
Once we’ve confirmed our server is updated, we need to go through the steps to create a functional LAMP setup, which means installing Linux, Apache, MySQL, and PHP. As we’ve already verified we have Linux Ubuntu 17.04 LTS installed, we’re going to proceed with installing Apache.
Installing Apache2
The following commands will allow you to gather the necessary repositories for the Apache2 installation:
apt-get install apache2 -y
After allowing the Apache2 installation scripts to finish processing, we need to confirm that the Apache2 service is correctly installed, running properly, and enabled at startup:
systemctl status apache2.service

systemctl enable apache2.service
If you encounter an issue with Apache2 not currently running, it may be started with the following command:
systemctl start apache2.service
Installing MySQL Server
We’ve confirmed Apache2 is installed and running, so it’s time to proceed with the MySQL server setup:
apt-get install mysql-server mysql-client -y
While you proceed with the MySQL server installation process, you will receive a prompt for the MySQL root password. Please make sure you save this password someplace safe since you will need it later during the setup.
Once the installation of the MySQL server has completed, you will want to make sure you secure the server using the following command:
mysql_secure_installation
Make sure to follow the prompts you receive, using the below answers to complete each prompt:
Enter password for user root: ENTER ROOT PASSWORD

Press y|Y for Yes, any other key for No: n

Change the password for root ? n

Remove anonymous users? y

Disallow root login remotely? y

Remove test database and access to it? y

Reload privilege tables now? y
Similar to the Apache2 setup, we need to confirm that MySQL is running and ensure that MySQL is setup to start on boot:
systemctl status mysql.service

systemctl enable mysql.service
Now that the Apache2 and MySQL server is installed on your node, it’s time to configure your MySQL credentials for the future WordPress setup. This step will require your MySQL root password from a few steps earlier:
mysql -u root -p
After signing into your MySQL instance, you need to create the wordpressdb database using the following command:
mysql> CREATE DATABASE wordpressdb;
Once created, run the following command to create a new user named “wpuser” with a new password. Then grant that user access to the wordpressdb database. During setup, it’s important to replace “type_new_password_here” with your chosen password:
mysql> GRANT ALL ON wordpressdb.* TO 'wpuser'@'localhost' IDENTIFIED BY 'type_new_password_here';
When your new user has been created, it’s important to reload the privileges for MySQL before leaving the console:
mysql> FLUSH PRIVILEGES;

mysql> exit
Installing PHP and Related Modules
We’ve completed the Apache2 and MySQL installations, so it’s time to proceed with installing PHP. Utilizing the below command, initiate the PHP installation:
apt-get install php libapache2-mod-php php-mysql php-curl php-gd php-pear php-imagick php-imap php-mcrypt php-recode php-tidy php-xmlrpc wget -y
Setting Up WordPress
Now that we’ve finished installing Apache2, MySQL, and PHP, it’s time to install the latest version of WordPress to your server:
cd /tmp/ && wget http://wordpress.org/latest.tar.gz
Once this completes, we need to extract the archive and then install the extracted archive under the apache vhost folder:
tar -xzvf latest.tar.gz

cp -R wordpress/* /var/www/html
After installing the extracted archive, it’s important to remove the default index page from Apache2:
rm -rf /var/www/html/index.html
Configuring WordPress
We’re getting close to finalizing your WordPress setup. Now we will copy the default configuration file example that’s provided by WordPress:
Once you’ve copied the default configuration file, you need to edit it to match the below setup:
nano /var/www/html/wp-config.php
According to what was created in the MySQL setup earlier, these are the areas that need modification:
define(‘DB_NAME’ => The database name we have created for this purpose, in our case: wordpressdb
define(‘DB_USER’ => The database user we have created to access this wordpressdb database
define(‘DB_PASSWORD’ => The database password we have created for this user (during: mysql> GRANT ALL ON wordpressdb.* TO ‘wpuser’@’localhost’ IDENTIFIED BY ‘type_new_password_here’; )
// ** MySQL settings - You can get this info from your web host ** //

/** The name of the database for WordPress */

define('DB_NAME', 'wordpressdb');

/** MySQL database username */

define('DB_USER', 'wpuser');

/** MySQL database password */

define('DB_PASSWORD', 'type_new_password_here');

/** MySQL hostname */

define('DB_HOST', 'localhost');

/** Database Charset to use in creating database tables. */

define('DB_CHARSET', 'utf8');

/** The Database Collate type. Don't change this if in doubt. */

define('DB_COLLATE', '');
Then you may save and close the editor.
Now that you’ve edited the WordPress config file with new settings, it’s time to change the Apache2 directory permissions and enable Apache-Modules, which allows WordPress to function properly:
chown -R www-data:www-data /var/www/html/

chmod -R 755 /var/www/html/

a2enmod headers

a2enmod rewrite

a2enmod env

a2enmod dir

a2enmod mime
Once the permissions have been changed and modules enabled, it’s time to restart Apache2:
systemctl restart apache2
Final Steps
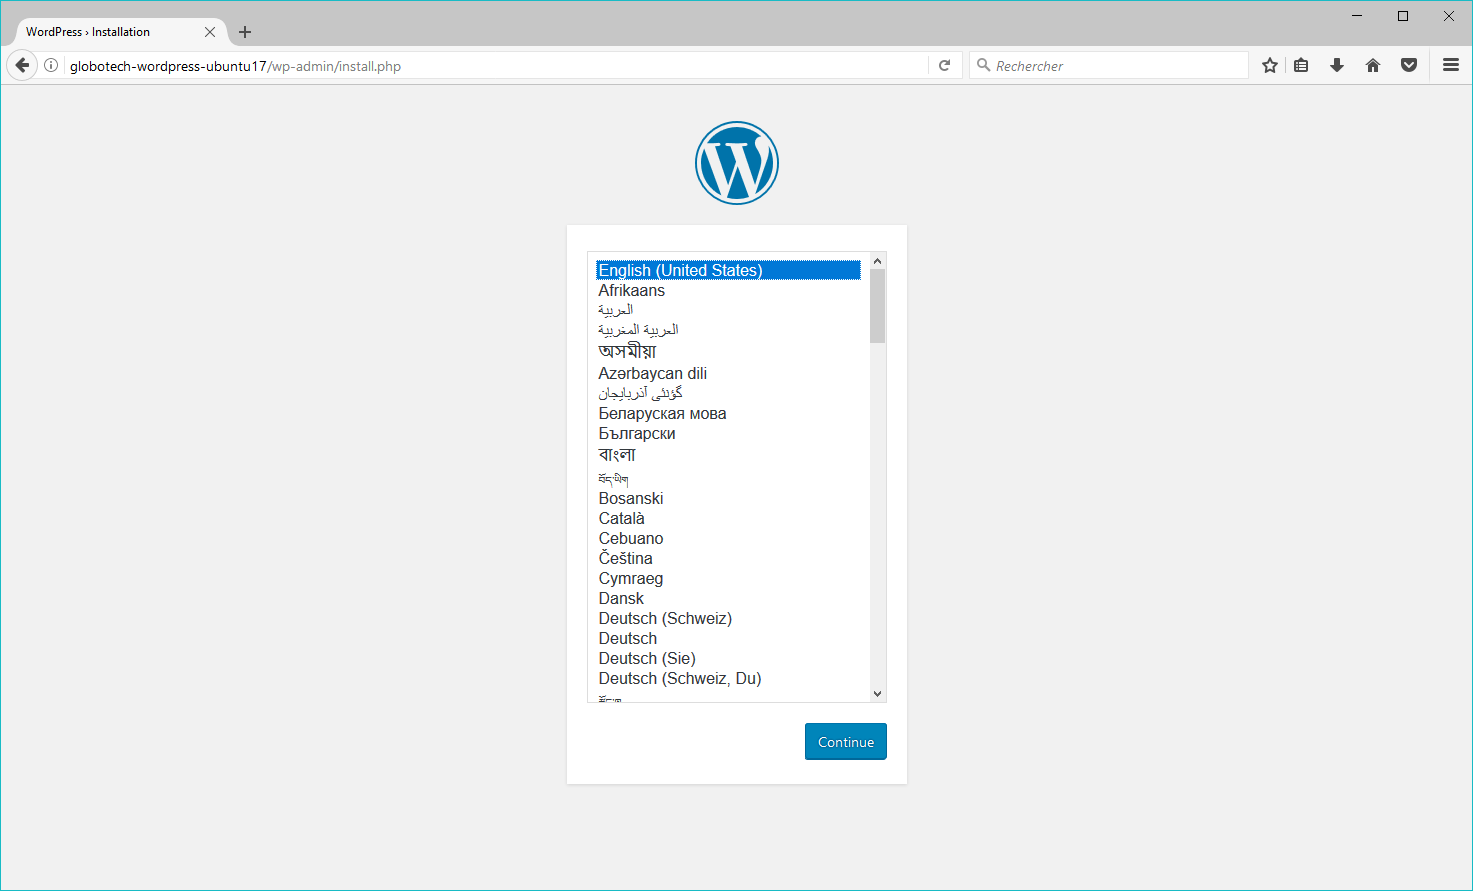
The server part of your setup is complete. Now you’ll open your internet browser and access your server’s IP address.
For example, if the IP address for your server were 1.2.3.4, then you would open your browser and go to the following link: http://1.2.3.4
You will see the WordPress default setup page at this point, prompting you for the language of your WordPress setup and then prompting you to create an administrative account.
Congratulations! You’ve just completed your WordPress setup on Ubuntu 17.04 LTS.
You’ve successfully moved through every step necessary to install WordPress on your dedicated node running Ubuntu 17.04 LTS. You are not able to begin using the WordPress CMS and exploring the features and benefits it provides when operated from a dedicated server. If you had success following this guide and found it helpful, please share it with other individuals that may be setting up their WordPress server.
MySQL is a database management system that runs on multiple platforms, including Windows, Unix-based, and Linux platforms. MySQL is often used for web-based applications, online publishing, and some web development platforms.
Ubuntu is an open source operating system based on Linux and is a popular operating system choice for personal computers and mobile devices. Ubuntu is also a popular choice for running physical or virtual servers and is currently one of the most popular choices for running cloud hosting environments.
In order to follow this guide you will need to have the following in place:
• One node (Cloud Server or Dedicated Server) that has Ubuntu 14.04 LTS installed.
• SSH Root Access to your server
Before you can begin installing MySQL on Ubuntu 17.04, you need to have one node, a cloud server or a dedicated server, with Ubuntu 17.04 currently installed.
Additionally, Secure Shell (SSH) root access to your server running Ubuntu 17.04 is recommended. SSH, if you’re unaware, is a network protocol used when network services are being executed over an unsecured network; SSH allows for secure execution.
Installing MySQL
Now that your node is established, Ubuntu is installed, and you have SSH root access to your server, you want to verify that your server is up to date and current repositories are installed:
apt-get update && apt-get upgrade -y
Once you have confirmed the server is currently running the most recent version, you can begin the process to install MySQL. While the primary installation package is necessary, other packages may be optional and should be installed if necessary:
apt-get install mysql-server mysql-client -y
While you are installing MySQL packages, you will be prompted to select a new root password. That password will then be used to sign in to your MySQL as a super user. It’s recommended that you select a strong password, write it down if necessary, and keep it secured.
After the installation of MySQL is complete, you may need to secure your new MySQL. There is a script you may utilize from your command line to secure MySQL:
mysql_secure_installation
During this process, the script will prompt you for answers to several questions. You will not need to change your root password, but you may want to remove anonymous users and disable remote login, depending on your needs. You may follow the answers indicated below for an easy setup:
Enter password for user root: ENTER ROOT PASSWORD

Press y|Y for Yes, any other key for No: n

Change the password for root ? n

Remove anonymous users? y

Disallow root login remotely? y

Remove test database and access to it? y

Reload privilege tables now? y
Finally, you’ve completed the setup of your MySQL on Ubuntu 17.04. You are now able to log in using the root account and the password you setup earlier, entering them into the command line. Use the following command to log in:
mysql -u root -p
After entering the root username and password you created, you will be signed into the MySQL command line client.
Congratulations! Enjoy your new MySQL setup on your server running Ubuntu 17.04.
Conclusion
You’ve successfully completed the steps necessary to install MySQL on either a cloud or dedicated server that’s running Ubuntu 17.04. Your MySQL is ready to be placed into production. If you found this setup guide helpful, please share it with others that are looking to setup their own MySQL.