 Call us at 1-888-GTCOMM1
-

- Dedicated Hosting
- Cloud hosting
- Services
- Support
- Learning Center
- Referral Program
- Français
-
Why globotech
- Log in
Configuring your server with an accurate date and time is essential for keeping information consistent across multiple servers or file logs. The date and time for your server can be setup to validate using Network Time Protocol (NTP), which allows the system to synchronize for accurate time keeping.
NTP has been in use and continued development since 1985, making it one of the oldest internet standards currently used. NTP is intended for synchronizing the date and time on the network to within a few milliseconds of Coordinated Universal Time (UTC).
Using an NTP is an efficient method of making sure that the server date and time is always accurate, as the network will continuously adjust the system time based on the upstream NTP server.

NTP-Algorithm
The first step in your setup process is to install ntp and ntpdate, which can be installed using yum:
yum install ntp ntpdate
*Note: ntp is going to be used to receive a continuously updated, current system time from the upstream NTP server.

*Note: ntpdate is a utility that's used to set the system date and time via NTP.
Now that ntp and ntpdate are installed, you may use the following command to adjust your system’s date and time. This command should be run once, and then only as needed in the future:
ntpdate pool.ntp.org
Once the RPM installation has completed, you will need to edit the NTP configuration on your system using a text editor of your choice. After opening the NTP configuration file, add the NTP server that you would like to use for your upstream NTP server:
vim /etc/ntp.conf
You can set the public servers from the pool.ntp.org project web page:
server 0.north-america.pool.ntp.org

server 1.north-america.pool.ntp.org

server 2.north-america.pool.ntp.org

server 3.north-america.pool.ntp.org
After completing this, you are ready to start the ntpd server:
/etc/init.d/ntpd start
The final step is to set ntpd to start on boot if desired. If you choose to do so, use the following command to have the ntpd start on boot:
chkconfig ntpd on
Congratulations! You’ve completed setting up your system to received updated date and time from an upstream Network Time Server.
You’ve completed the steps needed to configure date and time using NTP on CentOS 6. These servers are designed to keep your system as close to Coordinated Universal Time as possible, usually within a few milliseconds. If you found this guide helpful during your setup, please share it with someone else that is going through the same process.
Open Virtuozzo, often abbreviated as OpenVZ, is a technology for Linux systems that allows users to run isolated operating system instance, referred to as containers, virtual private servers (VPS), or a virtual environment (VE). Similar to other virtualization technology providers, OpenVZ runs multiple operating systems. However, OpenVZ uses a single Linux kernel; this means OpenVZ can only run Linux-based operating system virtualization.
Before we start with creating the OpenVZ VPS server and installing the web panel, make sure you have root access to your CentOS 6 server. The setup will not work properly if root access is not utilized.
Preparing the Server
Now that you’re running root access on your CentOS server, it’s time to verify that your server is up-to-date by running the following command:
yum -y update
Once you’ve confirmed that your server is current, you need to disable SELinux:
sed -i 's|enabled|disabled|' /etc/sysconfig/selinux
Installing OpenVZ
After disabling SELinux, we can start installing OpenVZ on your CentOS system. The first step for this is adding the OpenVZ repository:
wget -P /etc/yum.repos.d/ http://ftp.openvz.org/openvz.repo

rpm --import http://ftp.openvz.org/RPM-GPG-Key-OpenVZ
When the installation of the repository has completed, you can proceed with installing the OpenVZ kernel:
yum install vzkernel
Configuring the Kernel Parameters
Now it’s time to work on configuring some parameters for your server by editing the sysctl.conf file. The parameters listed below may already exist in the file, but the values should be adjusted to the illustrated values. Any parameters that are not included should be added:
nano /etc/sysctl.conf
Once you’ve adjusted the sysctl.conf file, confirm that each of the required parameters is included:
net.ipv4.ip_forward = 1

net.ipv6.conf.default.forwarding = 1

net.ipv4.conf.default.proxy_arp = 0

net.ipv4.conf.default.send_redirects = 1

net.ipv4.conf.all.send_redirects = 0

net.ipv6.conf.all.forwarding = 1

net.ipv4.conf.all.rp_filter = 1

kernel.sysrq = 1
After confirming the values are listed, save the file and then reload the sysctl parameters for your server:
sysctl -p
The final configuration step, now that you’ve reloaded the parameters, is to install the OpenVZ utilities:
yum -y install vzctl vzquota ploop
Reboot the Server
Now that the OpenVZ kernel has been installed, the parameters have been adjusted, and the OpenVZ utilities have been added, it’s time to reboot your server. Usually your server will reboot into the OpenVZ kernel automatically. If that is not the case, you may need to edit the grub menu and comment out the other entries.
Additionally, you can choose to enable neighbor devices using different subnets between the OpenVZ host and guests:
nano /etc/vz/vz.conf
Find out the following entry in the vz.conf file:

#NEIGHBOUR_DEVS=detect

Change it for:

NEIGHBOUR_DEVS=all
Installing the OpenVZ Web Panel
First, we need to install the web panel dependencies:
yum install rubygems ruby ruby-sqlite3.x86_64 git
Once completed, collect the installation script and hotfix it:
cd /root

wget https://raw.githubusercontent.com/sibprogrammer/owp/master/installer/ai.sh

sed -i 's|http://ovz-web-panel.googlecode.com/files/|https://storage.googleapis.com/google-code-archive-downloads/v2/code.google.com/ovz-web-panel/|' ai.sh
That installation script should be run after completing the previous step:
sh ai.sh
After the installation script has completed running, it’s time to adjust the firewall rules:
nano /etc/sysconfig/iptables
The following line needs to be added to the existing iptables configuration file:
-A INPUT -m state --state NEW -m tcp -p tcp --dport 3000 -j ACCEPT
Once you’ve added the line to the iptables configuration file, the iptables service needs to be restarted for the change to take effect:
service iptables restart
Configuring the OpenVZ Web Panel
Now that OpenVZ has been installed and the web panel has been installed, it’s time to start the initial configuration of the environment. Shortly we’ll discuss acquiring virtual machine templates and setting up your web panel.
Access the OpenVZ Web Panel Interface
To begin our configuration of the web panel, use your web browser to access the following address: http://server.ip:3000
The default login credentials for http://server.ip:3000 are:
Login: admin

Password: admin
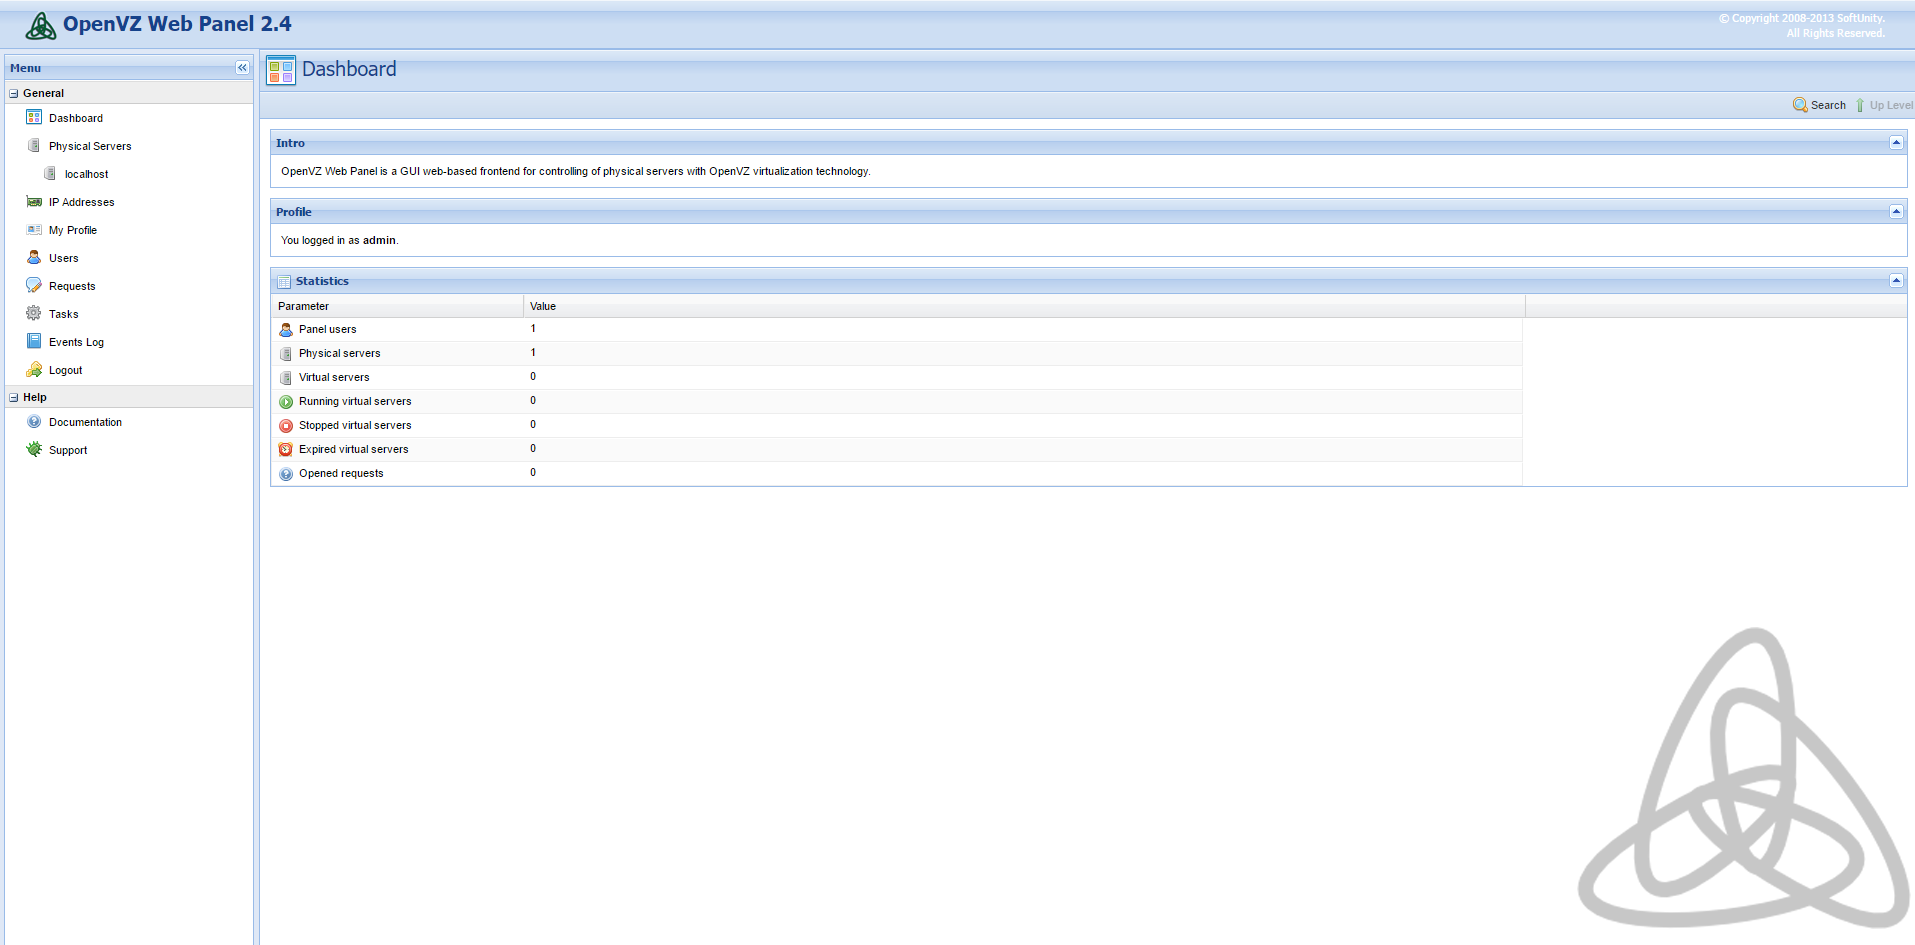
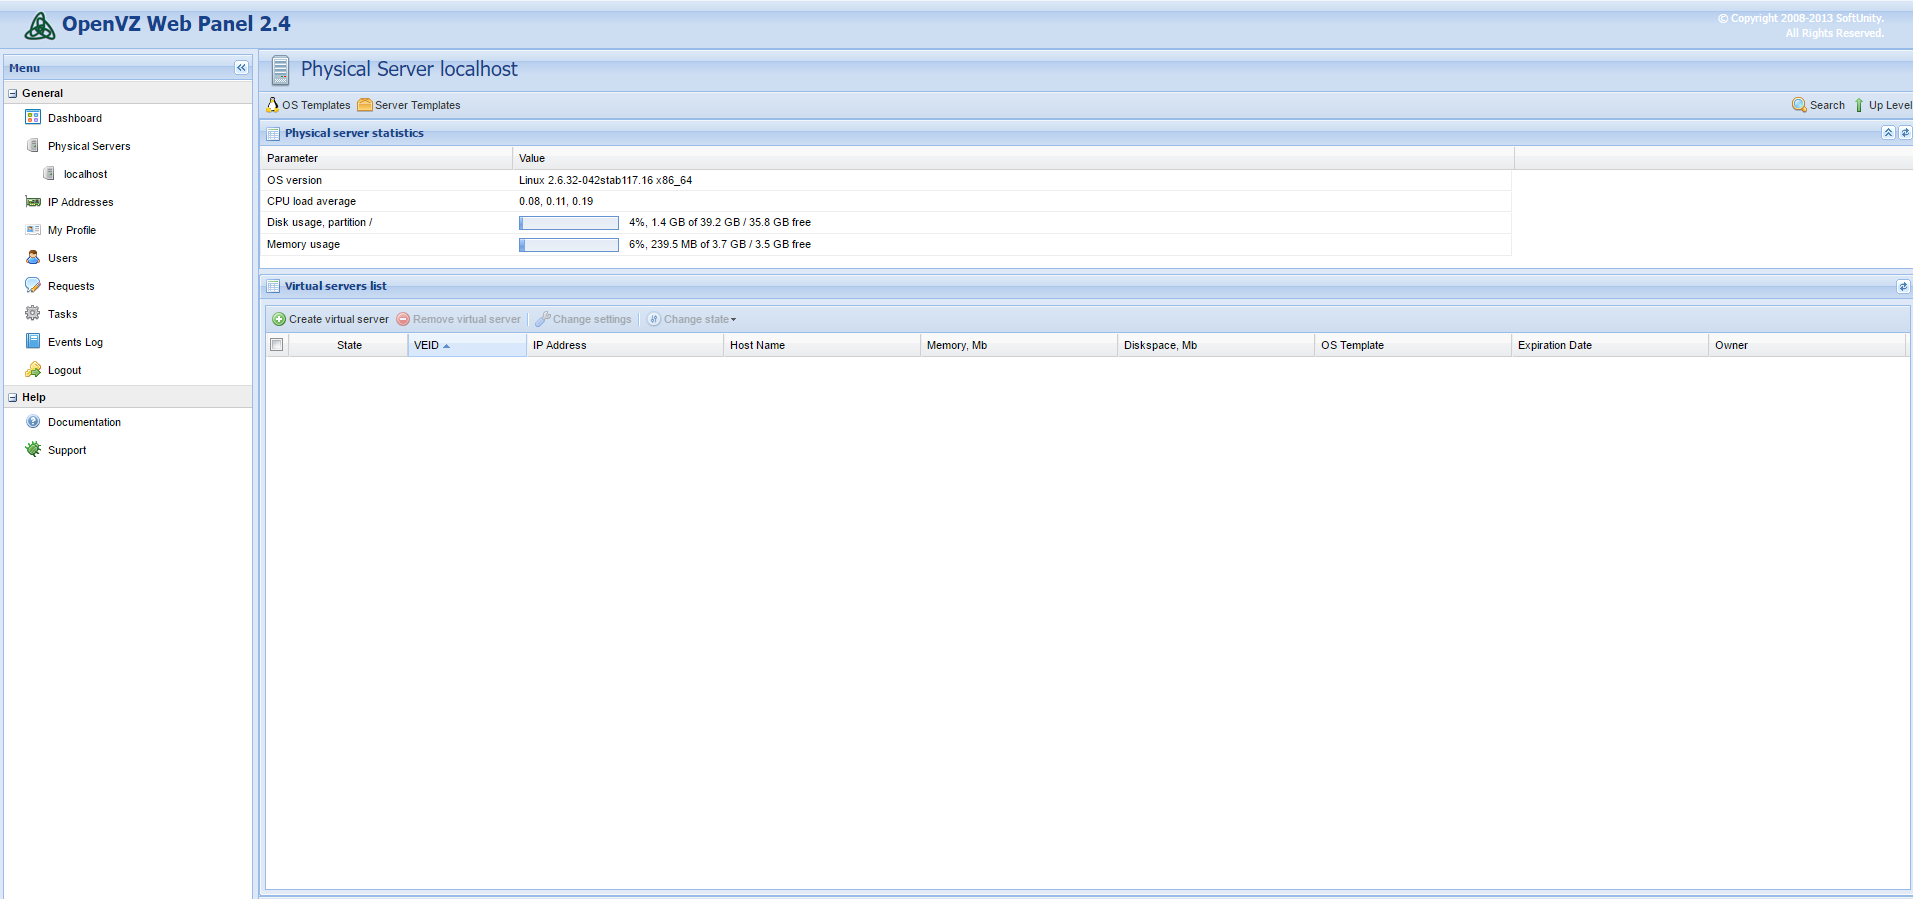
Once you’ve logged in, the default interface should resemble the following screenshot:
Change the Administrator Password
Changing the administrator account password is essential since the default password is “admin.” This generic password makes changing the default administrator password a priority.
To modify the password, click on ![]() . During this step, you can also specify an email address and name for your account:
. During this step, you can also specify an email address and name for your account:
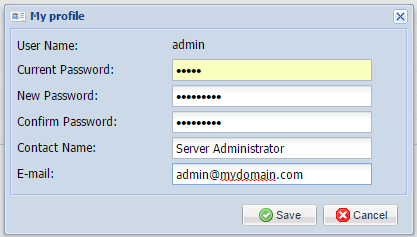
Once you’ve changed your password and included any optional details, you can click save to complete the reset.
Configure Your IP Addresses
Now we’re moving on to set up the IP addresses for your web panel. On the left menu click on ![]()
There are currently no IP addresses configured by default, so we need to add a new “IP Pool” by clicking on ![]()
To provide an example, we’re going to imagine the server was assigned a few IP addresses in the form of a single subnet. For this example, we’re going to say it is 67.215.1.0/28.
We would then select 67.215.1.2 to be our new server’s primary address while keeping 67.215.1.3 through 67.215.1.14 for our virtual machines. We would populate that information in the IP Pool selection like in the below picture:
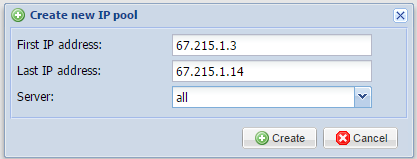
Once you’ve similarly filled in your addresses, press the create icon. This then creates your IP address pool that can be attributed to virtual machines in the future.
Configuring Operating System Templates
To correctly provision our virtual machines, we need to make sure to add operating system templates to the system.
The web panel allows you to download them in a convenient manner directly from the interface, so follow the below steps to configure these easily.
On the left navigation panel, click on ![]()
This option will open the host’s server page. Click on ![]() and you’ll be taken to the templates section, which will resemble the following screenshot:
and you’ll be taken to the templates section, which will resemble the following screenshot:
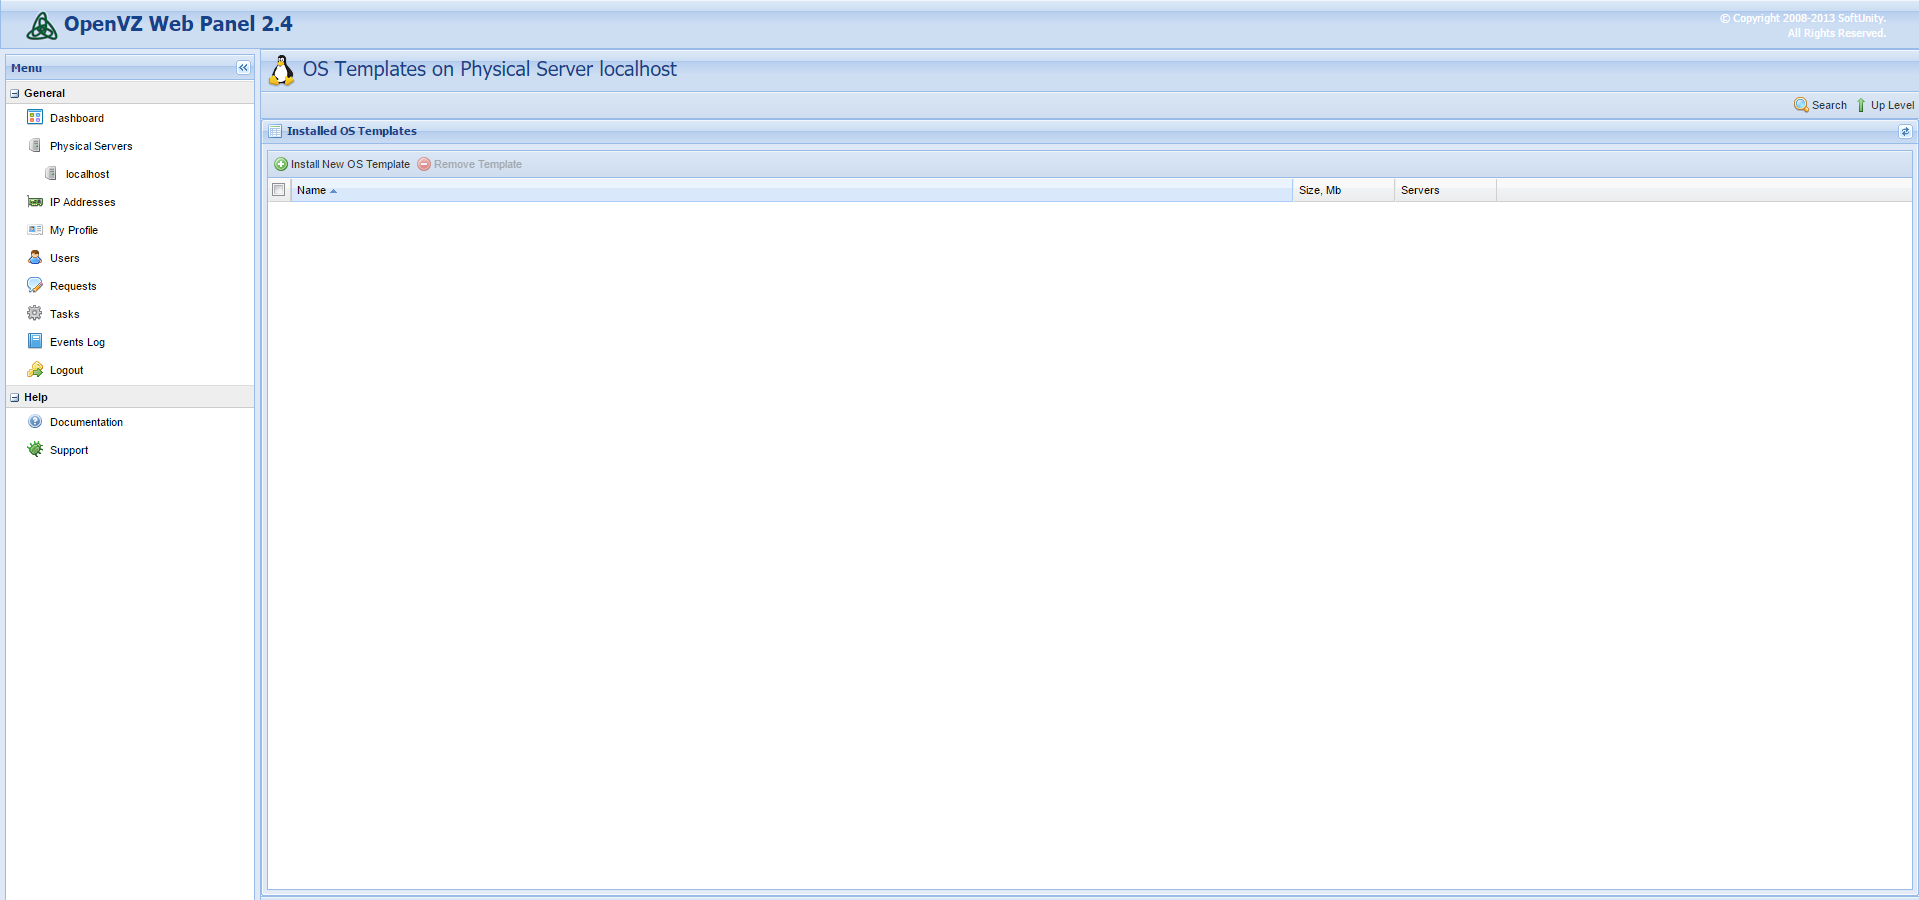
To open the selection menu, click on ![]()
A menu will open that gives you the option to select different templates to download. After making your selections, press the install icon to begin the download:
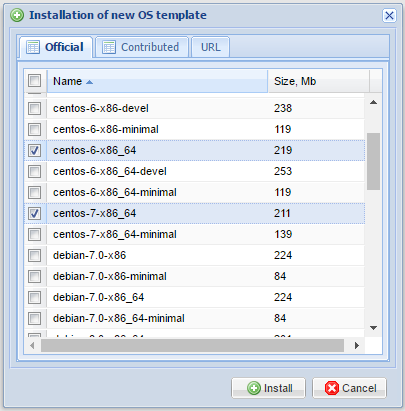
Allow the system to run for a few minutes while the images download. The base templates are small, so the installation process should be quick. Once the download completes, you can begin creating your first virtual machine.
Create Your First Virtual Machine
You’ve completed your deployment of your OpenVZ server and web panel, configured your IP addresses, and downloaded operating system templates, so now it’s time to deploy your first virtual machine.
To start setting up your first virtual machine, click on ![]() and we’ll be taken here:
and we’ll be taken here:
Click through ![]() to continue setting up your virtual machine. Dialog boxes will open, prompting you to fill in details for your new machine.
to continue setting up your virtual machine. Dialog boxes will open, prompting you to fill in details for your new machine.
During this process, you will select the operating system template you would like to use, as well as any resources you’d like to attribute to your virtual machine. You will also need to select an IP address and assign a root password to your virtual machine. The below screenshot is an example:
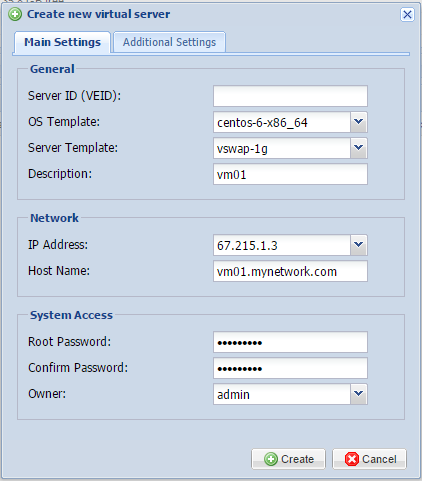
After filling in this information and documenting it someplace safe, press the create icon, and your virtual machine will generate shortly.
Congratulations! You’ve completed configuring your new OpenVZ VPS server, installed the management panel, and created your first virtual machine on your CentOS 6 server.
You’ve successfully created an OpenVZ VPS Server and installing the Web Panel on CentOS 6. You’re now ready to move your VPS server into production and get started with your virtual operating system desktop. If you found this guide helpful during your setup process, please share it with other users that are going through the same process or may be interested.
SSH is a useful program for remotely logging in to a computer over the internet or a network. It creates a secure connection so powerful commands and tools can be safely used. In order to do this it needs a ‘port’: a number on the server that identifies which program can connect. However, two programs trying to use the same port can cause network conflicts. And although the default port is usually fine, sometimes the way other programs are set up stop it from working properly.
The following guide explains how to change the port SSH connects to on a CentOS 6 server.
Confirm that you have the following before you follow this guide:
• 1 Node (Cloud Server or Dedicated Server) running CentOS 6.
• Root access to the node.
In order to change the port, the first step is editing the config file for ‘sshd’, which is the SSH daemon. Use this command to edit it:
nano /etc/ssh/sshd_config
The default port for SSH is 22. Change this number to whatever you need, but be sure to avoid ports already in use by the server which are commonly used by other programs. This means most ports below 1024, but be sure to check what is in use to avoid conflicts later.
[...]

# The strategy used for options in the default sshd_config shipped with

# OpenSSH is to specify options with their default value where

# possible, but leave them commented.  Uncommented options change a

# default value.

#Port 22 <----------------------------------------------- You need to remove the comment (#) and change the value by the port you want
#AddressFamily any
#ListenAddress 0.0.0.0
#ListenAddress ::
[...]
After the config file has been edited and saved, the SSH daemon needs to be restarted for the changes to take effect. Use this:
service sshd restart
Or this:
/etc/init.d/sshd restart
If SELinux is enabled on the server, its security features will block the connection unless the port is also added there. Use this command, and insert the port number that was set in the sshd config file:
semanage port -a -t ssh_port_t -p tcp xxxx
Finally, the firewall will also need to be modified to allow the port through. If you used SSH for this guide, logging out before this last step will mean you can't log back in! Use this command, again substituting the port number used in the sshd config:
-A INPUT -m state --state NEW -m tcp -p tcp --dport xxxx -j ACCEPT
You can now securely connect to the server with SSH on the chosen port. If this guide was useful to you, share it with your friends!
Automatic updates for CentOS 6 can be a time life saver, as well as ensure that your system is always receiving all new patches, fixes, and security enhancements. Setting up this process is very quick and easy using the built-in package manager yum, and can simplify an administrator’s tasks greatly. This is achieved with one package that allows yum to be called from cron, a scheduler daemon.
This tutorial will show you how you can enables automatic updates for yourself on your CentOS 6 server.
For this guide, you will need the following:
• 1 Server (Cloud Server or Dedicated Server) with CentOS 6
• All commands should be run as the root user
Before you can set your CentOS 6 system to update automatically, you must make sure it is already up to date. You can do this by using the following command:
yum update -y
It is essential that there are no errors in this initial update, otherwise the process of setting up automatic updates will fail due to outdated package information. If there are any errors, troubleshoot them before continuing.
With your CentOS 6 system fresh, install the yum-cron package to enable running package downloads automatically on a user-specified schedule:
yum install yum-cron -y
To enable the yum-cron daemon to run on boot, execute this command:
chkconfig yum-cron on
We also need to disable and stop the yum-updatesd daemon, which provides notifications about which updates are available for your system. This daemon becomes unnecessary after setting up automatic updates. The following commands ensure to stop the service from running:
chkconfig yum-updatesd off

service yum-updatesd stop
If you have packages to exclude from the updates, proceed to the next section. If not, you are now free to start the yum-cron daemon:
service yum-cron start
If you do have packages that you want to exclude for reasons such as other external dependencies, you must edit the configuration file for yum. Open the file for editing:
nano /etc/yum.conf
Add each package that you want to exclude from the updates to a line at the bottom of the file, such as the httpd package is shown in this example:
exclude= httpd
[main]

cachedir=/var/cache/yum/$basearch/$releasever

keepcache=0

debuglevel=2

logfile=/var/log/yum.log

exactarch=1

obsoletes=1

gpgcheck=1

plugins=1

installonly_limit=5

bugtracker_url=http://bugs.centos.org/set_project.php?project_id=23&ref=http://bugs.centos.org/bug_report_page.php?category=yum

distroverpkg=centos-release

#  This is the default, if you make this bigger yum won't see if the metadata

# is newer on the remote and so you'll "gain" the bandwidth of not having to

# download the new metadata and "pay" for it by yum not having correct

# information.

#  It is esp. important, to have correct metadata, for distributions like

# Fedora which don't keep old packages around. If you don't like this checking

# interupting your command line usage, it's much better to have something

# manually check the metadata once an hour (yum-updatesd will do this).

# metadata_expire=90m

# PUT YOUR REPOS HERE OR IN separate files named file.repo

# in /etc/yum.repos.d

exclude= httpd <----- ADD THIS LINE WITH THE PACKAGE NAME
To specify multiple packages to exclude at a time, you can write the line as such:
exclude= httpd php kernel*
Save and close the configuration file. Now you have set all available updates to be installed on your server except for the ones you have just excluded in the yum configuration file. After updating your system, reports are automatically configured to be sent to the root user. This as well as further settings that you can customize are found in the configuration file for yum-cron specifically. This file is located at:
/etc/sysconfig/yum-cron
The following shows what this configuration file will look like. The CHECK_ONLY option allows you to only check packages and not install, and the DOWNLOAD_ONLY option differs in that it allows you to also download the checked packages, but not install them. For example, if you want to only receive an email notification when new packages are available but not download the updates, you should set CHECK_ONLY to yes. Here the default is shown:
[...]

# Default - check for updates, download, and apply

CHECK_ONLY=no

DOWNLOAD_ONLY=no

# Download the updates and email a report

CHECK_ONLY=no

DOWNLOAD_ONLY=yes

# Don't download the updates, just email a report

CHECK_ONLY=yes

DOWNLOAD_ONLY=no

[...]
The automatic update job will run whenever your normal daily cron jobs are set to run from cron.daily. The exact automatic update task can run between a range of times during this normal period, but you can modify your settings further to control exactly when it runs. With your settings configured as you want them, you can now enable and start the yum-cron daemon to finish up and let automatic updates work for you:
service yum-cron start
After completing this guide, your CentOS 6 server will now have automatic updates, making administration and update management significantly simpler. If you found this tutorial to be helpful for you when managing your CentOS 6 server, please share it with others who may also benefit from it.
Way back in 1979, network time synchronization was one of the first applications of the internet demonstrated to the general public. Today, it is one of the most crucial services that computers take advantage of. The protocol for network time synchronization in common use is called NTP, or Network Time Protocol.
NTP works via a hierarchy of servers organized into different strata. Stratum 0 is reserved for devices that report the time accurately, such as atomic clocks. Stratum 1 contains servers that directly get their time from devices in Stratum 0, and thus has in theory the highest level of accuracy. Servers in Stratum 2 obtain their time from servers in Stratum 1, and the time thus propagates downward through the strata to a maximum depth of 15.
Using a Network Time Server (NTP) is a very good way to make sure that your server time is always accurate, as it will continuously adjusts system time from upstream NTP servers. Without an accurate time system like NTP, there would be no way to be sure that timestamps on files are correct, making tasks like automated backups, collaboration on group projects, and version control much more difficult and fraught with error.
This guide will show you how to set up the date and time on your CentOS 6 server using NTP.
• A server with CentOS 6
First, after making sure your system is fully up to date, install ntp and ntpdate. You will use the package manager yum for this.
yum install ntp ntpdate
ntp is used to have a continuously adjusted system time from upstream NTP server ntpdate is an utility to set the date and time via NTP.
Now you can adjust your system date and time using the following command. Run this one time, and then only when necessary in the future.
ntpdate pool.ntp.org
Try editing your NTP config. Open the file with a text editor, and add the NTP server you would like to use.
vim /etc/ntp.conf
You can also set which public servers you’ll use from the pool.ntp.org project.
server 0.north-america.pool.ntp.org

server 1.north-america.pool.ntp.org

server 2.north-america.pool.ntp.org

server 3.north-america.pool.ntp.org
Now you can start the ntpd server for automatic time updating.
/etc/init.d/ntpd start
You’ll probably want to have ntpd start automatically on system boot. Use this command to enable that feature.
chkconfig ntpd on
With accurate time reporting provided by ntpd, you can rest easy knowing that your system is in step with the rest of the internet. If you liked this KB article, please share it with your friends.
CentOS WebPanel is a free control panel solution for RPM-based Linux distributions. What sets it apart from other control panels is that it can be used to install and configure a number of key web server applications. When added to a minimal installation of CentOS 6, it provides one of the quickest ways to get a web server up and running.
To complete this guide, you will need the following:
• 1 Node (Cloud Server or Dedicated Server) running a clean installation of CentOS 6.
• All commands should be run as the root user
Ensure that your CentOS 6 installation is up to date and that the program wget is installed.
yum -y install wget && yum -y update
Selinux will need to be disabled, so go ahead and do that now.
setenforce 0

sed -i 's/enforcing/disabled/' /etc/sysconfig/selinux
Set up the hostname for your server.
hostname server.example.com
Before starting installation of CentOS WebPanel, you’ll need the following:
A valid hostname that will resolve on the IP used for the control panel
All your initial IP addresses bound on the server
Using wget, grab the installation script from CentOS WebPanel’s official web site.
cd /usr/local/src

wget http://centos-webpanel.com/cwp-latest
Run the included shell script, making sure to specify the preferred MariaDB option when prompted.
sh cwp-latest -d mariadb
Once the installation process has completed, you will be given a list of credentials for logging into the web panel. Take note of them and then reboot the server.
reboot
Once the server is back online, you may navigate to the web interface and login with your root credentials to access your newly installed CentOS WebPanel.
Now that CentOS WebPanel is installed, it provides a handy interface to add additional services and configure existing ones in the realm of user management, SQL, email, DNS, PHP, firewalls, and more. It also facilitates security monitoring, making it easier to detect issues ahead of time. If this guide was helpful to you, kindly share it with others who may also be interested.