 Call us at 1-888-GTCOMM1
-

- Dedicated Hosting
- Cloud hosting
- Services
- Support
- Learning Center
- Referral Program
- Français
-
Why globotech
- Log in
While Drupal is not difficult to install, it certainly isn’t painless. Start by obtaining a Linux server. Then, install your database and web server. Finish up by installing all of Drupal’s dependencies, and by downloading and unpacking the Drupal distribution. If you’re a skilled system administrator, you can complete all necessary tasks in under an hour. But if you’re just launching a Drupal site, the last thing you might want to do is maintain the underlying technology stack. Fortunately, with our Drupal One Click App, you can quickly set up your website and leave the remaining details to us.
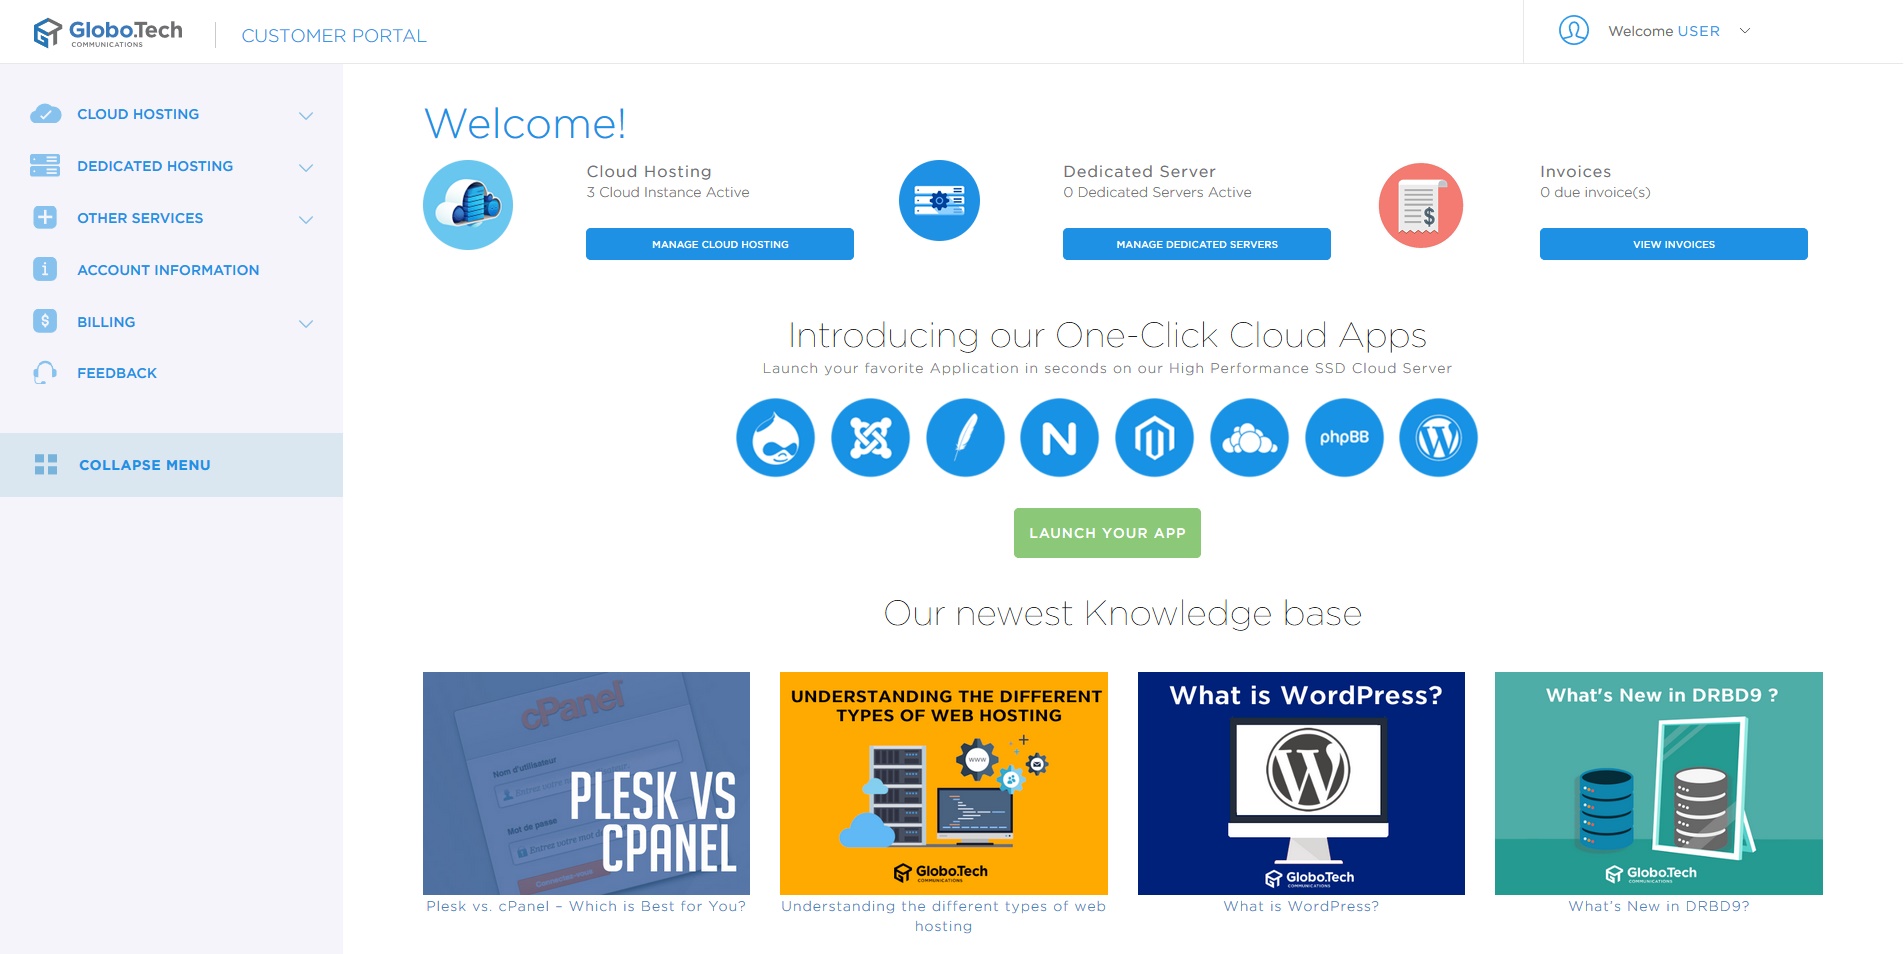
Start by logging into your account page. The landing page should look something like this.
What Is An OCA?
Lots of technology is involved in serving up the websites you visit. Every website runs on a web server, relies on various programming languages, and uses other services to store data and send messages. Our One Click Apps package all of these components into a bundle that is easy to install and maintain.
OCAs aren’t just faster to set up. By including all necessary dependencies, you aren’t left wondering if some aspect of your website won’t work, or stuck researching what PHP modules Drupal needs. We’ve done all of that for you, giving you the best possible system for running Drupal-based sites.
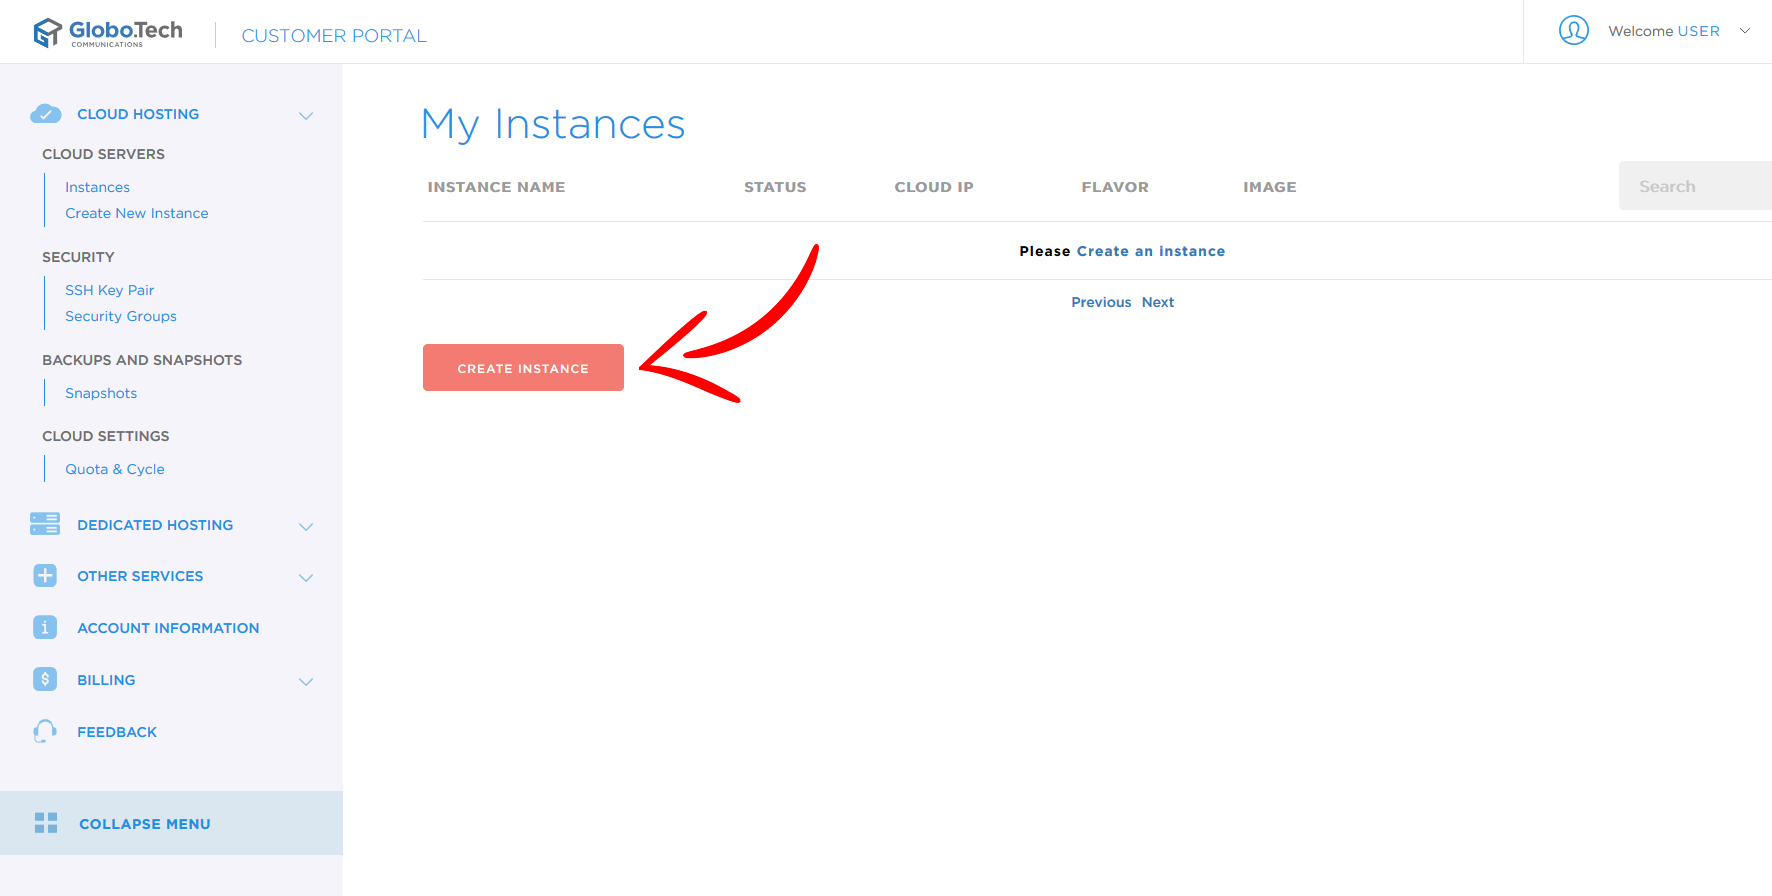
Here we’ll demonstrate how to use the Drupal OCA. Start by clicking “Cloud Hosting,” and then “Instances.” You’ll then see a list of active instances, if any. Click “Create Instance” to continue.
You should be on the instance creation page, which consists of several fields. We’ll explain those fields below.
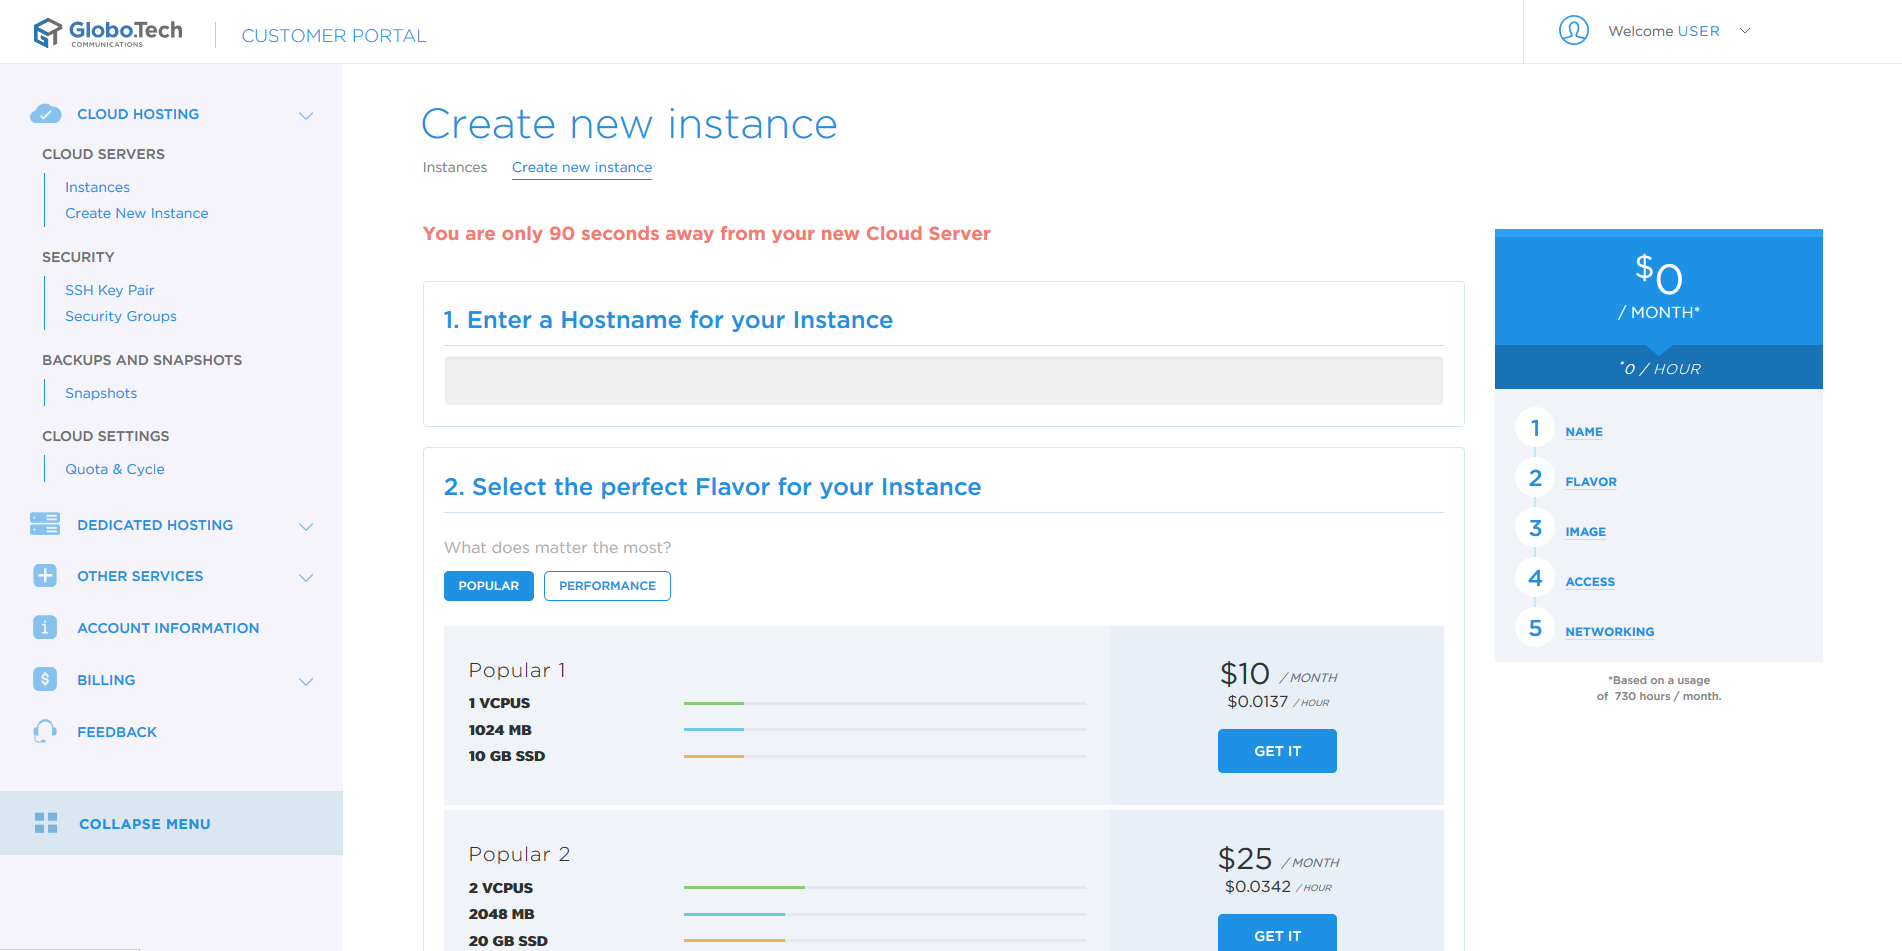
Start by choosing a name by which your instance will be identified.

Servers consist of RAM, CPU cores, disk space, and other characteristics. It can be difficult knowing how many of each a website might require. Our Flavor system is here to help make the task a bit easier. Instead of choosing a server according to RAM and CPU count, you instead choose based on how popular your site is.
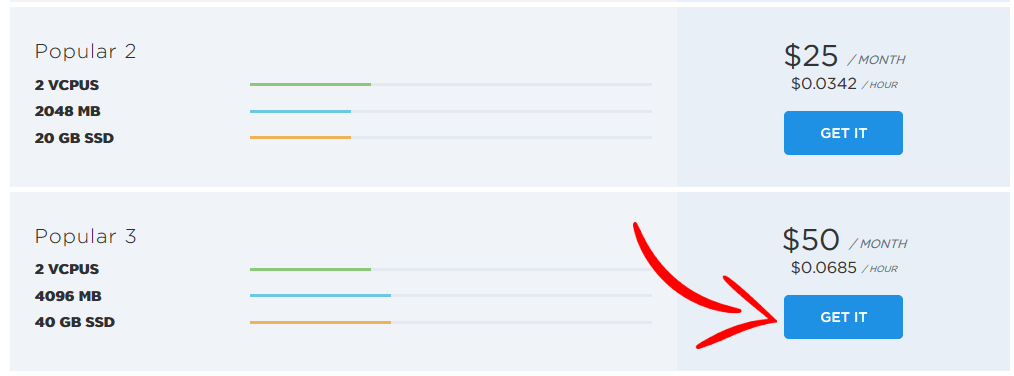
Initially, you may wish to choose our Popular 2 flavor. If instead you’re migrating an existing site with users and content, Popular 3 might be a better choice. Note that whatever you choose now isn’t binding, and you can change your flavor later. When you’ve decided, click “GET IT” to continue.
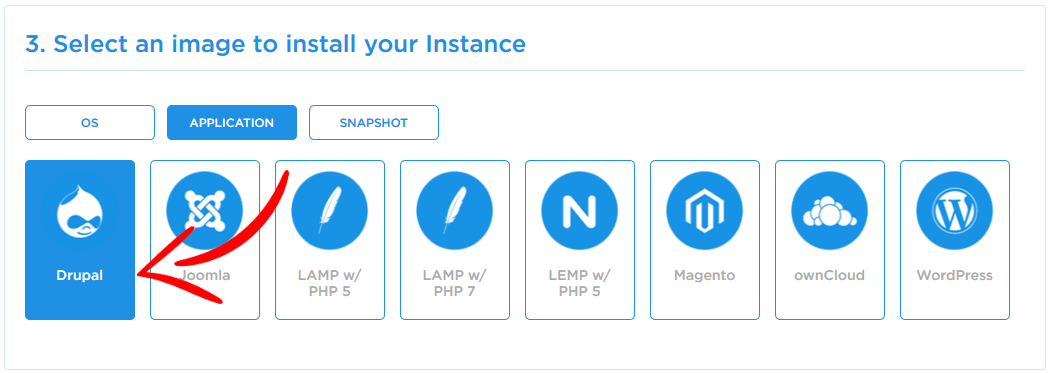
Here you’ll choose an image, a prepackaged server setup appropriate for a given task. Since we’re setting up Drupal, choose the Application tab, then click Drupal.
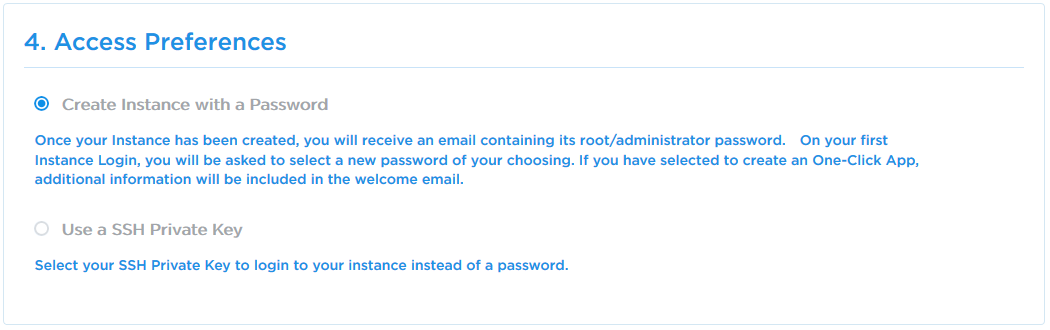
Here you’ll choose whether to secure your instance with a password or an SSH key. Choose “Password.”
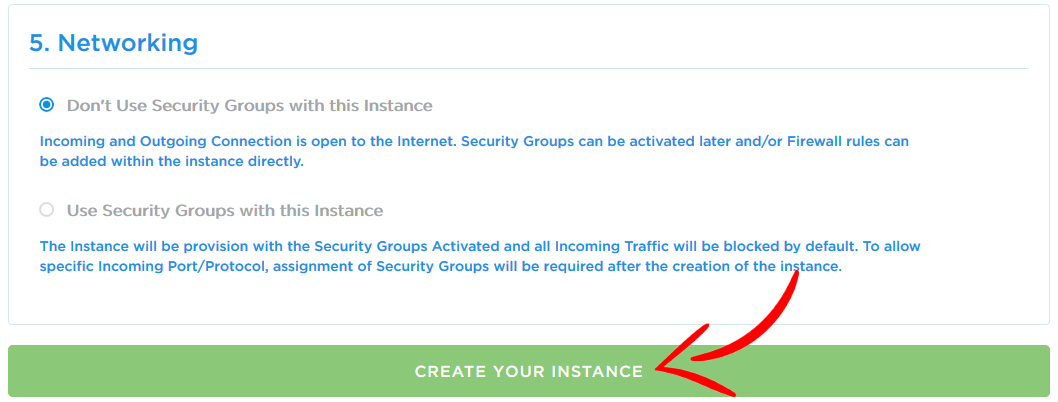
On this screen, you’ll decide whether this instance should use security groups. We have another guide for those, but to get up and running more quickly we’ll elect not to use them here. Click “Create your Instance” to set everything up.
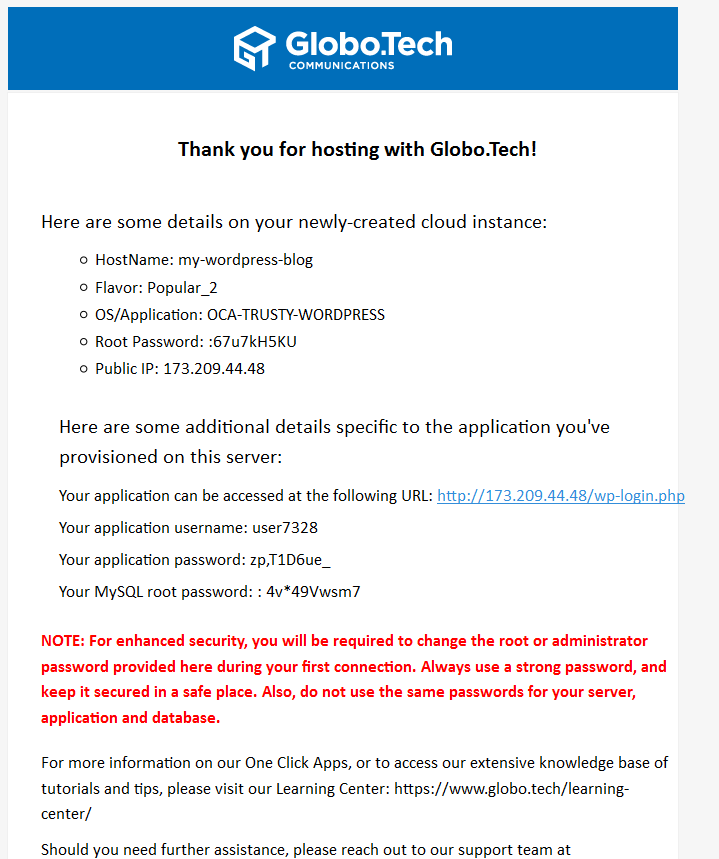
Check your email. We’ve just sent you everything required to access your new Drupal site, including administrative credentials for Drupal itself.
With access credentials in hand, we’ll now test the newly created Drupal site.
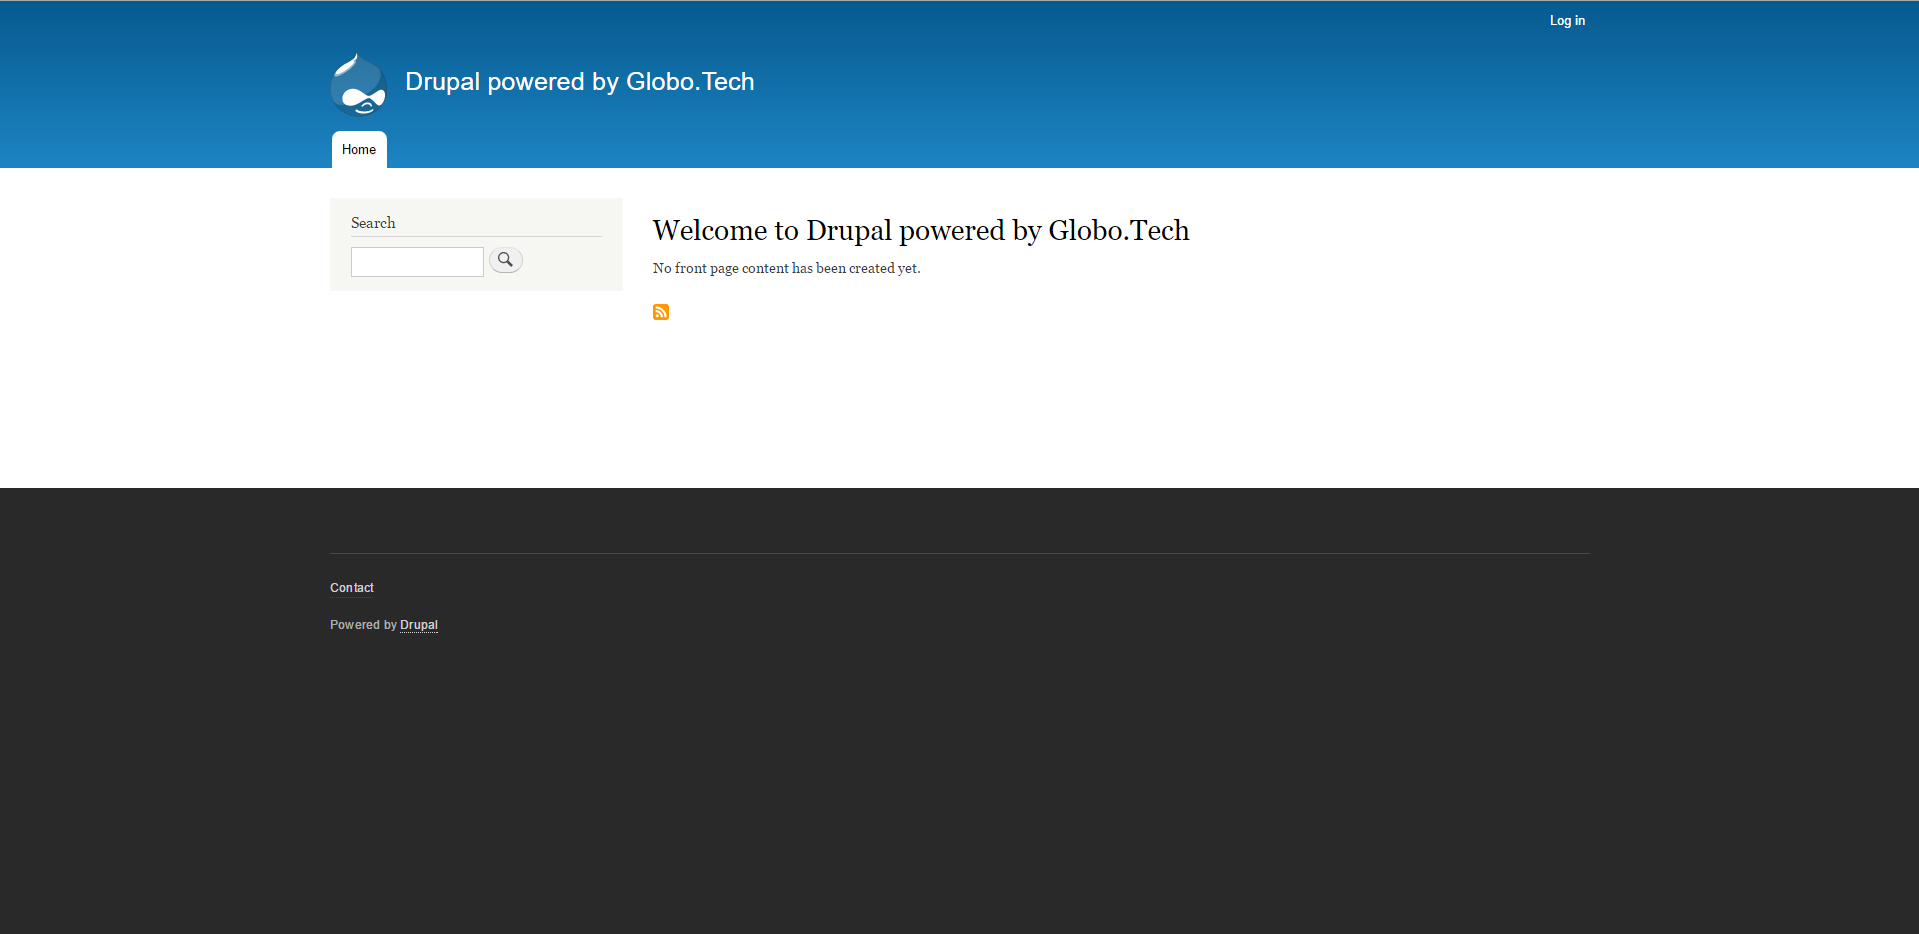
Start by visiting the site directly. In this example, our site’s IP address is http://173.209.44.55. Yours will be different, and should have been included in the email we sent.
Let’s test the administrative interface. Click the “Log in” link at the top right. Use the credentials included in the email to access your administrative area.
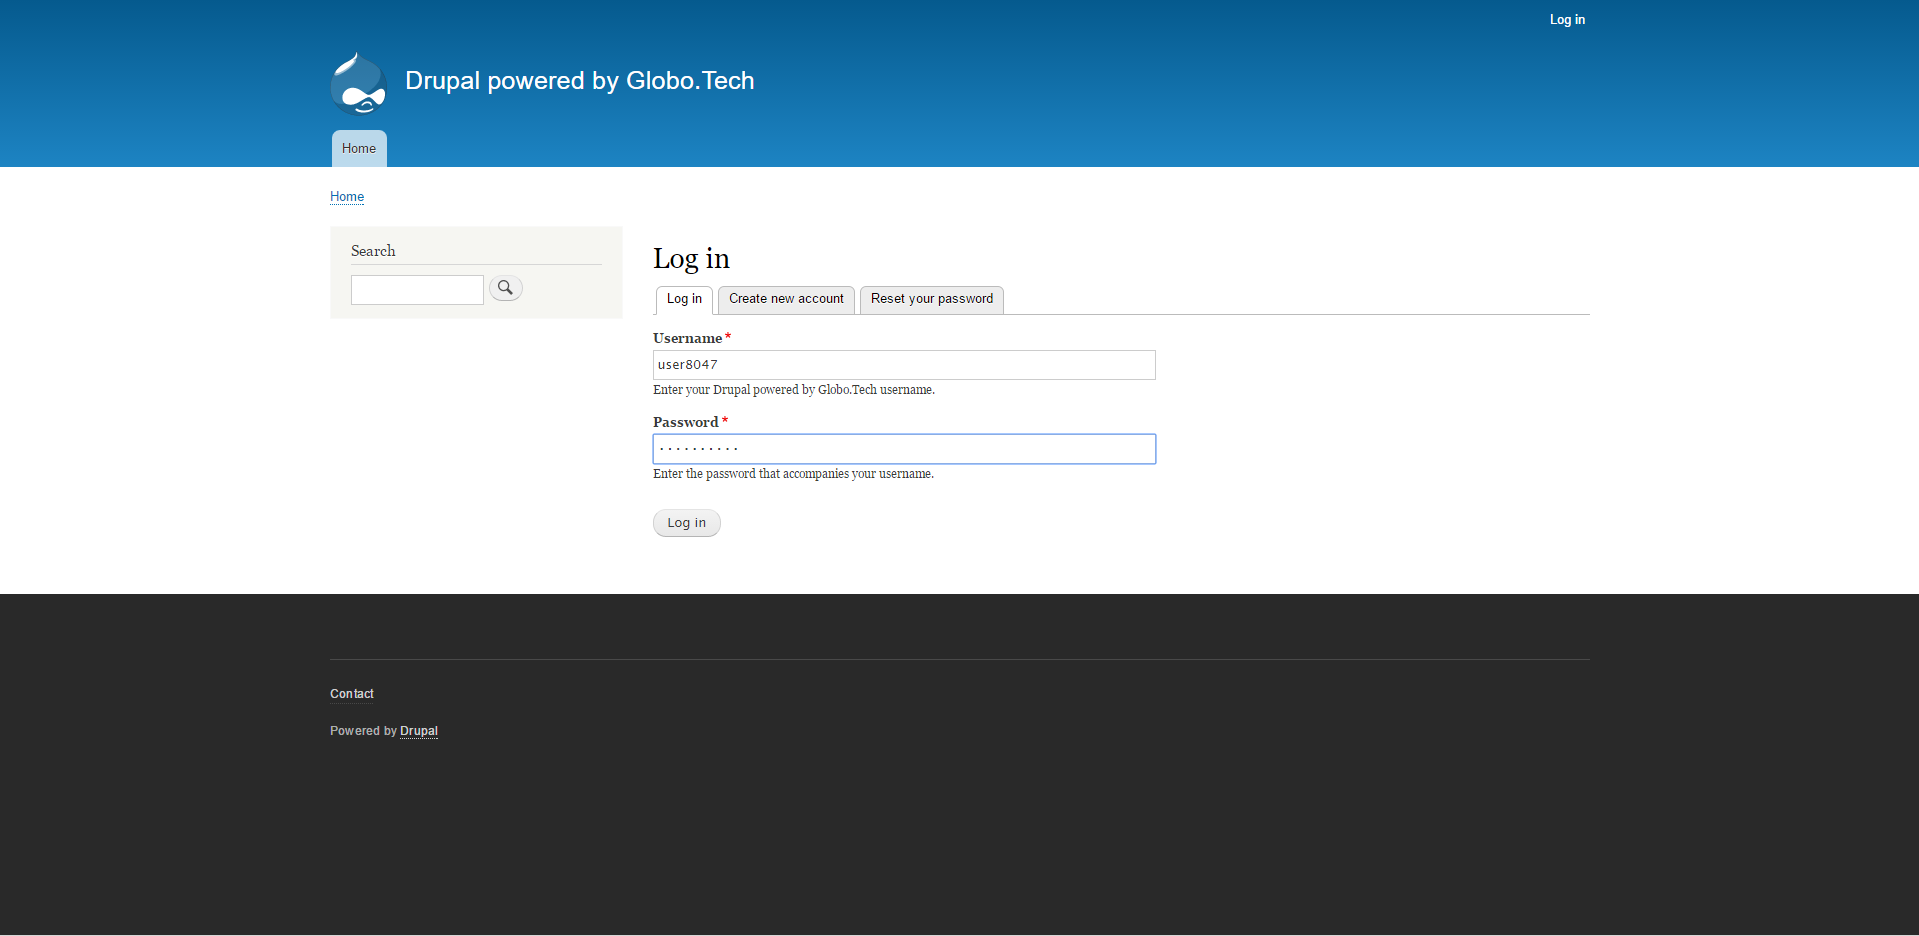
If all goes well, you’ll be logged into your Drupal site’s administrative interface. Here you’ll find links to publish content and configure your new site.
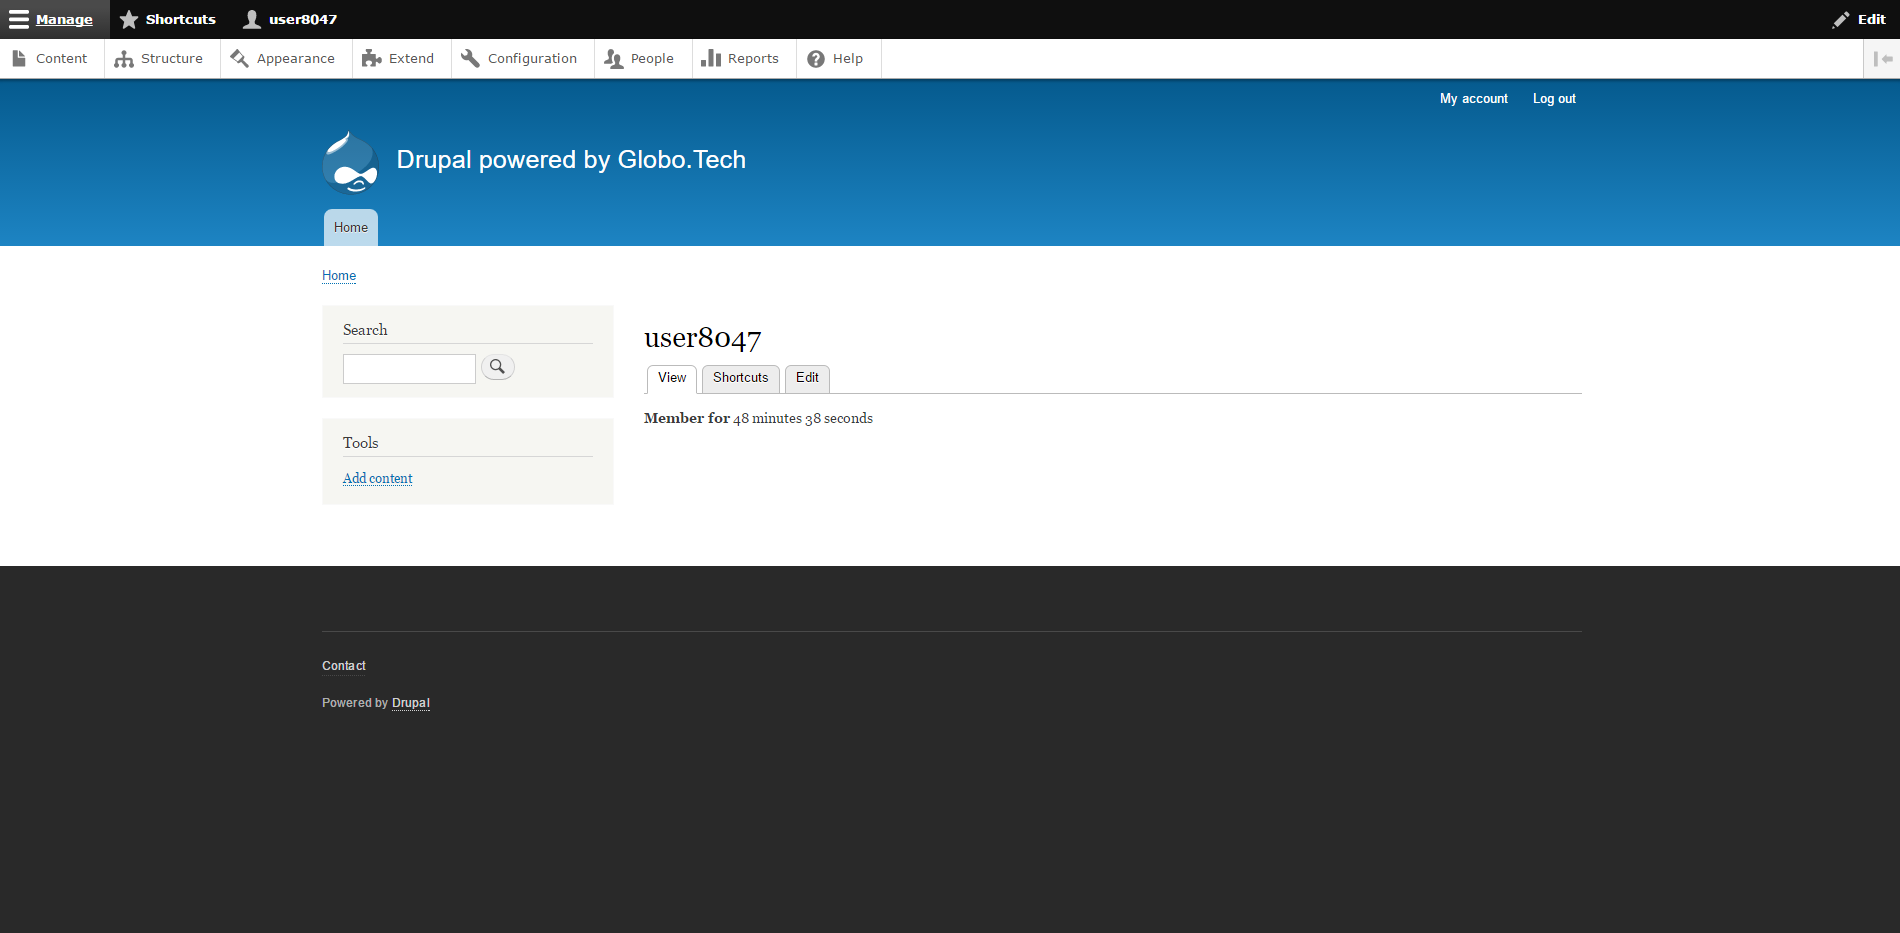
Drupal is now running successfully. It is now ready to be configured, and you can begin adding content and changing the site’s theme.
Ideally, you’d like your Drupal site to run at a specific domain rather than an IP address. For this step, you’ll need to have purchased a domain name. If you’re unfamiliar with this process, contact us directly and we’ll sell you a domain and help set it up.
In this guide, we’ll use the domain name MyDrupalSite.com and the IP address 173.209.44.55. You will, of course, substitute your own domain name and IP for these examples. Domain registrars differ in how records are configured, so we can’t show screenshots of how to complete this process, but you’ll need to add two A records pointing at your IP:
mydrupalsite.com to point towards 173.209.44.55
www.mydrupalsite.com to point towards 173.209.44.55
Unfortunately, DNS changes don’t happen immediately. In general, they require several hours to propagate across the entire internet, though in some rare cases they may take up to 48 hours to go live. If you cannot access your site yet, be patient and give it time.
You can now configure Drupal however you like, but doing so is outside the scope of this tutorial. Drupal’s official documentation is quite good, and can help you with any tasks you wish to perform on your new Drupal site. Find it here.
Whether you’re launching a personal blog or setting up a company website, we hope you’ve found our Drupal One Click App useful. By making it easy to spin up a Drupal site, we’ve freed you from the tedium of managing your web server so you can focus on what you do best, building awesome websites and making great things.