 Call us at 1-888-GTCOMM1
-

- Dedicated Hosting
- Cloud hosting
- Services
- Support
- Learning Center
- Referral Program
- Français
-
Why globotech
- Log in
Backing up your SQL Server databases regularly is a good practice for any database administrator to prevent data loss or corruption. Backing up is the only way to protect and recover your data from many failures including, Media failure, Hardware failures, User errors and many more.
Moreover, a database backup is also useful for day-to-day administrative tasks such as, database mirroring, archiving and copying a database from one server to another.
MSSQL is the most widely used database management system for Windows-based systems developed and marketed by Microsoft. It is used to store website data like, blog and user information.
In this tutorial, we will show you how to backup and restore the MSSQL database on Windows operating system.
Prerequisites
First, we will create a new database using the SQL Server Management Studio (SSMS) for testing purposes.
Follow the below steps to create a new database:
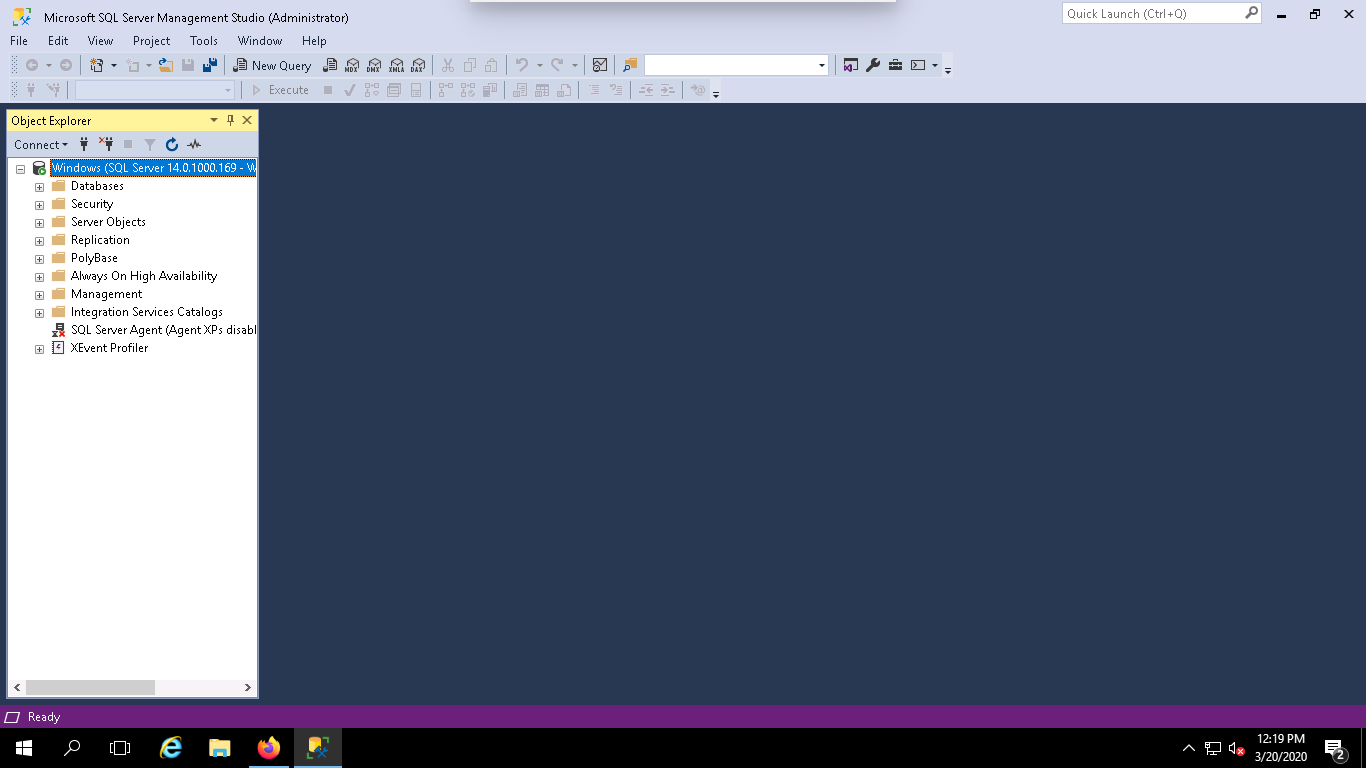
Step 1 – Open SQL Server Management Studio (SSMS) from the Start menu as shown below:
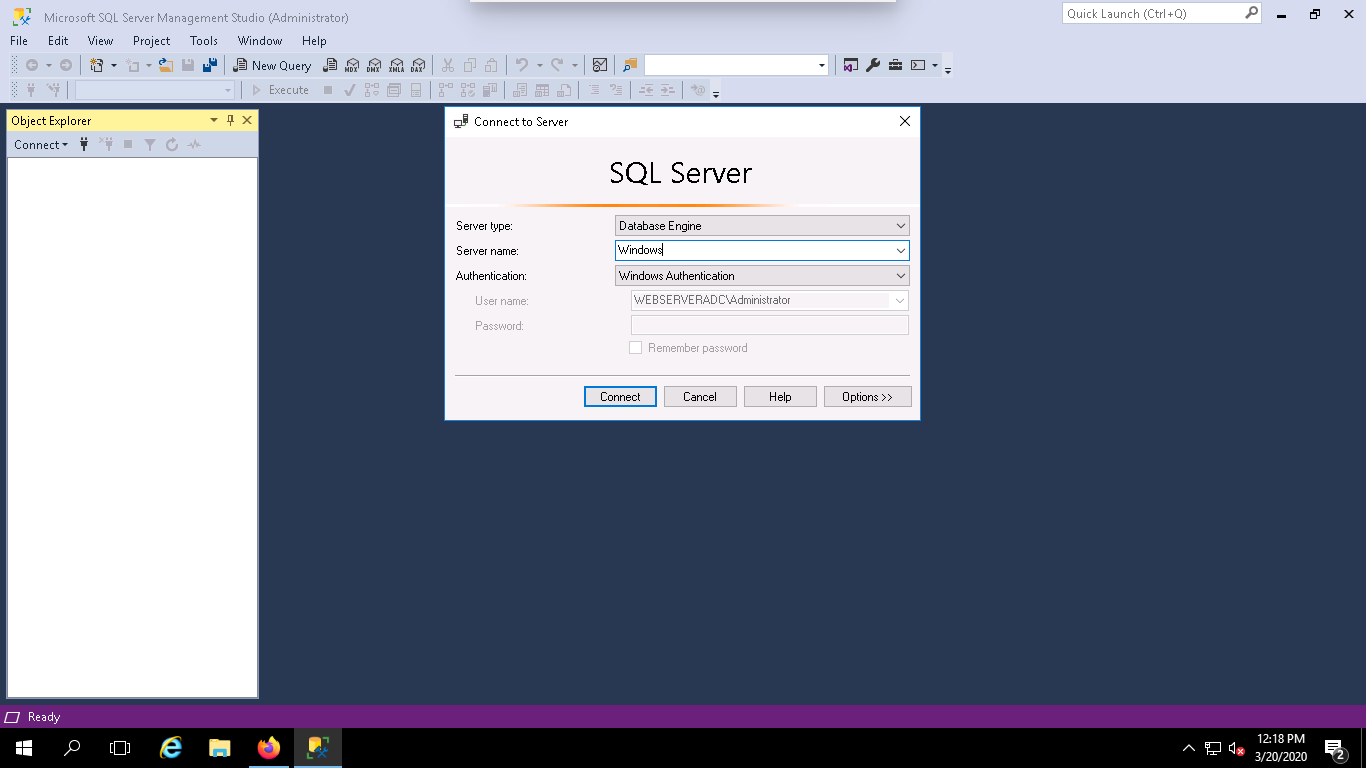
Step 2 – Click on the connect button to connect with your MSSQL Server instance. You should see the following page:

Step 3 – Click on the New Query button to open a new Query window as shown below:
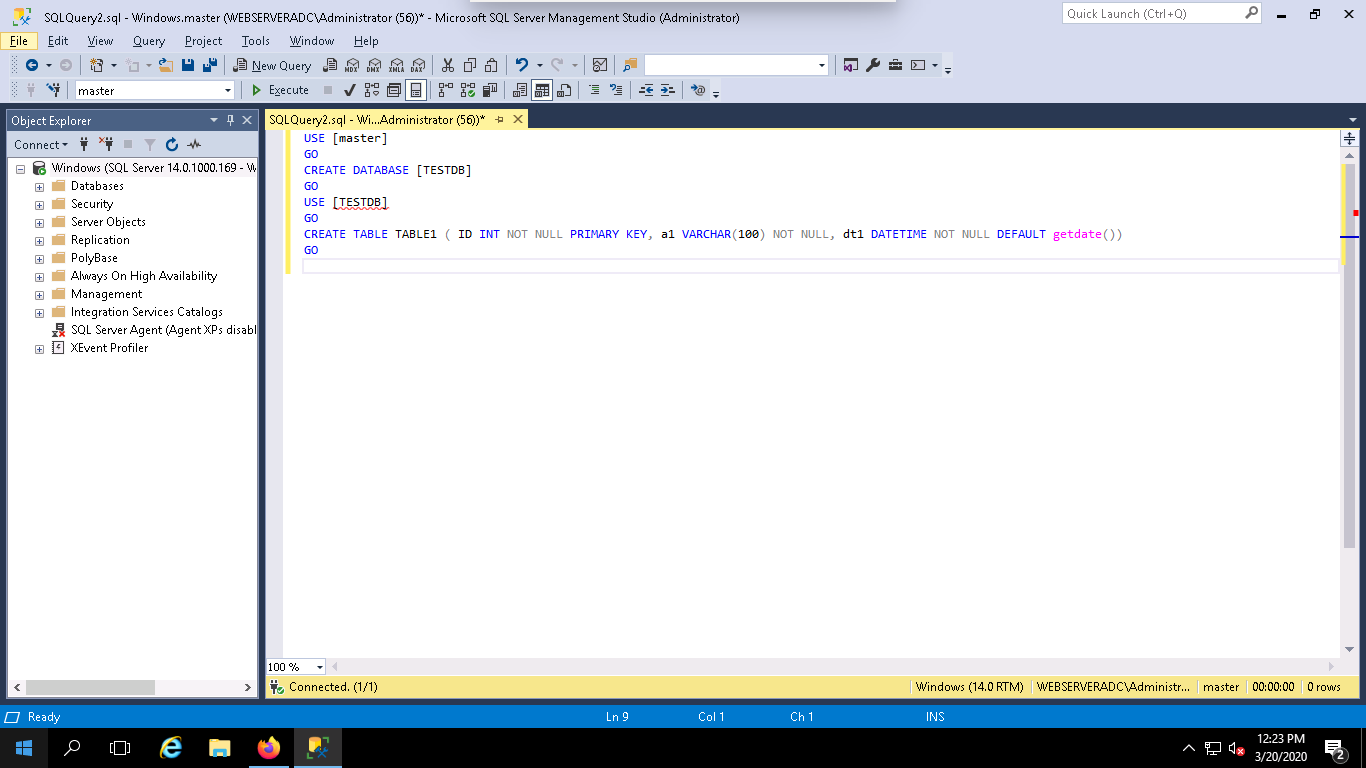
Step 4 – Type the following query in the above query window to create a new database named TESTDB and create a new table named TABLE1:
USE [master]
GO
CREATE DATABASE [TESTDB]
GO
USE [TESTDB]
GO
CREATE TABLE TABLE1 (
ID INT NOT NULL PRIMARY KEY,
a1 VARCHAR(100) NOT NULL,
dt1 DATETIME NOT NULL DEFAULT getdate()
)
GO
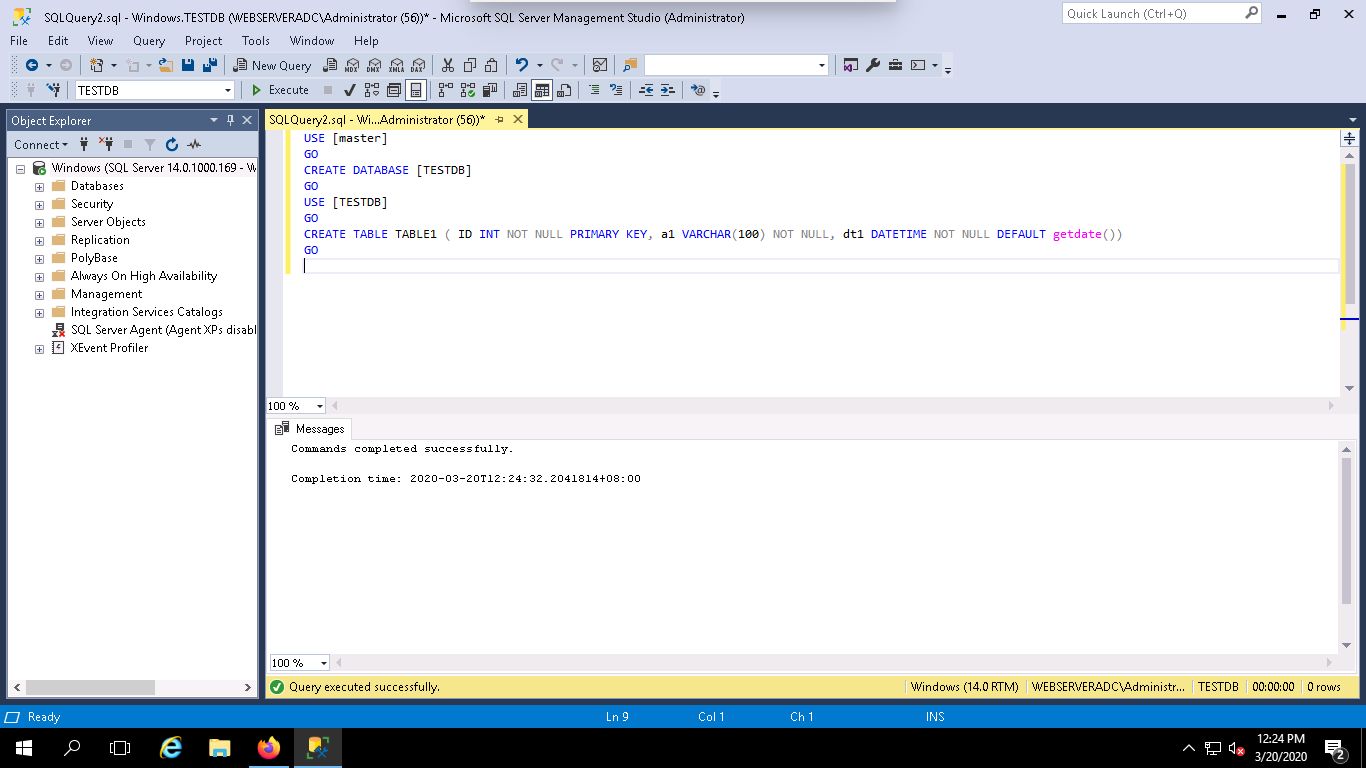
Next, click on the Execute button to run the query. Once the query has been executed successfully, you should see the following page:
In this section, we will learn how to take a backup of a database named TESTDB using the Microsoft SQL Server Management Studio (SSMS).
Follow the below steps to back up the TESTDB database:
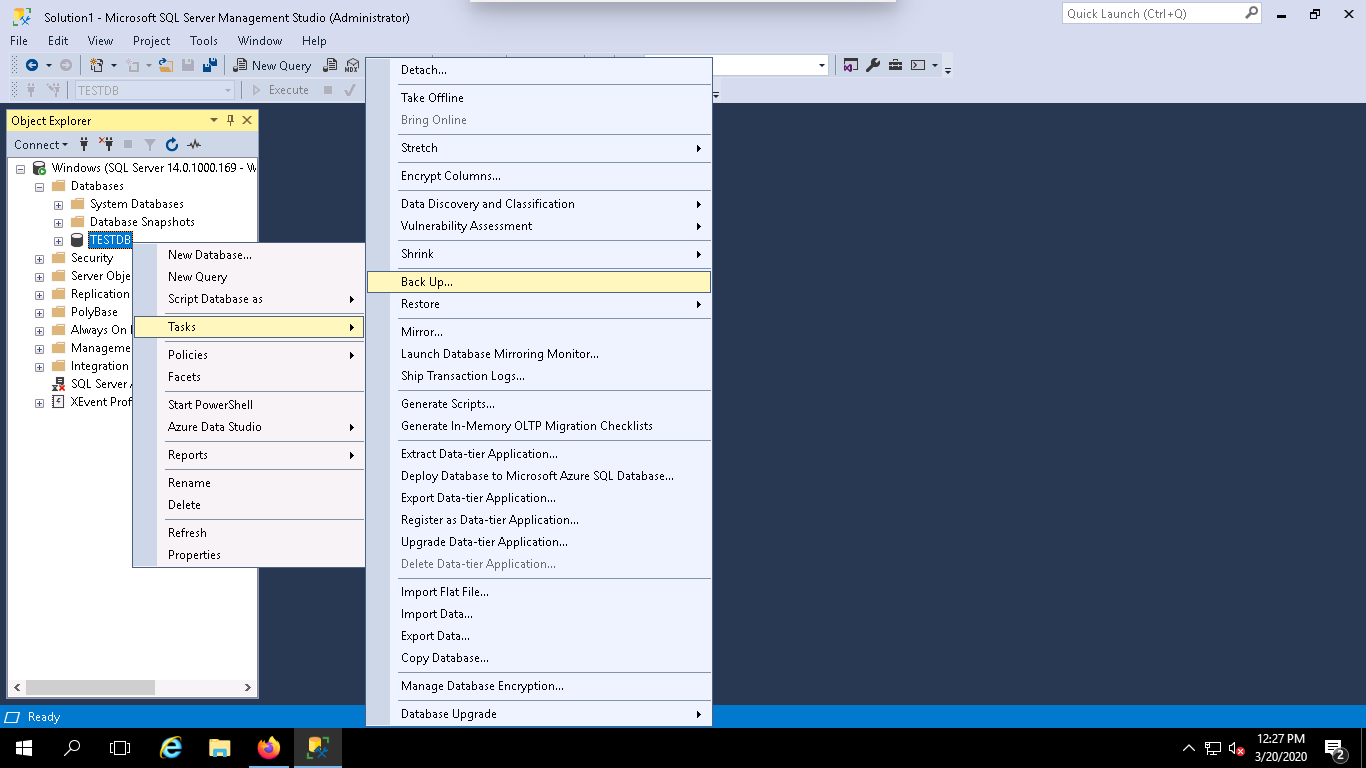
Step 1 – Launch the MSSQL Server Management Studio (SSMS) and expand the Databases as shown below:

Step 2 – Right-click on the TESTDB and click on the Tasks => Back Up. You should see the following page:
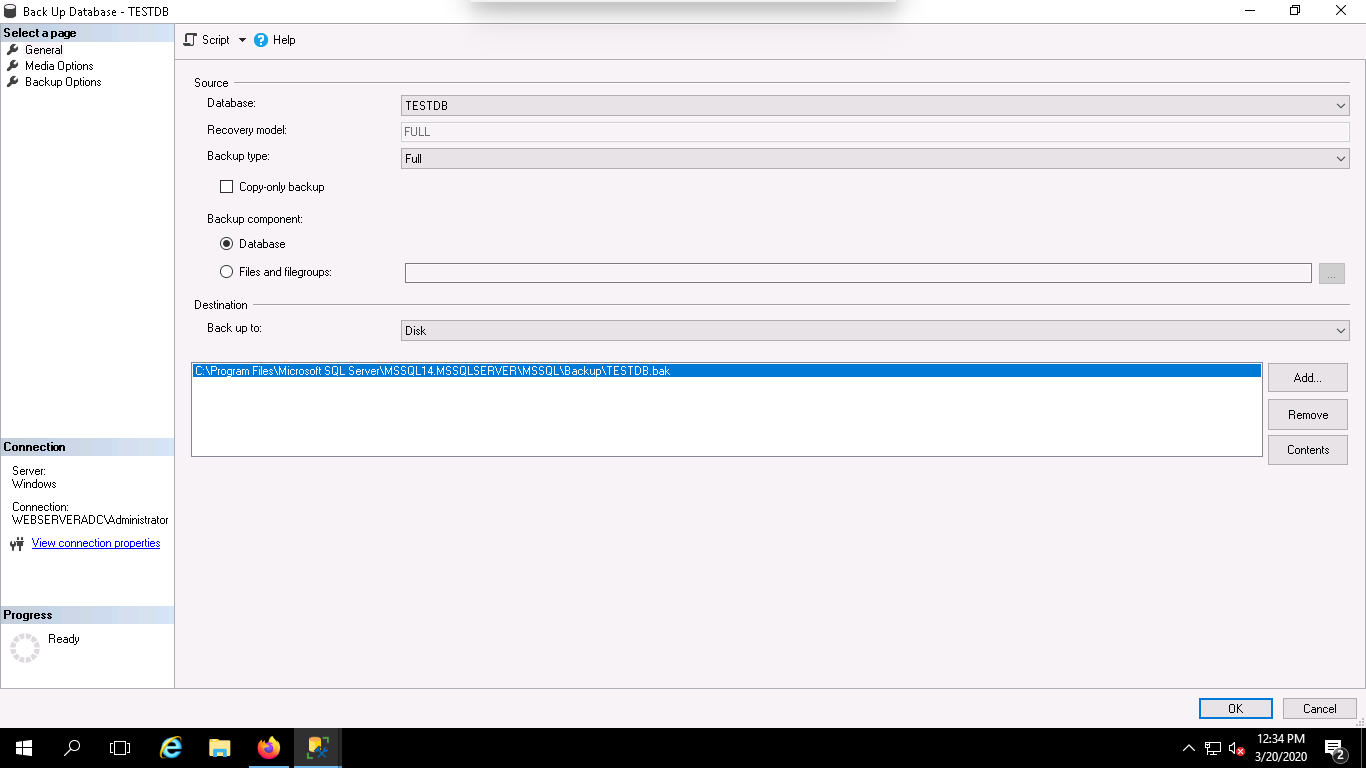
Step 3 – Select all required information like, Database, Backup type, Backup path and click on the OK button. Once the backup has been created successfully, you should see the following page:
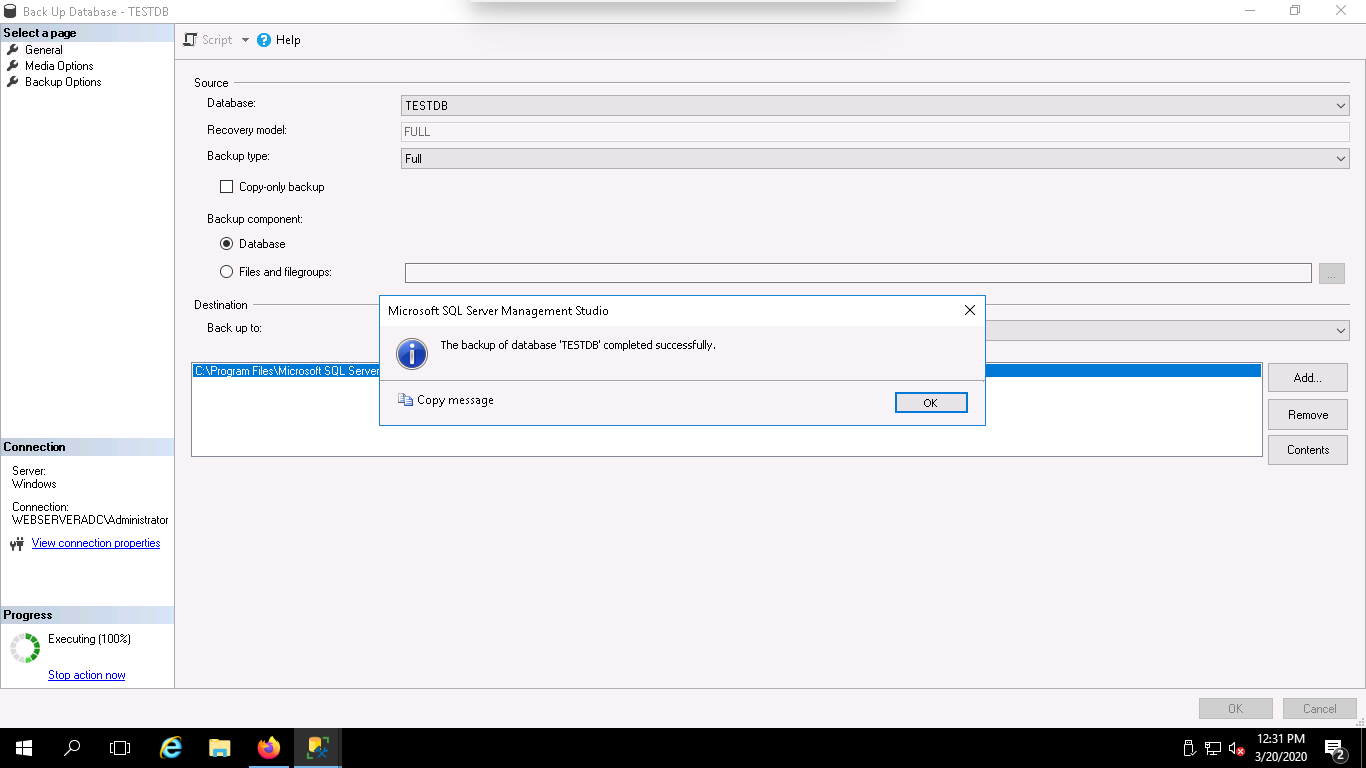
Step 4 – If the backup is successfull, you get the confirmation message “The backup of database “DBTEST” completed successfully, as follow:
You can also take a backup of your database with Transact-SQL command from the query window.
Follow the below steps to backup your TESTDB database with Transact-SQL command:
Step 1 – Launch the Microsoft SQL Server Management Studio (SSMS).
Step 2 – Click on the New Query button to open a new Query window as shown below:
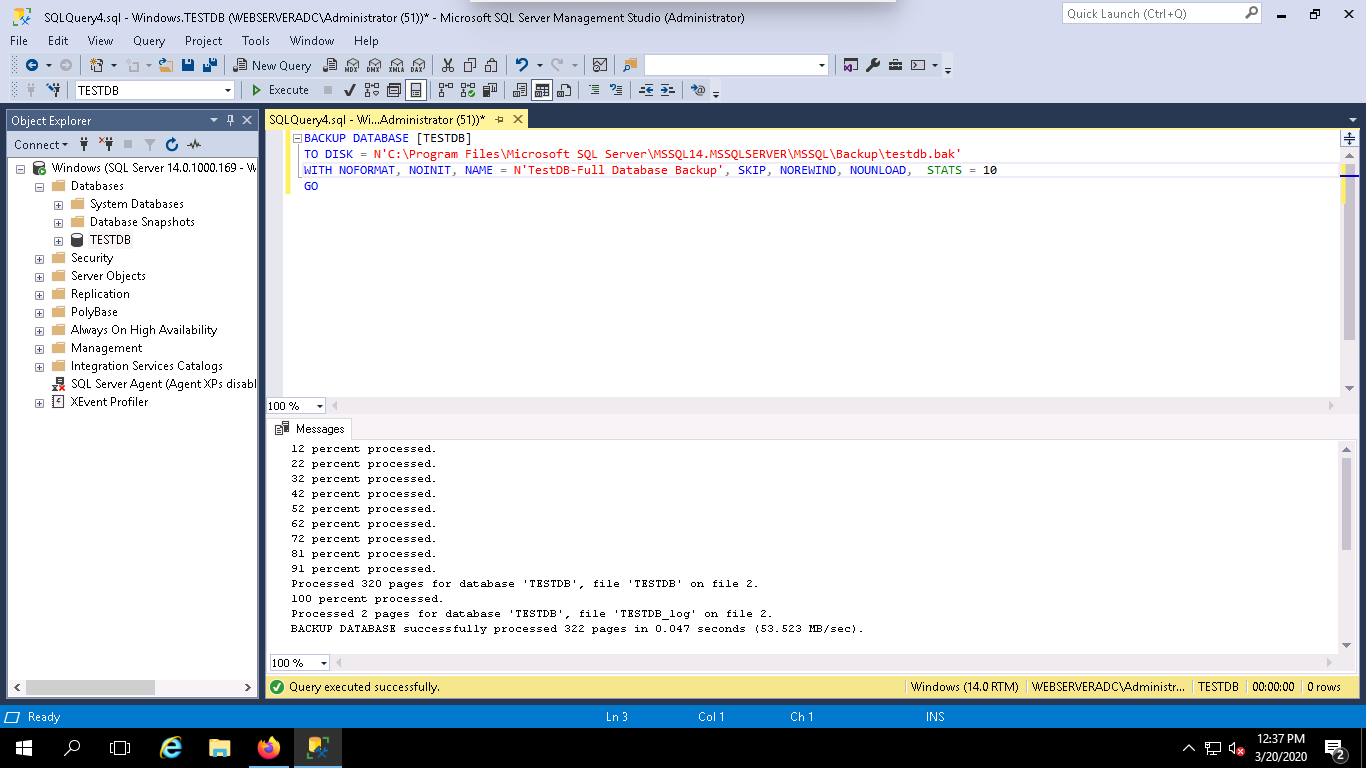
Step 3 – Type the following query in the above query window to take a backup of TESTDB database:
BACKUP DATABASE [TESTDB]
TO DISK = N'C:\Program Files\Microsoft SQL Server\MSSQL14.MSSQLSERVER\MSSQL\Backup\TESTDB.bak'
WITH NOFORMAT, NOINIT,
NAME = N'TestDB-Full Database Backup', SKIP, NOREWIND, NOUNLOAD, STATS = 10
GO
Step 4 – Click on the Execute button to create a backup.
You can also restore a backup using the SQL Server Management Studio (SSMS).
Follow the below steps to restore your database named TESTDB:
Step 1 – Launch the SQL Server Management Studio (SSMS).
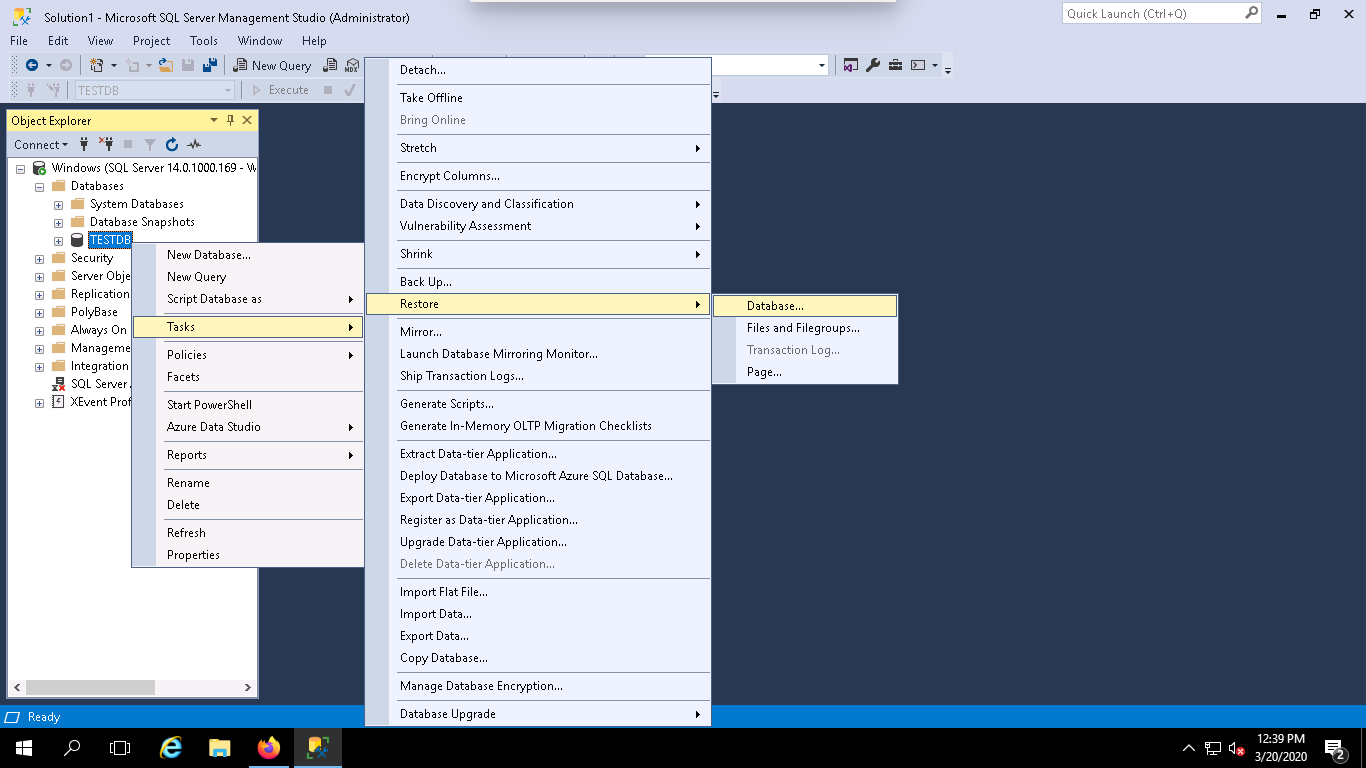
Step 2 – Right-click on the TESTDB and click on the Tasks => Restore => Database. You should see the following page:
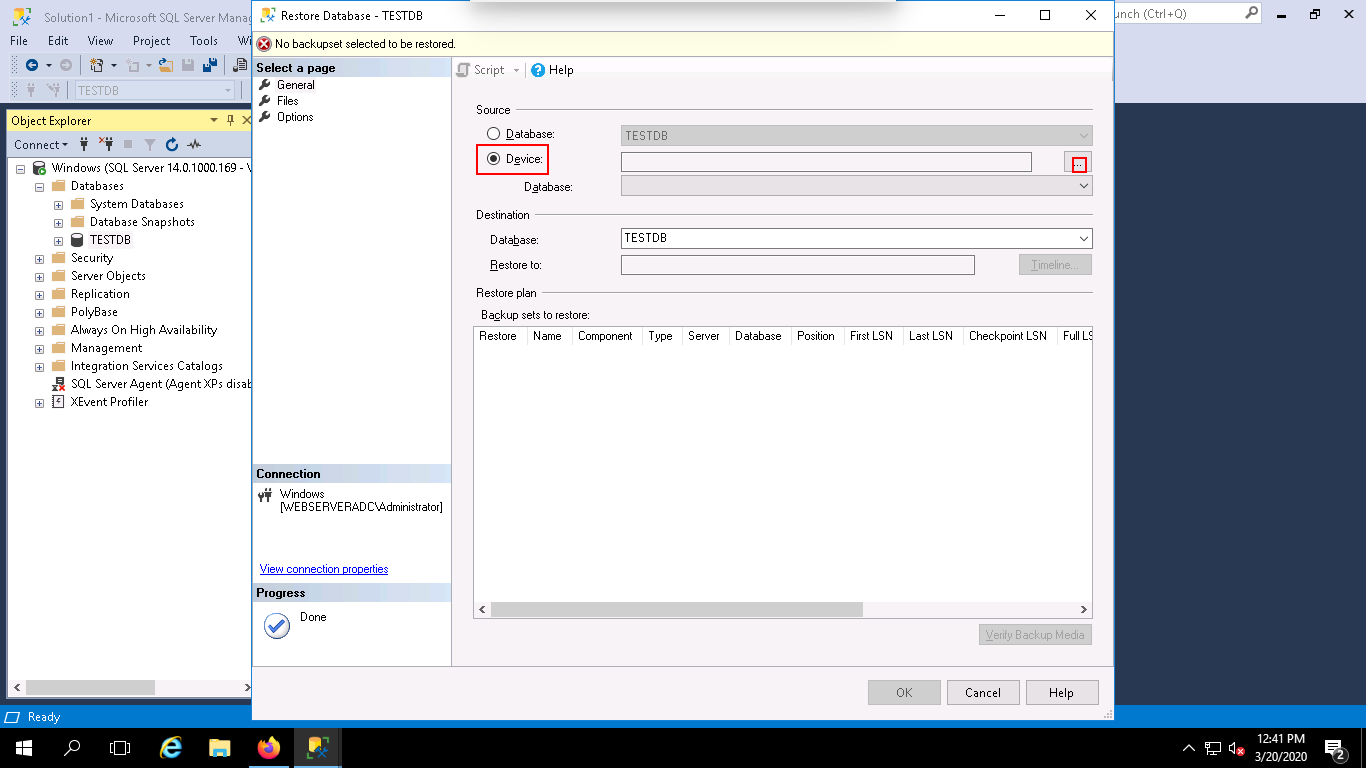
Step 3 – Select Device and click on the “…“. You should see the following page:
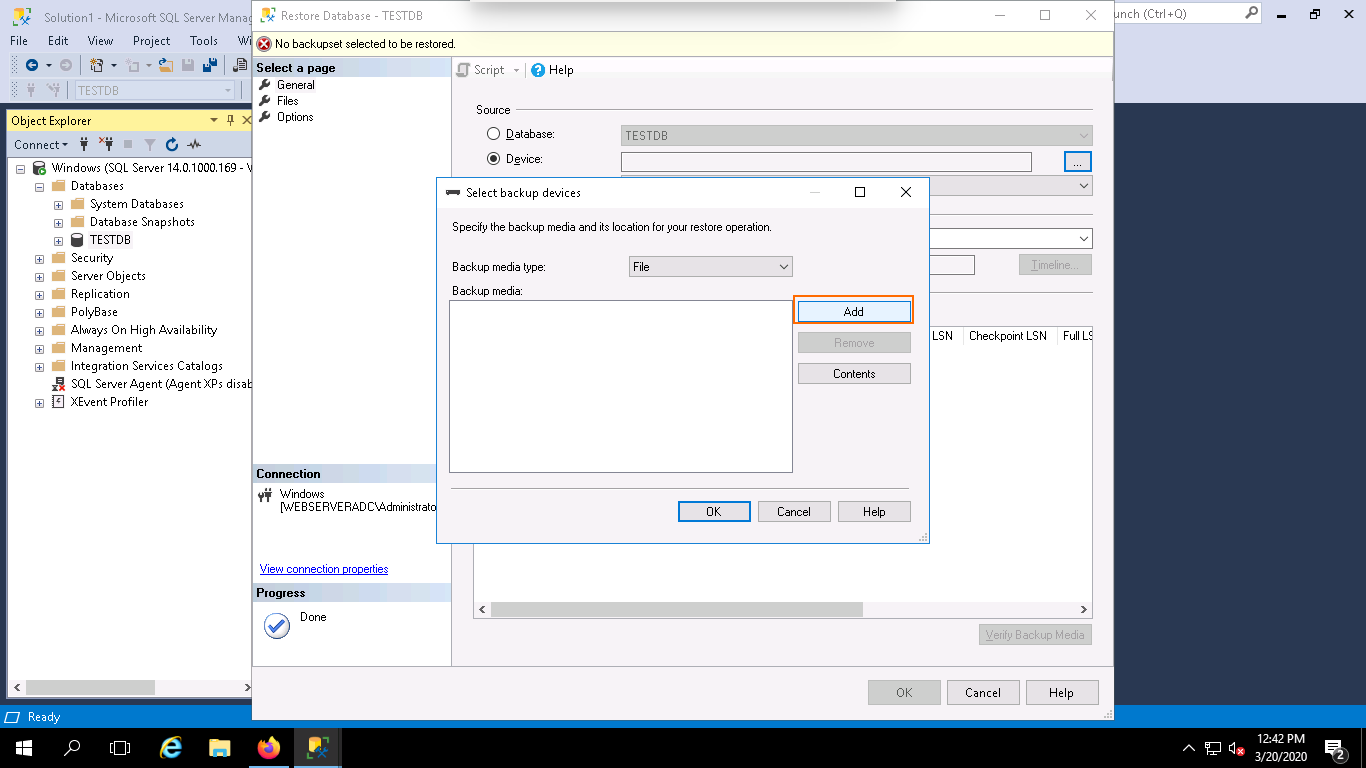
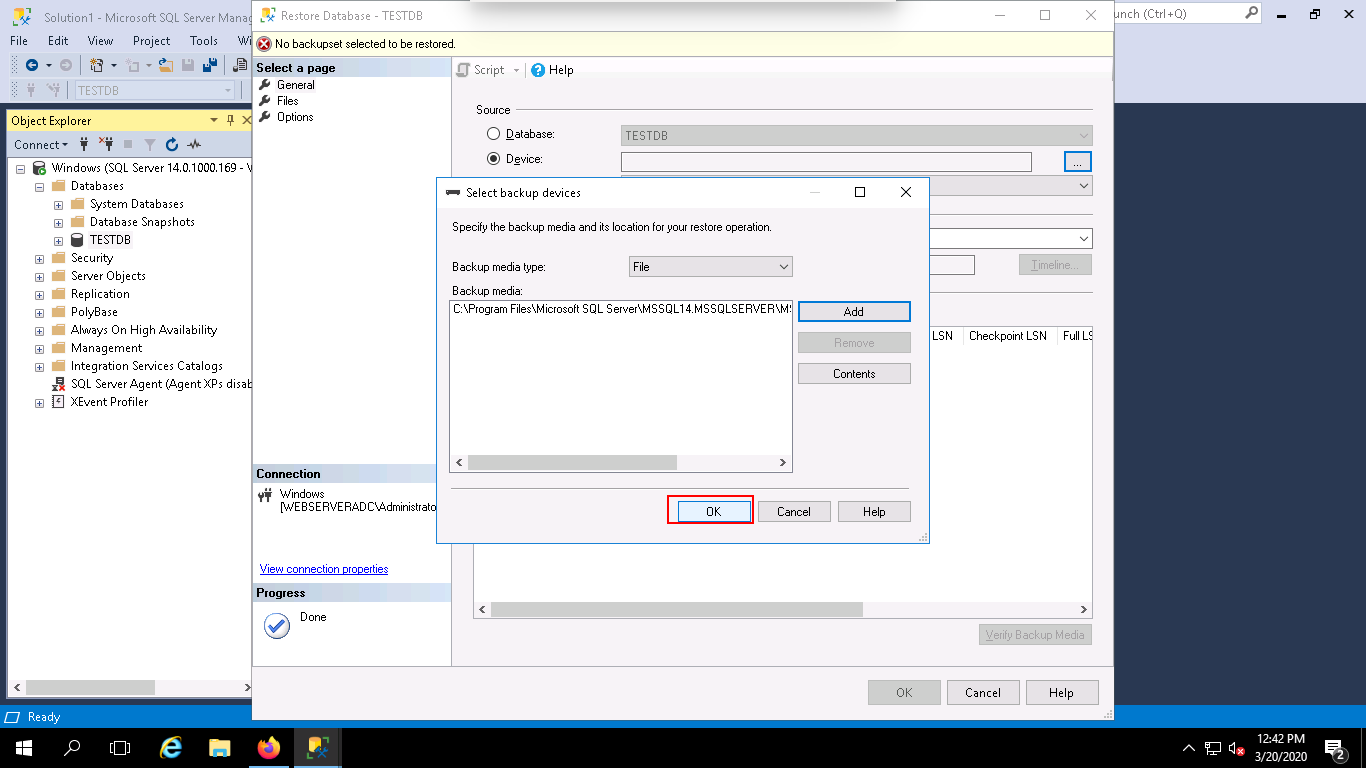
Step 4 – Click on the Add button. You should see the following page:
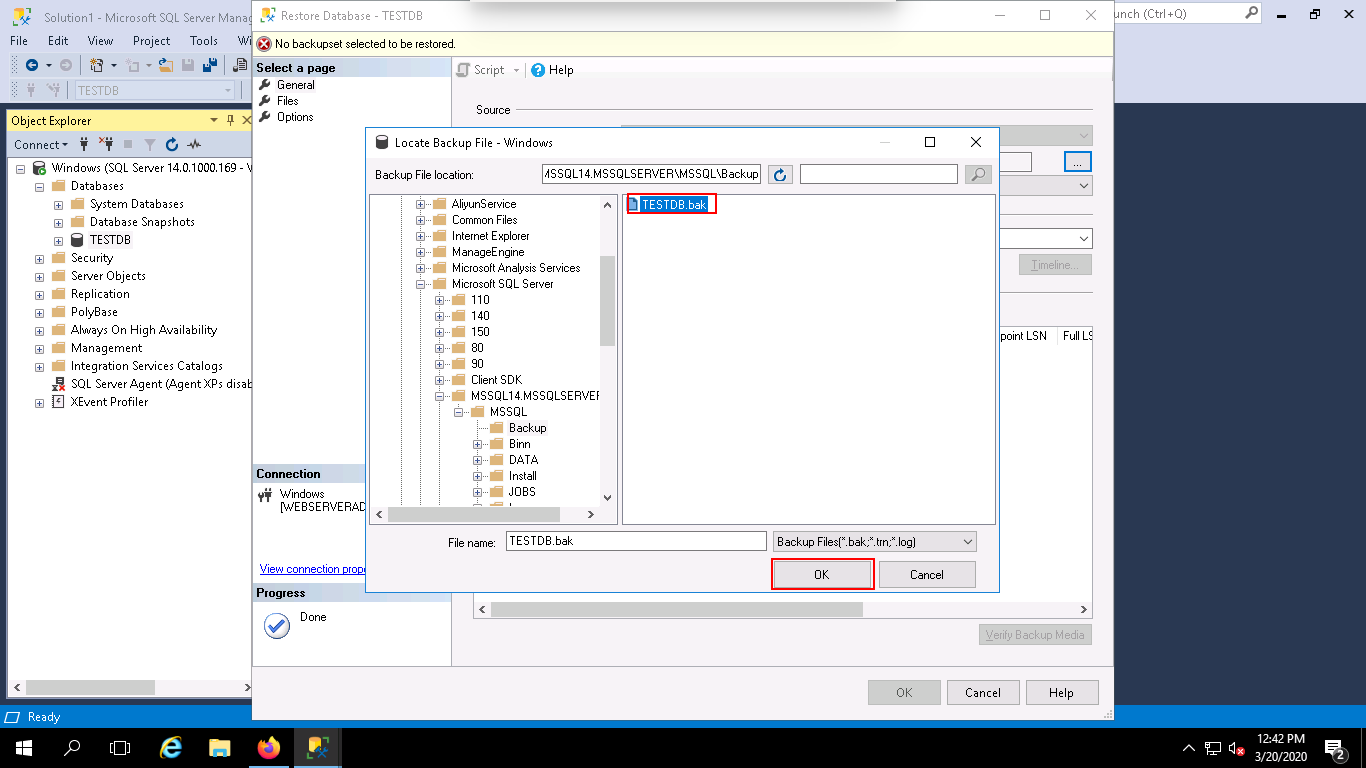
Step 5 – Select your database backup file and click on the OK button. You should see the following page:
Step 6 – Click on the OK button again to close the “Select backup devices window”. You should see the following page:
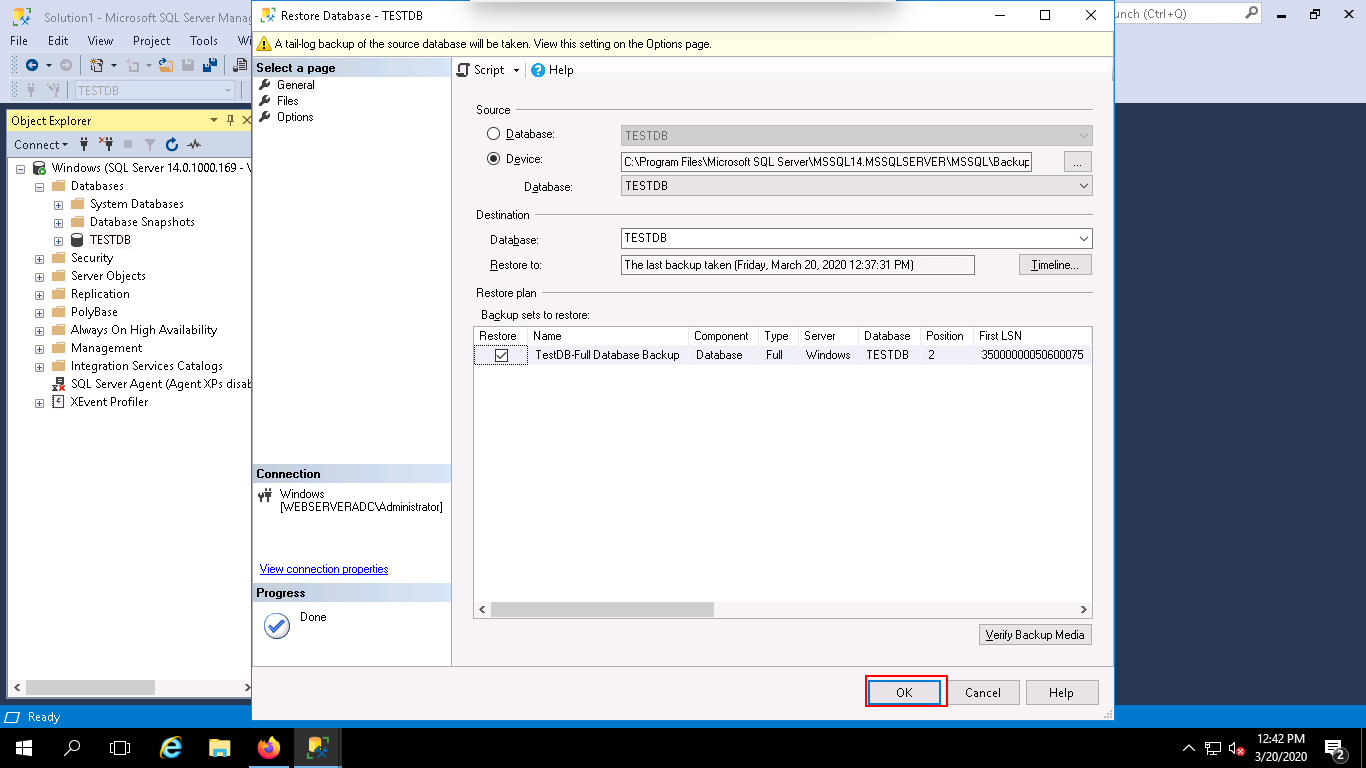
Step 7 – Next, click on the OK button to restore the backup of your database. Once the backup completed successfully, you should see the following page:
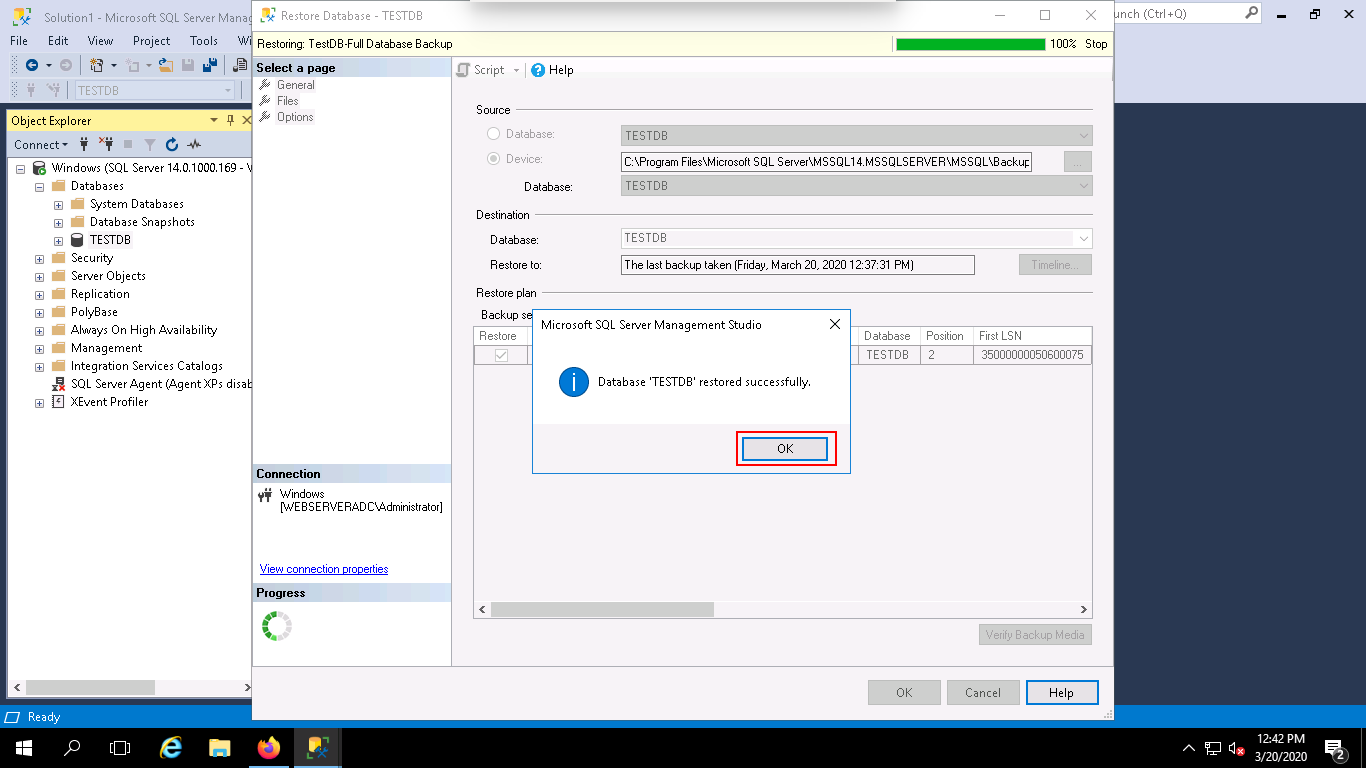
In this guide, you learned how to backup and restore the MSSQL database in Windows server 2016. I hope this will help you to recover data in case of data corruption issue.
In this tutorial, we will show you how to delete MySQL database on Ubuntu 18.04 server.
Creating and deleting the MySQL databases is a day-to-day task of any database administrator. You can delete the MySQL databases by using either a command-line interface or PhpMyAdmin web-based interface. In order to delete a MySQL database from your system, you must have a MySQL user account with delete privileges.
Prerequisites
Mysqladmin is a MySQL command-line utility that can be used to perform some basic MySQL tasks including, creating and deleting databases, checking MySQL processes, Setting root password and many more.
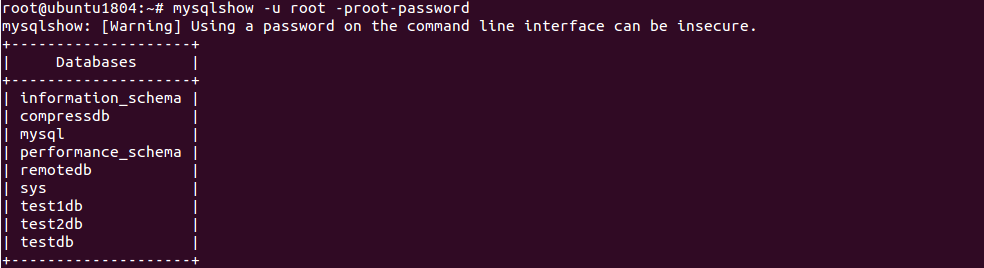
Before deleting any database, list all available databases in your system with the following command:
mysqlshow -u root -proot-password
You should see the following output:
mysqlshow: [Warning] Using a password on the command line interface can be insecure.
 +--------------------+
 |     Databases      |
 +--------------------+
 | information_schema |
 | compressdb         |
 | mysql              |
 | performance_schema |
 | remotedb           |
 | sys                |
 | test1db            |
 | test2db            |
 | testdb             |
 +--------------------+
Next, delete the database named testdb from the above list by running the following command:
mysqladmin -u root -proot-password drop testdb
You should see the following output:
 Dropping the database is potentially a very bad thing to do.
 Any data stored in the database will be destroyed.


 Do you really want to drop the 'testdb' database [y/N] y
 Database "testdb" dropped

You can also drop the MySQL database after log into the MySQL console.
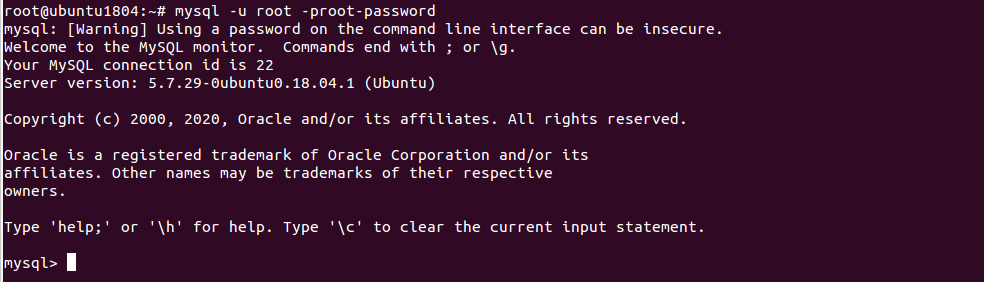
First, log into the MySQL console with root user with the following command:
mysql -u root -proot-password
Once login, you should see the following output:
 mysql: [Warning] Using a password on the command line interface can be insecure.
 Welcome to the MySQL monitor.  Commands end with ; or \g.
 Your MySQL connection id is 22
 Server version: 5.7.29-0ubuntu0.18.04.1 (Ubuntu)


 Copyright (c) 2000, 2020, Oracle and/or its affiliates. All rights reserved.


 Oracle is a registered trademark of Oracle Corporation and/or its
 affiliates. Other names may be trademarks of their respective
 owners.


 Type 'help;' or '\h' for help. Type '\c' to clear the current input statement.
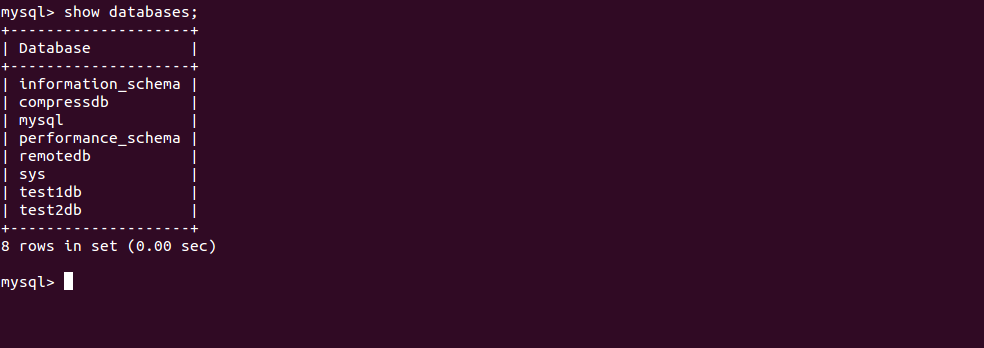
Next, list all available databases with the following command:
show databases;
Output:
 +--------------------+
 | Database           |
 +--------------------+
 | information_schema |
 | compressdb         |
 | mysql              |
 | performance_schema |
 | remotedb           |
 | sys                |
 | test1db            |
 | test2db            |
 +--------------------+
 8 rows in set (0.00 sec)
Next, delete the MySQL database named test1db from the above list with the following command:
drop database test1db;
Next, exit from the MySQL console with the following command:
exit;

You can also remove the MySQL database named test2db without log into the MySQL console as shown below:
mysql -u root -proot-password -e "drop database test2db";
First, open your web browser and access the PhpMyAdmin web UI. You should see the following page:
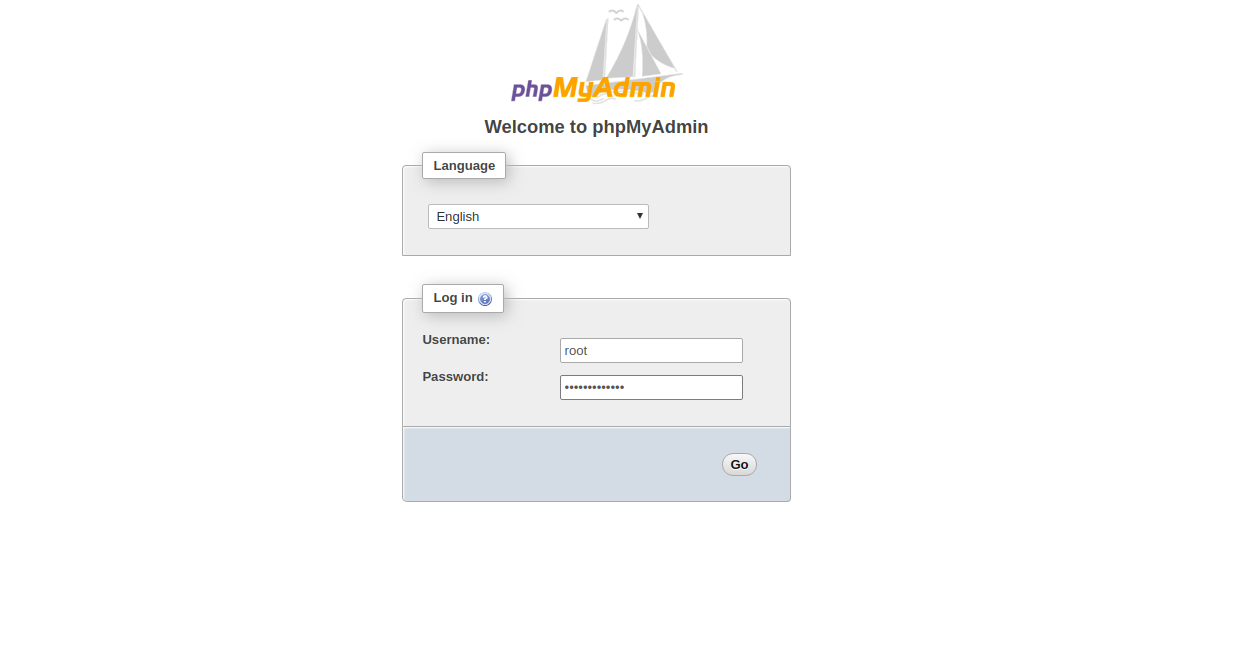
Provide your MySQL root username, password and click on the Go button. You will be redirected to the PhpMyAdmin dashboard in the following page:
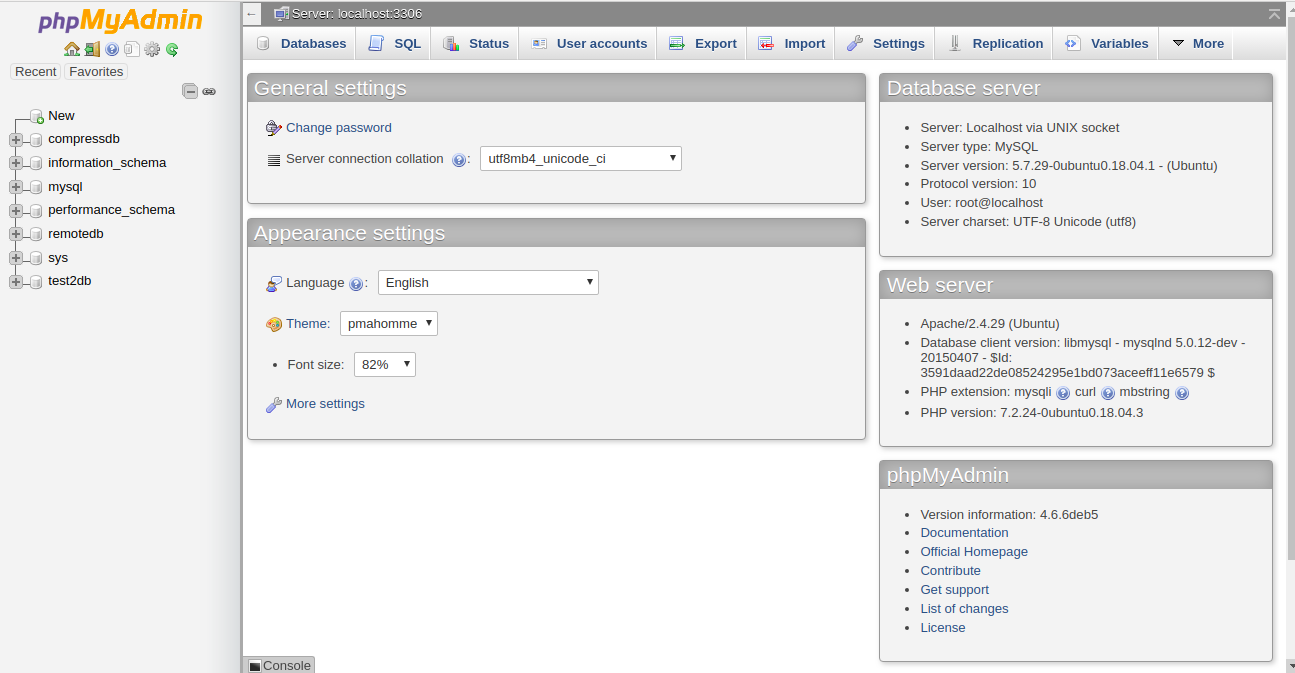
Now, click on the Databases, you should see all the databases in the following page:
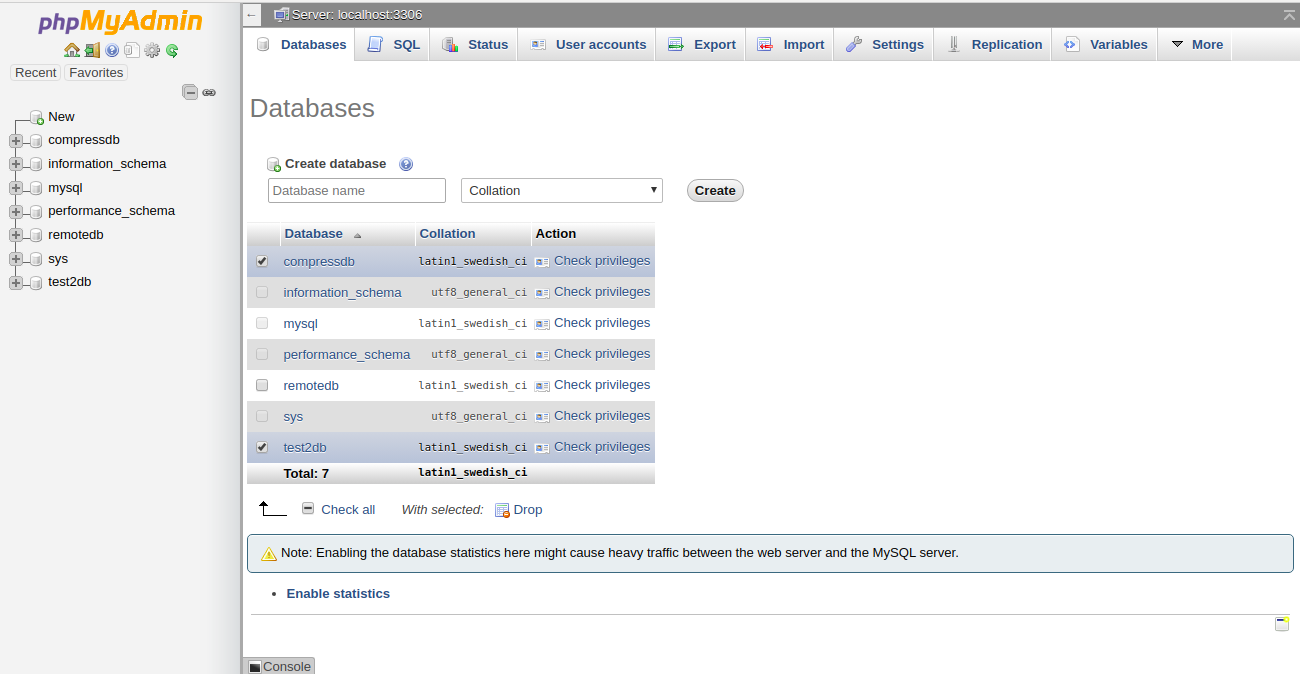
Now, select the database you want to delete and click on the Drop button to delete the selected database. You will be prompt to confirm as shown below:
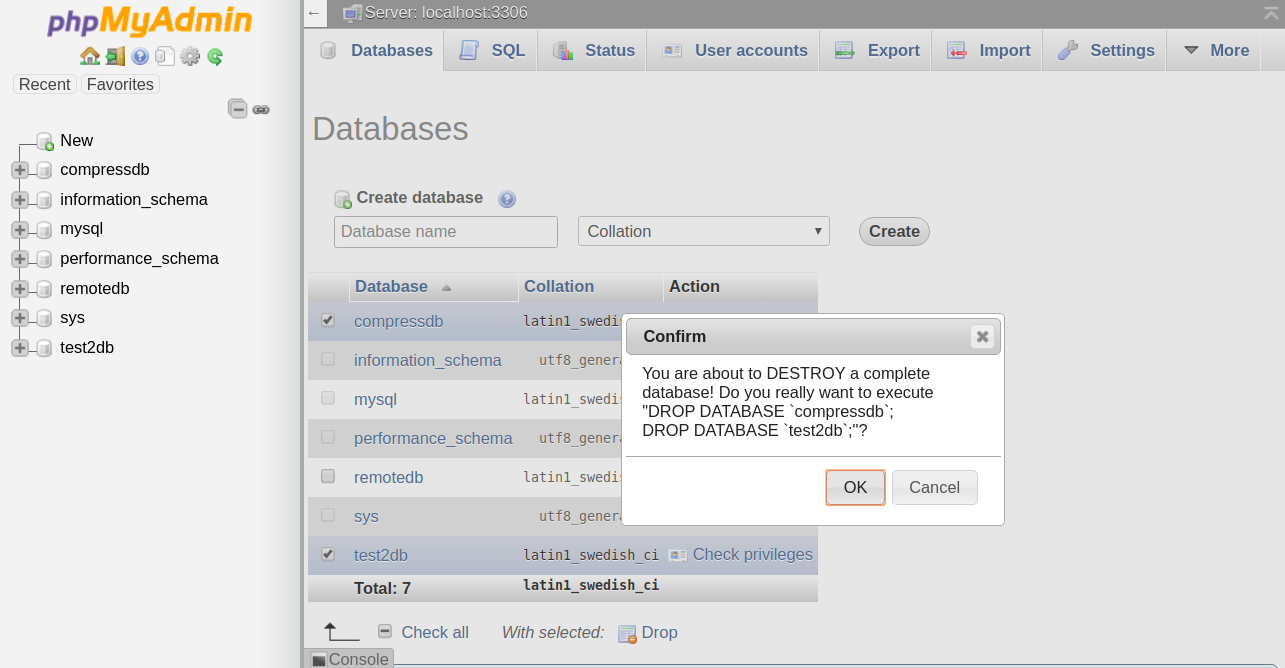
Click on the OK button to delete the database.
In the above guide, you learned how to drop a MySQL database server with command-line and PhpMyAdmin. I hope this will helps you to perform your day-to-day operations.

If you are a database administrator and responsible for managing MySQL server then you must have a knowledge of how to backup and restore the MySQL database. Regularly backing up MySQL database is a good practice for any database administrator as this will help you to prevent data loss if your server goes down. There are several ways to perform backup operations of MySQL databases.
In this tutorial, we will explain how to backup and restore the MySQL database in Linux.
You can backup and restore the MySQL database using the mysqldump utility. This utility will help you to backup a local or remote MySQL database into a single file.
You can backup a single MySQL database using the following syntax:
mysqldump -v -u [Username] –p[Password] [Database_name] > [Dump_file.sql]
A brief explanation of each parameter is shown below:
Username : Specify the MySQL username.
Password : Specify the password of the MySQL user.
Database_name : A name of the database that you want to backup.
Dump_file.sql : A name of the dump file that you want to generate.
For example, to take a backup of a single database named testdb and generates a dump file named testdb_backup.sql, run the following command:
mysqldump -v -u root –proot-password testdb > testdb_backup.sql
You should see the following output:
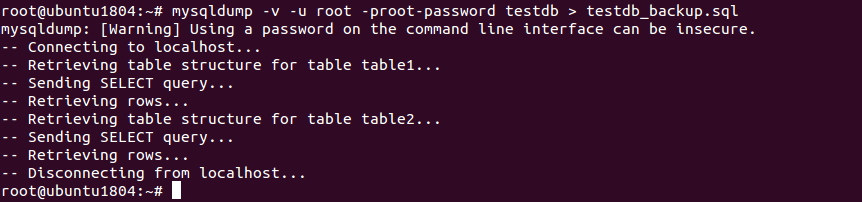
The above command will backup the testdb database into a file called testdb_backup.sql.
In some cases, you may need to backup more than one database. In this case, you can perform this operation using the –-databases option.
For example, to take a backup of a database named test1db and test2db, and generates a dump file named testdb.sql, run the following command:
mysqldump -v --user=root --password=root-password --databases test1db test2db > testdb.sql
You should see the following output:

You can also backup all MySQL databases in your system using the –all-databases option.
For example, backup all databases in your system and generates a single dump file named alldb.sql, run the following command:
mysqldump -u root –proot-password --all-databases > alldb.sql
It is also possible to backup all databases in your system and generates a separate dump file for each database. You can achieve this with the following command:
for DATABASE in $(mysql --user=root --password=root-password -e 'show databases' -s --skip-column-names); do
mysqldump --user=root --password=root-password $DATABASE > "$DATABASE.sql";
done
If your database is very large, you will need to compress the dump file to save the disk space. You can achieve this with gzip utility.
mysqldump -v -u root -proot-password compressdb | gzip > compressdb_backup.sql
You should see the following output:

You can also backup a specific table or multiple tables of MySQL database using the following syntax:
mysqldump -u root -proot-password [Database_name] [Table_name] > Dump_file.sql
For example, to take a backup of a single table named table1 from the database testdb, run the following command:
mysqldump -v -u root -proot-password testdb table1 > testdb_table1.sql
You should see the following output:

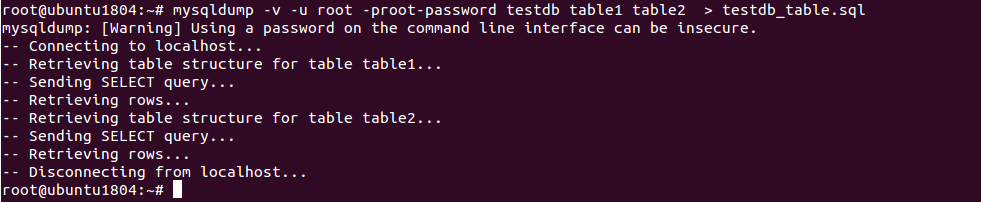
To take a backup of multiple tables named table1 and table2 from the database testdb, run the following command:
mysqldump -v -u root -proot-password testdb table1 table2 > testdb_table.sql
You should see the following output:
It is also possible to take a backup of the database from the remote MySQL server. In order to backup the remote MySQL database, you target MySQL must be configured to allow remote connection.
For example, to take a backup of a database named remotedb from the remote MySQL server 192.168.0.100, run the following command:
mysqldump -v -h 192.168.0.100 -u root -proot-password remotedb > remotedb_backup.sql
You should see the following output:

In order to restore a database on the target computer, you will need to create an empty database on the target computer.
For example, to restore a database named testdb, log into the target computer and create an empty database with the following command:
mysql -v -u root -proot-password -e "create database testdb";
Output:

Next, restore the database from the dump file testdb_backup.sql with the following command:
mysql -v -u root -proot-password testdb < testdb_backup.sql
Once the command is successfully executed, you do not receive any feedback, and return to the command prompt.
In the above guide, you learned several methods to backup and restore MySQL database with practical examples. I hope this will helps you to simplify your database administration task and save a lot of time.
If you are using the Windows server to host your website, you may use the MsSQL database server as a database backend. But, MsSQL is Microsoft’s commercial product and you will need to purchase license to use MsSQL will all features. So it is very difficult for small businesses to pay license costs.
To resolve this, you could try open-source database servers like, MySQL database server and use it as a database backend to save a license cost. You should install MySQL in your Windows Server 2016.
MySQL is a part of the Linux-based server and specially designed for LAMP/LEMP stack. It is also available for the Windows operating system. So you should use MySQL to manage and host your application.
In this tutorial, we will show you how to install and upgrade MySQL server on Windows Server 2016.
MySQL Server is available for Microsoft Windows 64-bit operating systems only. Before installing MySQL Server, it is recommended to see https://www.mysql.com/support/supportedplatforms/database.html for supported Windows platform.
The simple and easiest way to install MySQL server in Windows Server 2016 system is to install it using MySQL installer. MySQL installer provides a simple and user-friendly wizard to install MySQL on Windows.
At the time of writing this article, the latest available version of MySQL is MySQL 8.0.19.
You can download the latest version of MySQL installer from the MySQL Community Download page as shown below.
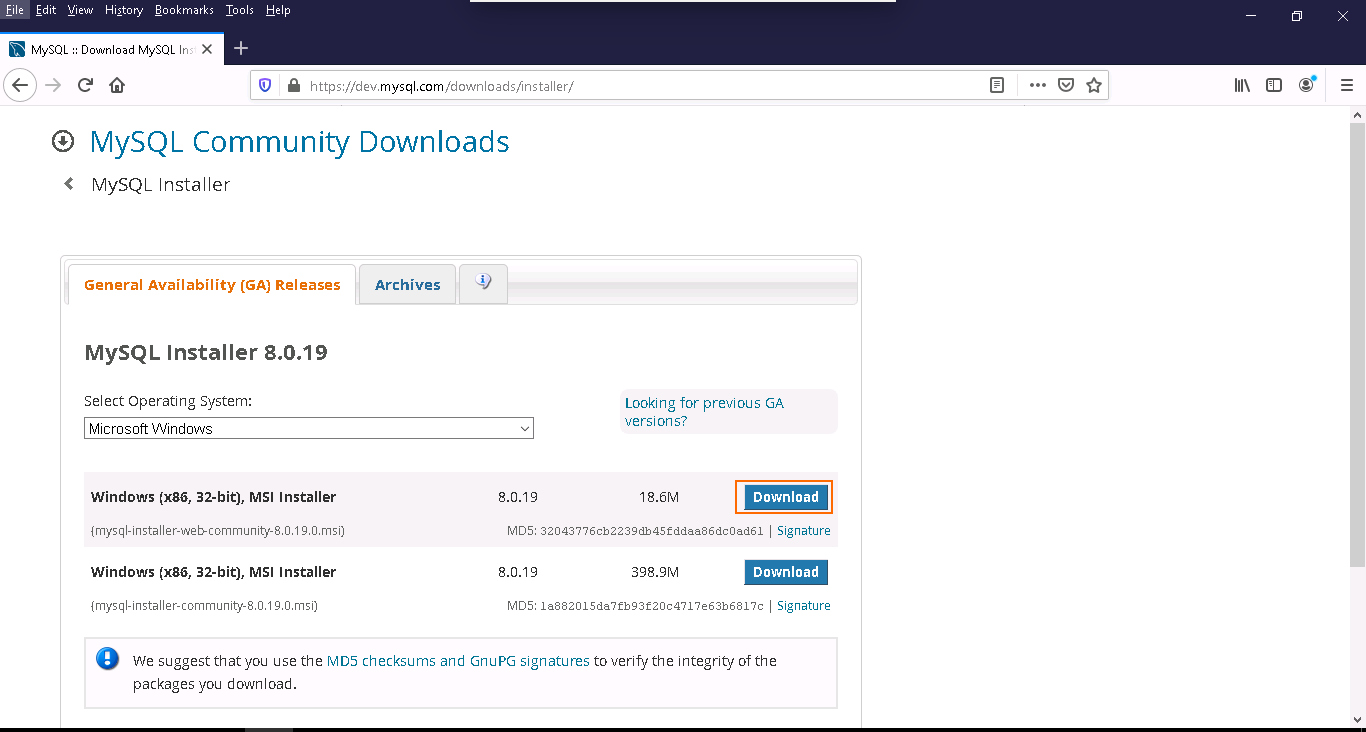
As you can see, there is two option available for download:
1- If you are connected to the internet, you can choose the online installation version mysql-installer-web-community-8.0.19.0.msi.
2- If you are not connected to the internet and want to install MySQL offline, you can choose the offline installation version mysql-installer-community-8.0.19.0.msi.
Click on the Download button to download the MySQL MSI installer.
You can install the following components using the MySQL installer:
Once you are done, you can proceed to the next step.
You can follow the below steps to install the MySQL server on Windows server 2016:
Step 1 – Double click on the downloaded mysql-installer-web-community-8.0.19.0.msi file. You should see the MySQL Installer wizard in the following page:
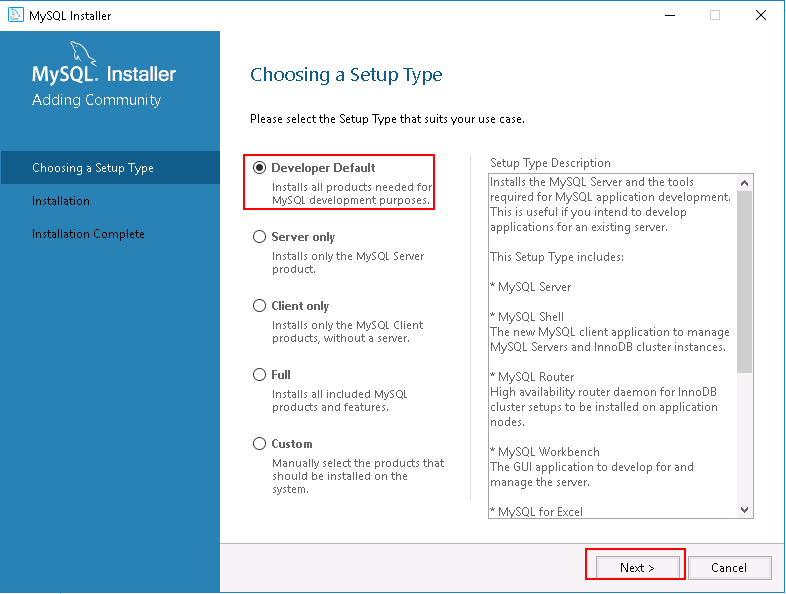
Developer Default option will install the selected version of MySQL Server with other MySQL tools required for MySQL development.
Step 2 – Choose your desired setup type and click on the Next button. You should see the list of all dependencies required to install MySQL server:
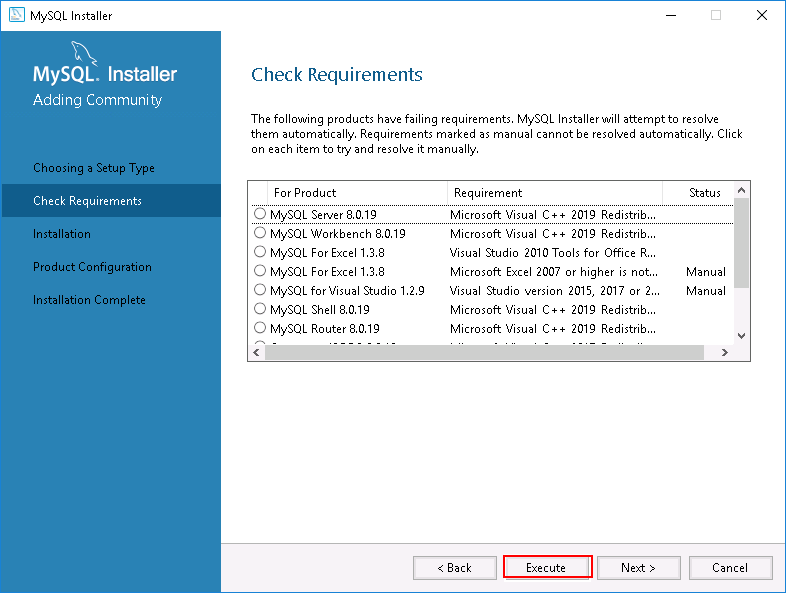
Step 3 – Click on the Execute button to install all dependencies. Once all the dependencies are installed, you should see the following page:
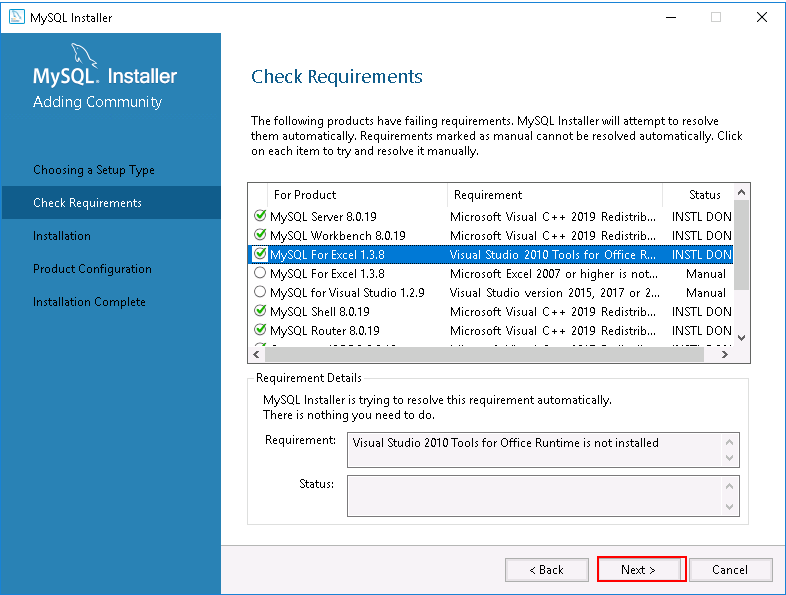
Step 4 – Click on the Next button to start the installation. You will be asked to install the MySQL server with some missing dependencies:
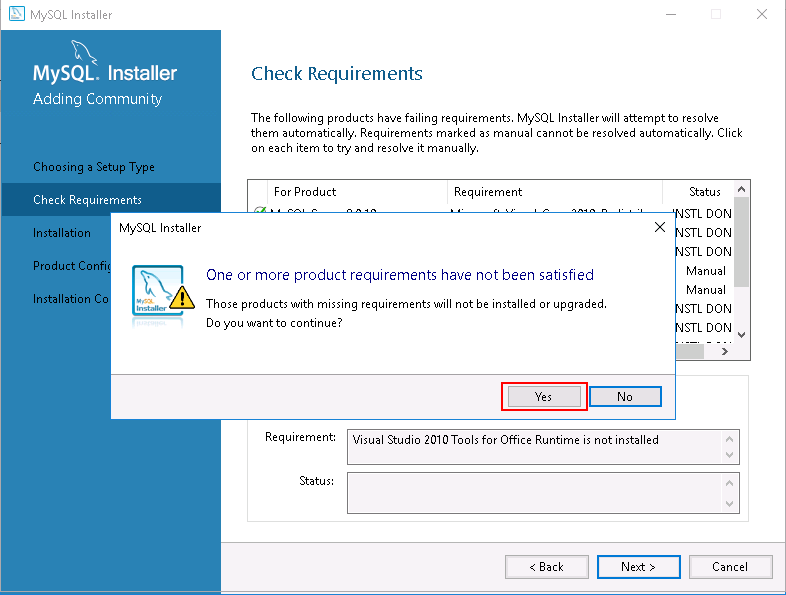
Step 5 – Click on the Yes button. You should see the following page:

Step 6 – Click on the Execute button to download and install the MySQL server with all required dependencies. Once the installation has been completed, you should see the following page:
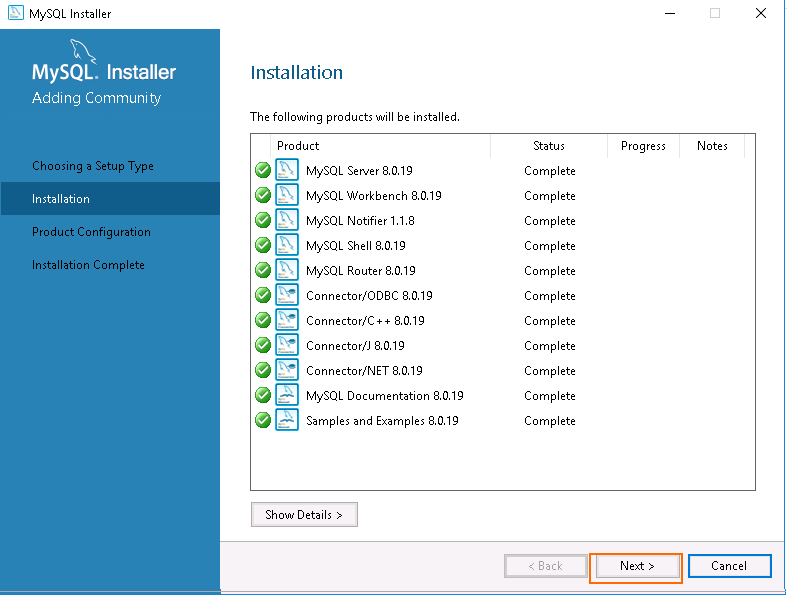
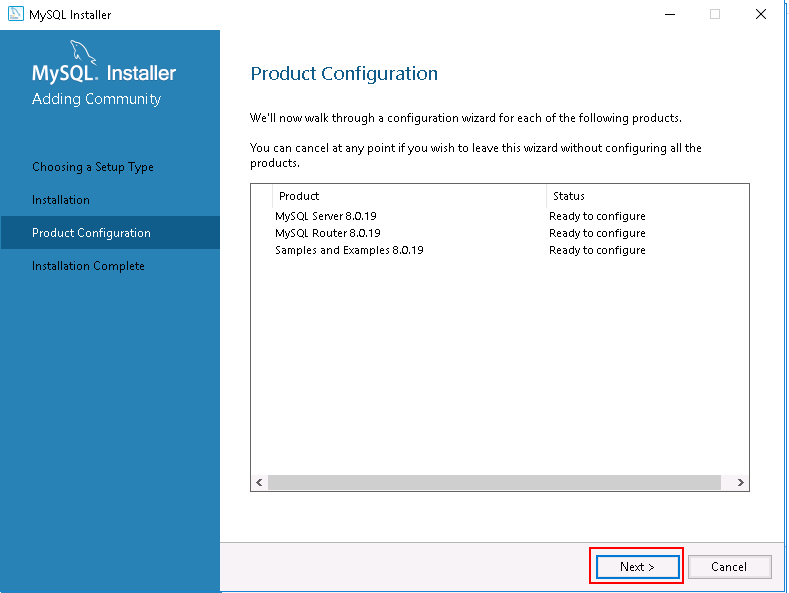
Step 7 – Click on the Next button. You should see the product configuration page:

Step 8 – Click on the Next button. You should see the following page:
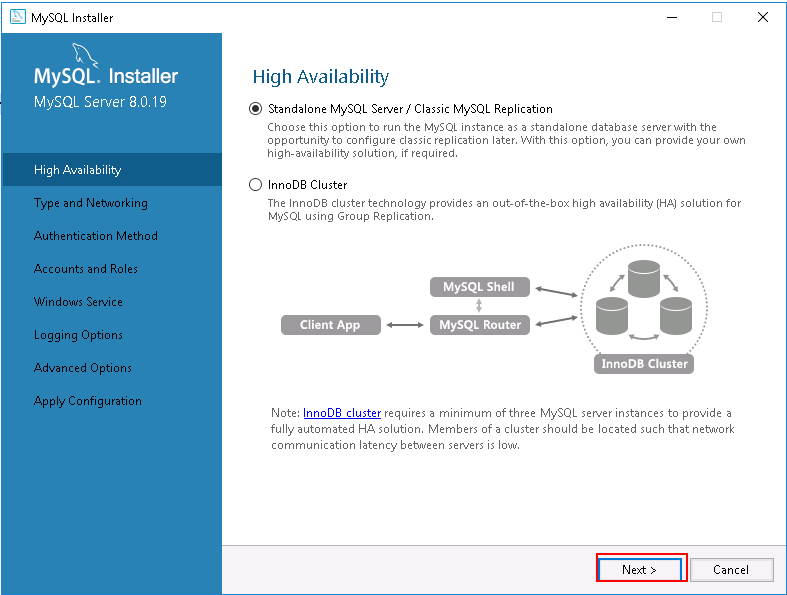
Step 9 – Select the Standalone MySQL server and click on the Next button. You should see the following page:
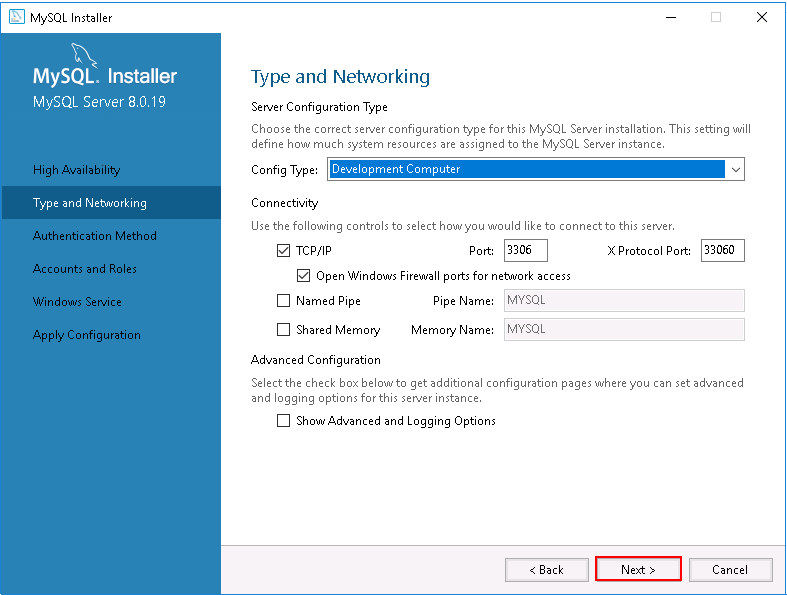
Step 10 – Choose the server configuration type and click on the Next button. You should see the following page:
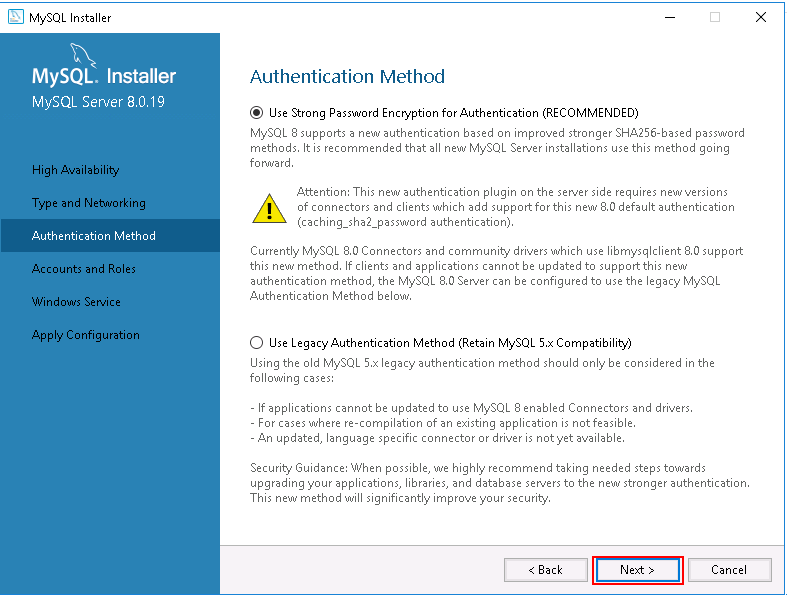
Step 11 – Select the authentication method and click on the Next button. You should see the following page:
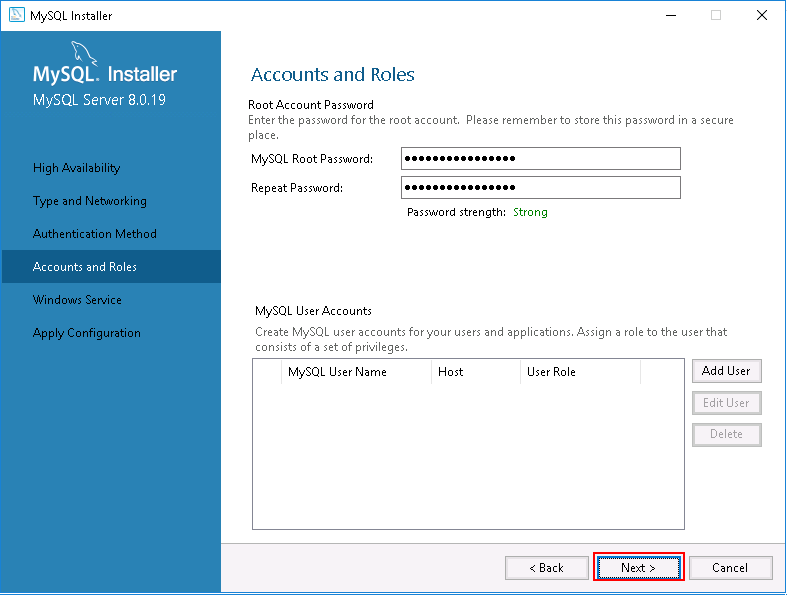
Step 12 – Set your root password and click on the Next button. You should see the following page:
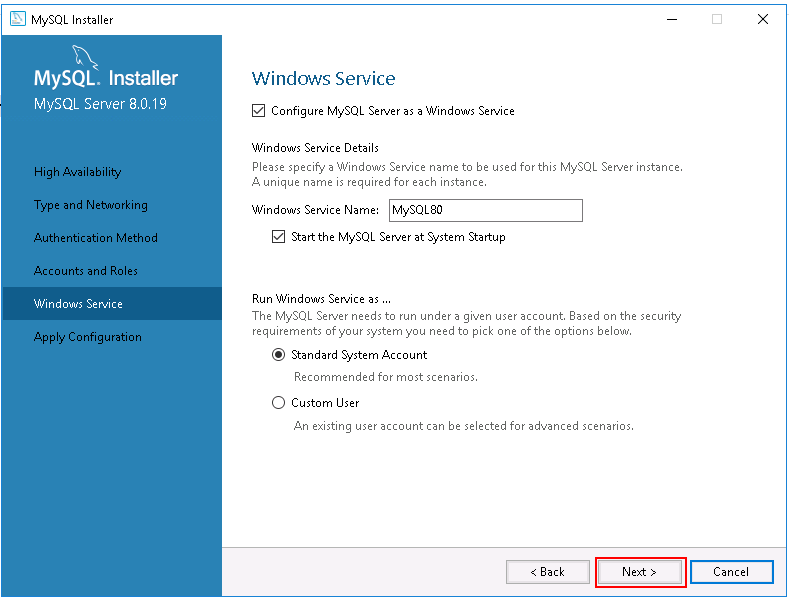
Step 13 – Configure MySQL service and click on the Next button. You should see the following page:
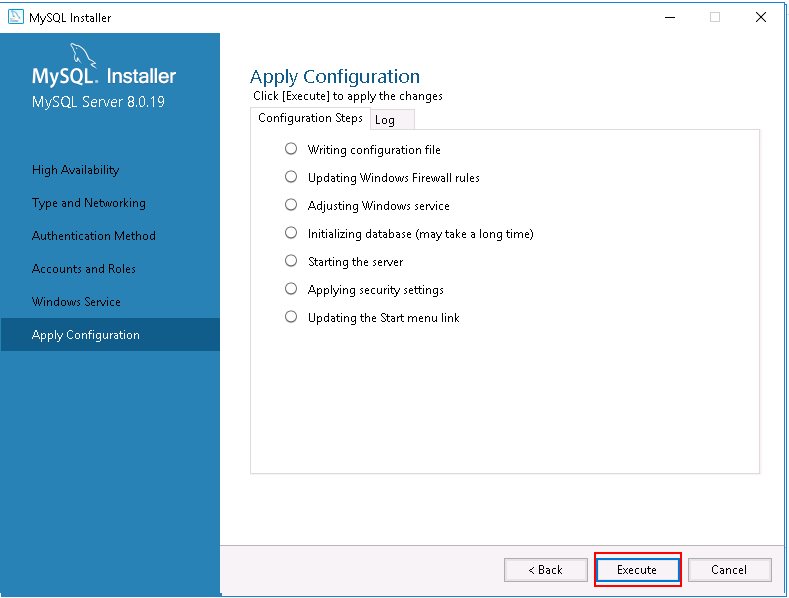
Step 14 – Click on the Execute button to apply the changes. You should see the following page:
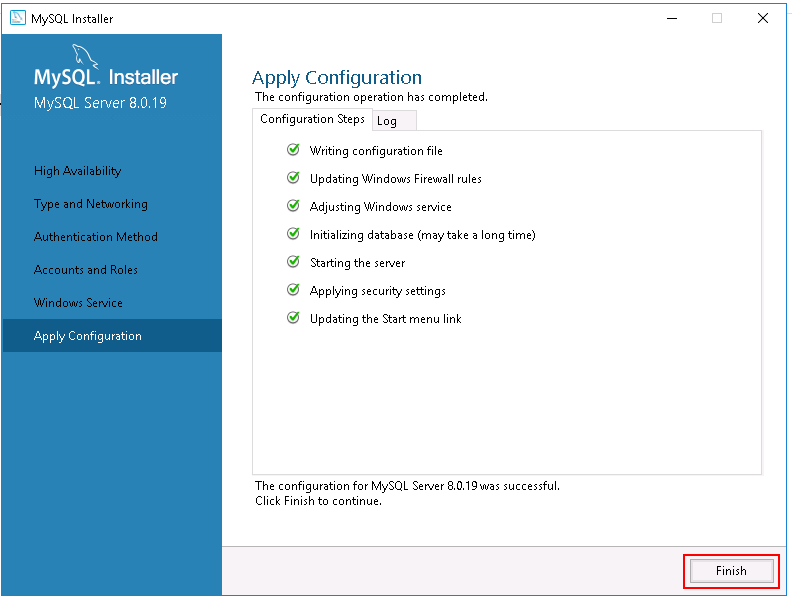
Step 15 – Click on the Finish button to complete the MySQL server configuration. You should see the following page:
Step 16 – Click on the Next button to configure MySQL Router. You should see the following page:
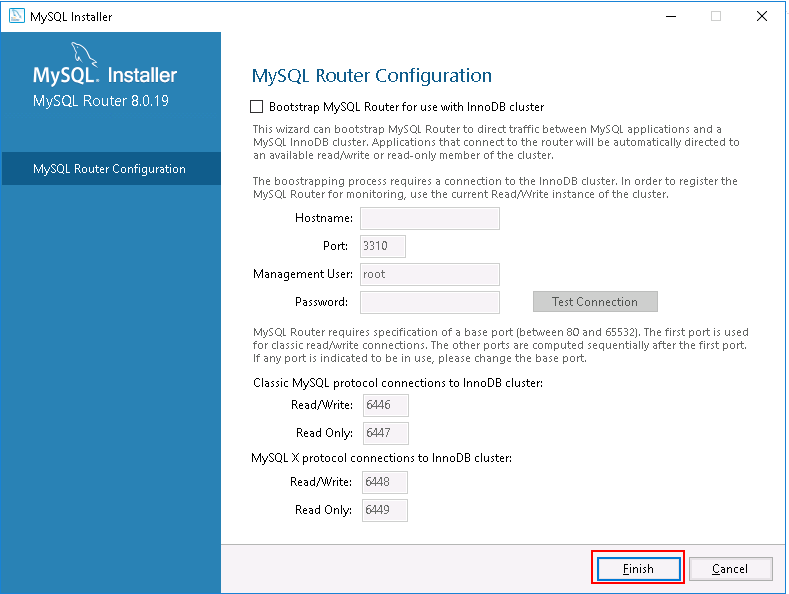
Step 17 – Click on the Finish button to complete the Router configuration. You should see the following page:

Step 18 – Click on the Next button to configure Samples and Examples. You should see the following page:
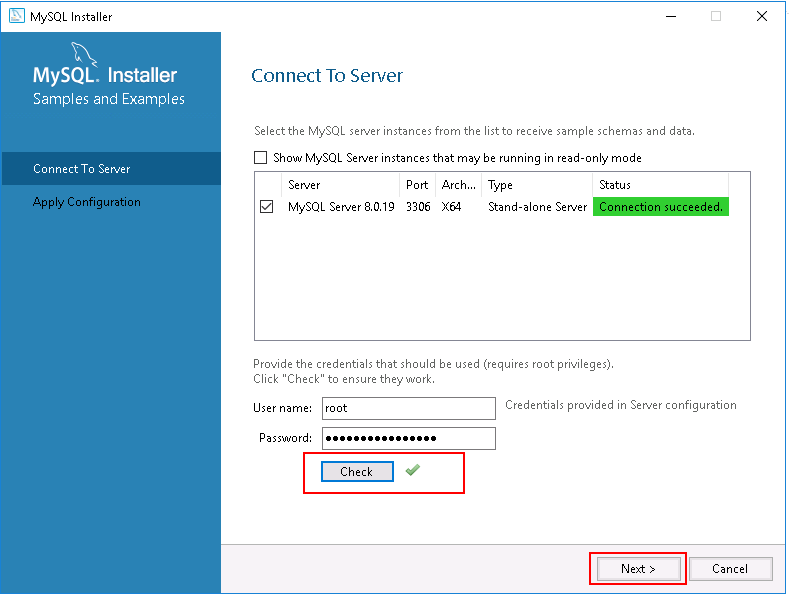
Step 19 – Select the MySQL server to receive sample schemas and data, click on the Check button and click on the Next button. You should see the following page:

Step 20 – Click on the Execute button to apply the changes. You should see the following page:
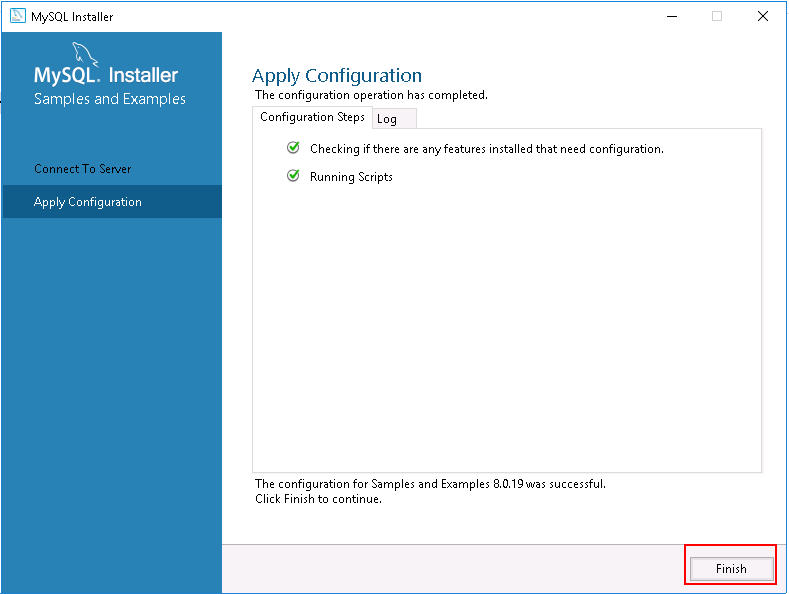
Step 21 – Click on the Finish button to complete the configuration. You should see the following page:
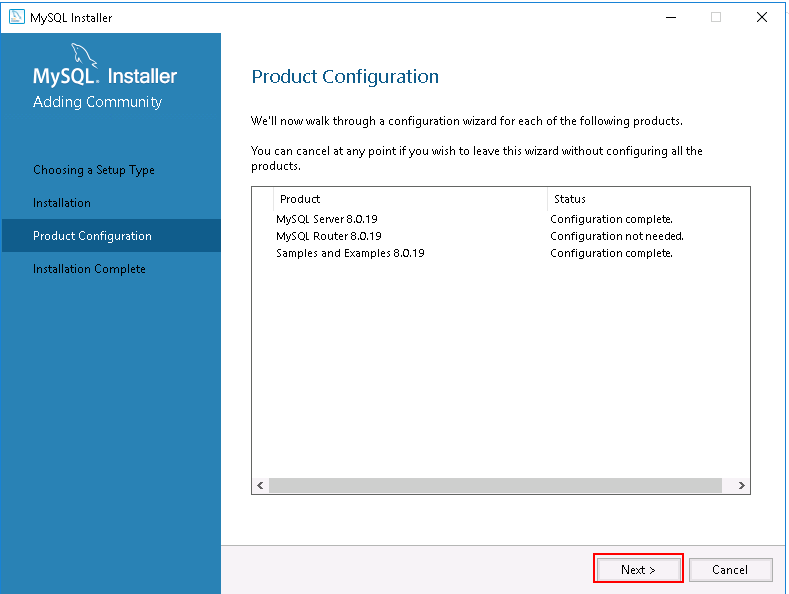
Step 22 – Click on the Next button. You should see the following page:
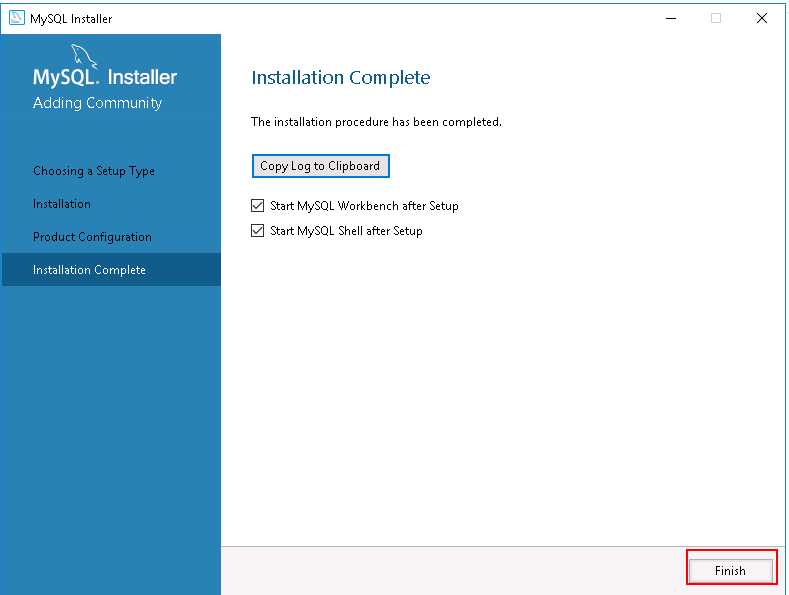
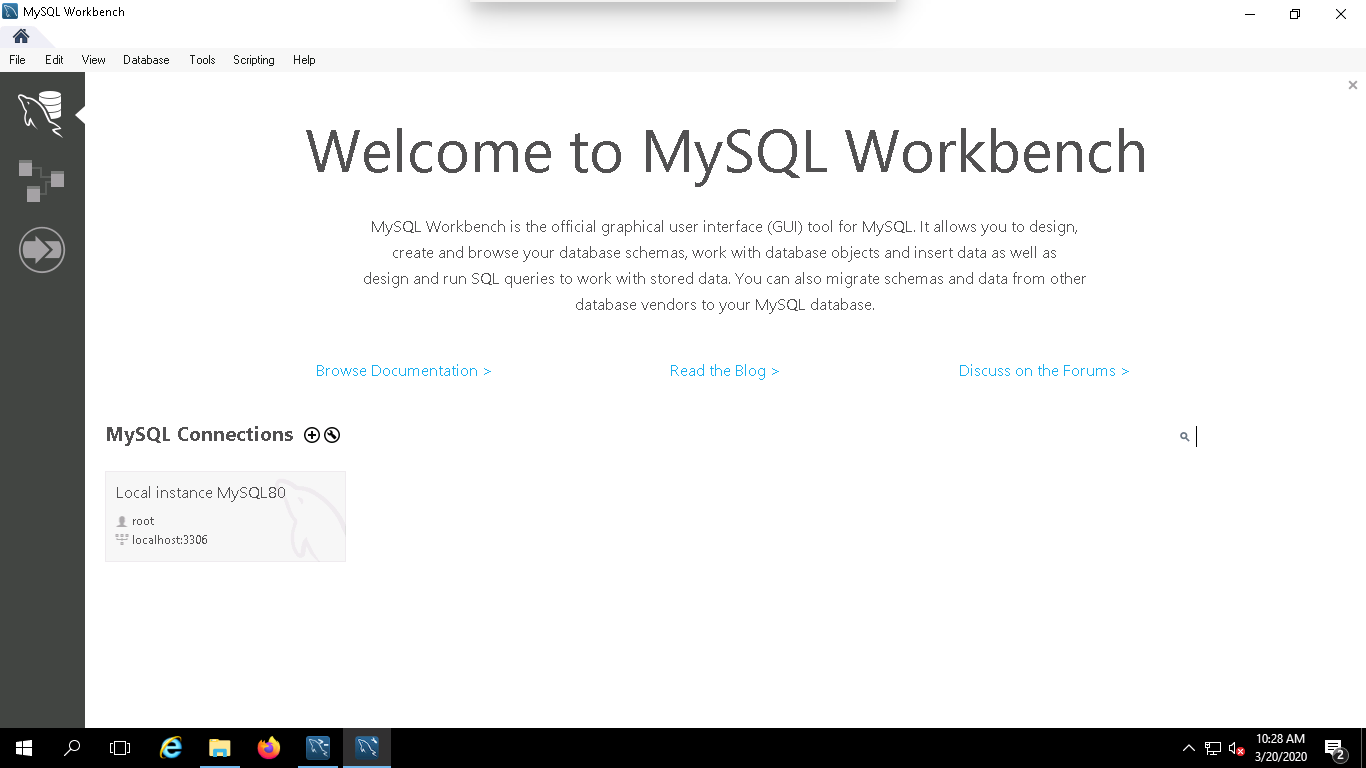
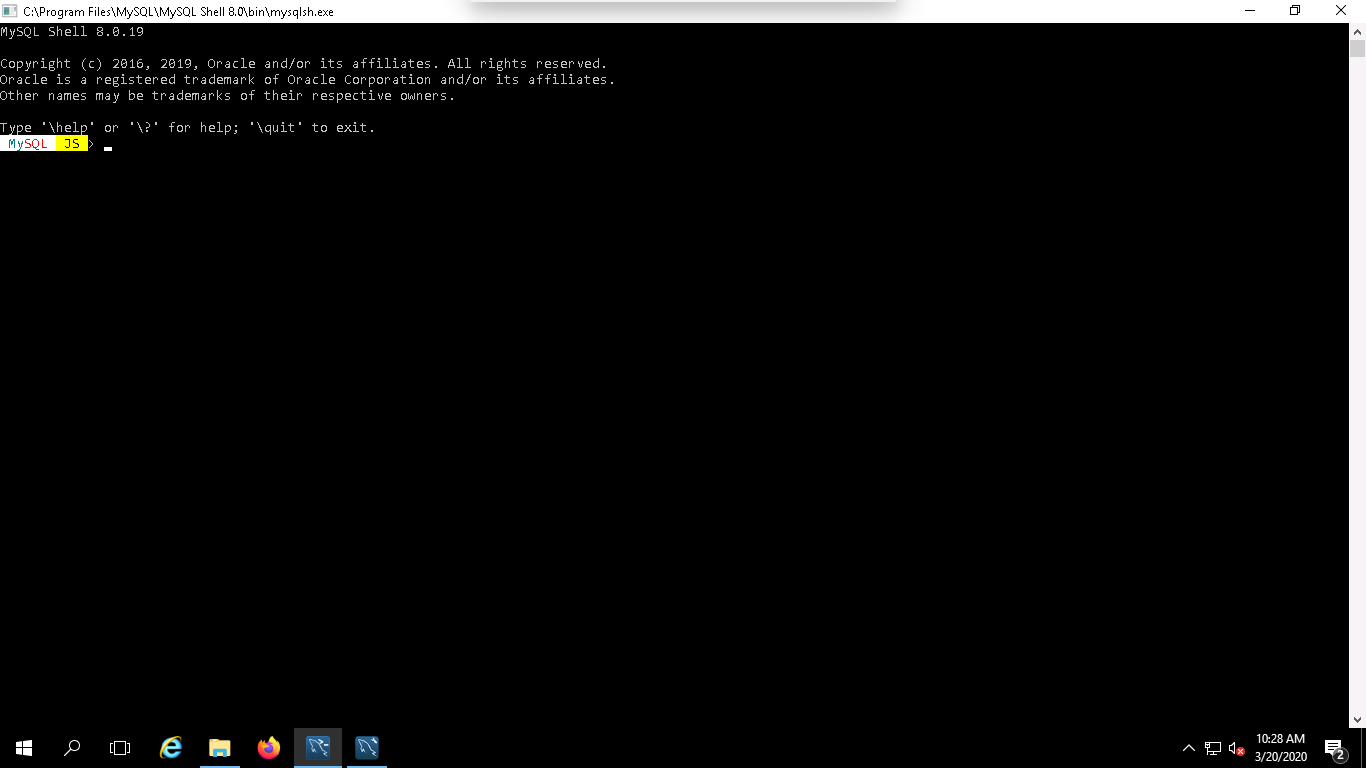
Step 23 – Click on the Finish button to complete the installation and launch MySQL Workbench and MySQL Console. You should see the following page:
MySQL Workbench:
MySQL Console:
Once you are done, you can proceed to the next step.
If you have MySQL Server already installed on your Windows server and want to upgrade it to the latest version, follow the below steps:
Step 1 – Download the latest version of MySQL installer from the MySQL Community Download page.
Step 2 – Double click on the downloaded mysql-installer-web-community-8.0.19.0.msi file. You should see the following page:
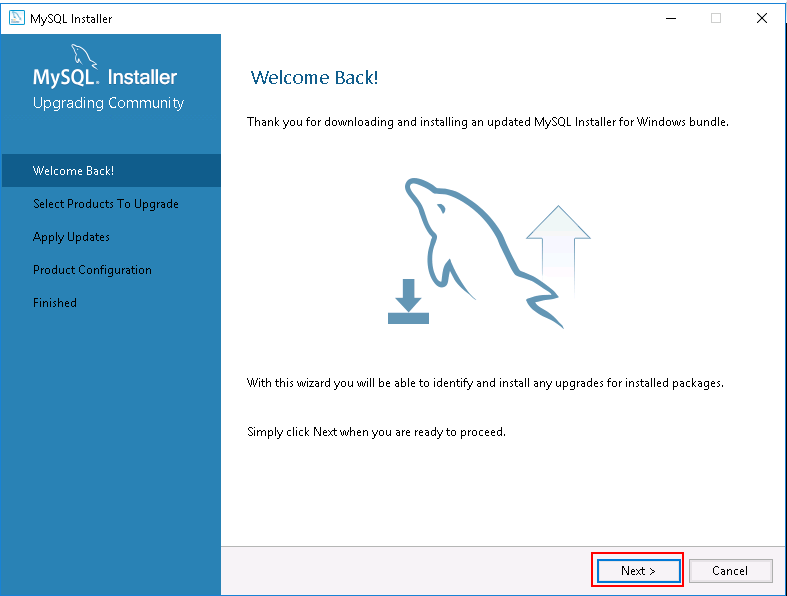
Step 3 – Click on the Next button. You should see the installed version and available upgrade version of MySQL server with other products are shown in the following page:
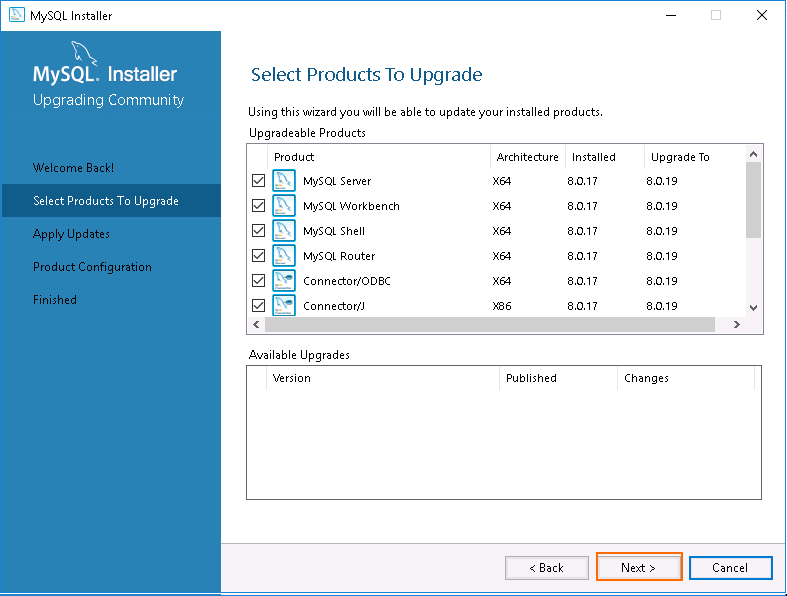
As you can see, MySQL server 8.0.17 is already installed and you will need to upgrade this to version 8.0.19.
Step 4 – Click on the Next button. You should see the following page:
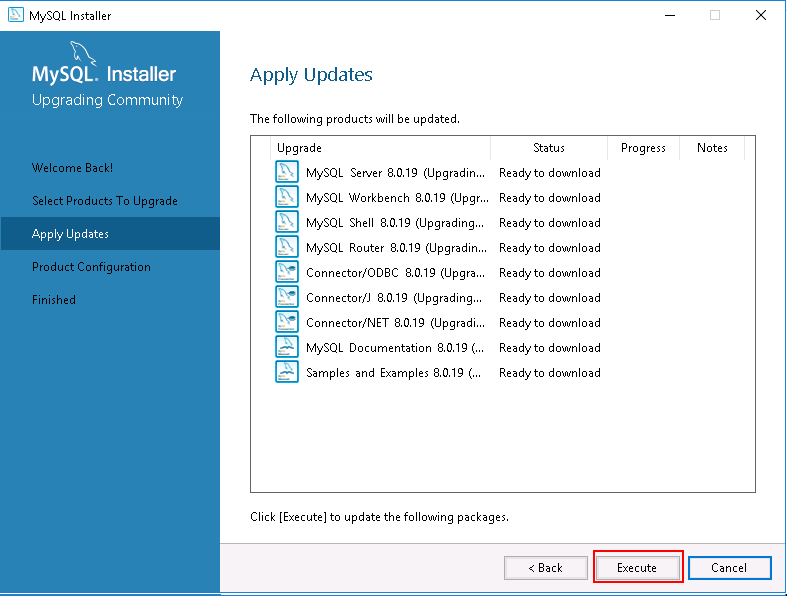
Step 5 – Click on the Execute button to download and upgrade the MySQL server.Once MySQL server with all products is upgraded, you should see the following page:
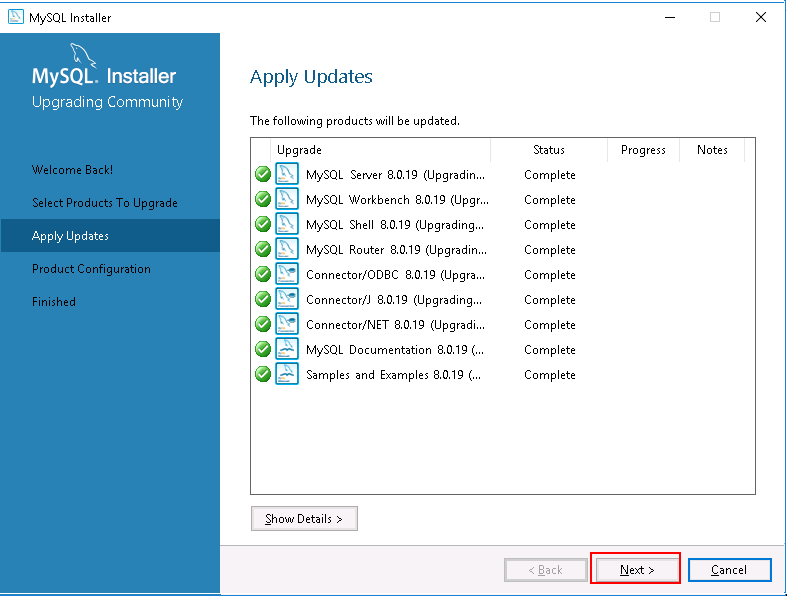
Step 6 – Next, click on the Next button and complete the remaining process to configure the MySQL server.
In the above guide, we learned how to install and upgrade the MySQL server on Windows server 2016. I hope you can now easily install MySQL server on any fresh Windows server.
For more information about MySQL for Windows, visit the MySQL Windows documentation at https://www.mysql.com/why-mysql/windows/.

If you are a database administrator, you should familiar with MySQL environment and know how to manage MySQL from command-line. One of the most common task is to show a list of MySQL databases available in the server. There are several to show list of MySQL databases in Linux operating systems.
In this tutorial, we will explain how to show list of MySQL databases in Linux.
1- You can list all databases for a specific user which have some privilege granted to using the following syntax:
mysql -u username -p -e 'show databases;'
For example, list all databases for MySQL root user with the following command:
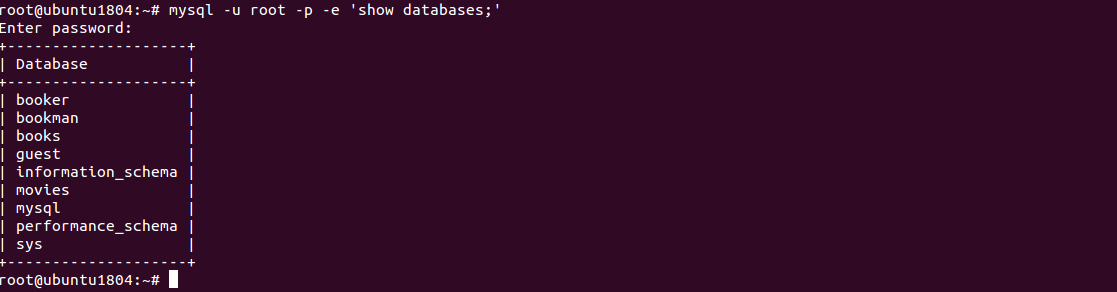
mysql -u root -p -e 'show databases;'
Provide your root MySQL password and hit Enter to list all databases as shown below:
 Enter password:
 +--------------------+
 | Database           |
 +--------------------+
 | booker             |
 | bookman            |
 | books              |
 | guest              |
 | information_schema |
 | movies             |
 | mysql              |
 | performance_schema |
 | sys                |
 +--------------------+
2- Next, list all databases for user hitesh with the following command:
mysql -u hitesh -p -e 'show databases;'
Provide your hitesh user MySQL password and hit Enter to list all databases as shown below:
 Enter password:
 +--------------------+
 | Database           |
 +--------------------+
 | guest              |
 | information_schema |
 | movies             |
 +--------------------+

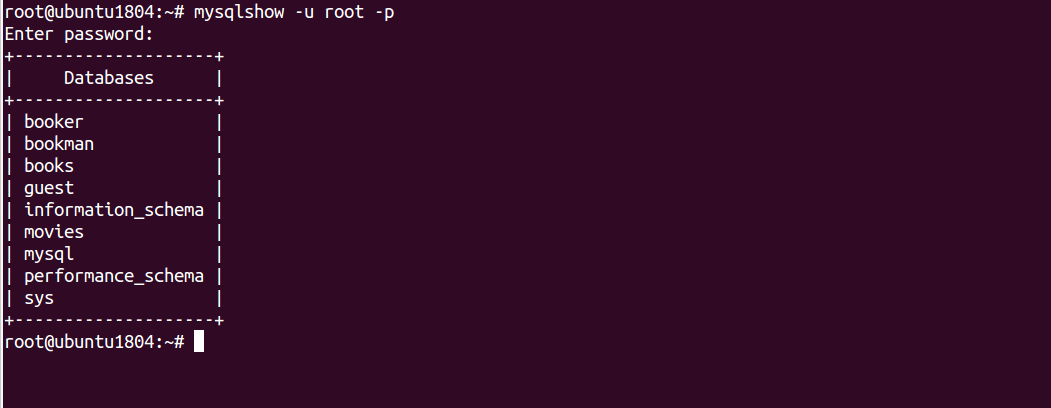
3- You can also list all MySQL databases using mysqlshow command as shown below:
mysqlshow -u root -p
You should get the following output:
 Enter password:
 +--------------------+
 |     Databases      |
 +--------------------+
 | booker             |
 | bookman            |
 | books              |
 | guest              |
 | information_schema |
 | movies             |
 | mysql              |
 | performance_schema |
 | sys                |
 +--------------------+
You can also list all MySQL databases after log in to MySQL shell.
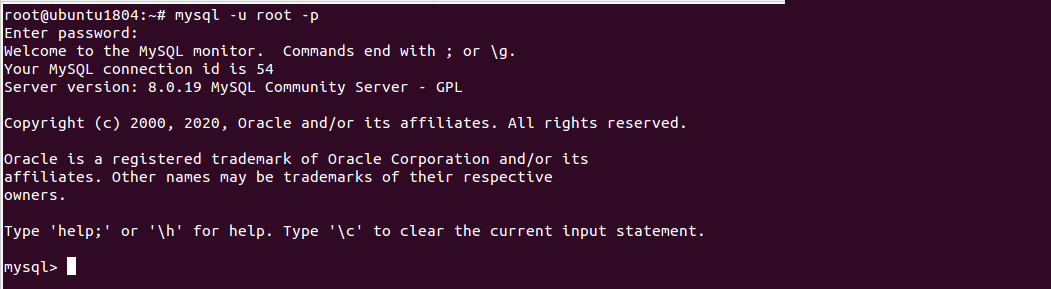
First, log in to MySQL shell with root user as shown below:
mysql -u root -p
Provide your root MySQL password and hit Enter to log in the MySQL shell:
 Welcome to the MySQL monitor.  Commands end with ; or \g.
 Your MySQL connection id is 54
 Server version: 8.0.19 MySQL Community Server - GPL


 Copyright (c) 2000, 2020, Oracle and/or its affiliates. All rights reserved.


 Oracle is a registered trademark of Oracle Corporation and/or its
 affiliates. Other names may be trademarks of their respective
 owners.


 Type 'help;' or '\h' for help. Type '\c' to clear the current input statement.


 mysql>
Next, run the following command to list all databases of MySQL root user:
mysql> show databases;
You should see all the databases in the following output:
 +--------------------+
 | Database           |
 +--------------------+
 | booker             |
 | bookman            |
 | books              |
 | guest              |
 | information_schema |
 | movies             |
 | mysql              |
 | performance_schema |
 | sys                |
 +--------------------+
 9 rows in set (0.00 sec)

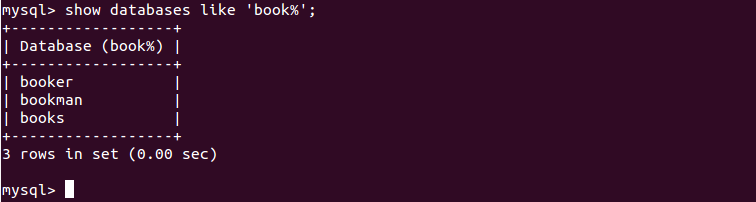
If you have a long list of databases and want to list a specific database use the following syntax:
show databases like 'string%';
For example, list all databases that start with the letters book using the following command:
show databases like 'book%';
You should see all the databases that start with the letters book in the following output:
 +------------------+
 | Database (book%) |
 +------------------+
 | booker           |
 | bookman          |
 | books            |
 +------------------+
 3 rows in set (0.00 sec)
If your server is hosted on the remote hosting company and they do not allow command-line access then you can list all databases using the PHPMyAdmin web interface.
1- First, open your web browser and type the PHPMyAdmin URL. After login, you should see the following screen:
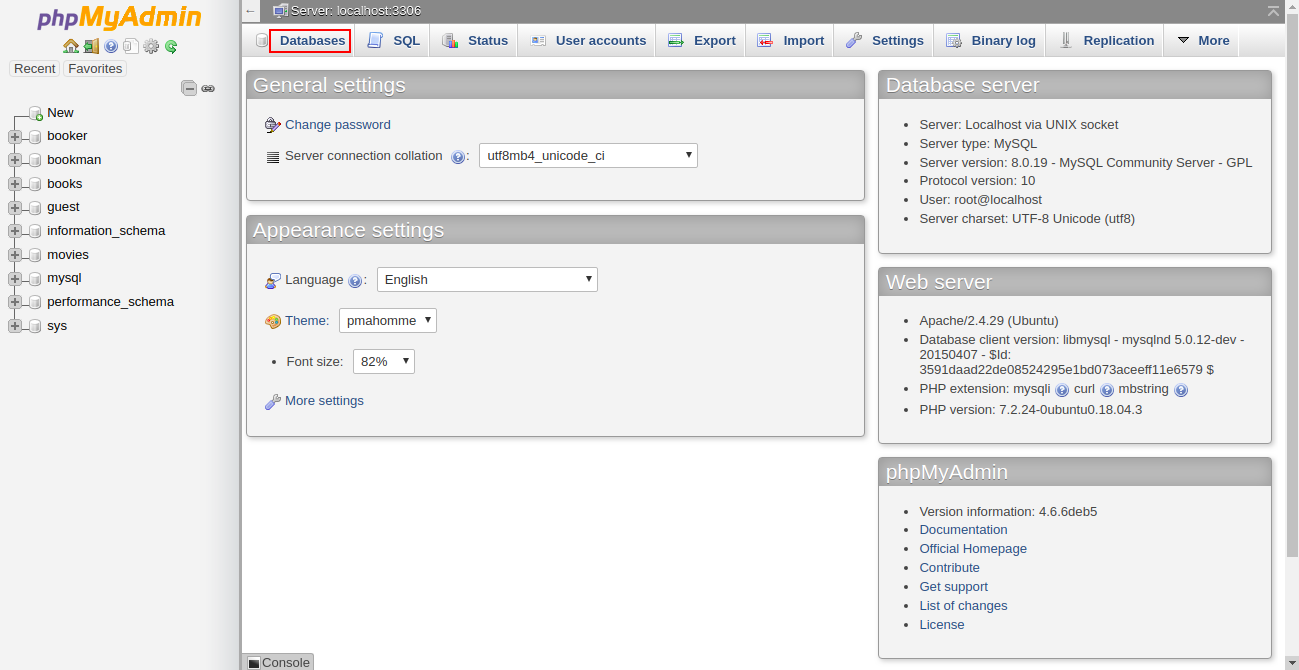
2- Now, click on the Databases, you should see all the databases in the following screen:
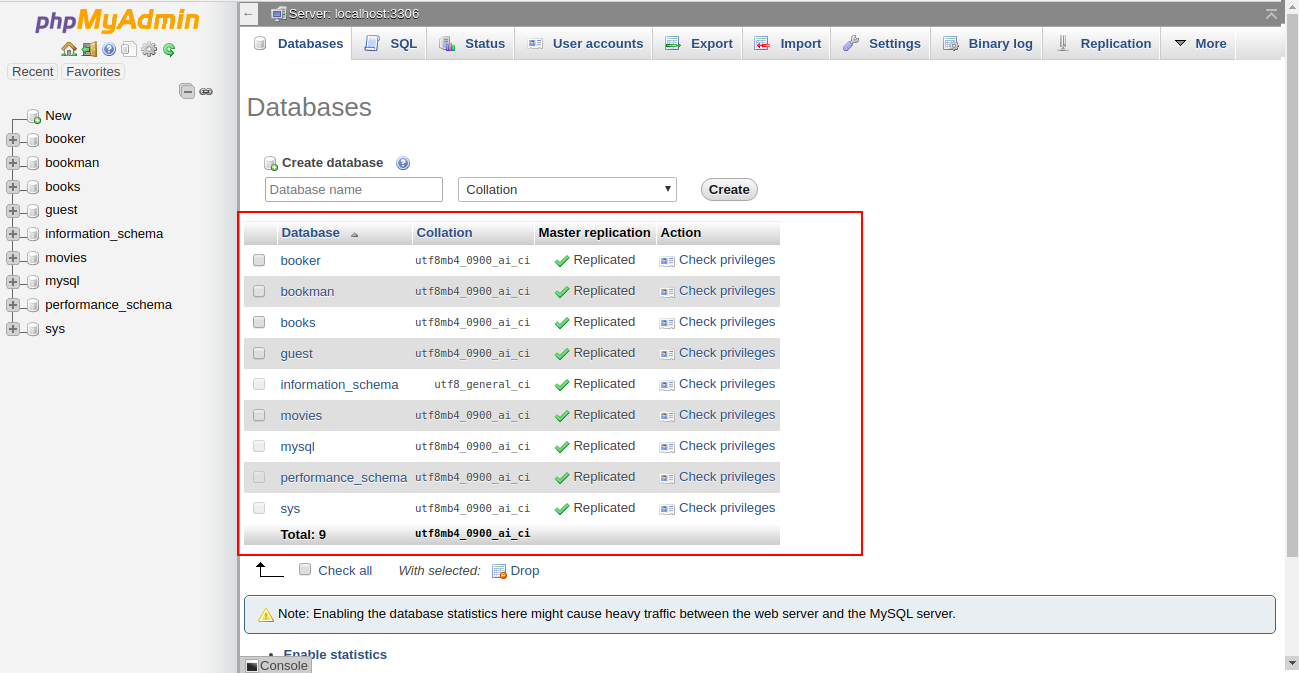
In the above guide, you learned how to list all databases using command-line, MySQL shell and PHPMyAdmin. You are now ready to expand your knowledge of database management systems.

You will need know how to check and repair MySQL databases or tables when you troubleshoot your website as they may have become corrupt. The mysqlcheck command is a maintenance tool that can be used to check, repair, analyze and optimize multiple tables from the command line. One of the best features of using mysqlcheck is that you don’t need to stop the MySQL service to perform the database maintenance.
In this tutorial, we will show you how to check/repair MySQL databases and tables.
Note : It is recommended to take a backup of your databases before performing a database repair operation.
A basic syntax of mysqlcheck is shown below:
mysqlcheck [OPTION] DATABASENAME TABLENAME -u root -p
A brief explanation of each option that you can use with mysqlcheck as shown below:
-c : Used to check a table for errors
-C : Used to check a tables that are changed after last week.
-a : Used to analyze tables.
-A : Used to check all databases.
-g : Used to check tables for version-dependent changes.
-B, –databases : Used to specify multiple databases.
-F : Used to check tables that are not closed properly.
–fix-db-names : Used to fix the database name.
–fix-table-names : Used to fix the table name.
–e : Used to perform an extended check.
-r : Used to repair corrupt table.
In some cases, you need to check a specific table in a specific database. In that case, you can use the following syntax:
mysqlcheck -c databasename tablename -u root -p
For example, checks authors table in books database by running the following command:
mysqlcheck -c books authors -u root -p
You should get the following output:
books.authors OK

If you want to check all the tables in a specific database use the following syntax:
mysqlcheck -c databasename -u root -p
For example, check all tables in books database by running the following command:
mysqlcheck -c books -u root -p
You should get the following output:
 Enter password:
 books.accountant                                   OK
 books.authors                                      OK
 books.writer                                       OK

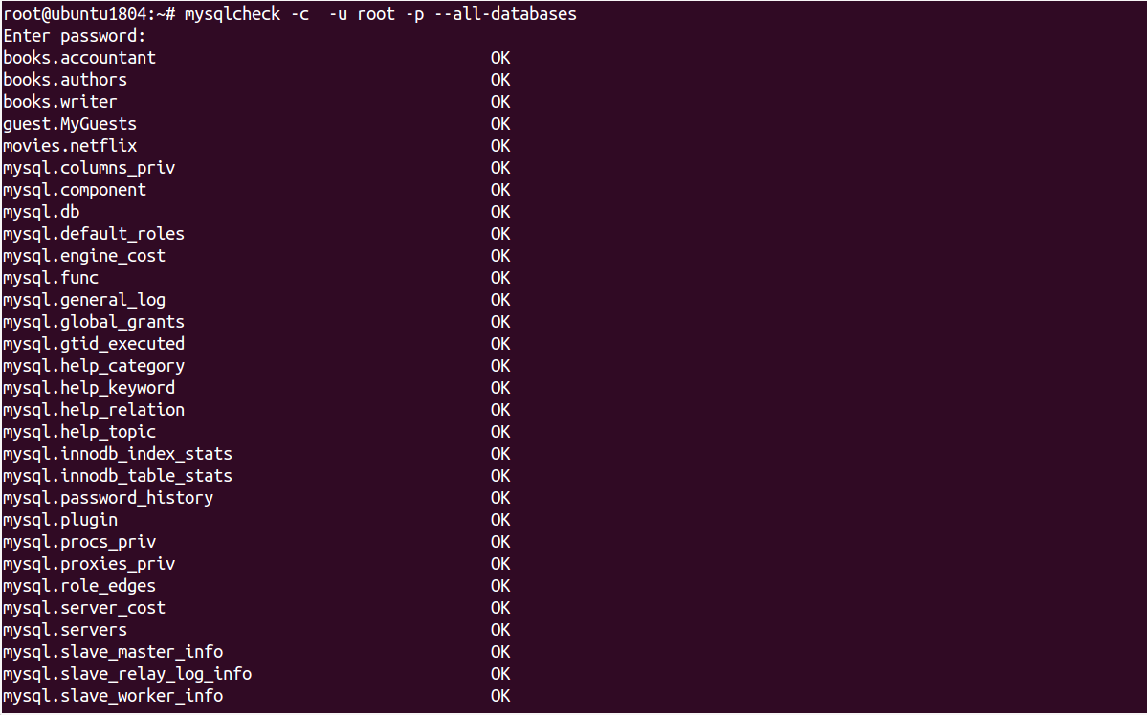
You can check all tables and all databases using the following command:
mysqlcheck -c -u root -p --all-databases
Output:
 Enter password:
 books.accountant                                   OK
 books.authors                                      OK
 books.writer                                       OK
 guest.MyGuests                                     OK
 movies.netflix                                     OK
 mysql.columns_priv                                 OK
 mysql.component                                    OK
 mysql.db                                           OK
 mysql.default_roles                                OK
 mysql.engine_cost                                  OK
 mysql.func                                         OK
 mysql.general_log                                  OK
 mysql.global_grants                                OK
 mysql.gtid_executed                                OK
 mysql.help_category                                OK
 mysql.help_keyword                                 OK
 mysql.help_relation                                OK
 mysql.help_topic                                   OK
 mysql.innodb_index_stats                           OK
 mysql.innodb_table_stats                           OK
 mysql.password_history                             OK
 mysql.plugin                                       OK
 mysql.procs_priv                                   OK
 mysql.proxies_priv                                 OK
 mysql.role_edges                                   OK
 mysql.server_cost                                  OK
 mysql.servers                                      OK
 mysql.slave_master_info                            OK
 mysql.slave_relay_log_info                         OK
 mysql.slave_worker_info                            OK
You can optimize all tables and all databases using the following command:
mysqlcheck -o root -p --all-databases
Output:
 Enter password:
 books.accountant
 note     : Table does not support optimize, doing recreate + analyze instead
 status   : OK
 books.authors
 note     : Table does not support optimize, doing recreate + analyze instead
 status   : OK
 books.writer
 note     : Table does not support optimize, doing recreate + analyze instead
 status   : OK
 guest.MyGuests
 note     : Table does not support optimize, doing recreate + analyze instead
 status   : OK
 movies.netflix
 note     : Table does not support optimize, doing recreate + analyze instead
 status   : OK
 mysql.columns_priv
 note     : Table does not support optimize, doing recreate + analyze instead
 status   : OK
 mysql.component
 note     : Table does not support optimize, doing recreate + analyze instead
 status   : OK
 mysql.db
 note     : Table does not support optimize, doing recreate + analyze instead
 status   : OK
 mysql.default_roles
 note     : Table does not support optimize, doing recreate + analyze instead
 status   : OK
 mysql.engine_cost
 note     : Table does not support optimize, doing recreate + analyze instead
 status   : OK
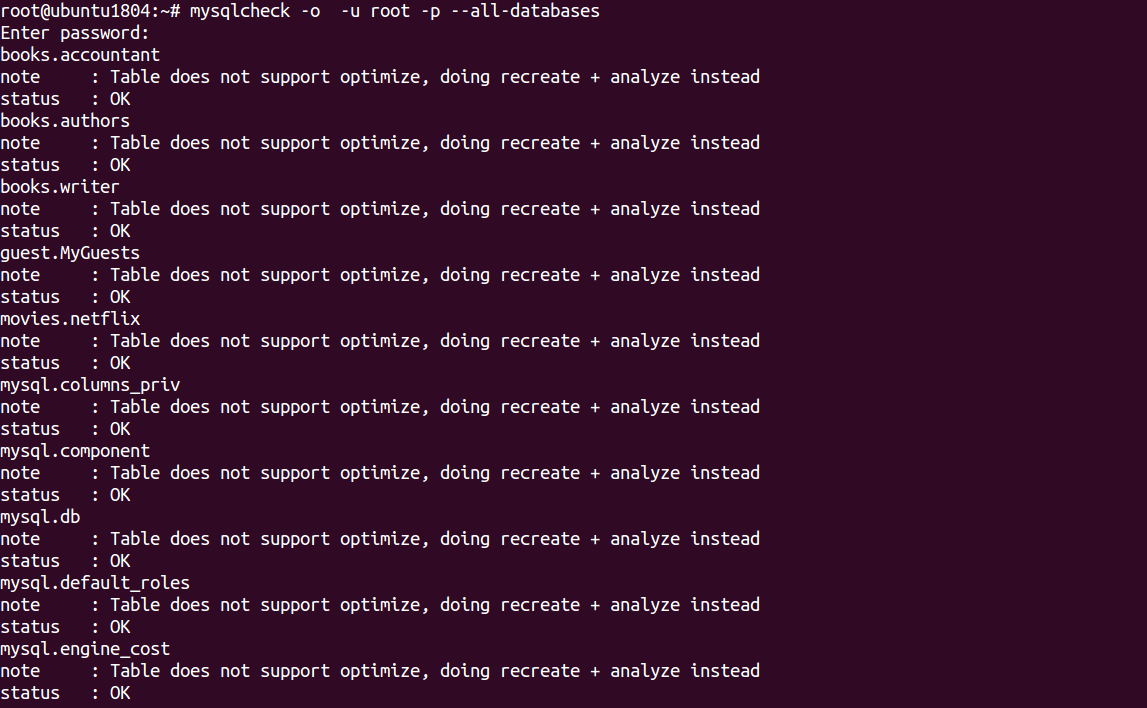
In the above output, you should see “Table does not support optimize” which means the InnoDB table that doesn’t support this option.
To repair accountant tables in books database run the following command:
mysqlcheck -r books accountant -u root -p
Output:
 mysqlcheck -r books accountant -u root -p
 Enter password:
 books.accountant                                   OK

To repair all tables in both books and movies database run the following command:
mysqlcheck -r --databases books movies -u root -p
Output:
 Enter password:
 books.accountant                                   OK
 books.authors                                      OK
 books.writer                                       OK
 movies.netflix                                     OK

To check and repair all tables in all databases run the following command:
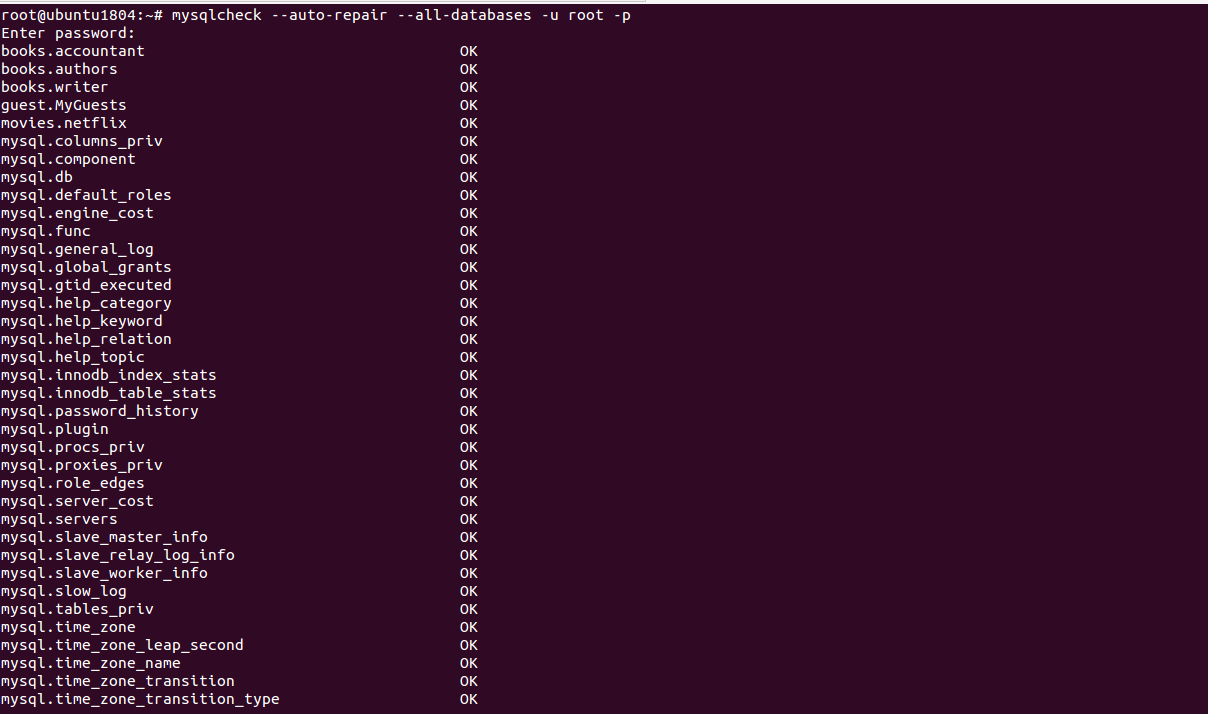
mysqlcheck --auto-repair --all-databases -u root -p
Output:
 Enter password:
 books.accountant                                   OK
 books.authors                                      OK
 books.writer                                       OK
 guest.MyGuests                                     OK
 movies.netflix                                     OK
 mysql.columns_priv                                 OK
 mysql.component                                    OK
 mysql.db                                           OK
 mysql.default_roles                                OK
 mysql.engine_cost                                  OK
 mysql.func                                         OK
 mysql.general_log                                  OK
 mysql.global_grants                                OK
 mysql.gtid_executed                                OK
 mysql.help_category                                OK
 mysql.help_keyword                                 OK
 mysql.help_relation                                OK
 mysql.help_topic                                   OK
 mysql.innodb_index_stats                           OK
 mysql.innodb_table_stats                           OK
 mysql.password_history                             OK
 mysql.plugin                                       OK
 mysql.procs_priv                                   OK
 mysql.proxies_priv                                 OK
 mysql.role_edges                                   OK
 mysql.server_cost                                  OK
 mysql.servers                                      OK
 mysql.slave_master_info                            OK
 mysql.slave_relay_log_info                         OK
 mysql.slave_worker_info                            OK
 mysql.slow_log                                     OK
 mysql.tables_priv                                  OK
 mysql.time_zone                                    OK
 mysql.time_zone_leap_second                        OK
 mysql.time_zone_name                               OK
 mysql.time_zone_transition                         OK
 mysql.time_zone_transition_type                    OK
Important note: InnoDB storage engine does not support repair. So you will need to change MySQL storage engine from InnoDB to MyISAM.
You can also check, repair and optimize tables and databases using the PHPMyAdmin web interface.
You can follow the below steps to check, repair and optimize tables and databases:
1- Open the phpMyAdmin tool through a web browser as shown below:
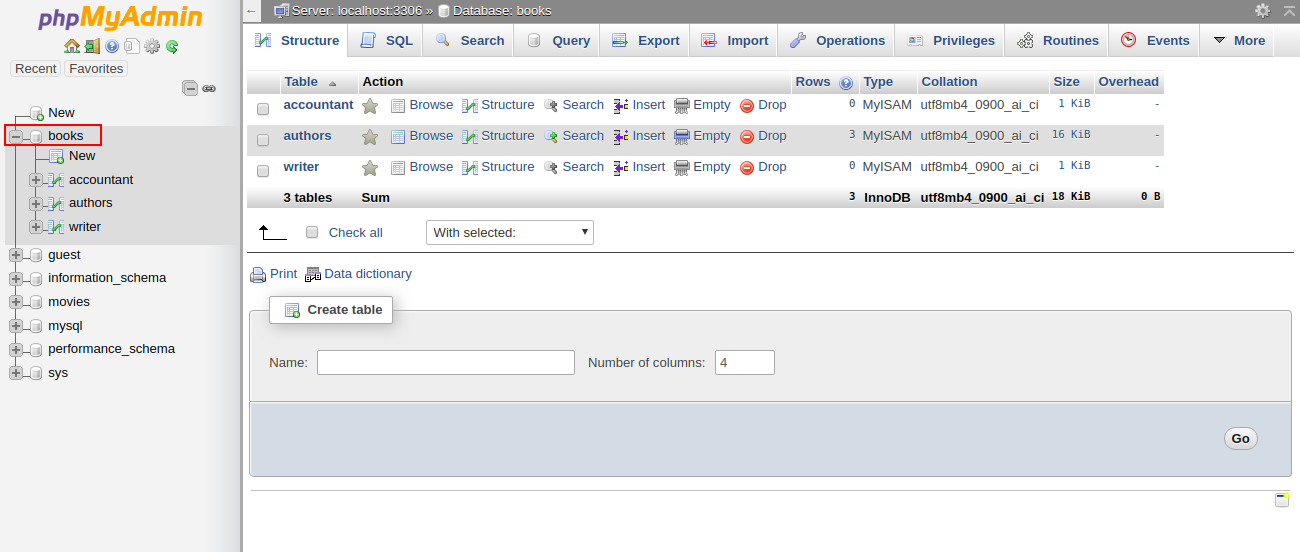
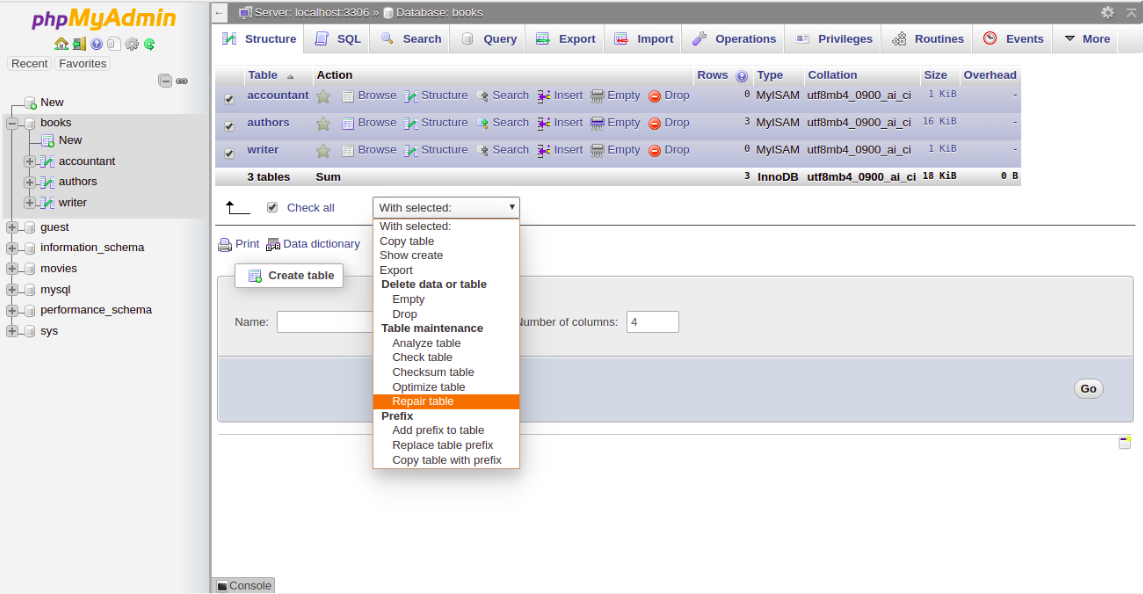
2- Select the affected database in the left pane. You should see all the tables in the right pane in the following screen:
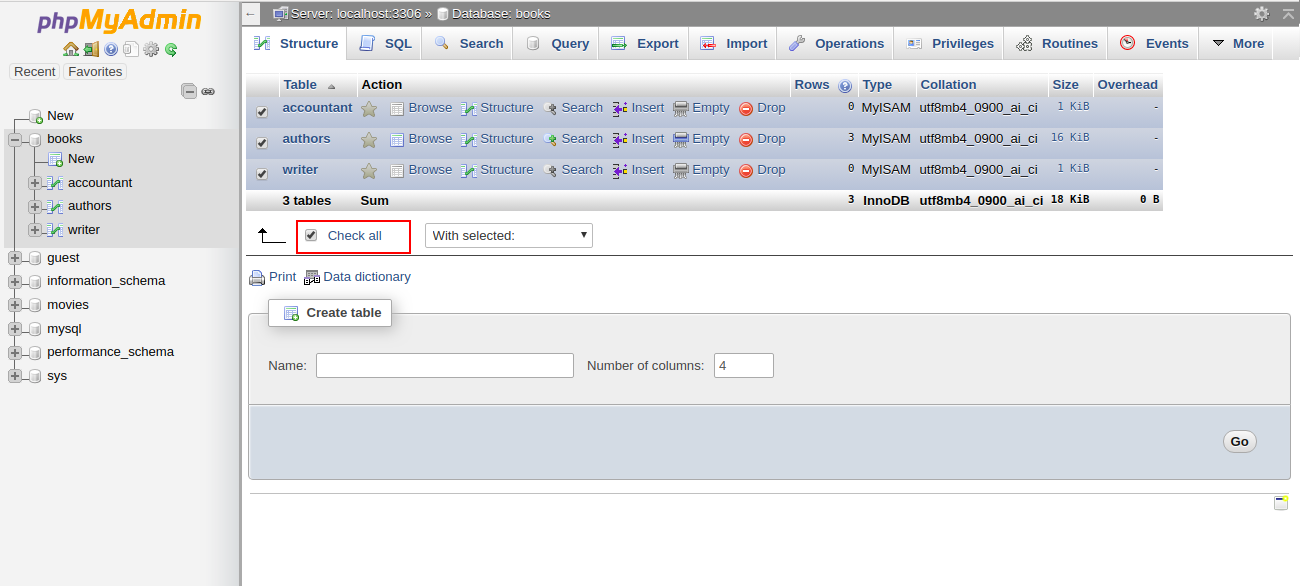
3- Click Check All to select all the tables. At the bottom of the window, choose Check Table from the menu. You should see a summary of the tables in the following screen:
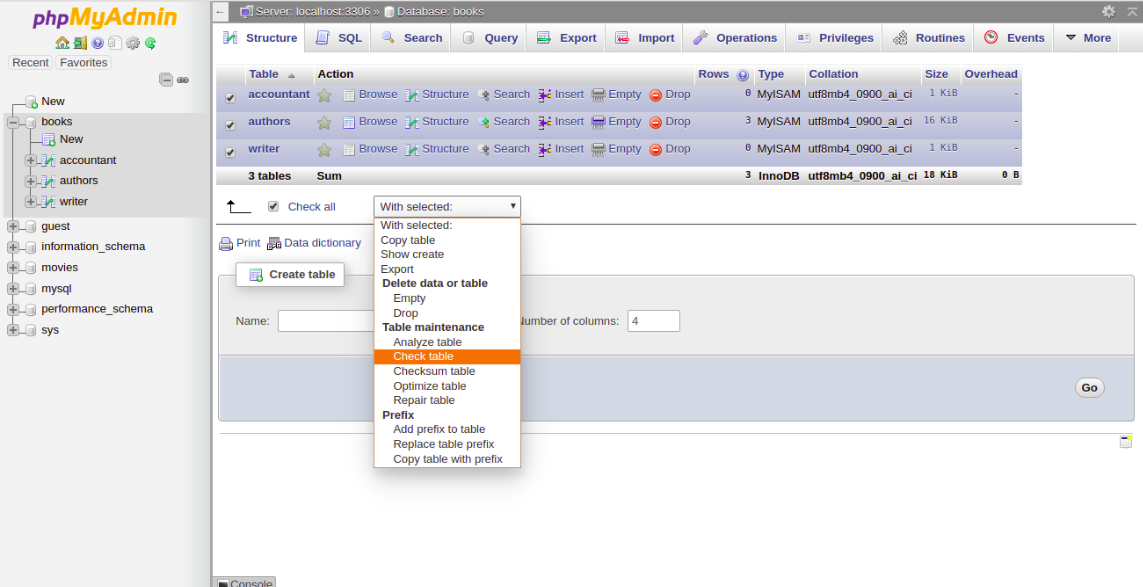
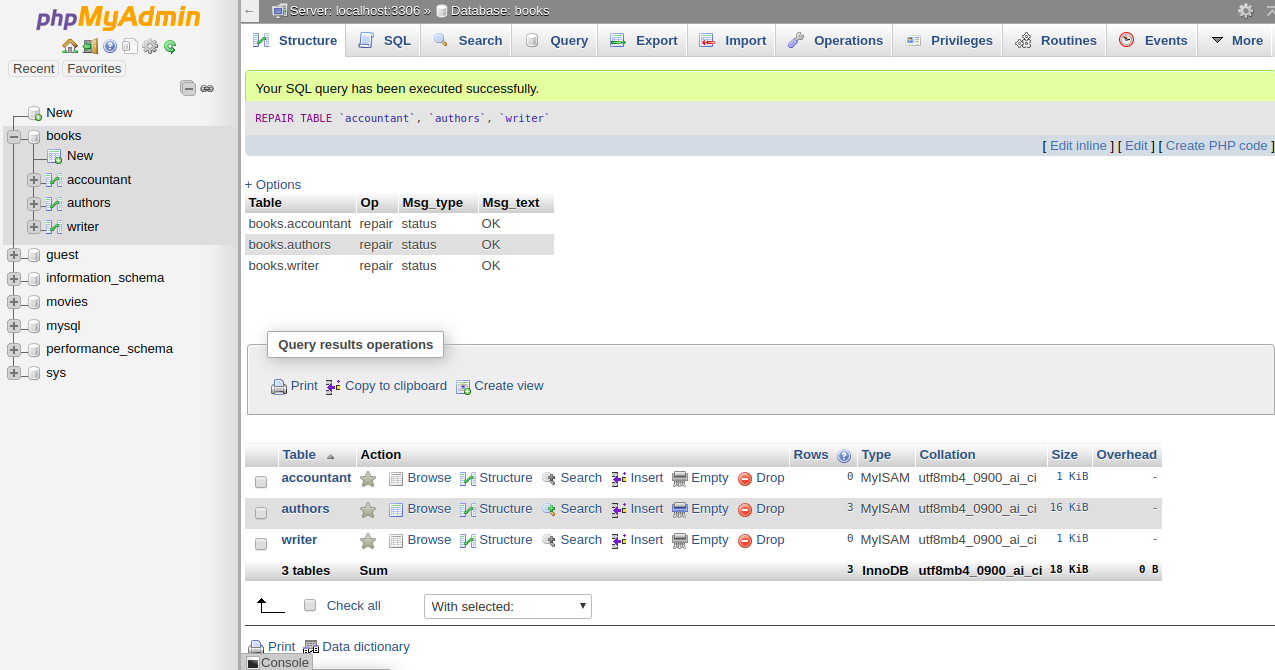
4- To repair the table, Check All to select all the tables and choose Repair Table from the menu. You should see the following page:
Then you should get a confirmation that the command been executed successfully:
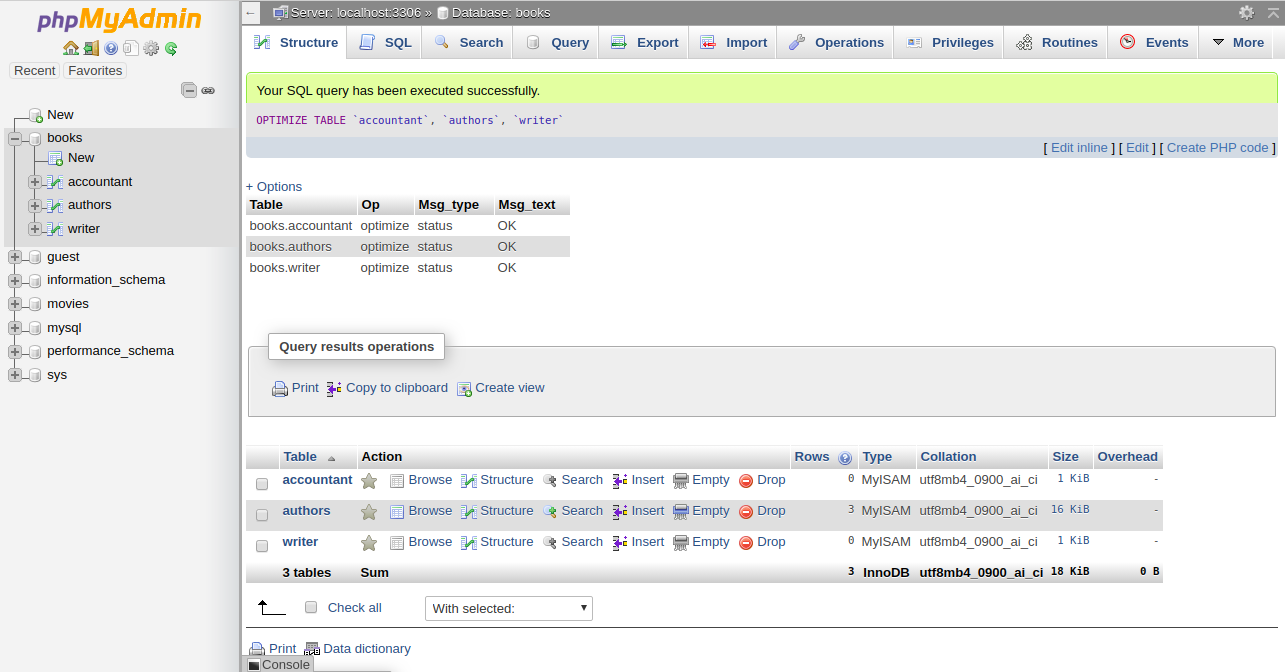
5- To optimize the table, Check All to select all the tables and choose Optimize Table from the menu. You should see the following page:

Then you should get a confirmation that the command been executed successfully:
In the above tutorial, we learned how to check and repair MySQL table using mysqlcheck command-line tool. We also learned how to check, repair and optimize database tables using the PHPMyAdmin web interface. I hope you can now easily fix your corrupted tables using this tool.

If you are a database administrator or system administrator, it is essential to know how to check version of MySQL you have installed. This will helps you to find which feature is available for your installed MySQL version. For example, if you want to install some application that requires a specific MySQL version. In this case, you will need to find out the MySQL version in your server before installing your application.
There are several ways to check the MySQL version in Linux operating systems.
The simple and easiest way to find the MySQL version installed on your system using the MySQL client command.
Option 1: Open your terminal interface and run the following command:
mysql -V
You should get the MySQL version in the following output:
mysql Ver 8.0.19 for Linux on x86_64 (MySQL Community Server - GPL)

Option 2: You can also check the MySQL version by login to MySQL Shell:
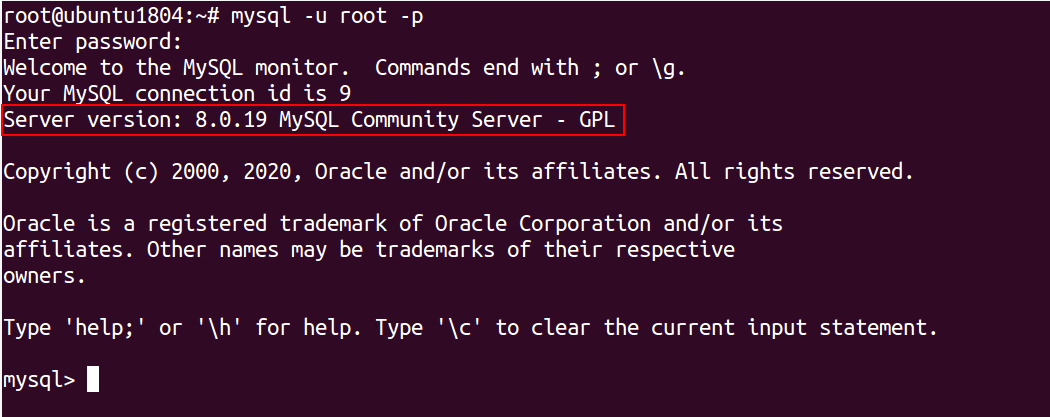
mysql -u root -p
Provide your root password (can be your any database user) and hit Enter to log in to MySQL shell as with version information shown below:
Enter password:
 Welcome to the MySQL monitor.  Commands end with ; or \g.
 Your MySQL connection id is 9
 Server version: 8.0.19 MySQL Community Server - GPL
 Copyright (c) 2000, 2020, Oracle and/or its affiliates. All rights reserved.
 Oracle is a registered trademark of Oracle Corporation and/or its
 affiliates. Other names may be trademarks of their respective
 owners.
 Type 'help;' or '\h' for help. Type '\c' to clear the current input statement.

You can also verify the MySQL version by querying the version variables inside the MySQL shell.
Step 1: First, log in to MySQL Shell with the following command:
mysql -u root -p
Provide your root password and hit Enter to log in the MySQL shell.
Step 2: Next, run the following command to display the MySQL version into mysql prompt:
SHOW VARIABLES LIKE "%version%";
You should get the following output with, were you can find the MySQL version:
 +--------------------------+-------------------------------+
 | Variable_name            | Value                         |
 +--------------------------+-------------------------------+
 | immediate_server_version | 999999                        |
 | innodb_version           | 8.0.19                        |
 | original_server_version  | 999999                        |
 | protocol_version         | 10                            |
 | slave_type_conversions   |                               |
 | tls_version              | TLSv1,TLSv1.1,TLSv1.2,TLSv1.3 |
 | version                  | 8.0.19                        |
 | version_comment          | MySQL Community Server - GPL  |
 | version_compile_machine  | x86_64                        |
 | version_compile_os       | Linux                         |
 | version_compile_zlib     | 1.2.11                        |
 +--------------------------+-------------------------------+
 11 rows in set (0.02 sec)
Alternative option: You can also use the SELECT VERSION() statement inside MySQL shell to display MySQL version information:
SELECT VERSION();
You should get the following output:
 +-----------+
 | VERSION() |
 +-----------+
 | 8.0.19    |
 +-----------+
 1 row in set (0.00 sec)

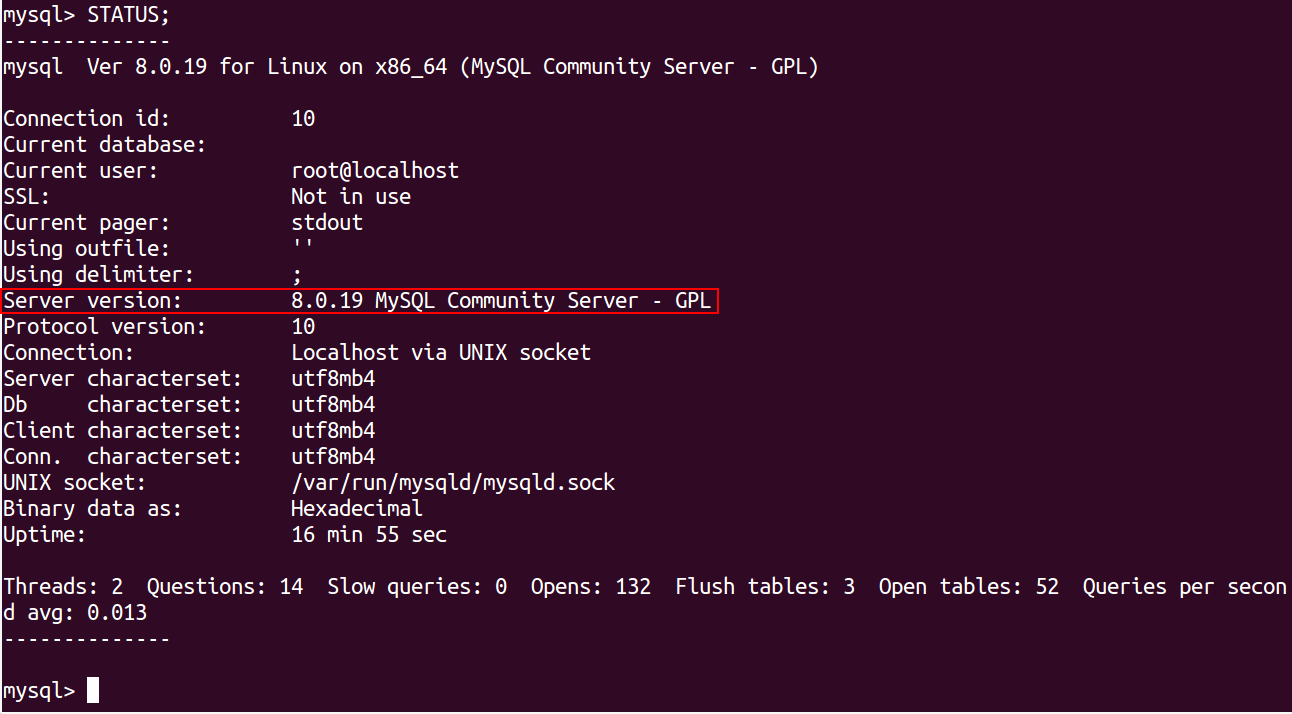
Another alternative option: The STATUS command also displays the information about MySQL version and the server status:
STATUS;
You should get the following output:
 mysql  Ver 8.0.19 for Linux on x86_64 (MySQL Community Server - GPL)


 Connection id: 10
 Current database:
 Current user: root@localhost
 SSL: Not in use
 Current pager: stdout
 Using outfile: ''
 Using delimiter: ;
 Server version: 8.0.19 MySQL Community Server - GPL
 Protocol version: 10
 Connection: Localhost via UNIX socket
 Server characterset: utf8mb4
 Db     characterset: utf8mb4
 Client characterset: utf8mb4
 Conn.  characterset: utf8mb4
 UNIX socket: /var/run/mysqld/mysqld.sock
 Binary data as: Hexadecimal
 Uptime: 16 min 55 sec


 Threads: 2  Questions: 14  Slow queries: 0  Opens: 132  Flush tables: 3  Open tables: 52  Queries per second avg: 0.013
PHPMyAdmin is a graphical interface for managing the databases. You can also verify the MySQL version from the PHPMyAdmin interface.
Step 1: Open your web browser and type the URL bellow. You will be redirected to the PHPMyAdmin login page:

Then you should see the phpMyAdmin login page:
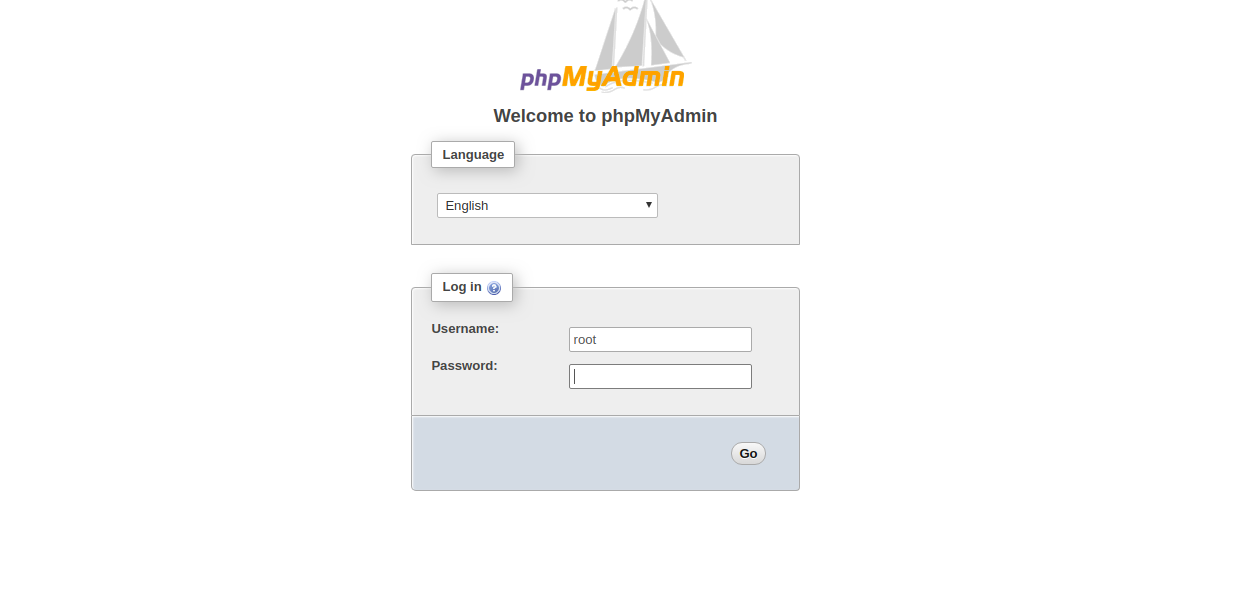
Step 2: Provide your MySQL root username and password, and click on the Go button. You should see the PHPMyAdmin web interface in the following screen:
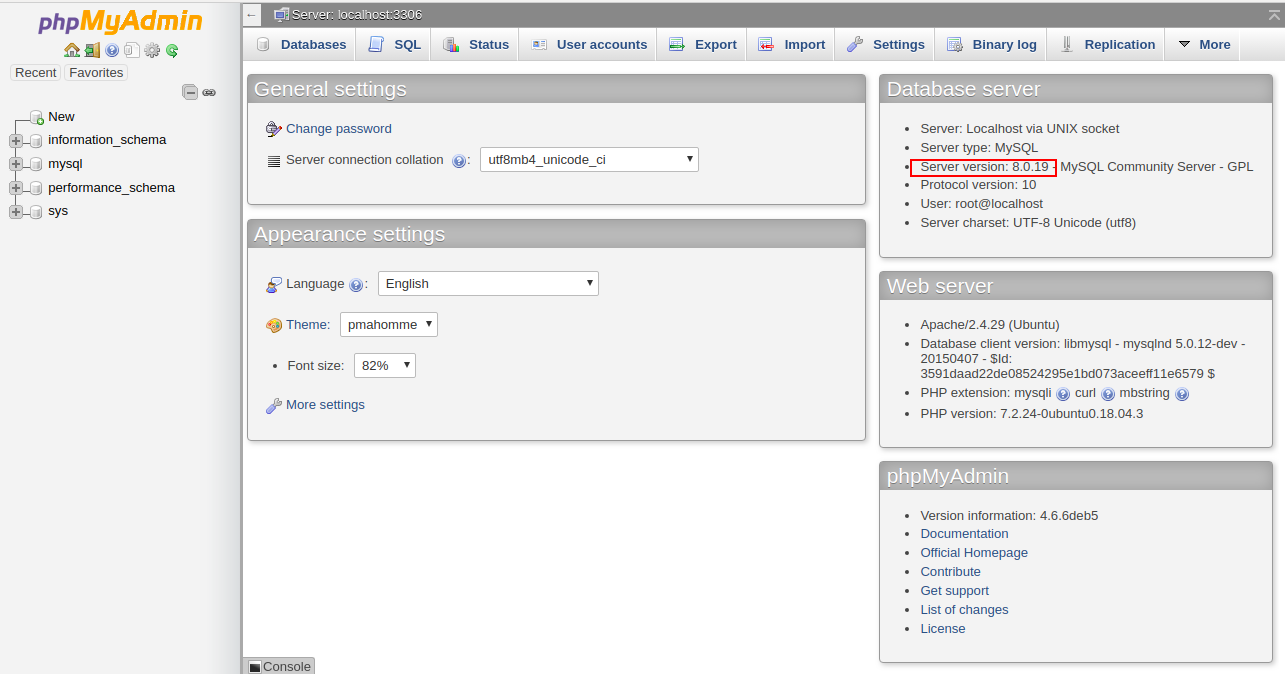
In the above guide, you have seen how to check the MySQL version in Linux with several methods. You have also learned how to get additional data from within the MySQL client.

Still running MySQL 5.5 on your cPanel & WHM server? It’s important to know that this version of MySQL has been in its end-of-life (EOL) status since December, 2018. As a result, no more security, bug fixes, or updates will be available for servers that are still running MySQL 5.5. Major control panel providers already started to drop the support for MySQL 5.5 as well. That said, time has come to upgrade to a newer version of MySQL or MariaDB.
cPanel & WHM also announced that they will block any panel updates for servers running MySQL 5.5 from version 80. So, that is another good reason not to stick to the old version of MySQL.
Considering that MySQL 5.6 will be in its EOL status by February, 2021, it may be better to upgrade to MySQL 5.7 or MariaDB 10.3. MySQL 5.6 will only last for a few years; hence, upgrading to MySQL 5.7 is strongly recommended. This will ensure that you can enjoy the new and improved features that come with version 5.7, even before its predecessor reaches its end of life.
Migrating from MySQL 5.5 to a newer version is a major upgrade that must be done with some consideration in mind. Returning to MySQL 5.5, in case anything goes wrong, is not possible, so a solid backup is essential before you can proceed with the upgrade. For better stability, we recommend a systematic upgrading approach. Here is the step-by-step procedure for upgrading your MySQL:
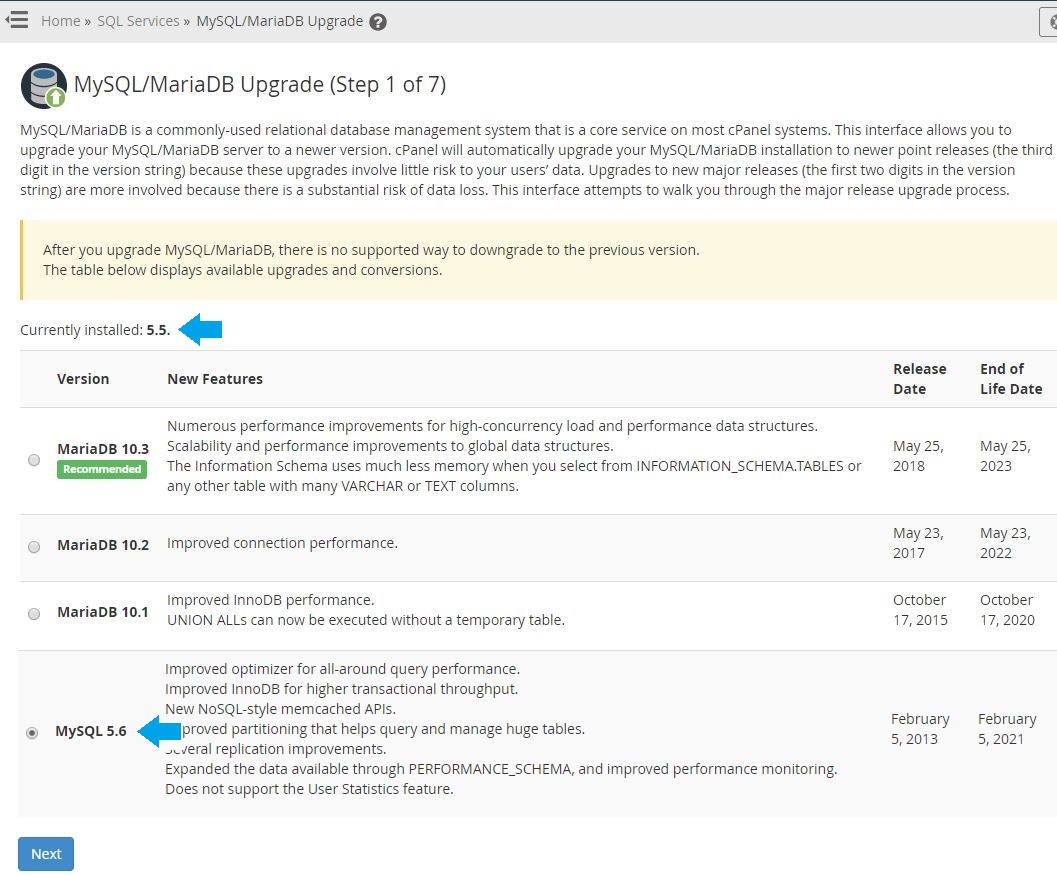
1 – Log into WHM, go to “SQL Services“, and click on “MySQL/MariaDB Upgrade“.
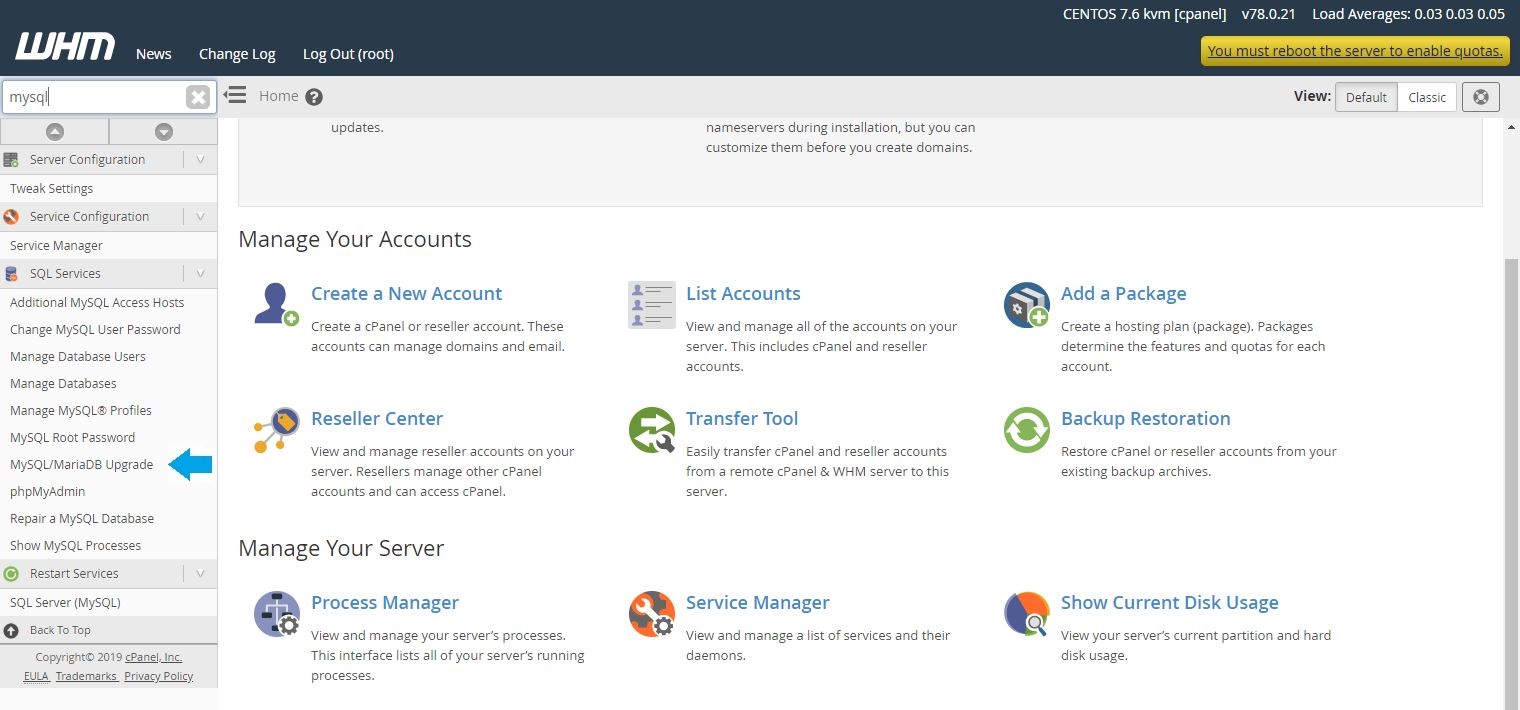
2 – Confirm your current MySQL version, select the new version you want to upgrade to, and then click “Next“. Upgrade one version at a time.
3 – On the next interface, check the boxes for each warning to acknowledge that you are aware of the potential consequences of the upgrade, then click “Continue“. It’s important to know that downgrading from MariaDB is not supported by cPanel & WHM or switching back to MySQL. It’s also not recommended to try doing so. This must be considered when upgrading from MySQL to MariaDB.

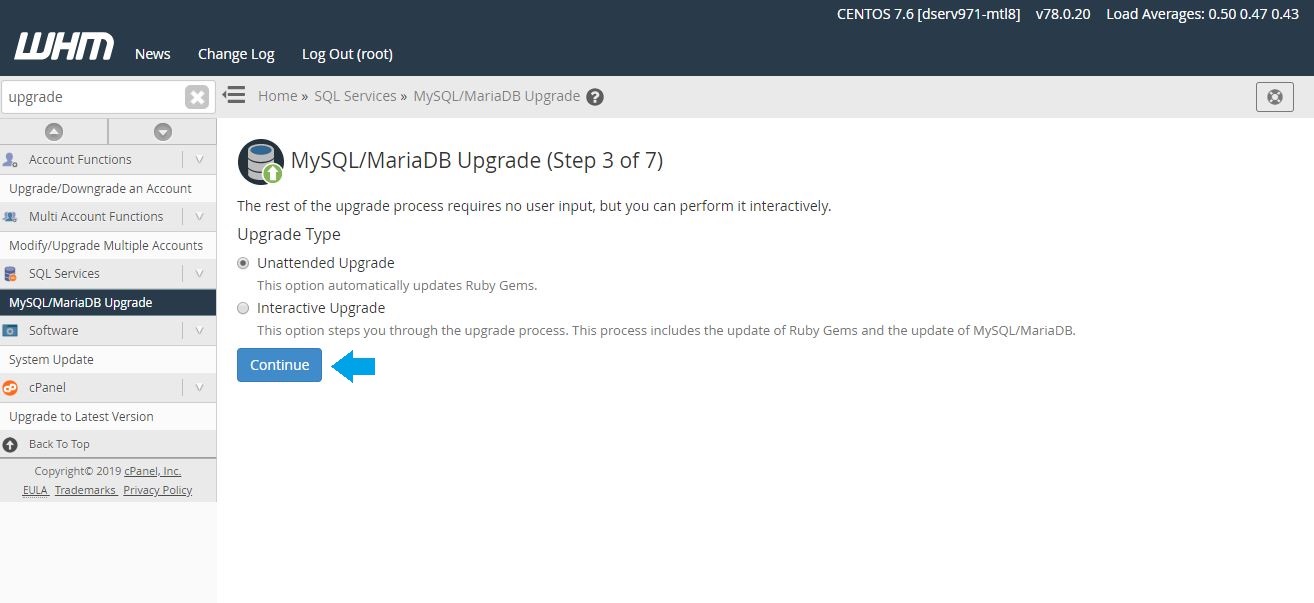
4 – Choose the upgrade type you wish to use:
Unattended Upgrade: (Recommended) — Automatically rebuilds Apache and PHP with the last saved defaults. It also automatically updates Ruby Gems and rebuilds Apache and PHP.
Partially-Interactive Upgrade: (On some cPanel & WHM versions only) — This option automatically updates Ruby Gems, but it does not automatically rebuild Apache and PHP, until you choose to do so.
Interactive Upgrade: (Advanced users only) — This option takes you through the upgrade process step by step. The process includes the Ruby Gems update, the MySQL or MariaDB upgrade, and the Apache and PHP rebuild.
Once you have selected the upgrade type, click “Continue” to start the upgrade process.
Once the upgrade is complete, we strongly suggest that you check your website databases just to be sure that things are working properly. Check the MySQL error log for any errors. The best way to check your websites for errors is by testing them in a browser. In some cases, you may need to update the user password for a specific database, due to an incompatibility issue. Updating the password is a quick fix.
If your error log is not customized, your configuration file is usually named $hostname.err in /var/lib/mysql/. If your hostname, for instance, is ‘host.example.com’, the file will be named host.example.com.err. To interact with this file, you could use commands such as cat and tail: tail /var/lib/mysql/`hostname`.err. The file should not be edited.
Once you confirm that all your sites are working properly, the migration is complete.
MongoDB is a free, open-source document-oriented database, which is classified as a NoSQL database; NoSQL databases are not relational databases but are based on other data storage and retrieval means. Unlike other database programs, such as MySQL and MariaDB, MongoDB is based on JSON-like documents that are flexible, which means fields in different documents can vary and the data structure can change over time. MongoDB also provides users with high availability, smooth scaling, and simple geographic distribution, making it an efficiently utilized solution.

MongoDB was released in February of 2009 and is made available for free use while offering commercial support and other services to consumers.
To install MongoDB on Debian 9, sometimes called Debian Stretch, you will need one node that is running the Linux Debian 9 operating system; the node you choose may be a cloud server node or dedicated server node. The operating system needs to be up to date, and you will need root access to your server.
Root access normally requires a root username and root password, and this allows you to execute commands with higher levels of authority than a standard user would have access to execute.
The first thing to remember is that each command executed below is executed with root user access.
First, it’s essential to update the server before attempting to install MongoDB:
apt-get update && apt-get upgrade -y
When the server is finishing updating, it’s time to install MongoDB:
apt-get install mongodb
Once MongoDB is installed, you will need to start and stop MongoDB, verifying that it functions correctly:
systemctl start mongodb

systemctl stop mongodb
Now you can check your MongoDB version, making sure it’s the proper version or the version you were expecting:
mongod --version
db version v3.2.11

git version: 009580ad490190ba33d1c6253ebd8d91808923e4

OpenSSL version: OpenSSL 1.0.2l  25 May 2017

allocator: tcmalloc

modules: none

build environment:

distarch: x86_64

target_arch: x86_64
After completing the installation and verifying the MongoDB version, it’s time to test MongoDB, making sure it functions as anticipated on your server:
mongo
MongoDB shell version: 3.2.11
connecting to: test
> help
db.help() help on db methods
db.mycoll.help() help on collection methods
sh.help() sharding helpers
rs.help() replica set helpers
help admin administrative help
help connect connecting to a db help
help keys key shortcuts
help misc misc things to know
help mr mapreduce
show dbs show database names
show collections show collections in current database
show users show users in current database
show profile show most recent system.profile entries with time >= 1ms
show logs show the accessible logger names
show log [name] prints out the last segment of log in memory, 'global' is default
use
db.foo.find() list objects in collection foo
db.foo.find( { a : 1 } ) list objects in foo where a == 1
it result of the last line evaluated; use to further iterate
DBQuery.shellBatchSize = x set default number of items to display on shell
exit quit the mongo shell
> exit
bye
Congratulations, you’ve completed installing MongoDB on Linux Debian 9, and it’s time to move your server into production. If you found this guide helpful, please share it with other users that are interested in setting up the same document-oriented database system.
Debian 9 is the latest stable release in the Debian operating system line, which is an open source project based on Unix systems. The current release, given the codename Stretch, has several changes that impact user functionality and third-party application compatibility. Each major Debian release provides new packages, software updates, and comes with three years of support for the release; stable releases, such as Stretch, are released every two years.

However, one major change from the previous Debian 8 release is the change from MySQL to MariaDB. With the new release, the previous instances of MySQL are being replaced by the equivalent instance of MariaDB. This guide will help you install MySQL 5.7 on a node running the Debian Stretch operating system.
To get started with installing the MySQL packages on Stretch, you need to have a cloud server or dedicated server node, whichever you prefer, with an current instance of Debian Stretch installed.
Mentioned earlier, one of the biggest changes from the previous stable release to this release was the replacement of MySQL with MariaDB; MySQL was the default. However, it’s possible to install MySQL as the default database, replacing MariaDB, with an official MySQL repository.
During this process, having root user access, sometimes called privileged access, may be necessary to complete the setup. You will be prompted to create a MySQL root password during installation as well.
The first step in installing the official MySQL instance is to go to MySQL’s website, find the correct .deb package, and download the .deb package.
Now that the .deb package is downloaded, you will need to download it to your Debian server, following the below example:
wget https://dev.mysql.com/get/mysql-apt-config_0.8.8-1_all.deb
Once downloaded to your server, check the .deb package name, then install it with dpkg:
ls mysql-apt-config_0.8.8-1_all.deb
Follow the steps to complete the download of your .deb package:
dpkg -i mysql-apt-config_0.8.8-1_all.deb
During the installation, you will be prompted to select options for your install. Make sure to leave the default options in place, then click “OK”
After the installation is complete, now you can update the package list:
apt update
When the above steps have completed, you are now ready to proceed with installing MySQL, both the server and the client. You will also receive a prompt, during setup, to create a MySQL root user password:
apt install mysql-server mysql-client
Once the installation of the MySQL server and MySQL client have completed, you need to enable the MySQL instance on your server, then start MySQL:
systemctl enable mysql && systemctl start mysql
Securing your MySQL installation is essential, so run the below script, leaving the default settings alone, to secure your MySQL server and client:
mysql_secure_install
Congratulations! You’ve completed an install of MySQL 5.7 on your Debian 9 cloud server or dedicated server node. While installing this official MySQL instance, you’ve replaced the existing MariaDB instance; this makes MySQL the default database software. If you had success using this guide to update your current Debian release with the MySQL instance, please share it with others going through the same process.