 Call us at 1-888-GTCOMM1
-

- Dedicated Hosting
- Cloud hosting
- Services
- Support
- Learning Center
- Referral Program
- Français
-
Why globotech
- Log in
Whether you want a website for your business, blog or personal musings, keeping it well-maintained and updated is the best way to keep your readers or customers in the loop. A good site that is always secure increases repeat visitors and is the perfect way to connect with them. However, whether you’ve used phpBB in the past, or are a new user, keeping it up to date on your own is a huge hassle. That’s why we’re so excited to bring you our phpBB One Click app. It’s now super easy to install, maintain and update your website automatically and whenever you want.
Log In
Before you do anything, you’ll have to log in to your GloboTech account. Enter your username and password here and you’ll reach a page that looks like this.

The phrase above may seem like complete gibberish, but OCA simply stands for “One Click App”. The way our One Click App works is that it packages all the services you need to get your site up and running in one handy place. That way, instead of worrying about servers, programming languages, data storage and other miscellaneous bits, you get to focus on the website itself.
In addition to being faster and easier to set up, you don’t have to worry about your site not working. Our OCA automatically updates your system with everything it needs to keep running smoothly.
Creating Your Instance
Now that you know what our One Click App does, it’s time to learn how to use it. The first step is setting up your instances.
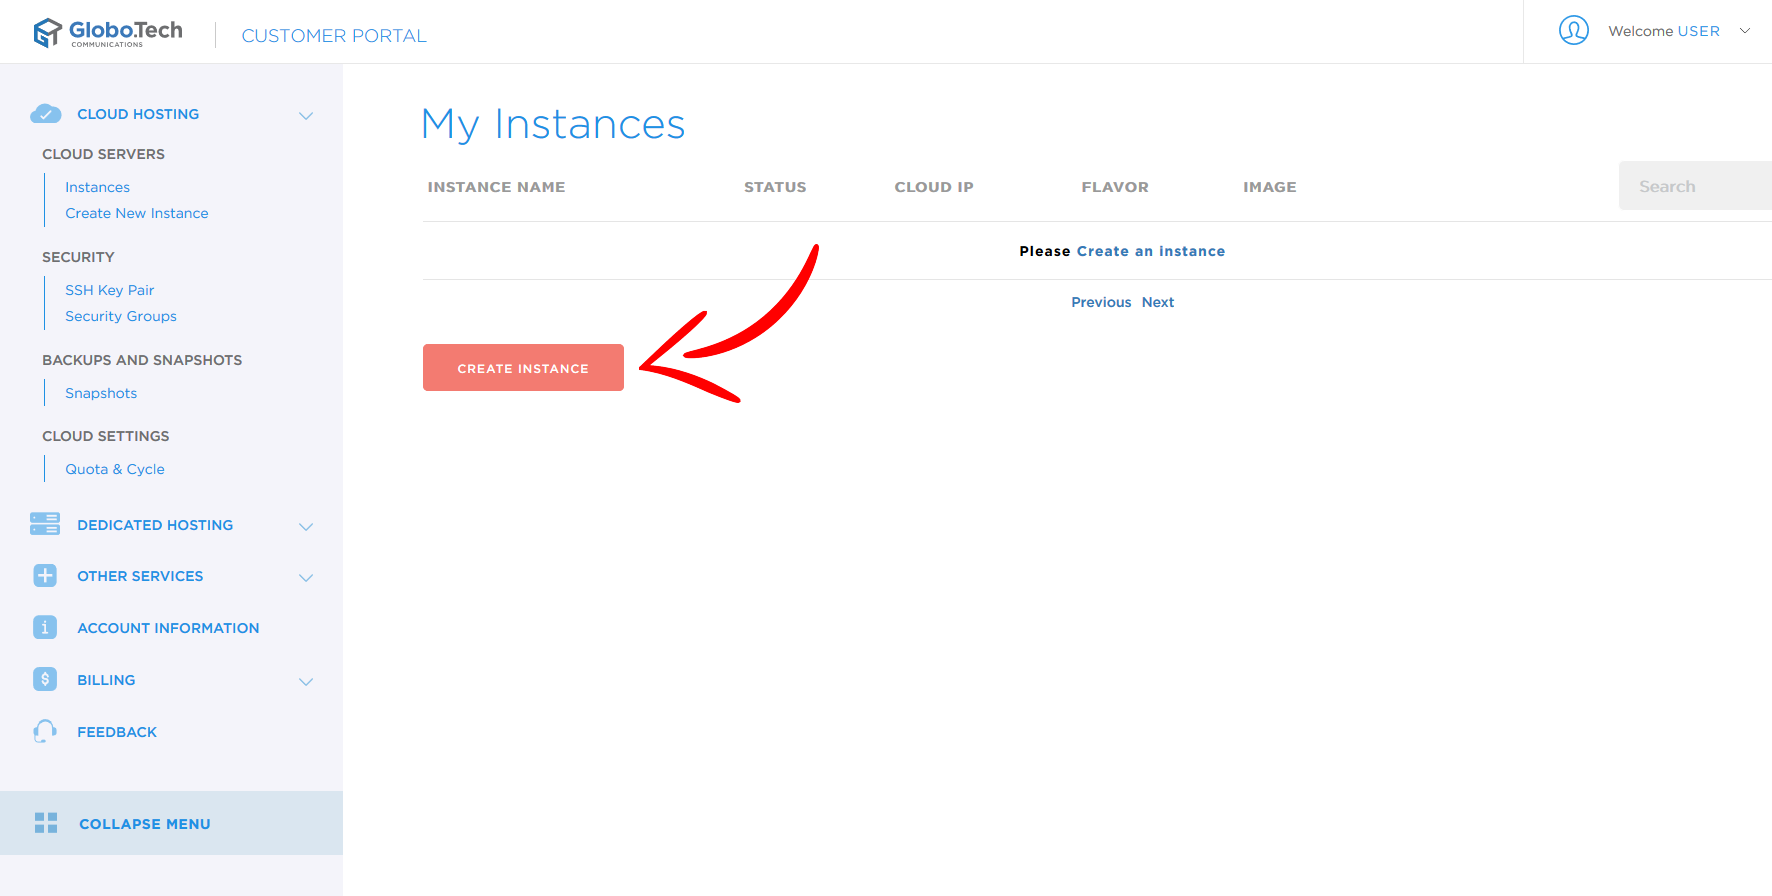
One the left side of your portal, you’ll see a menu with various options. Select the one labeled “Cloud Hosting” to open up a larger sub-menu, then select the option called “Instances”. It will show you active instances, if you have any, as well as display a tempting, red button labeled “Create Instance”. Click that button to continue.
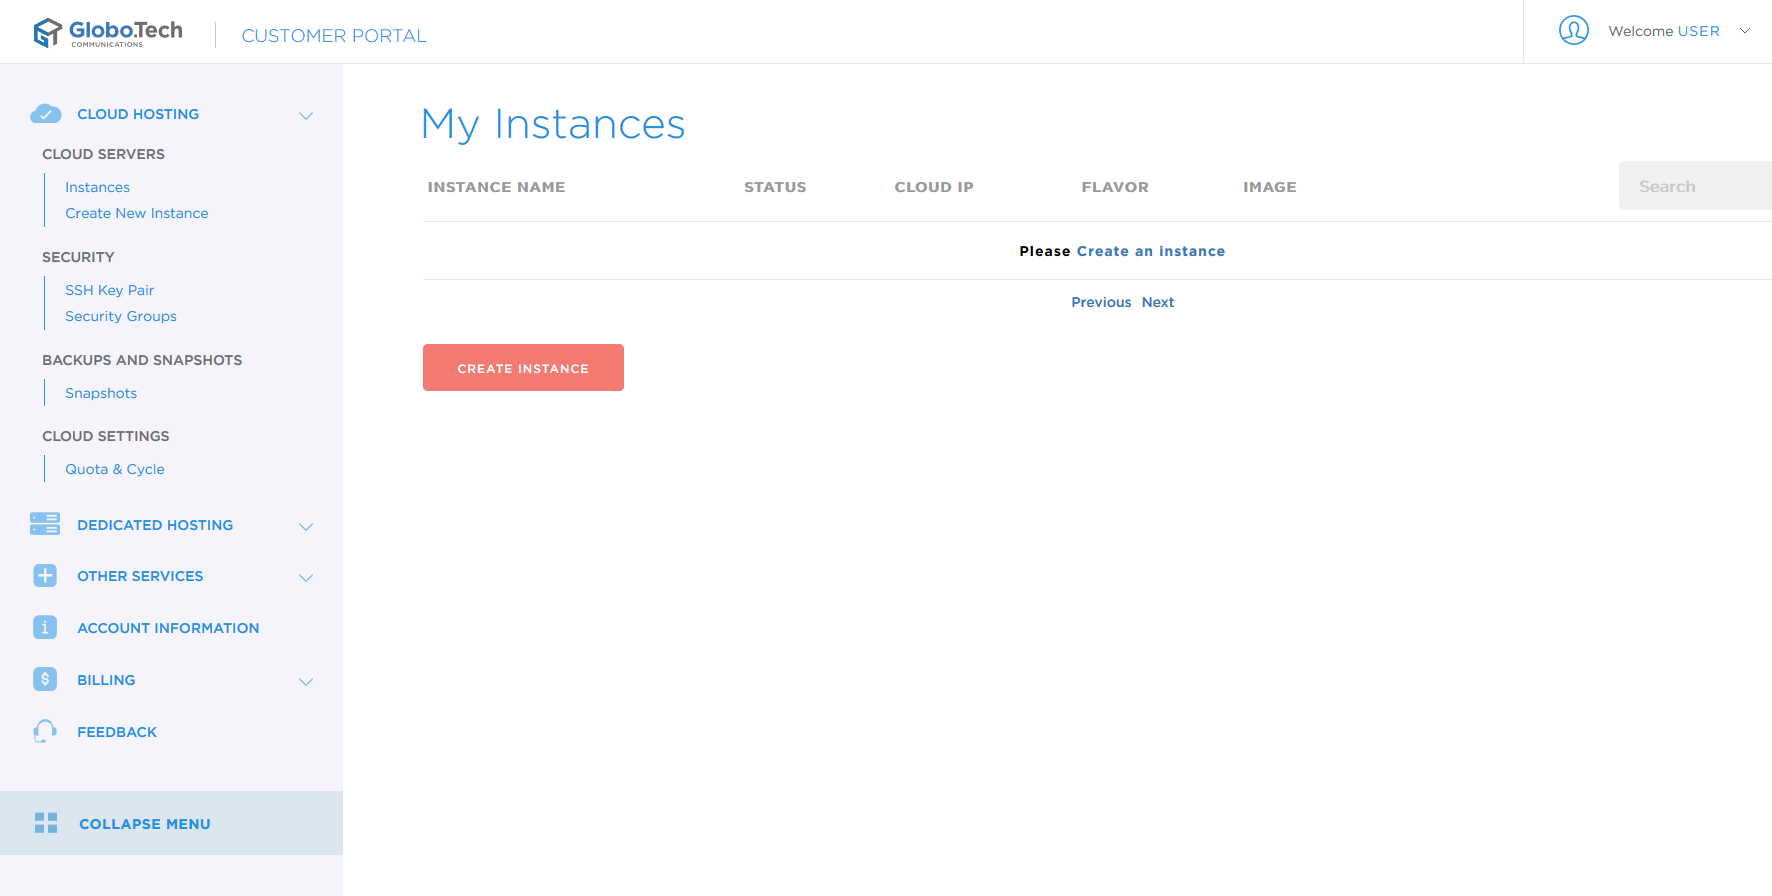
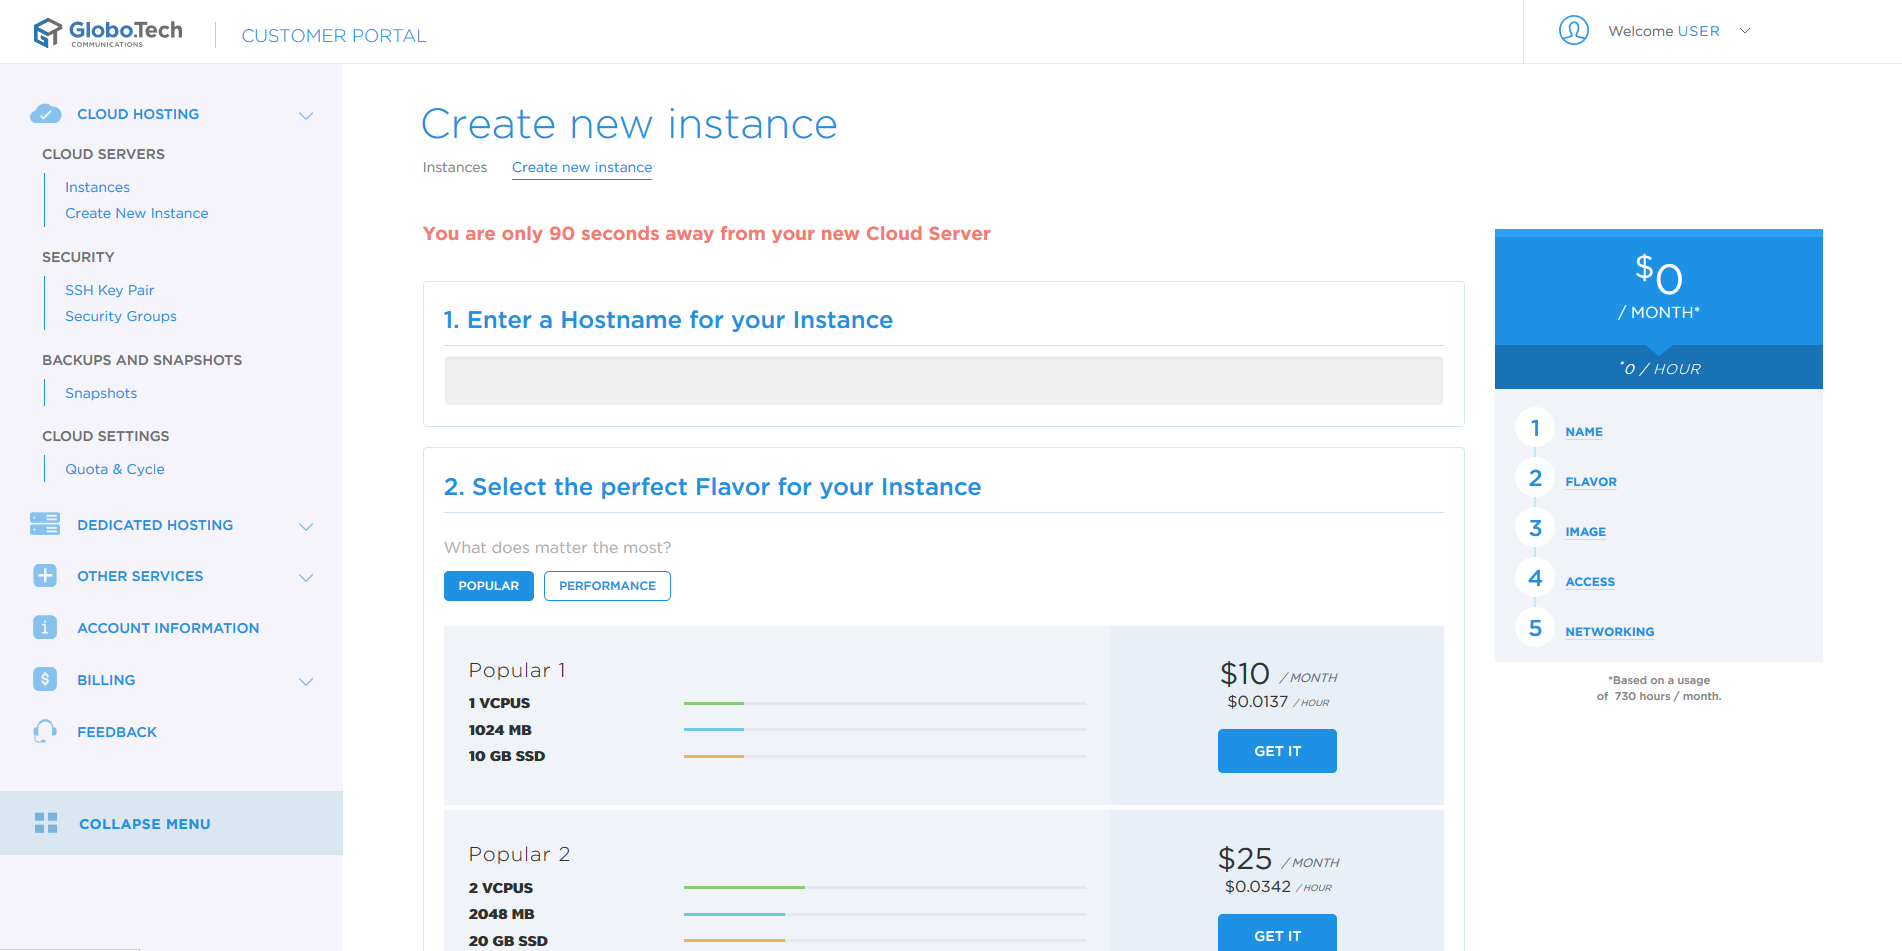
If all steps have been followed correctly, you’ll see an instance creation page that looks like the one below. It might seem tricky, but keep reading to find out what all those blank fields are for.

Enter an Instance name
Your first step is to choose a name for your Instance.

Select Your Flavor
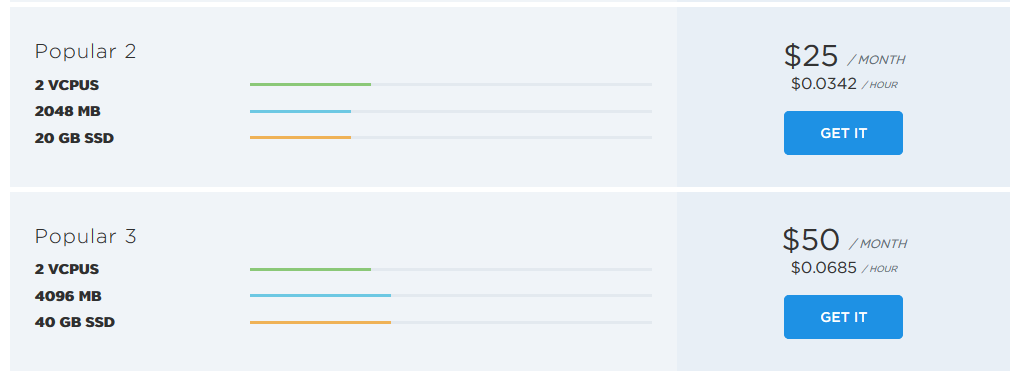
Most hosting sites require you to calculate the amount of RAM, data storage and capabilities of core processors you need. However, that’s not an easy thing to know. That’s where our Flavor option comes in. Rather than mess around with a ton of numbers that may change from day to day, it saves time by letting you choose based on your sites performance.
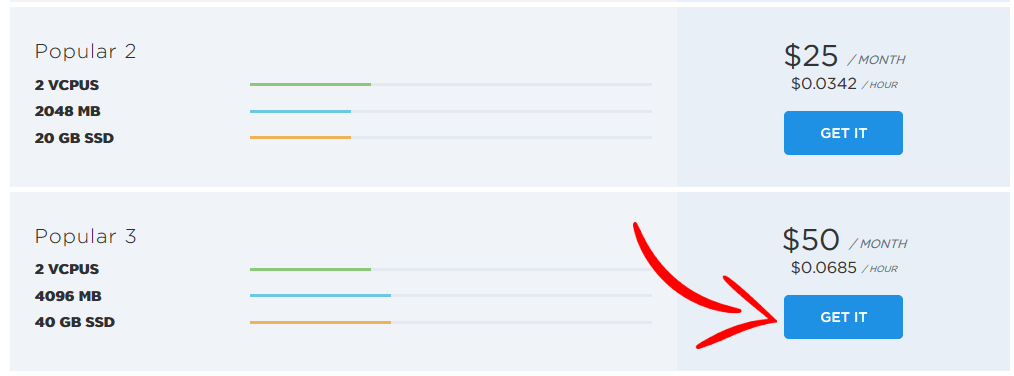
If you have a relatively smaller site, the Popular 2 option is perfect. It’s nice and simple and perfect for a website that may be just starting out. For larger, more well-established sites with an active visitor base, the Popular 3 is a better choice. Don’t worry about making the wrong choice now, though. You can always scale your Flavor option up or down depending on how much you need.
Once you’ve made your decision, simply click on the button labeled “GET IT” under your preferred flavor!
Select Image
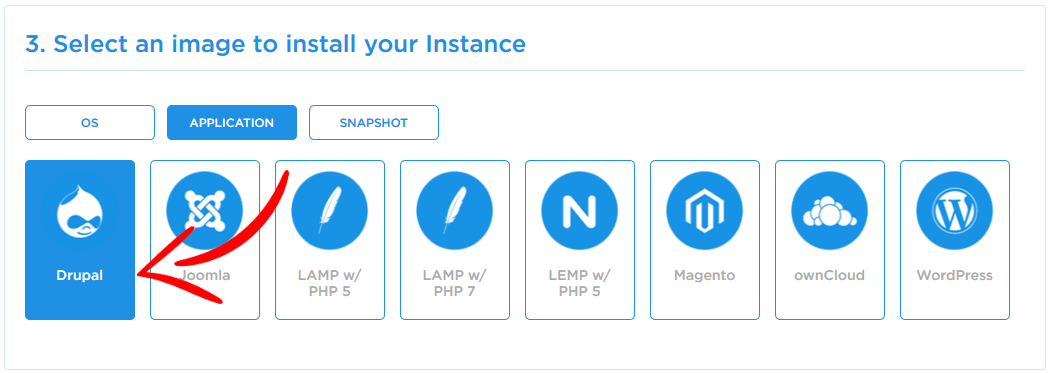
The images represent a server setup that performs the right tasks in your cloud server.
First, select the tab marked “Application”. Because this is all about setting up a One Click App for phpBB, select the image marked “phpBB”.

Setup Access Preferences
For security reasons, you’ll be required to set up your instance with either a password or an SSH key. Because it’s far simpler and more user-friendly, we’ll go with the password option.

Select Networking Options and Create Your Instance
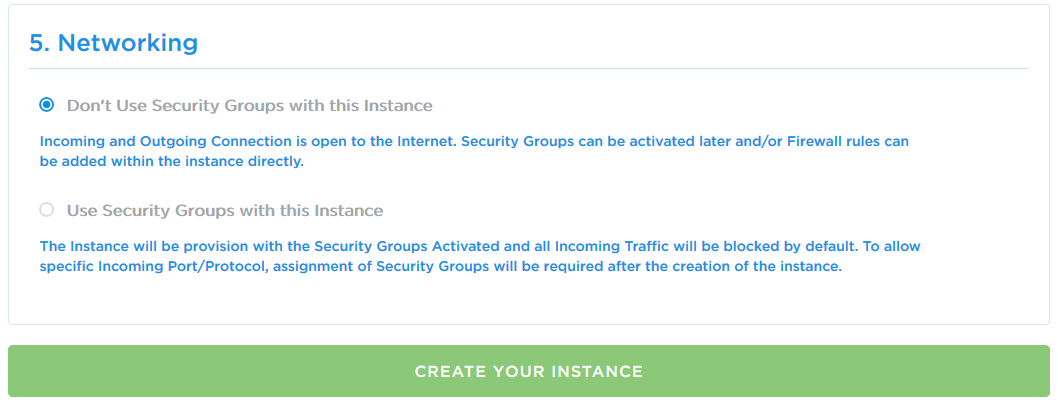
The real question here is whether you want to use security groups. If you do, we feature a separate guide for how to get those up and running. However, for a faster setup, for now we’ll choose not to use security groups. Once that’s selected, click the button marked “Create Your Instance”.
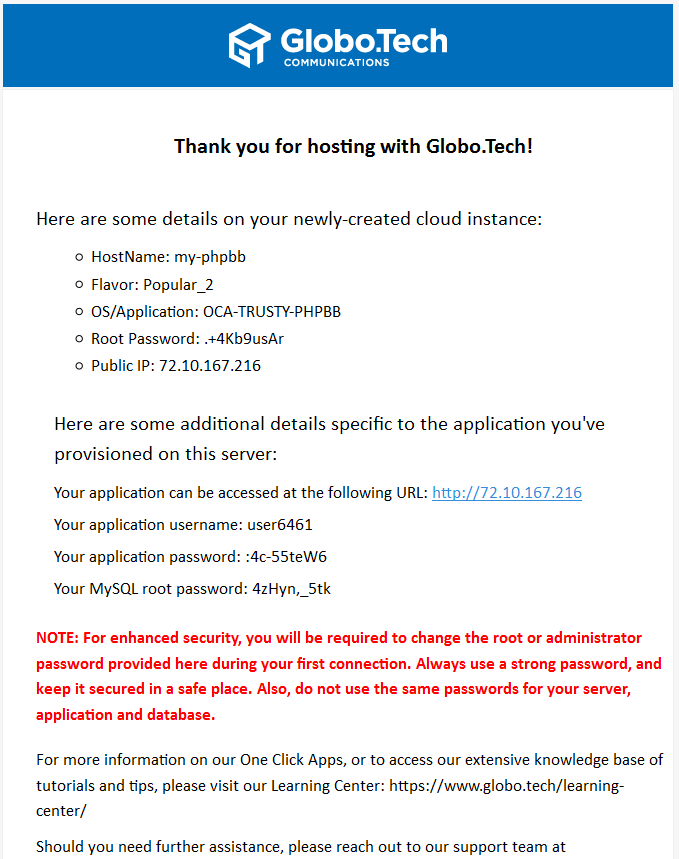
Access Your Credentials
Congratulations! Your instance has been created and you have a brand new website! All that’s left is to check your email and gain access to your administrator credentials for your new phpBB site.
Test Access to Your phpBB Forum
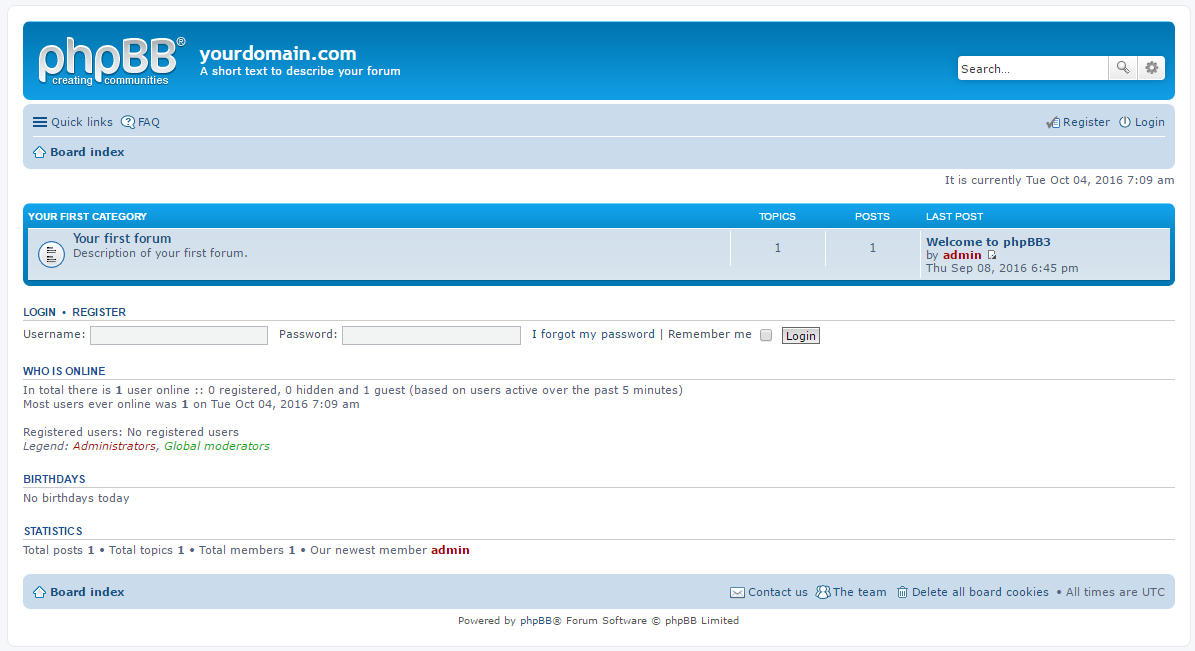
With the necessary information in hand, it’s time to test your new phpBB forum. The first step is to locate the URL in the email you received. In this test, we’ll visit the http://72.10.167.216 URL, which will bring us to the login page.
Log In as Administrator
Use the administrator credentials in the email you received to log in to your new forum. This will bring you to your user dashboard.
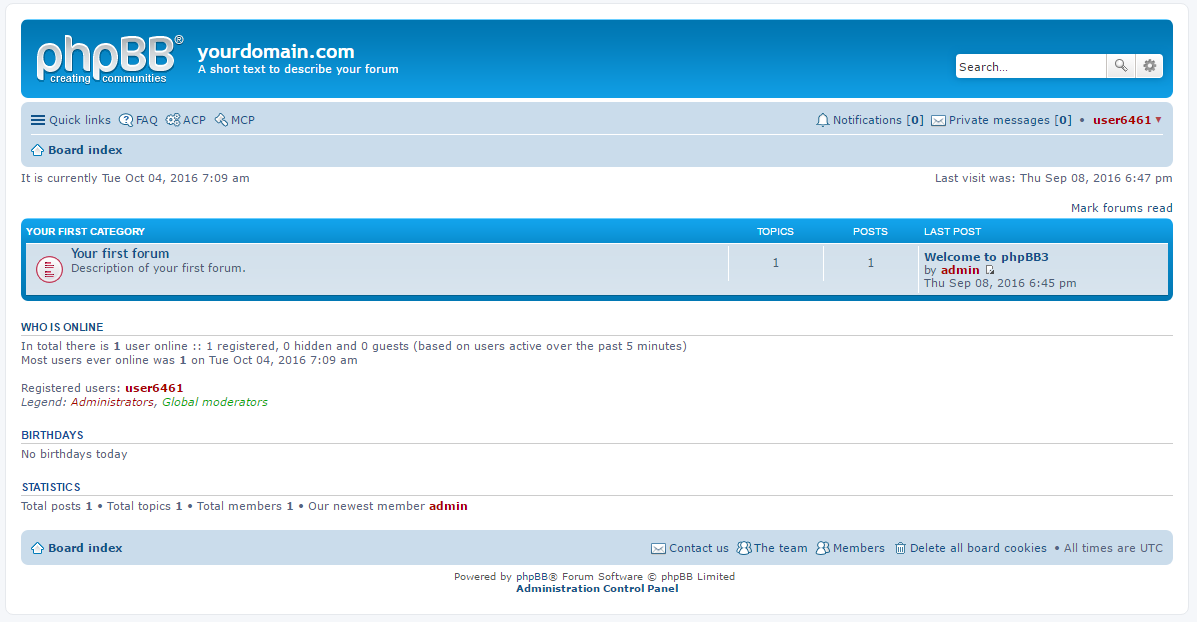
This page will let you modify your user settings, but not forum settings. In order to configure the forum settings, you’ll have to scroll down and click on “Administration Control Panel”. That will take you to another page where, for security purposes, you’ll be asked to log in to your account again.
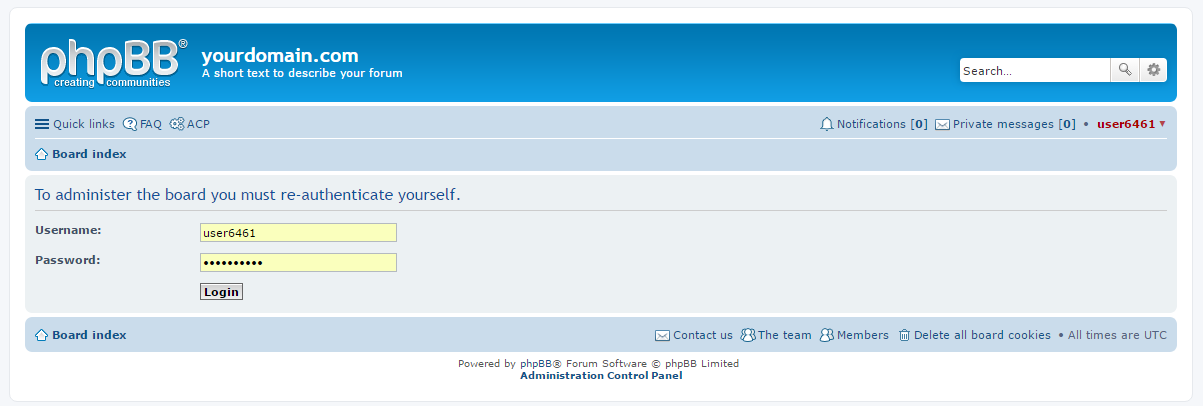
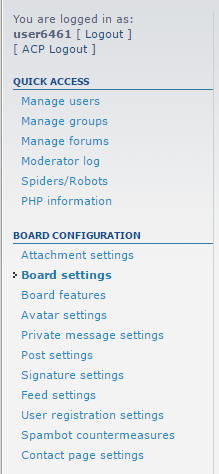
Once you’ve logged in a second time, you’ll be able to access the administration control panel, pictured here in all its glory.

Initial Configuration of your phpBB
The very first step for configuring your phpBB forum is changing the domain name. It’s a very simple process.
You can modify the domain name from the administration control panel. Just click on “Board Settings” to your right.
Here you’ll see a ton of different options, but focus on the Site Name and Site URL.
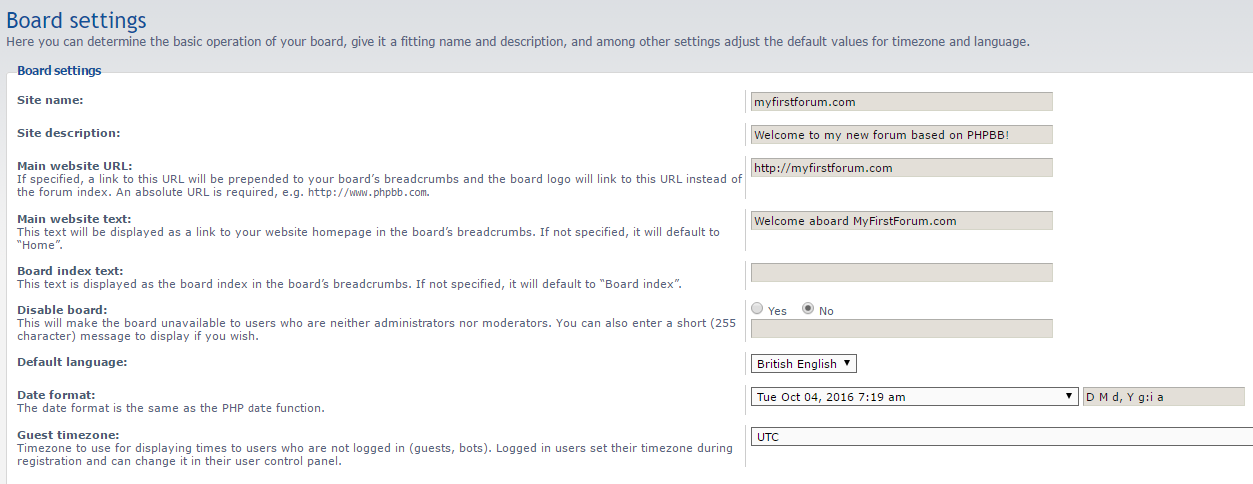
It’s as easy as typing in your information and clicking “Submit”!
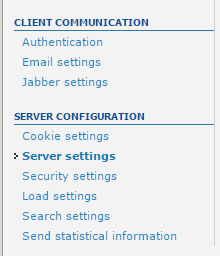
The next step is to configure your server settings. See the “Server Settings” link on the left side? Click on it.
If you’re only hosting one domain, enter it into the configuration block at the bottom titled “Server URL Settings”. If more than one, click “Yes” next to the option labeled “Force Server URL”.
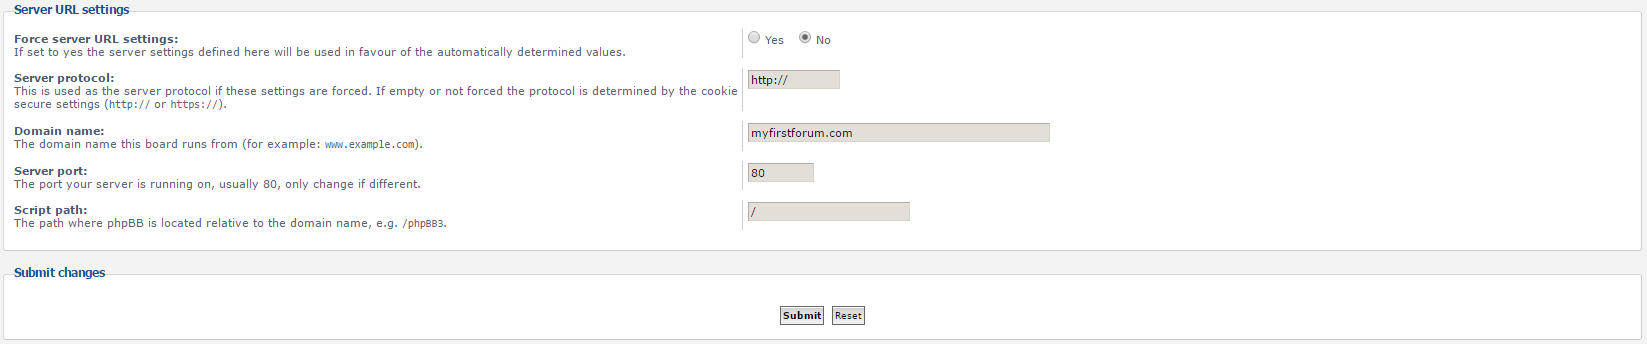
Once you’re done, just click “Submit” to change your server settings!
Your forum is all ready to be used! Just configure your DNS and it’s all set.
Setting DNS Records
Using an IP address as a URL might work, but it’s difficult for visitors to remember and has no bearing on what your site is actually about. Instead, you’ll want your own domain name.
If you aren’t comfortable purchasing a domain name somewhere else, we can help you with that!
For this example guide, we’ll go with something simple, such as “myfirstforum.com”.
First, you have to create 2 “A” records that will point the domain name towards your website’s IP. Because many domains are hosted on different DNS servers and there are a ton of different interfaces used for this, we’ll skip it.
Just make certain that at least two records exist:
myfirstforum.com to point towards 72.10.167.216

www.myfirstforum.com to point towards 72.10.167.216
It might take some time for your website to completely go online, but not too long. Some people report waiting up to 48 hours, but it’s really only a few hours in most cases.
Prefecting your phpBB configuration
Everything is now all set up and you can start to enjoy your brand new phpBB forum!
If you need more help with configuration and modifying your forum, check out phpBB’s existing documents here.
Git is a popular version control software that you can use to organize development and track progressive versions of your code with ease. Gitlab is a web-based Git repository manager that allows you to skip the command line and graphically interact with your codebase.
We here at GloboTech have made installing Gitlab on your account easier than ever. The following is a guide to our Gitlab One-Click App.
Log In
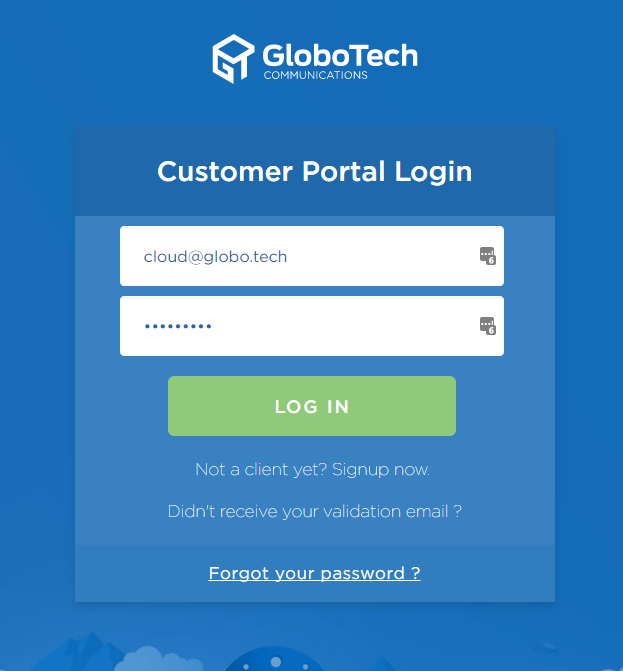
This guide is written for the GloboTech customer who already has credentials for the customer interface.
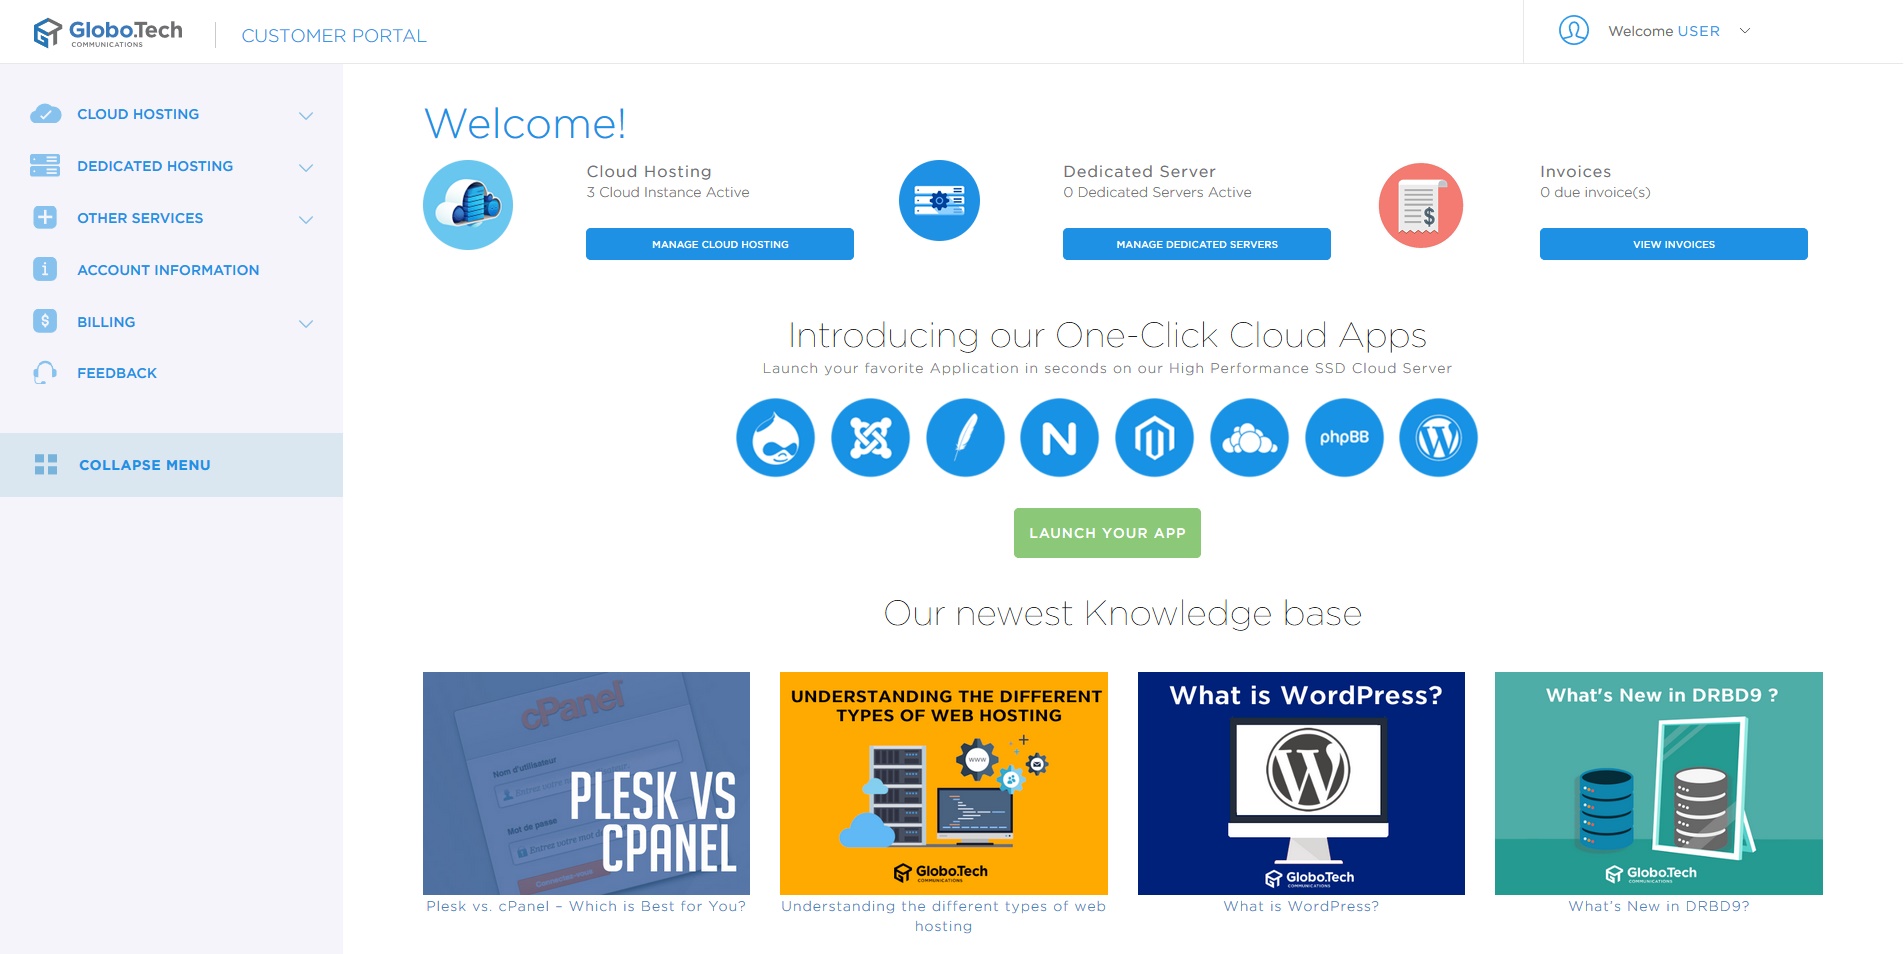
Your first step will be to log in to your GloboTech account at https://portal.globo.tech. After logging in, you should see a page similar to the following screenshot.
We’ll be running Gitlab on an OCA server image. GloboTech provides special OCA instances preloaded with a variety of useful applications, making less work for you as you don’t have to worry about spending time installing dependency after dependency.
Creating your Instance
To begin the OCA setup, click on the “Cloud Hosting” link on the left navigation menu of the portal. Next, find and click “Instances”. This will show you any active instances you might have. We want to create a new instance, so click the “Create Instance” option.
You’ll be transferred to the instance creation page, which looks like the following screenshot.
Enter an Instance name
Here, you can name your instance.

Select Your Flavor
Next, you can select which “flavor” you’d like to use. Flavors are performance packages that limit the amount of CPU, RAM and DISK usage a server instance will use. For example, Popular 2 for a site that hosts a small blog. Popular 3 is useful if you already have an active userbase with more visitors. It’s easiest to select a small flavor at the beginning and upgrade it if you find your performance suffering later on.
Once you have made your choice, click on the GET IT button on the right.
Select Image
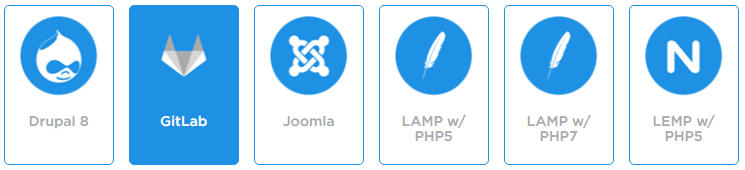
To begin the installation of our Gitlab One Click Application, click on the Application tab. You’ll be presented with a list of applications. Select Gitlab as your choice.
Setup Access Preferences
Now let’s set up your access preferences. Here you may choose to either create your instance with a password or use a SSH key. For the purposes of this guide, we’ll select the password option.
You also have the option of using security groups. We’ll disable it for now. Be sure and refer to our security groups article for more information on how they can benefit your server.
Select Networking Options and Create Your Instance
Finally, click on “create your instance” below to finish.
Access Your Credentials
After instance creation, we’ll email you your server information.
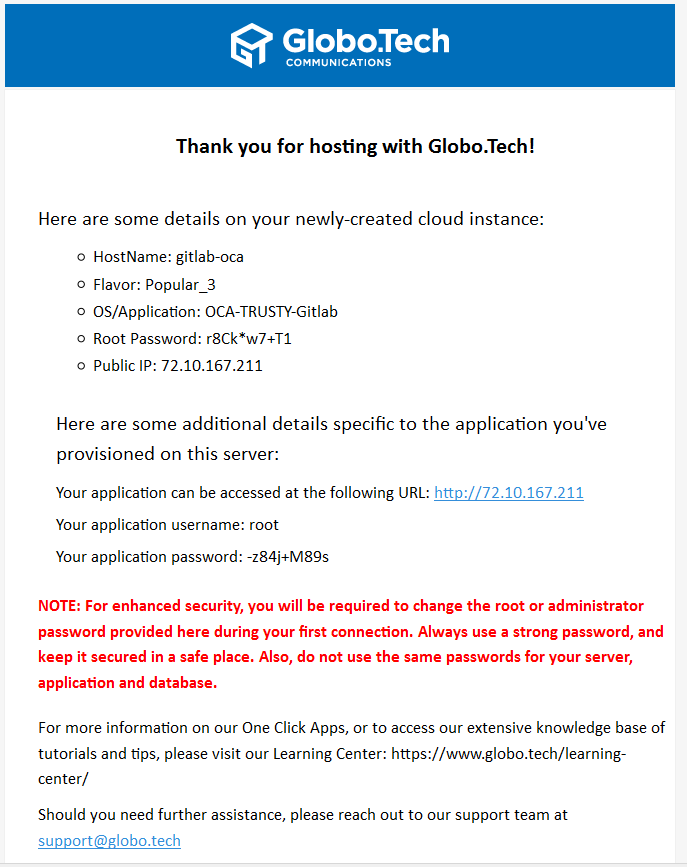
Test Access to Your Gitlab
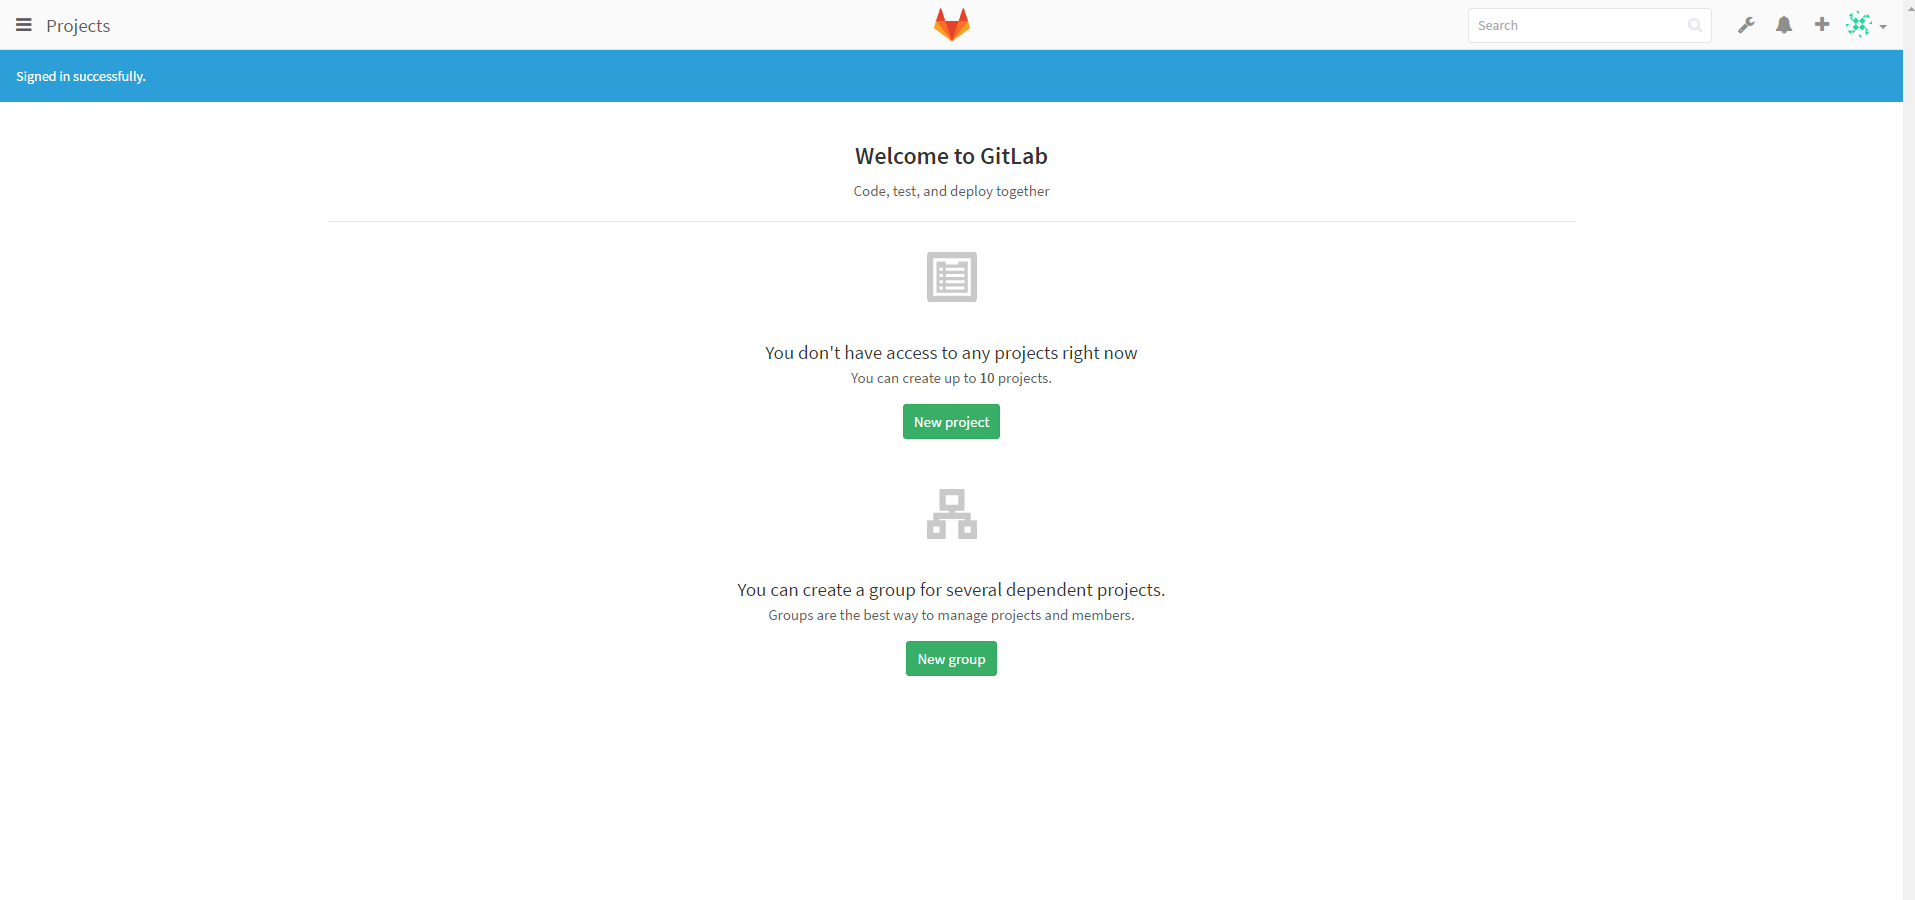
Let’s test out our Gitlab instance. Visit the URL that we emailed you. You will land on the login page for Gitlab.

Log In as Administrator
The credentials we gave you will allow you to log in as an administrator. Once logged in, you’ll be taken to the admin dashboard:
In order to be able to visit your Gitlab site with a domain name rather than just an IP address, the site will now require a domain and DNS records.
If you don’t have any domain to use, then you can buy a new one for your site. Please ask our team if you are not at ease with this part, as it’s quite easy to purchase domain names from us directly.
For the purposes of this guide, we’ll use “mygitcode.com” as an example of a domain name you might use, and “72.10.167.211” as the example IP address it might point to.
You will need to create 2 “A” records that will point the domain name towards your website’s IP. All providers use different interfaces and you also may have your domain hosted on separate DNS servers already, so we will skip this part. Just make sure that both of the following records exist:
mygitcode.com to point towards 72.10.167.211

www.mygitcode.com to point towards 72.10.167.211
Allow some time for those records to propagate to the internet. In some cases it can take up to 48 hours. However, in the majority of cases it only takes a few hours to propagate entirely.
Now that Gitlab is installed and fully operational, you can refer to gitlab’s official documentation to further customize your configuration for your needs. More information is available here: https://docs.gitlab.com/ce/
A snapshot of your server is essentially a backup of all your data in one quick go. Now there are tedious ways to do this using the command line or other applications, however it’s much easier to do with GloboTech’s portal. While it may sound like a difficult process, with the user interface given to every cloud hosting account, creating your snapshot is a breeze and only a few clicks away. Let’s go ahead and get started shall we?
IMPORTANT: Remember that your cloud instance will be offline and unusable while your snapshot is being created.
1. First things first, head on over to https://portal.globo.tech/access/login and go ahead and punch in your portal credentials to login and get the process started.
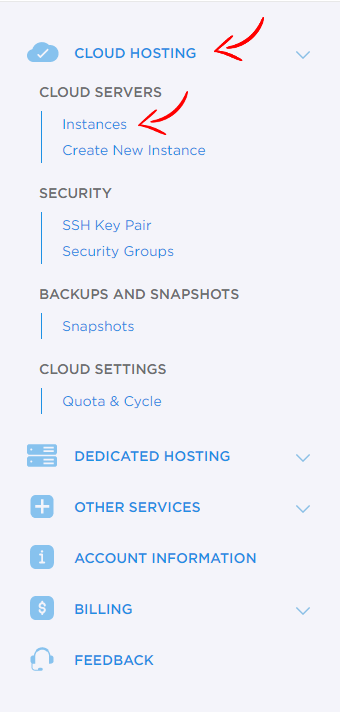
2. Next you’ll want to click on Cloud Hosting and then go ahead and select “Instance” to get a list of your cloud hosted servers.
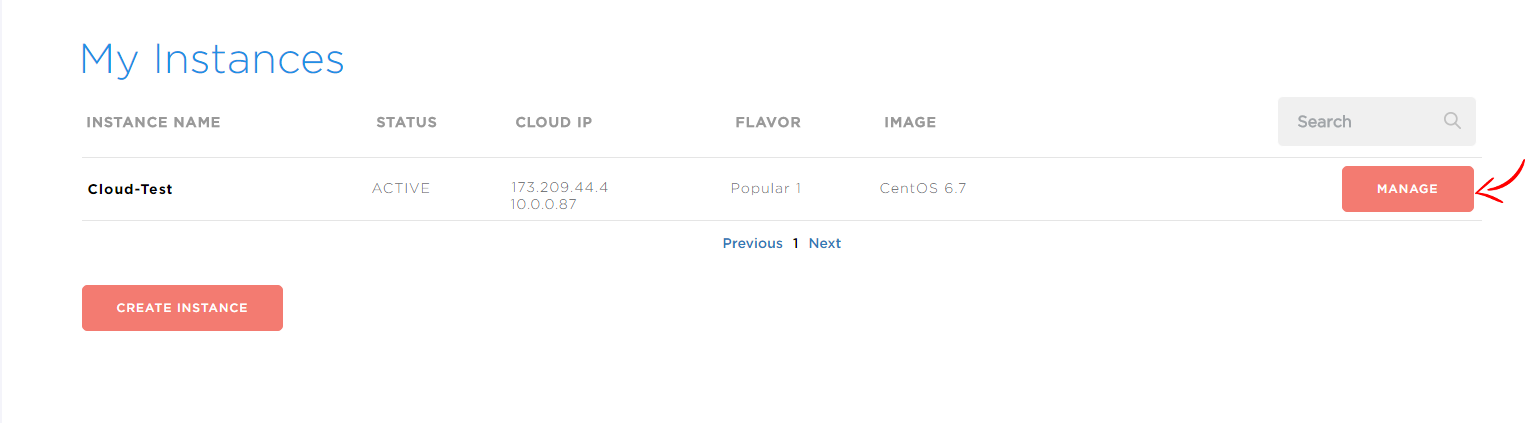
3. Now go down to the cloud instance you will be wanting to backup and click on “Manage.”
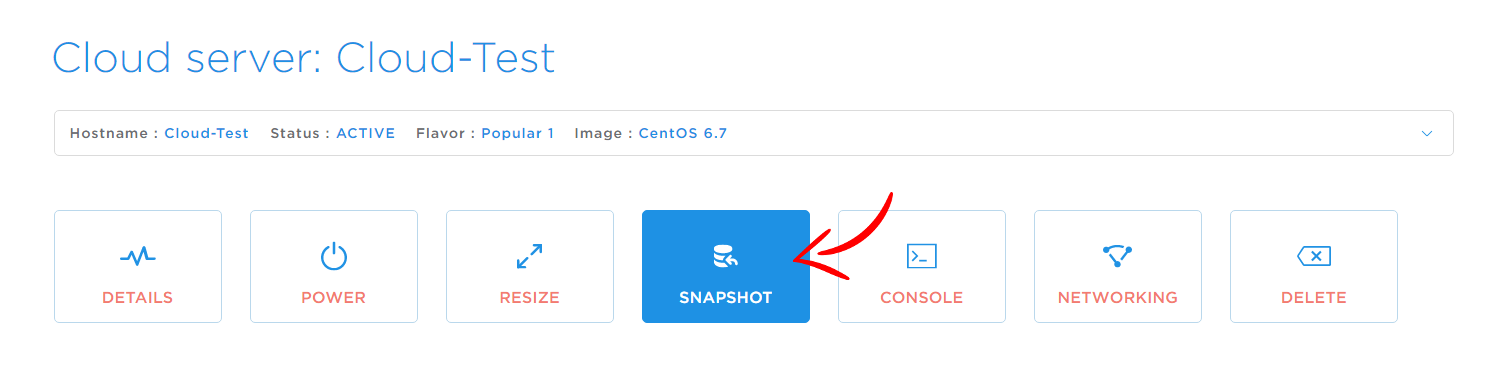
4. Then you’ll want to go ahead and click on the “Snapshot” button.
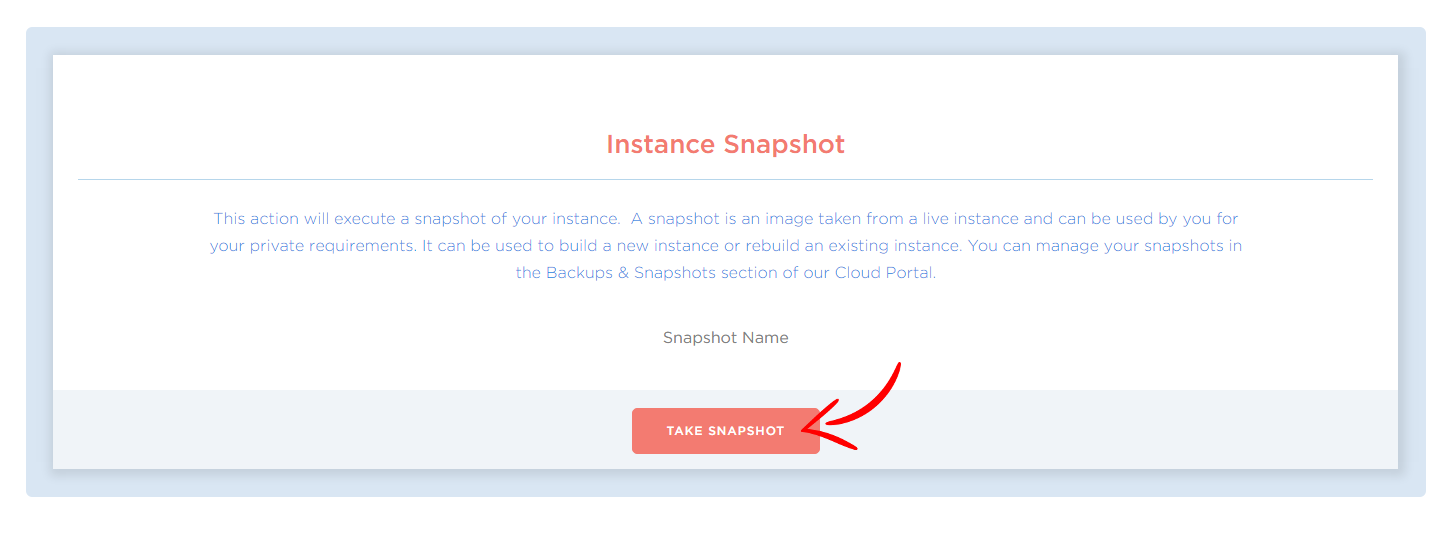
5. Finally type in the name you want the snapshot to be saved under (something like server1-snapshot-january-1 is usually a sure fire way to keep good track of which snapshot is which) and then click on “Take Snapshot” to backup your data.
To sum things up, I think you’ll find that snapshots with GloboTech are a simple and straight forward backup option that can be done with just a few minutes of your time. Unlike the various other software techniques there is no need to open up a command line or ensure you are backing up the proper disk. And also remember that you can recover from a few minutes of a server being down; you can never recover completely lost data from the cloud.
Swapping is a valuable Linux process that can allow you to essentially add more memory to your Linux instance than it actually possesses by overwriting new new information into a preconfigured swap space. By default, our GloboTech Cloud instances come without swap enabled as swap can slow down the performance of a system. However, depending on your landscape you may still find the ability to artificially increase your memory a useful tool even at the cost of some performance.
Swapping will first and foremost allow you to circumvent a system needing more memory than is physically available. If a running process does not have enough memory, your Linux instance will switch to using the swap space and start swapping out less used RAM (random access memory) chunks known as pages and giving this memory to the process. In any Linux system, a significant number of memory pages that used by applications are in fact only used during their initialization. This means that even when running at full memory capacity, your Linux system will still have the capacity to utilize swap and free the memory from these unused pages.
However, as stated above, swapping does have a downside as it can be a slow process due to its direct reading and writing off of the main hard disk instead of to memory. While memory speeds are measured in nanoseconds, disk speed is instead measured in milliseconds. This means that when using swap, you may find that accessing the disk can be even tens of thousands of times slower than accessing the physical memory, and the more swapping that occurs, the slower your system will become. If you have an instance that a system is constantly swapping memory, and not only for a few particular use cases, then the only true solution will be increasing the RAM. If not, then swap is a reliable choice that can save you trouble in situations of tight memory availability. Without swap on your server, you can run into cases where your instance is simply out of memory and will crash, taking your applications temporarily offline. This makes swap ideal as a back-up plan in the case that your memory is overloaded, so that you can rest in peace knowing your system will be protected from memory-induced crashes.
If you find swap to be a good choice for your Linux-based instance, this guide will show you how you can add swap memory to your GloboTech Linux-based instance. Note that the information in this guide will pertain to the majority of Linux-based distributions such as CentOS, RHEL, Fedora, Ubuntu, and Debian.
Swap memory can be allotted to your instance in one of two ways. The first, more complicated method requires the creation of a new partition to be used for swapping. For this, you will oftentimes have to repartition your disk in order to create the empty partition required and this can create more difficulties for your landscape and can be rather risky.
The second method, creating a swap file, removes this requirement and is the preferred way to add swap memory with as little impact as possible on your existing infrastructure. The swap file acts as a swap partition with the advantage being that you will not need an actual empty partition or need to repartition the disk to use it. The size allotted to the file will determine the amount of swap memory that will be available on your server. This is the easiest method of adding swap memory as it is fail-proof, requires zero risky repartitioning, and can be done in only a few easy steps.
1. Ensure you have enough space
The swap file we create will require filesystem space. You will need to check your available space to make sure that you have enough by using the command:
df -h
The output should show something like the following example, where you can see that we have 8.8GB available on the disk:
Filesystem      Size  Used Avail Use% Mounted on

udev            491M     0  491M   0% /dev

tmpfs           100M  4.4M   95M   5% /run

/dev/sda1       9.7G  877M  8.8G   9% /

tmpfs           497M     0  497M   0% /dev/shm
2. Allocate the swap file
Having ensured that we have enough space on our system, we will now actually create the swap using the fallocate utility. You can also create your swap file using dd, but the fallocate tool is quicker and simpler to use and is the preferred method. Since our system only has 8.8GB of available disk space, we will create a swap file that is 1GB only. If you have more space on your system, you can create a larger swap file. As the root user, execute the following command replacing the size with your desired size to create a swap file in /swapfile. Use M to indicate Megabytes and G for Gigabytes when giving the size:
fallocate -l 1G /swapfile.swap
If you run into any issues using fallocate, you can always use dd as a fallback. Execute the following as root:
dd if=/dev/zero of=/swapfile.swap bs=1024 count=1048576
3. Set file permissions
With the file created, we will need to set restrictive permissions on it in order to prevent it from accidental alterations by system users, which would break the file.
chmod 600 /swapfile.swap
4. Prepare the swap file
Next, we will use the mkswap utility to configure the created file to be used as swap space. Execute the following command to turn the file into swap:
mkswap /swapfile.swap
5. Mount the swap file
The file is not yet available in your system until you mount it. Activate it using swapon:
swapon /swapfile.swap
To make the changes permanent, we will add the swap file to the fstab file. This will allow the new swap file to be mounted automatically on boot. Open the /etc/fstab file in any text editor such as nano shown below:
nano /etc/fstab
Add the following line to the file:
/swapfile.swap none swap defaults 0 0
6. Prevent system processes from abusing of the swap
Since swap memory is not as able to handle heavy usage as regular RAM without taking performance hits, we can takes steps to ensure that processes won’t abuse the swap space. This will help keep your system from slowing down, and can be accomplished by modifying the swappiness sysctl parameter. This parameter represents the preference/avoidance of the kernel for swap space, and can take any value from 0 to 100 with the default being 60. A lower swappiness value will improve the responsiveness on your system by reducing RAM swapping. Set the swappiness by opening the sysctl file in any text editor (for example, nano):
nano /etc/sysctl.d/99-sysctl.conf
Find the line for the vm.swappiness parameter, and modify it to look like the following with a swappiness value of 10:
vm.swappiness=10
Save and close the file when you are finished.
Congratulations! Having completed all steps in this guide, your Linux instance. Now that all steps are completed, your system has a permanent swap file created which will be auto mounted at every reboot. Enjoy the extra memory!
SSH is one of the most popular and widely used protocols out there for ensuring the secure transmission of data over the open internet. SSH stands for Secure Shell, and was first invented way back in 1995 to take the place of insecure protocols like Telnet, that would transmit all data in plaintext, rendering them powerless against a simple packet sniffer. Nowadays, it’s in wide use as a way to safely log in to remote servers via files called “keys”.
The following guide will show you the steps to setting up SSH login on your own server via the Portal.
The first step is to go to our login URL (https://portal.globo.tech/access/login) and log in using your Portal credential.
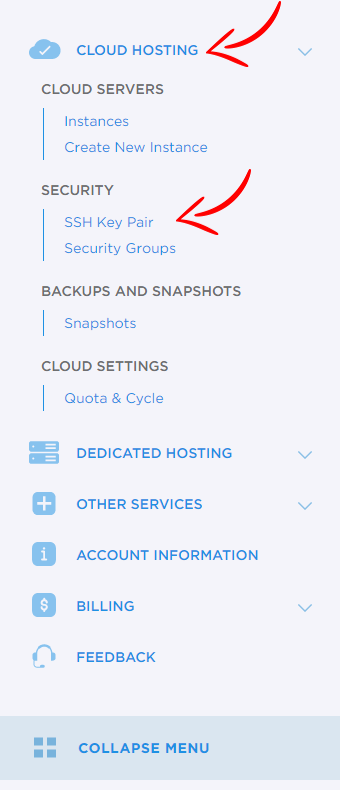
Click on Cloud Hosting, and then next click on the SSH Key Pair option.
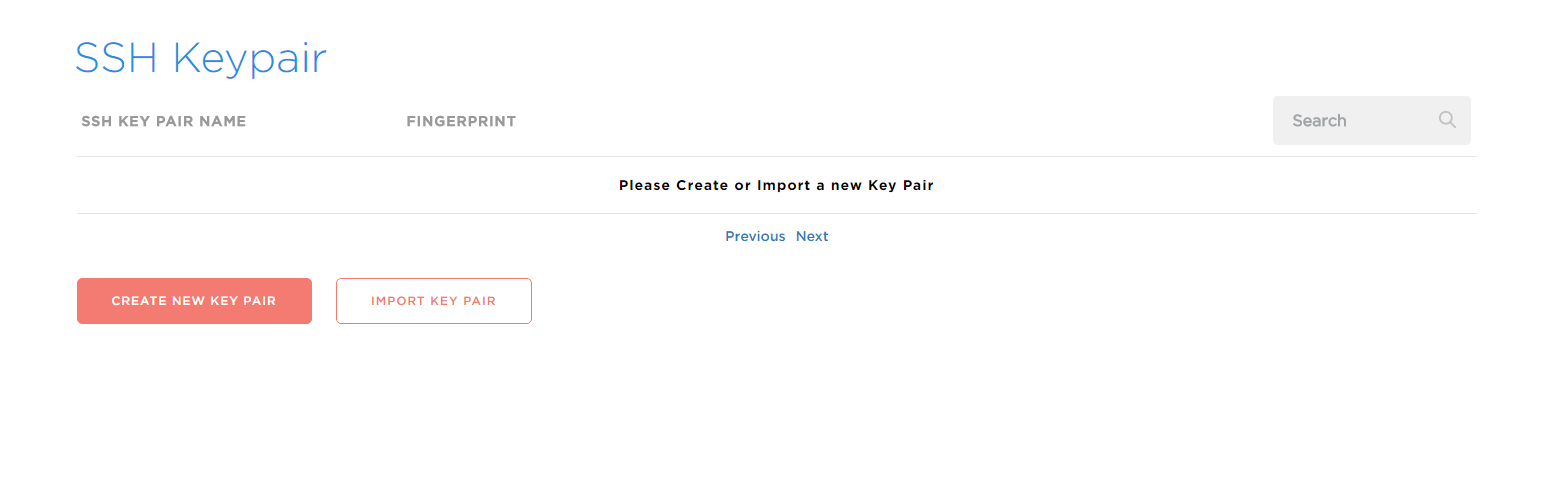
Here you will have two options. You can either import an existing key that you have on your system, or create a new ssh key entirely.
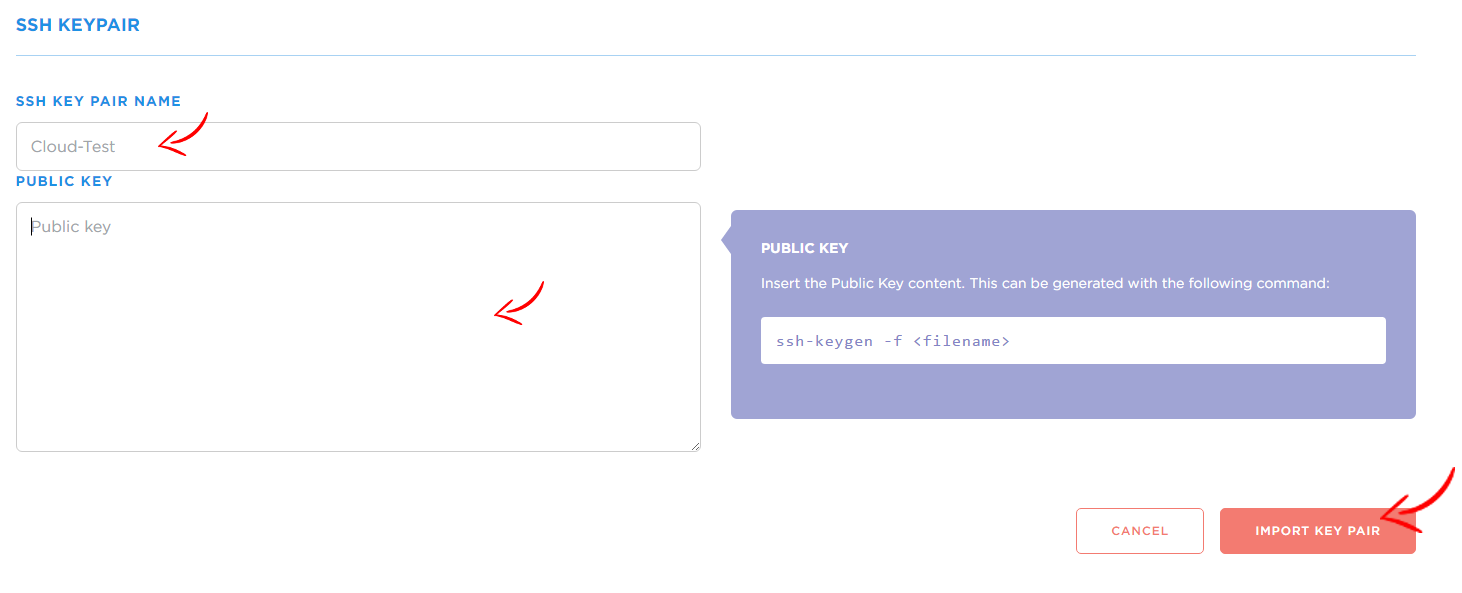
• If you want to import a SSH Key, write the name of the ssh key you want, paste your ssh key in the window we provide and then click on the “Import Key Pair” option.
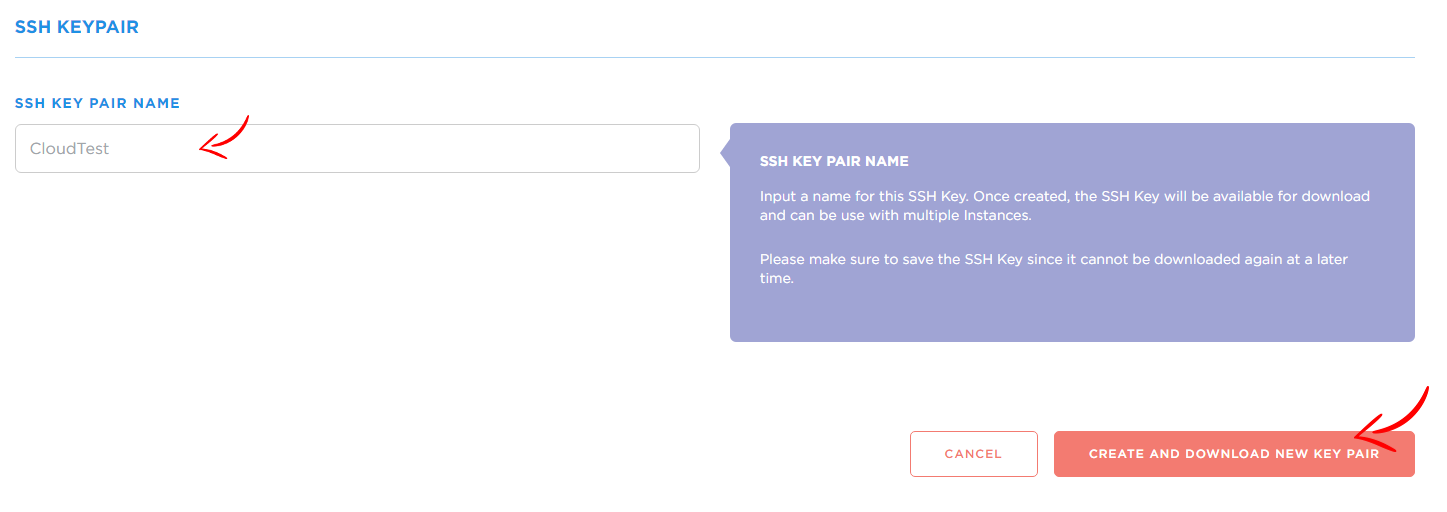
• Or, if you want to create a new SSH key pair, simply write the SSH Key name you want and click on the “Create and download new key pair” option. Above all, make sure you save the SSH Key now because you won’t be able to download it again at a later time.
When creating a new instance, you will get the choice to use the SSH key you created or imported instead of using the root password for login. But take note of that root password, because for security reasons you should still change it once the instance is created.
Now that you know how to enable SSH login with a key, you have access to the most secure way to administer a remote server.
While Drupal is not difficult to install, it certainly isn’t painless. Start by obtaining a Linux server. Then, install your database and web server. Finish up by installing all of Drupal’s dependencies, and by downloading and unpacking the Drupal distribution. If you’re a skilled system administrator, you can complete all necessary tasks in under an hour. But if you’re just launching a Drupal site, the last thing you might want to do is maintain the underlying technology stack. Fortunately, with our Drupal One Click App, you can quickly set up your website and leave the remaining details to us.
Start by logging into your account page. The landing page should look something like this.
What Is An OCA?
Lots of technology is involved in serving up the websites you visit. Every website runs on a web server, relies on various programming languages, and uses other services to store data and send messages. Our One Click Apps package all of these components into a bundle that is easy to install and maintain.
OCAs aren’t just faster to set up. By including all necessary dependencies, you aren’t left wondering if some aspect of your website won’t work, or stuck researching what PHP modules Drupal needs. We’ve done all of that for you, giving you the best possible system for running Drupal-based sites.
Here we’ll demonstrate how to use the Drupal OCA. Start by clicking “Cloud Hosting,” and then “Instances.” You’ll then see a list of active instances, if any. Click “Create Instance” to continue.

You should be on the instance creation page, which consists of several fields. We’ll explain those fields below.
Start by choosing a name by which your instance will be identified.

Servers consist of RAM, CPU cores, disk space, and other characteristics. It can be difficult knowing how many of each a website might require. Our Flavor system is here to help make the task a bit easier. Instead of choosing a server according to RAM and CPU count, you instead choose based on how popular your site is.
Initially, you may wish to choose our Popular 2 flavor. If instead you’re migrating an existing site with users and content, Popular 3 might be a better choice. Note that whatever you choose now isn’t binding, and you can change your flavor later. When you’ve decided, click “GET IT” to continue.
Here you’ll choose an image, a prepackaged server setup appropriate for a given task. Since we’re setting up Drupal, choose the Application tab, then click Drupal.
Here you’ll choose whether to secure your instance with a password or an SSH key. Choose “Password.”

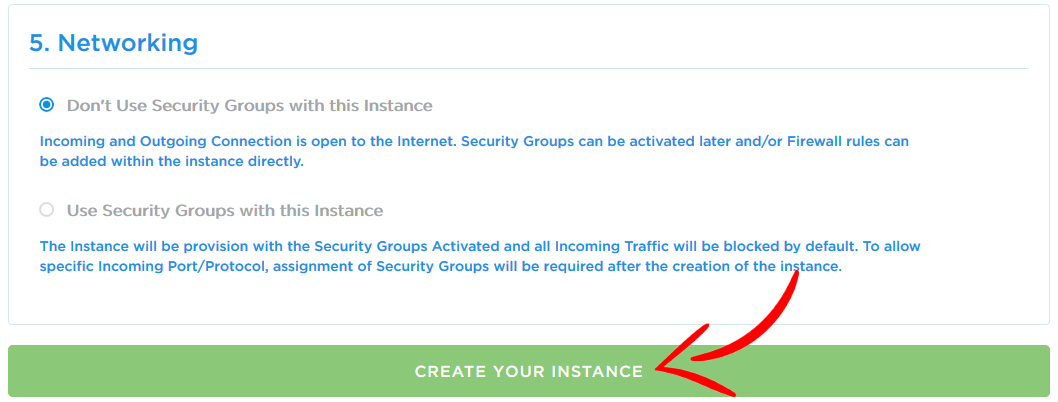
On this screen, you’ll decide whether this instance should use security groups. We have another guide for those, but to get up and running more quickly we’ll elect not to use them here. Click “Create your Instance” to set everything up.
Check your email. We’ve just sent you everything required to access your new Drupal site, including administrative credentials for Drupal itself.

With access credentials in hand, we’ll now test the newly created Drupal site.
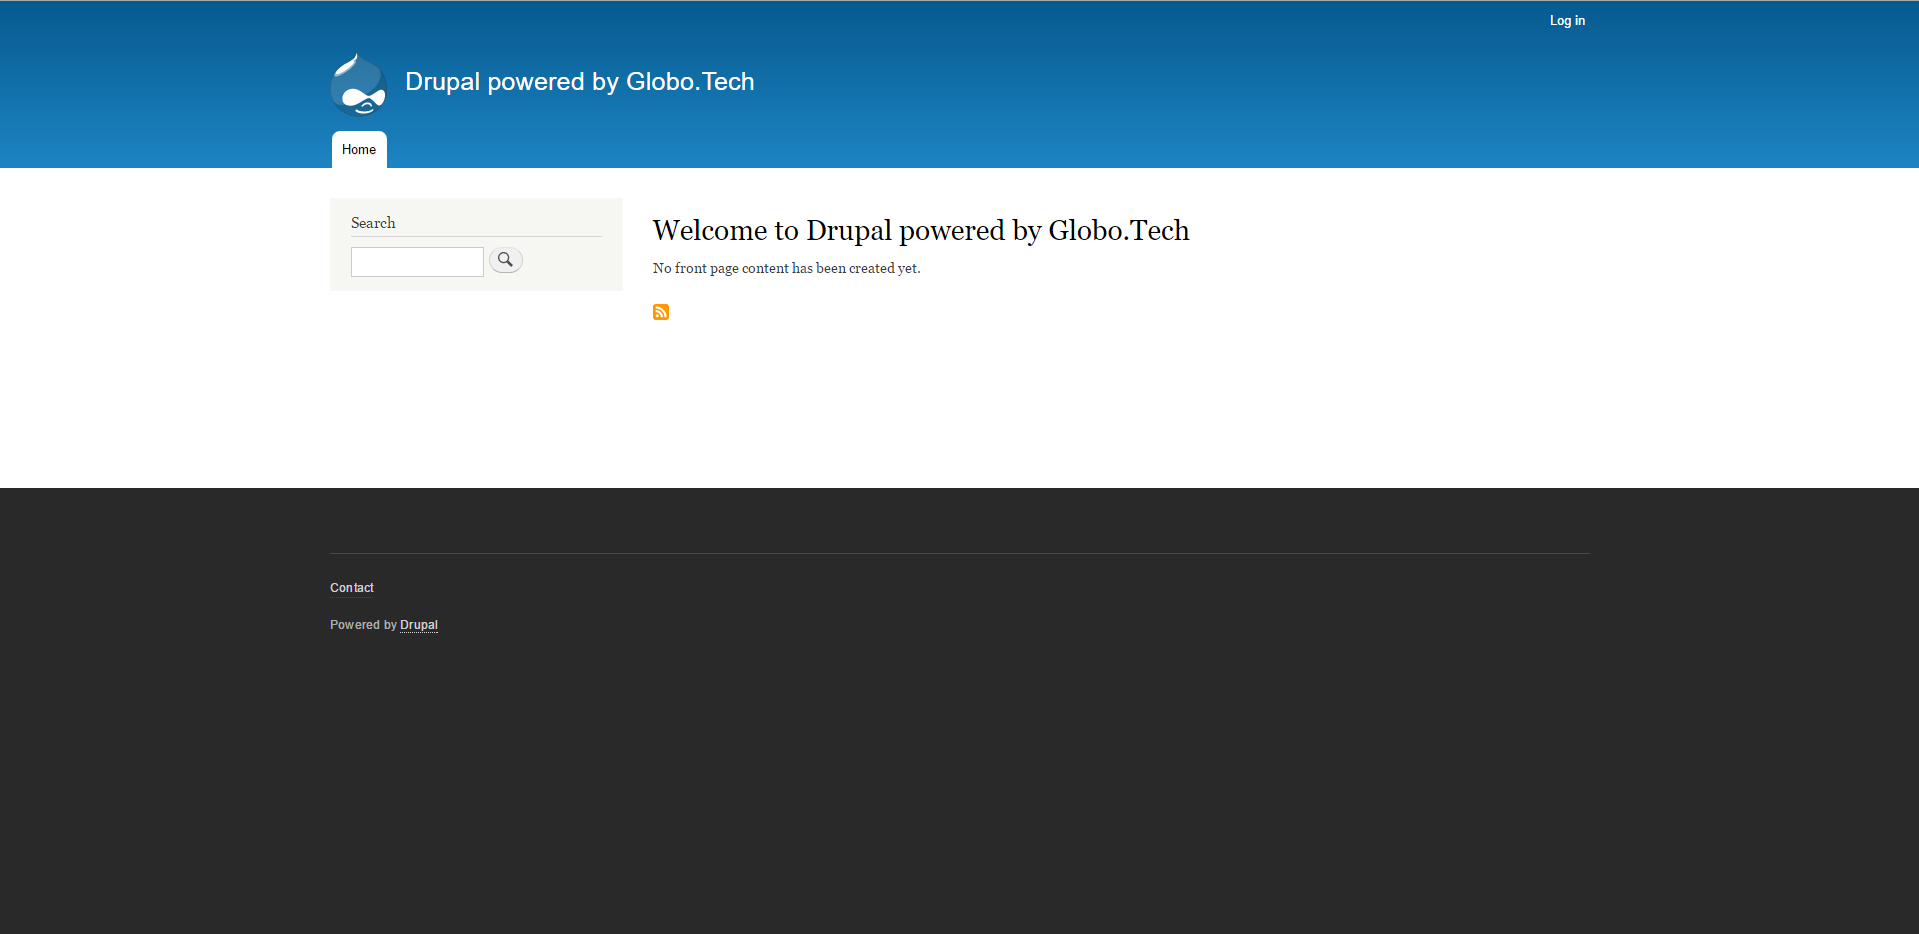
Start by visiting the site directly. In this example, our site’s IP address is http://173.209.44.55. Yours will be different, and should have been included in the email we sent.
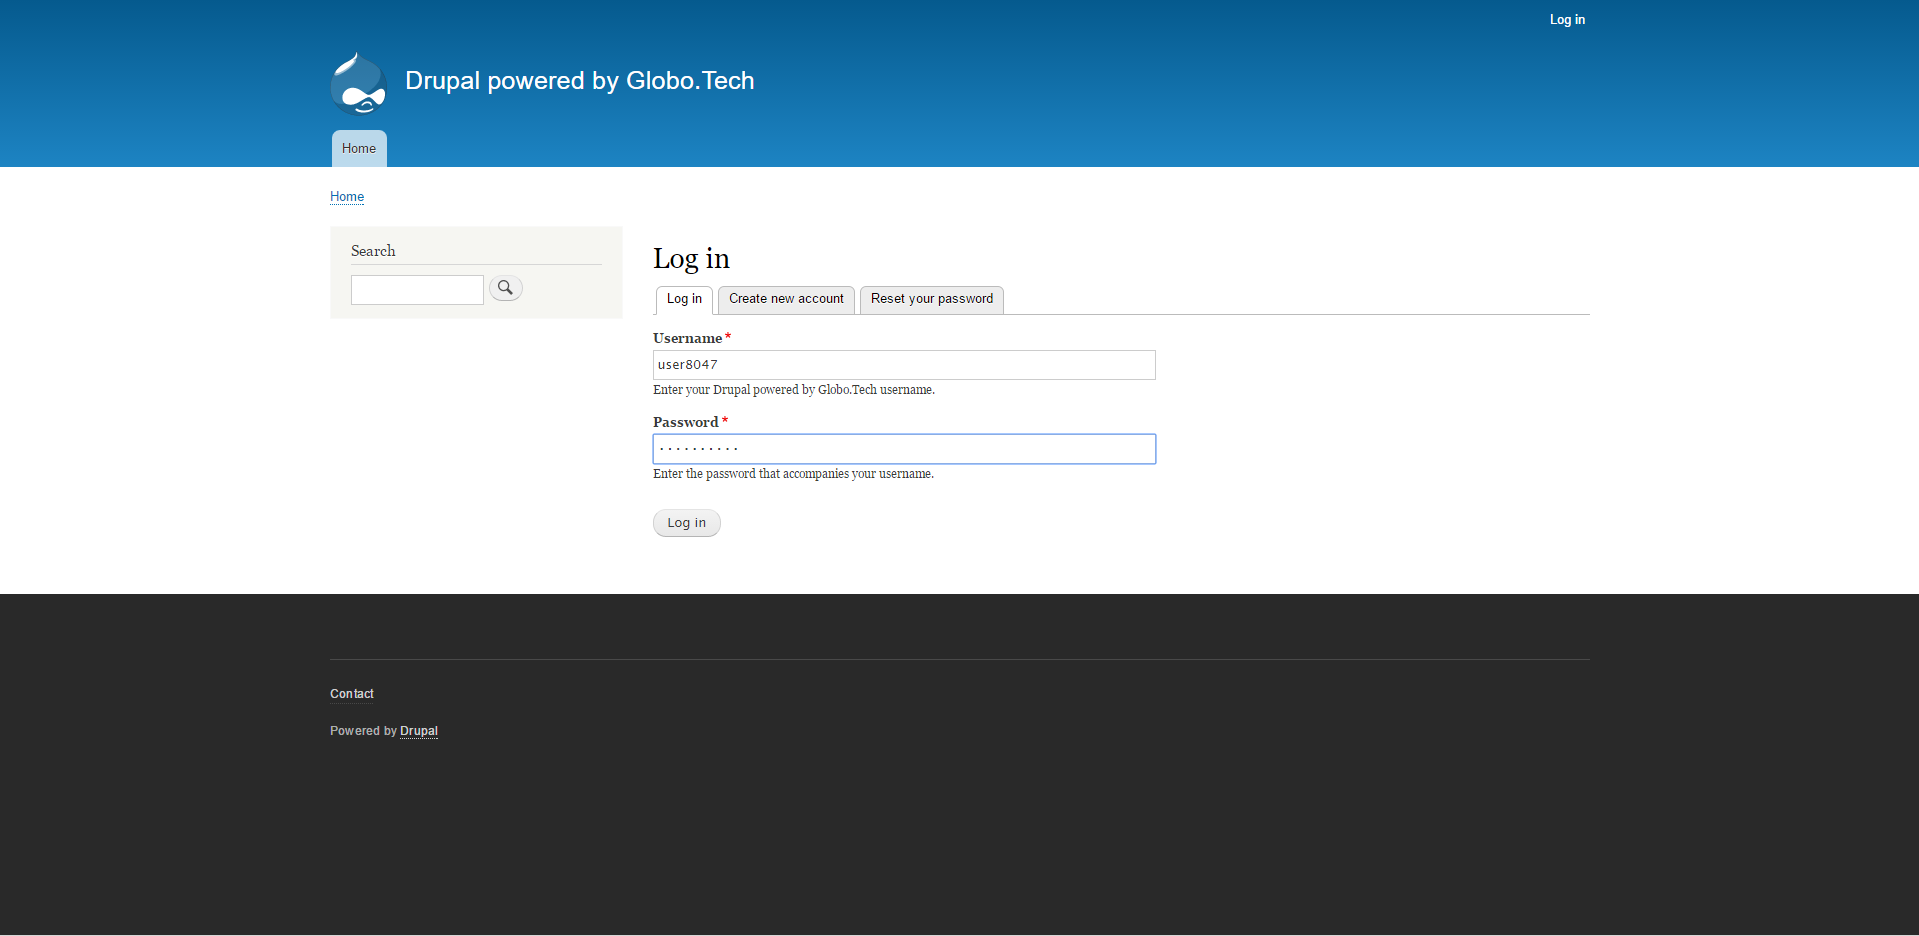
Let’s test the administrative interface. Click the “Log in” link at the top right. Use the credentials included in the email to access your administrative area.
If all goes well, you’ll be logged into your Drupal site’s administrative interface. Here you’ll find links to publish content and configure your new site.
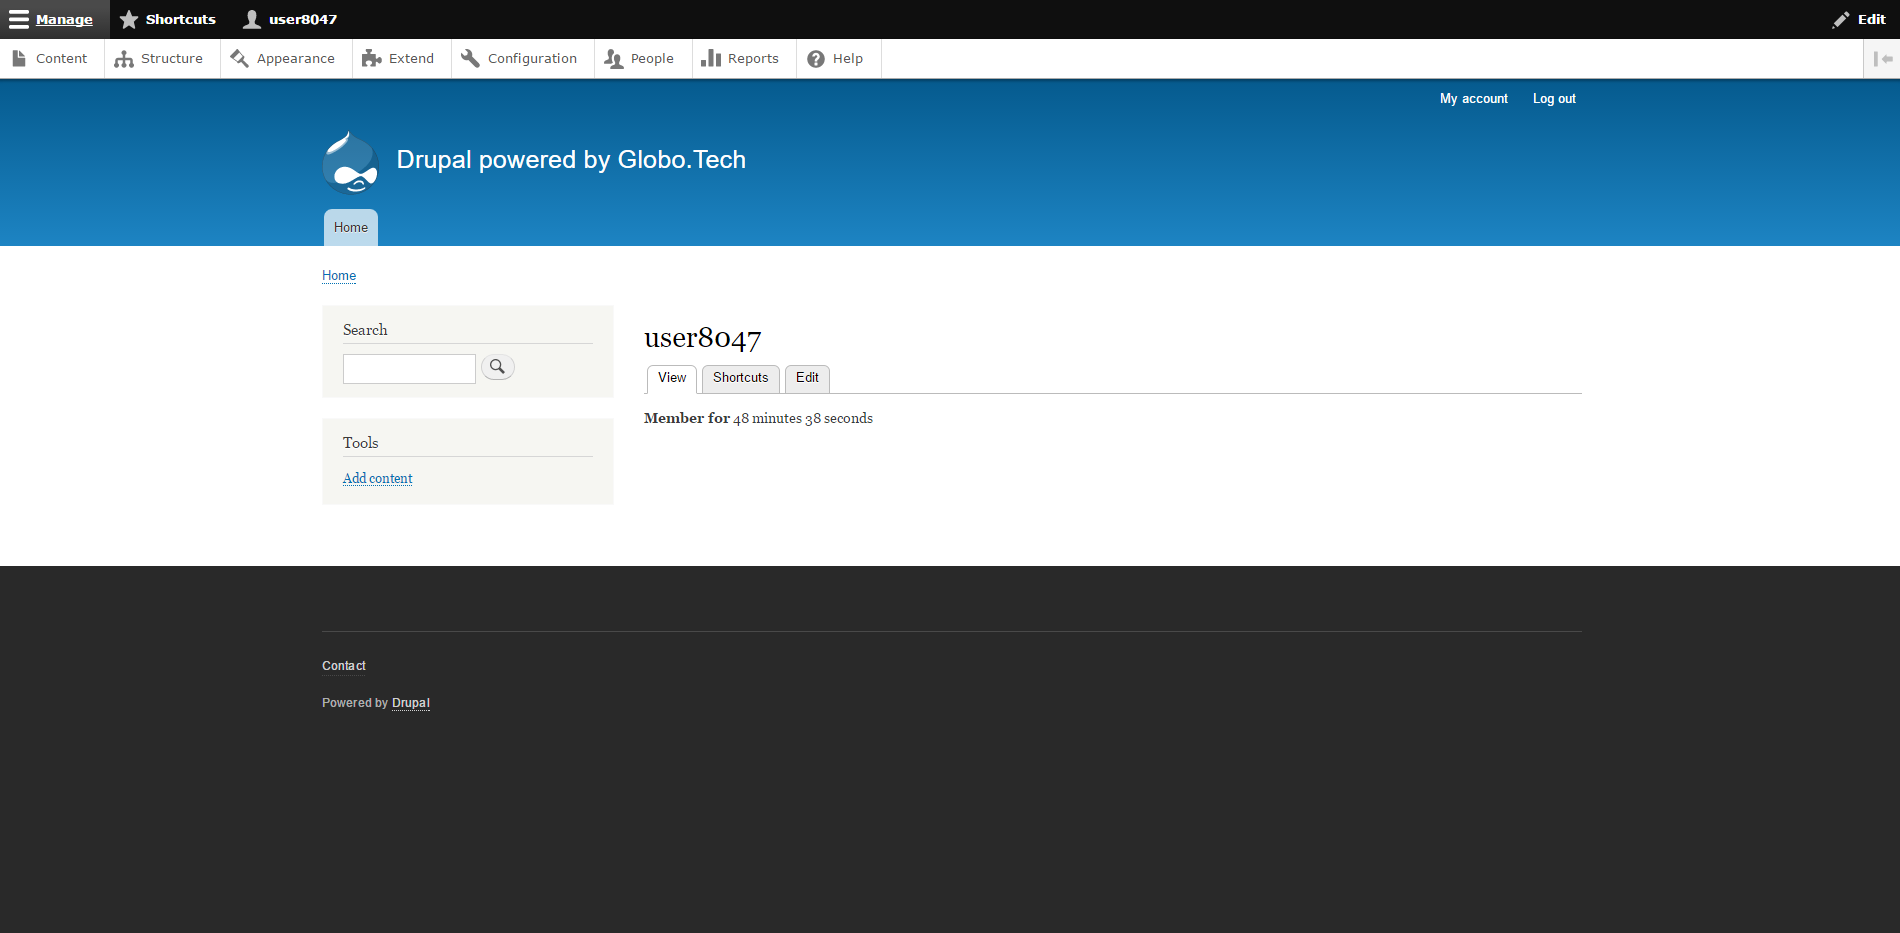
Drupal is now running successfully. It is now ready to be configured, and you can begin adding content and changing the site’s theme.
Ideally, you’d like your Drupal site to run at a specific domain rather than an IP address. For this step, you’ll need to have purchased a domain name. If you’re unfamiliar with this process, contact us directly and we’ll sell you a domain and help set it up.
In this guide, we’ll use the domain name MyDrupalSite.com and the IP address 173.209.44.55. You will, of course, substitute your own domain name and IP for these examples. Domain registrars differ in how records are configured, so we can’t show screenshots of how to complete this process, but you’ll need to add two A records pointing at your IP:
mydrupalsite.com to point towards 173.209.44.55
www.mydrupalsite.com to point towards 173.209.44.55
Unfortunately, DNS changes don’t happen immediately. In general, they require several hours to propagate across the entire internet, though in some rare cases they may take up to 48 hours to go live. If you cannot access your site yet, be patient and give it time.
You can now configure Drupal however you like, but doing so is outside the scope of this tutorial. Drupal’s official documentation is quite good, and can help you with any tasks you wish to perform on your new Drupal site. Find it here.
Whether you’re launching a personal blog or setting up a company website, we hope you’ve found our Drupal One Click App useful. By making it easy to spin up a Drupal site, we’ve freed you from the tedium of managing your web server so you can focus on what you do best, building awesome websites and making great things.
As a small business, your biggest obstacle on the road to success is getting your product or service out there. You could have the next big thing on your hands, but if you have no way of effectively advertising what you’ve got, then you won’t be able to build your business. That’s where we come in. At GloboTech, we specialize in making you look awesome. We keep on top of the latest innovations and leave no stone unturned when it comes to promoting you. In this post, we’re going to look at how you can take advantage of our easy-to-use WordPress One Click App to get you that much closer to making your first million and giving a super inspiring TED talk. Let’s get started with how to login.
This one’s pretty simple. Just login with your username and password over at https://portal.globo.tech
What is an OCA?
In simple terms, an OCA consists of a regular system image the same as if you were going to provision an Ubuntu server. The cool thing here is that we’ve set up special images that have your favorite applications pre-loaded into them.
The reason why you’re doing this is that it’ll speed up your setup time and make sure that the system has the right dependencies to accomodate the app.
You’re definitely going to want a nifty WordPress image if you want to promote yourself. The way you’ll get this is to click on the “Cloud Hosting” link on the left navigation menu that’s on our portal. After that, you’ll click on “Instances.”
If you’ve already got active instances, they’ll show up here. Self-explanatory, but you’ll then want to click on “Create Instance.”
At this point, you’re on the instance creation page. We’ll explain the various fields below.
Start by setting an instance name.

While we wish instances were ice cream, flavor means something different here. Flavors are performance packages associated with cloud servers that limit their amount of CPU, RAM and DISK usage. If you’ve got a cozy little blog, you should go with a Popular 2. If you’ve got a bigger operation going, though, you’d be better off with a Popular 3.
If you’re not sure what to go with, it’s best to start small. You can always upgrade later on. Once you’ve picked your flavor, go ahead and click the giant “GET IT” button on the right.
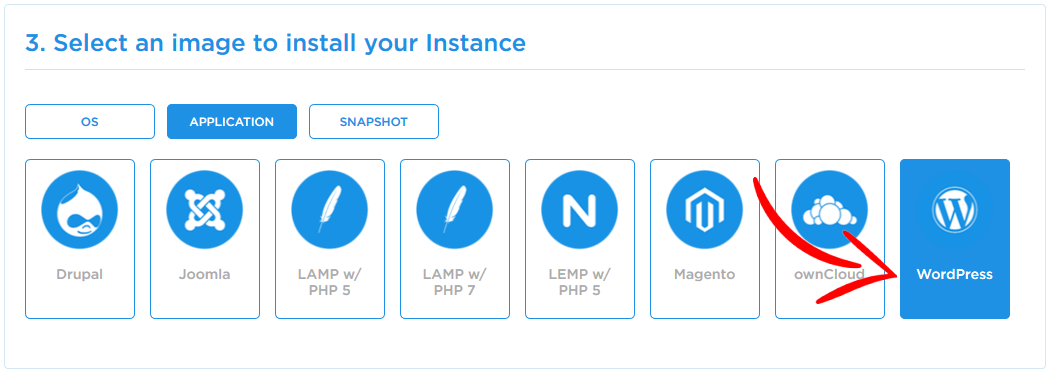
You’ve got to have an image on your cloud server, and this is how you’ll get it. We’re going with a WordPress One Click App here, so you’re going to click on the Application tab. You’ll have a huge list of applications to choose from, but you’ll go with “WordPress.”
Security is crucial, so here you can either create your instance with a password or an SSH key. Using a password is your best bet.
Another of the many things you’ll have to decide on is if you want to use Security Groups. We’ll just leave them disabled now, and you can decide later. After this, just click on “Create your instance” to finish your quest.
After you’ve completed all of those steps, you’ll get an email with all the info you need to deploy your app on WordPress.
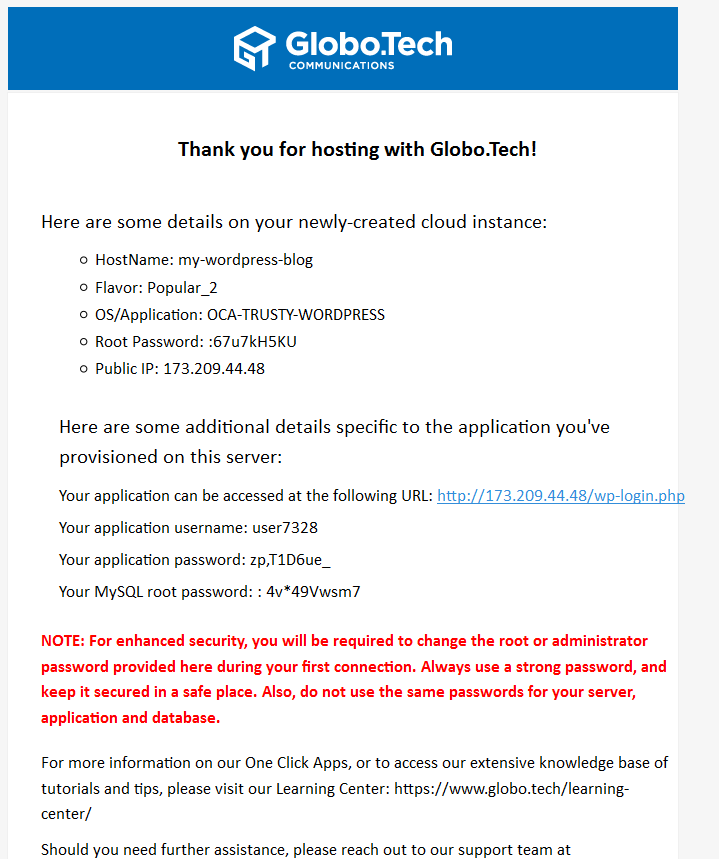
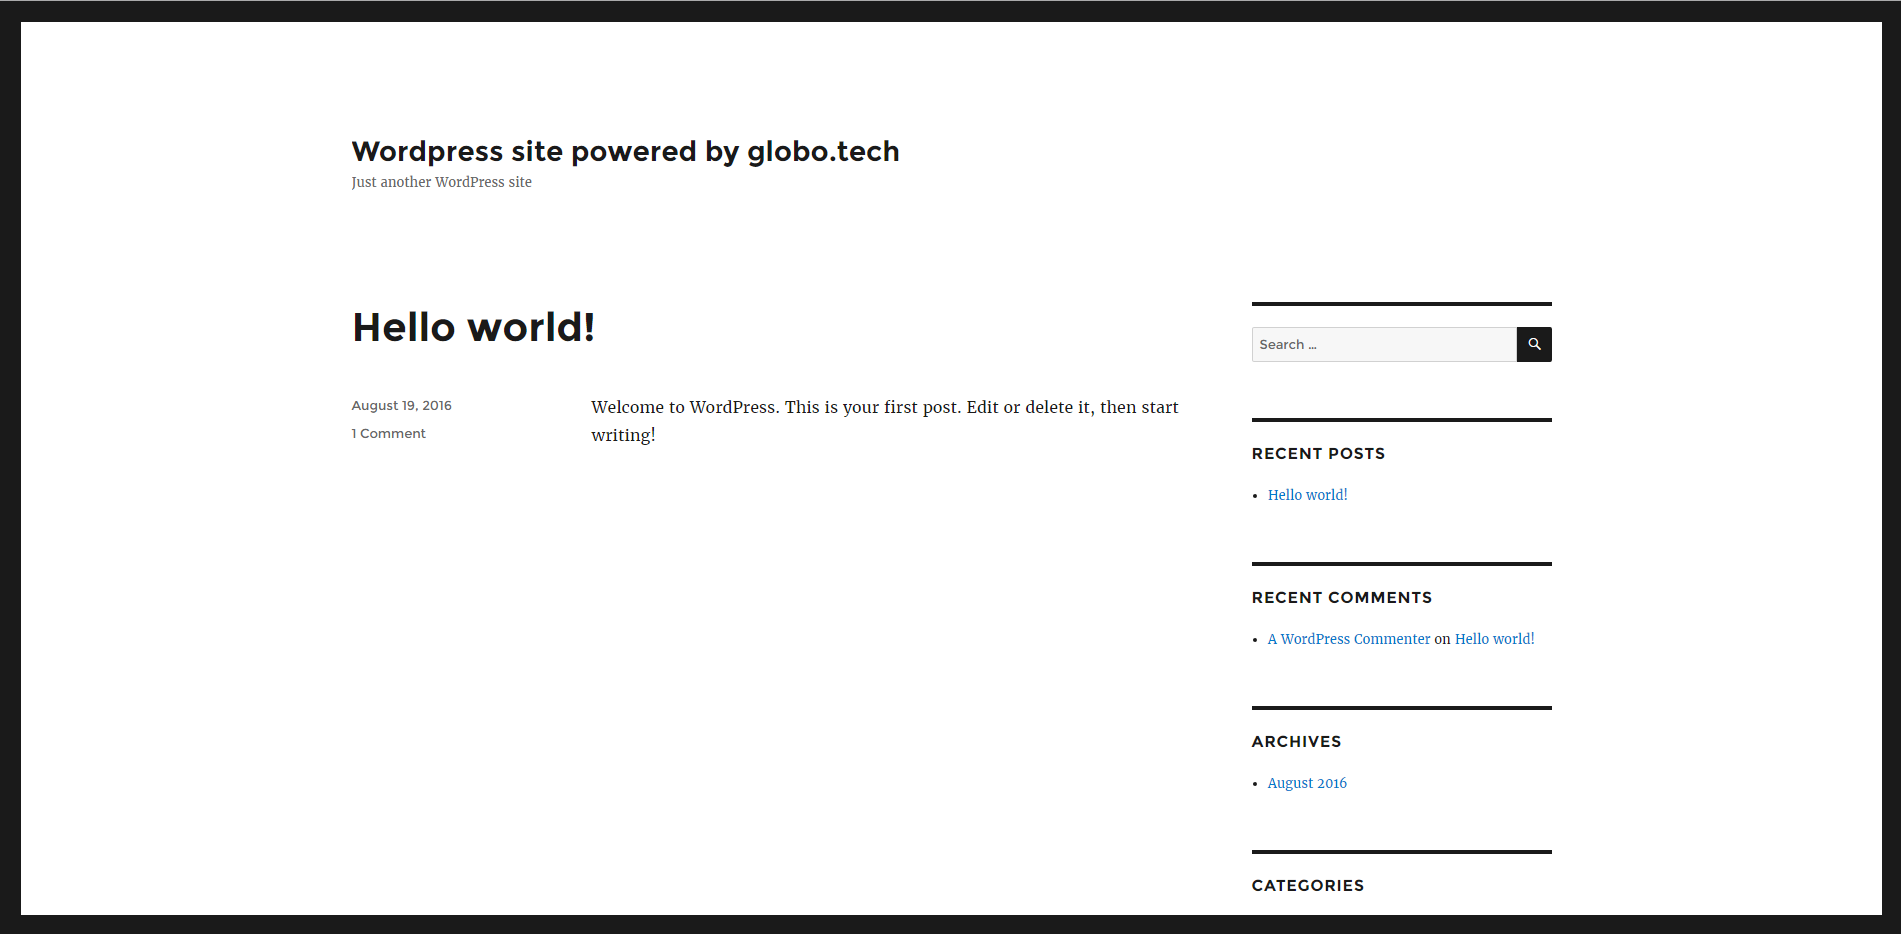
Now comes the super exciting part where you test out the instance you’ve made. The simplest way to get there is to visit http://173.209.44.48
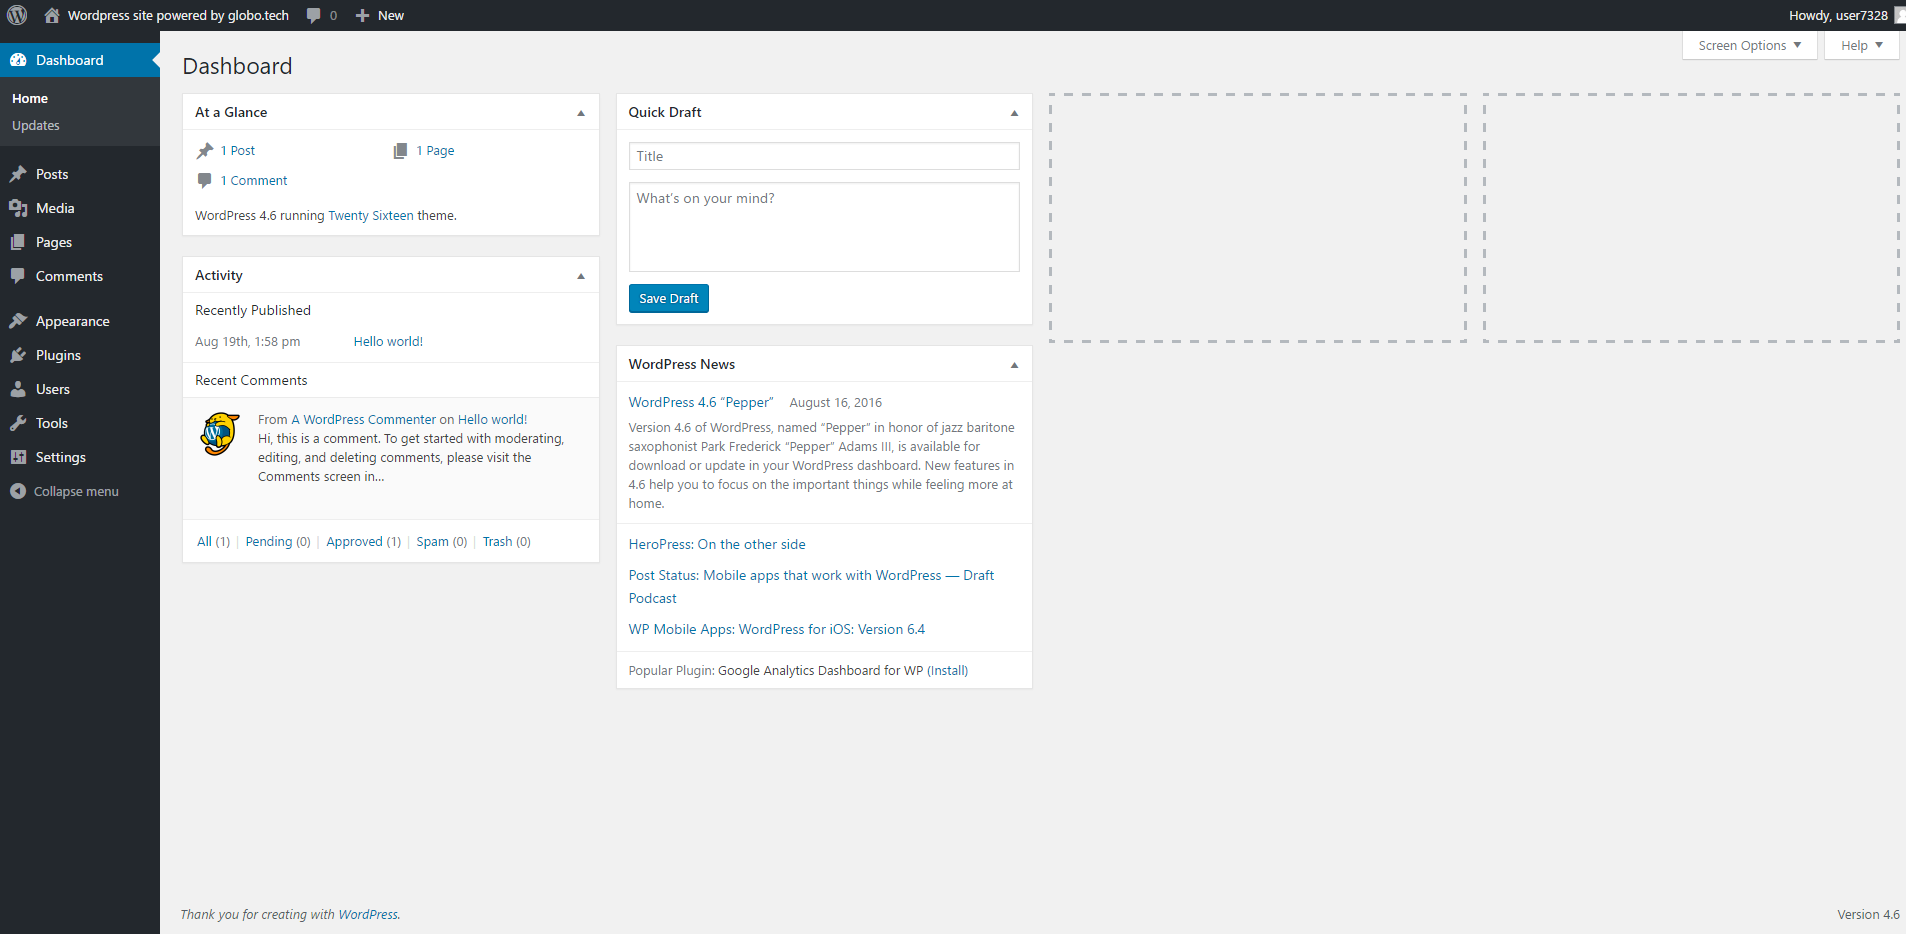
Once you’ve found the inevitable mistakes in your first draft of the site, you’ll want to access the admin section to tidy up a bit. First, visit http://173.209.44.48/wp-login.php and then use your handy-dandy credentials to get in. Once you’ve done this, you can confirm that your instance is looking good. If it works for you, let’s get some content in there.
Your site’s going to need a domain and DNS records, because a domain name is a heck of a lot more appealing than the string of numbers of an IP address. For instance, let’s use “CatsAndDogsBlog.com.”
You’re going to need two “A” records that’ll sync up your domain with the IP. Without all the techy jargon, you’ll need to make sure that catsanddogsblog.com points towards 173.209.44.48 and that www.catsanddogsblog.com points towards 173.209.44.48.
We know you’re going to be antsy to see if everything’s up and running, but it could take some time for everything to show up on the interwebs. Patience is a virtue, after all.
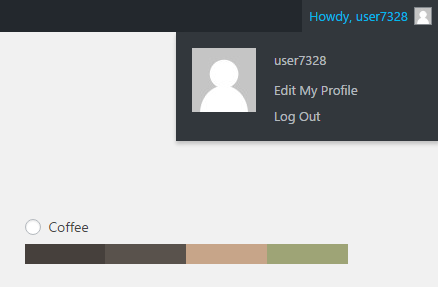
Creating a One Click App gives you a random username with no profile. Start off by clicking on “Howdy user7238” and then “Edit My Profile.”
This is where you can setup your super cool profile. You can change your password, nickname, and even your email address.
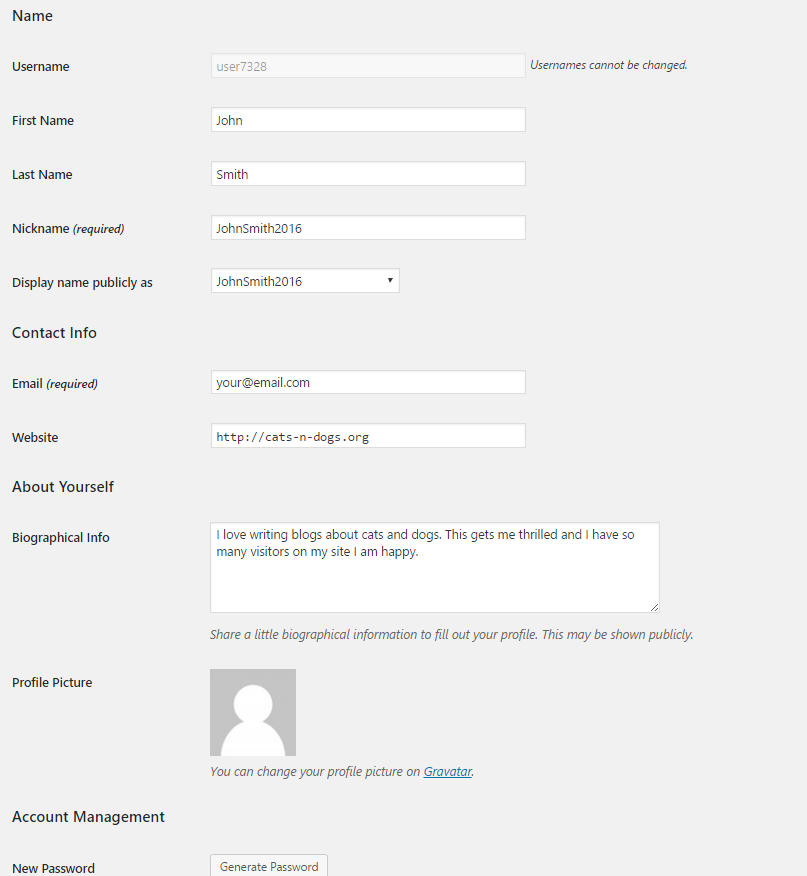
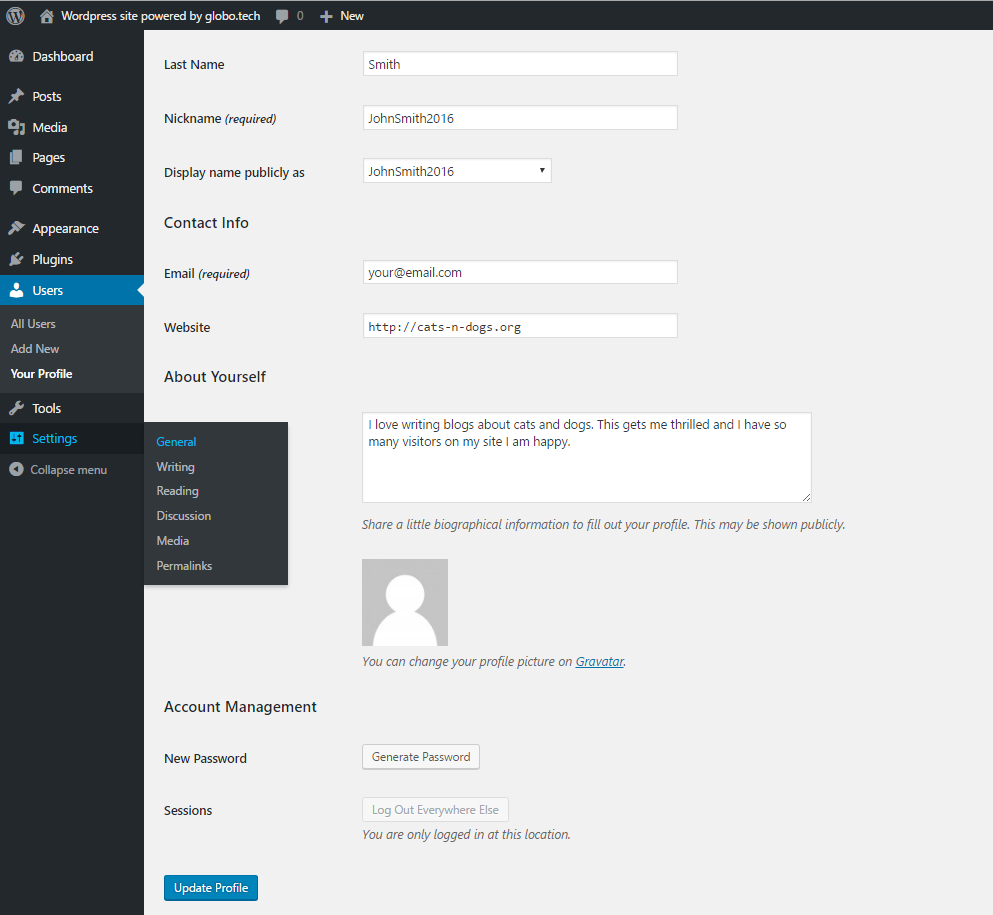
You will land on the profile editing page where you can enter your informations. Once you’re done, click on the “Update Profile” button.
Here’s where you make your site pop with descriptions and domains. Hover your mouse over the “Settings” link on the left navigation bar and select “General.”
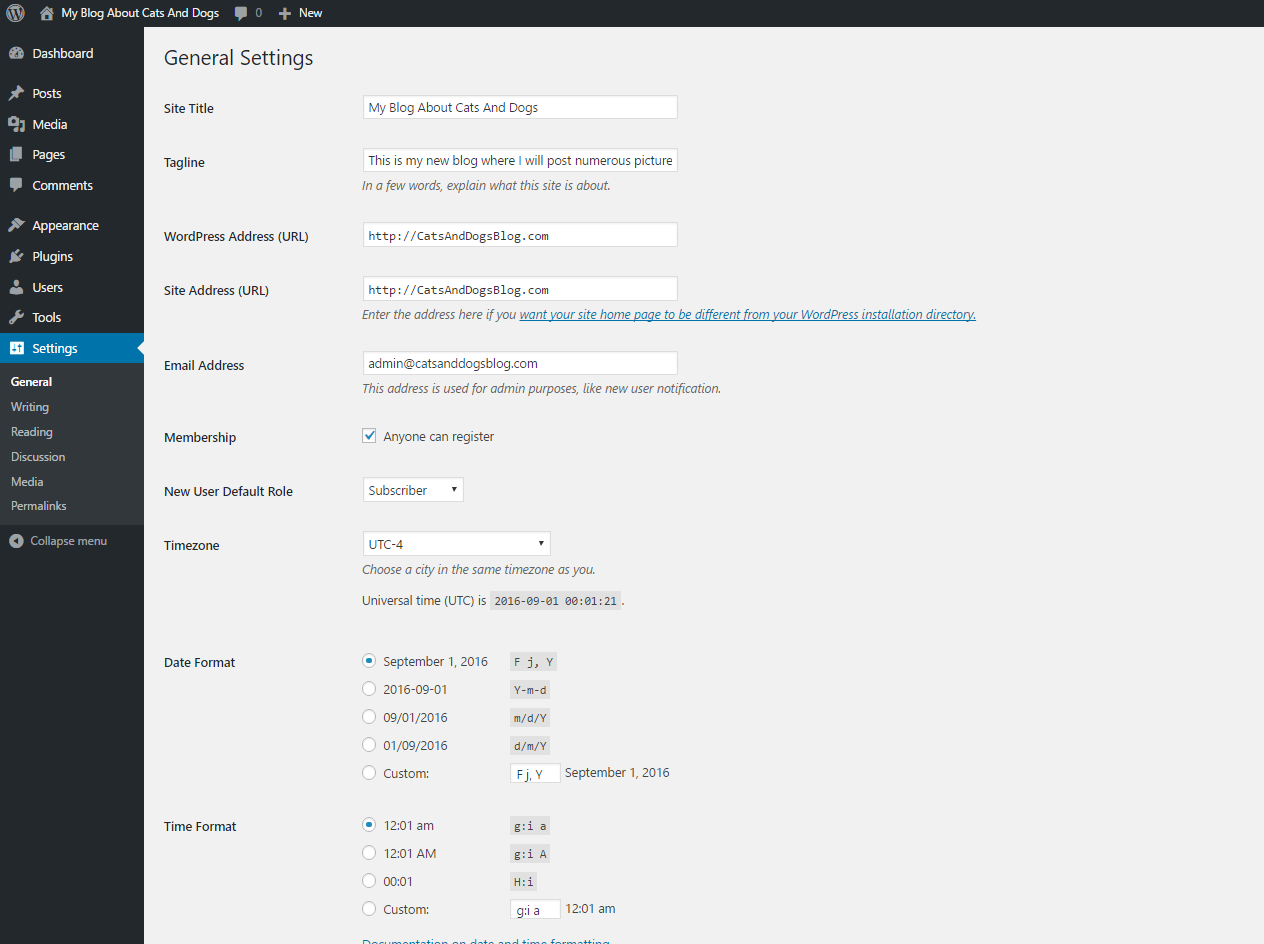
This will lead you to a page where you can set the blog title, tagline, and domain. Make sure that the wordPress address and site address match the domain name you’ve chosen, or you will not be a happy camper. After that, press “Save Changes.”
It’s time to post your first article! Simply login to the admin section by visiting http://catsanddogsblog.com/wp-admin and then hover your mouse over the +NEW link on top and select “Post.”
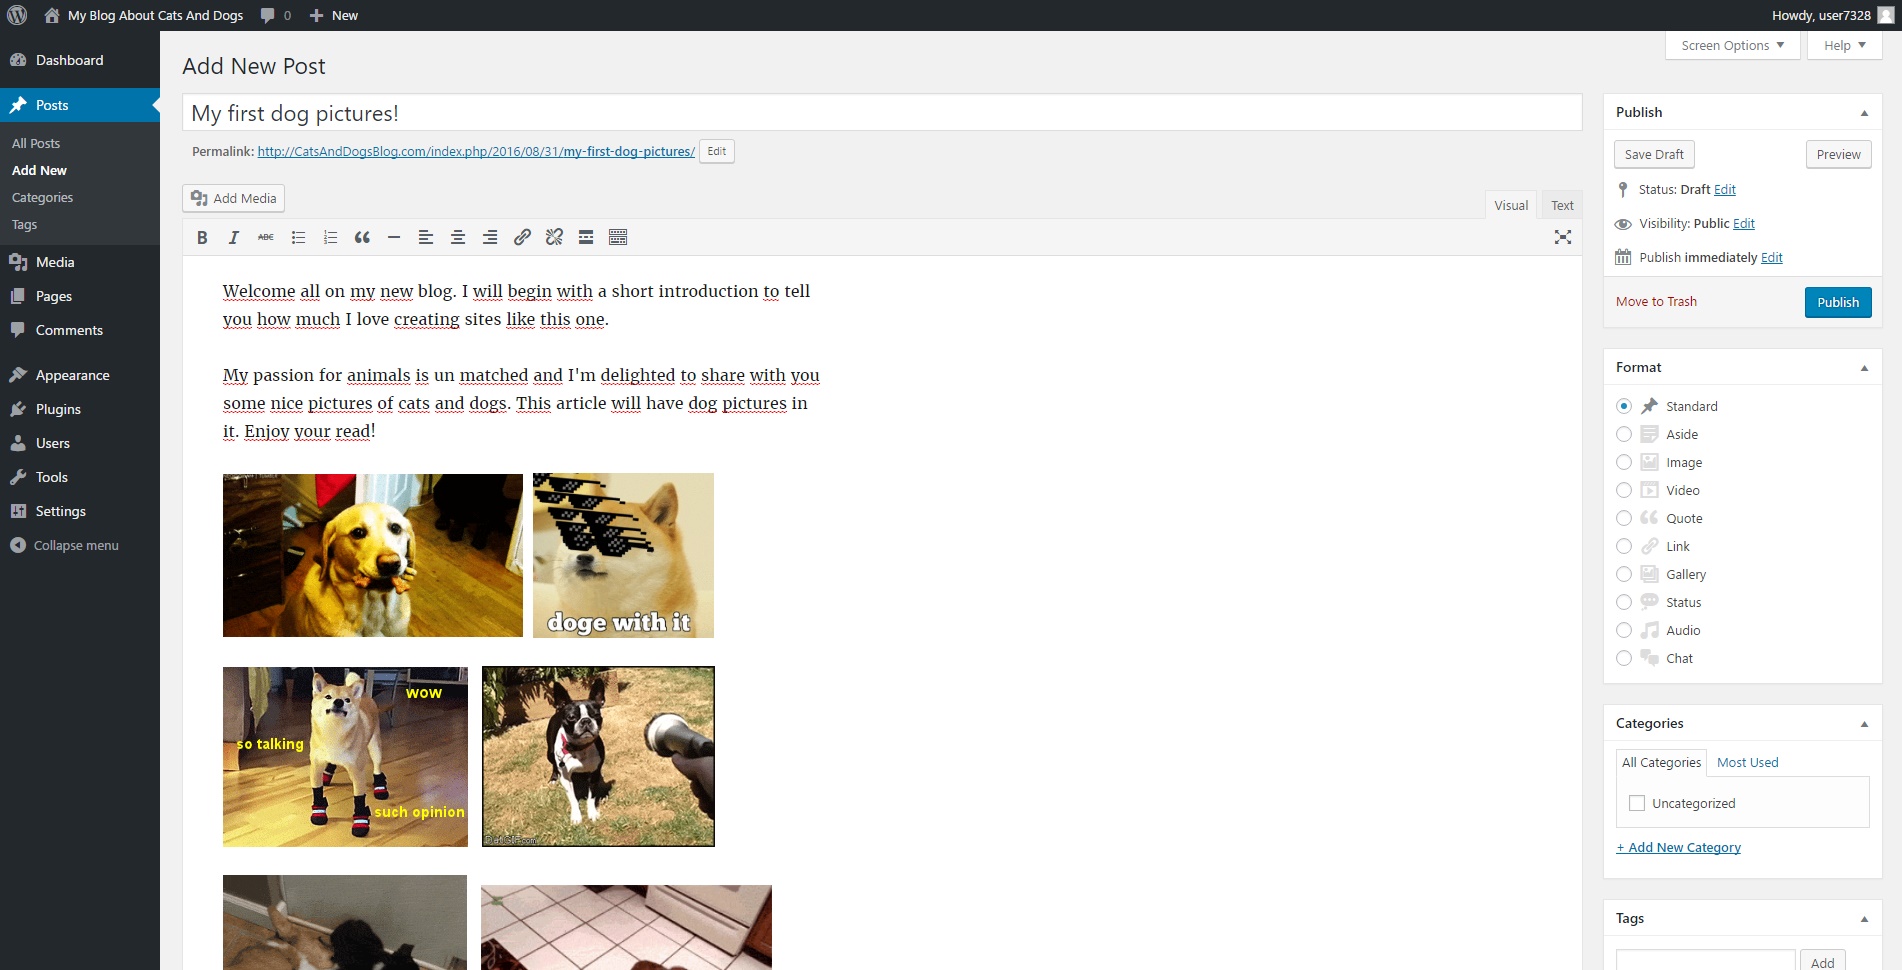
Here’s where you let loose your creative butterfly. You’ve got this. WordPress is pretty cool, as it allows you to add images, links, and other types of content that’ll make you look like the pro you are. Click publish and boom: You’re done.
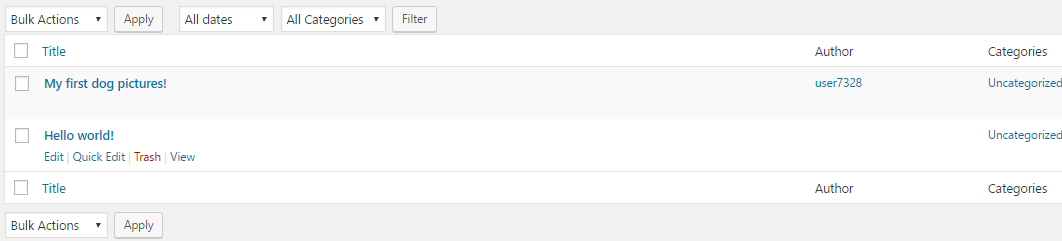
To get rid of WordPress’s default post, go to “Posts” in your admin dashboard.

Delete “Hello world!” and then you’re good to go.
From there, go to http://catsanddogsblog.com and bask in the glory of your new site!

If you follow all the steps we laid out, you’ll be looking like a pro in no time. So get out there and follow your dreams. You’ve got this!
ownCloud offers flexibility and privacy, and a safe haven for calendars, files, contacts, email and more. You’ll be able to access and share on personal devices.
An enticing aspect of ownCloud is the ability to develop your own personal ownCloud server app. Even if you have no background in app development, ownCloud simplifies the process. Fortunately, with our ownCloud One Click App, you can quickly set up your cloud and leave the remaining details to us.
What is an OCA?
In simple terms, an OCA consists of a regular system image the same as if you were going to provision an Ubuntu server. The cool thing here is that we’ve set up special images that have your favorite applications pre-loaded into them.
The reason why you’re doing this is that it’ll speed up your setup time and make sure that the system has the right dependencies to accomodate the app.
Begin by accessing your account. Once you’re logged in, you’ll see our administrative portal.
An OCA quickens setup time. Like with Ubuntu server provisions, the OCA allows initiation of an image system. There is a library of images for use with any favored apps. They can be pre-loaded into apps. The feature helps ensure your system has all its proper dependencies to accommodate the application.
An instance is a concrete occurrence that accomplishes a task during running programs. In the case of an ownCloud image, it’s the process of getting your selected image to show up accordingly.
First, you need to click on “Cloud Hosting” located in the navigation menu on the left side of the portal. You will open a window for active instances. Click on “Create Instance.”
This action will take you to Instance Creation.
Use the dialogue box to give your new Instance a name.

Flavors are performance packages. They are attributed to cloud orders to limit RAM, CPU and DISK usage. You have two options here: (i) Popular 2 for a small blog or (ii) Popular 3, for active user bases with an accumulation of visitors.
If you’re unsure about which is best, it’s not a problem. You always have the opportunity to upgrade the cloud server’s performance.
Once you have made a choice, select the GET IT button.
You have the option of selecting an image to apply to your cloud server. Click on the Application tab. Find and select ownCloud from the choices.
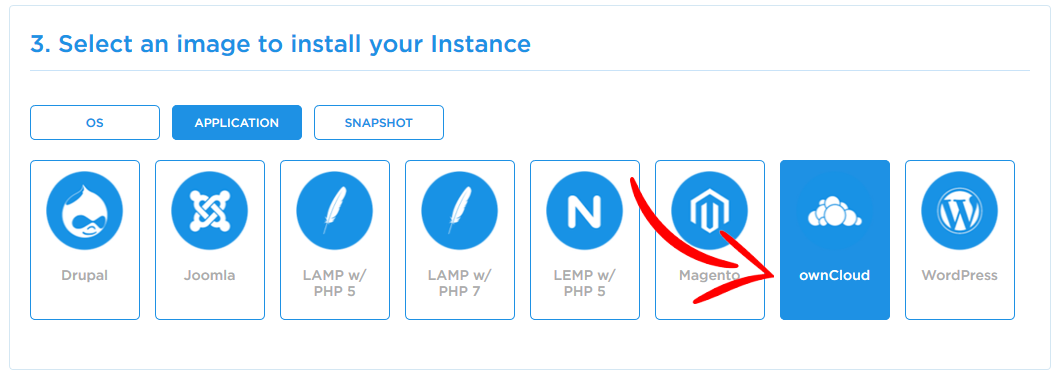
Choose to create your Instance with password security or SSH key. For the purposes of this exercise, we will use “Create Instance with a password.”
We must now choose whether to use Security Groups. In another article, we describe how to accurately generate and use these actions. For this exercise, we will disable the feature. Now click to create an Instance to complete the task.
Your Instance has been created. Check the appropriate email address for server information. This will contain everything you need for your ownCloud deployment and Instance.
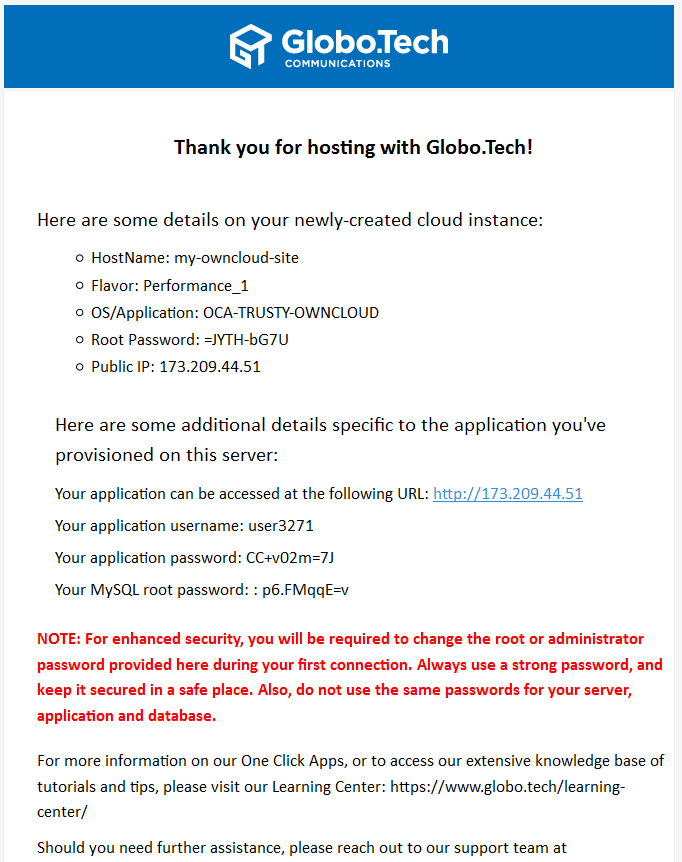
With information in hand, let’s test the ownCloud Instance.
a. Visit your site.
b. Visit provided URL: http://173.209.44.51
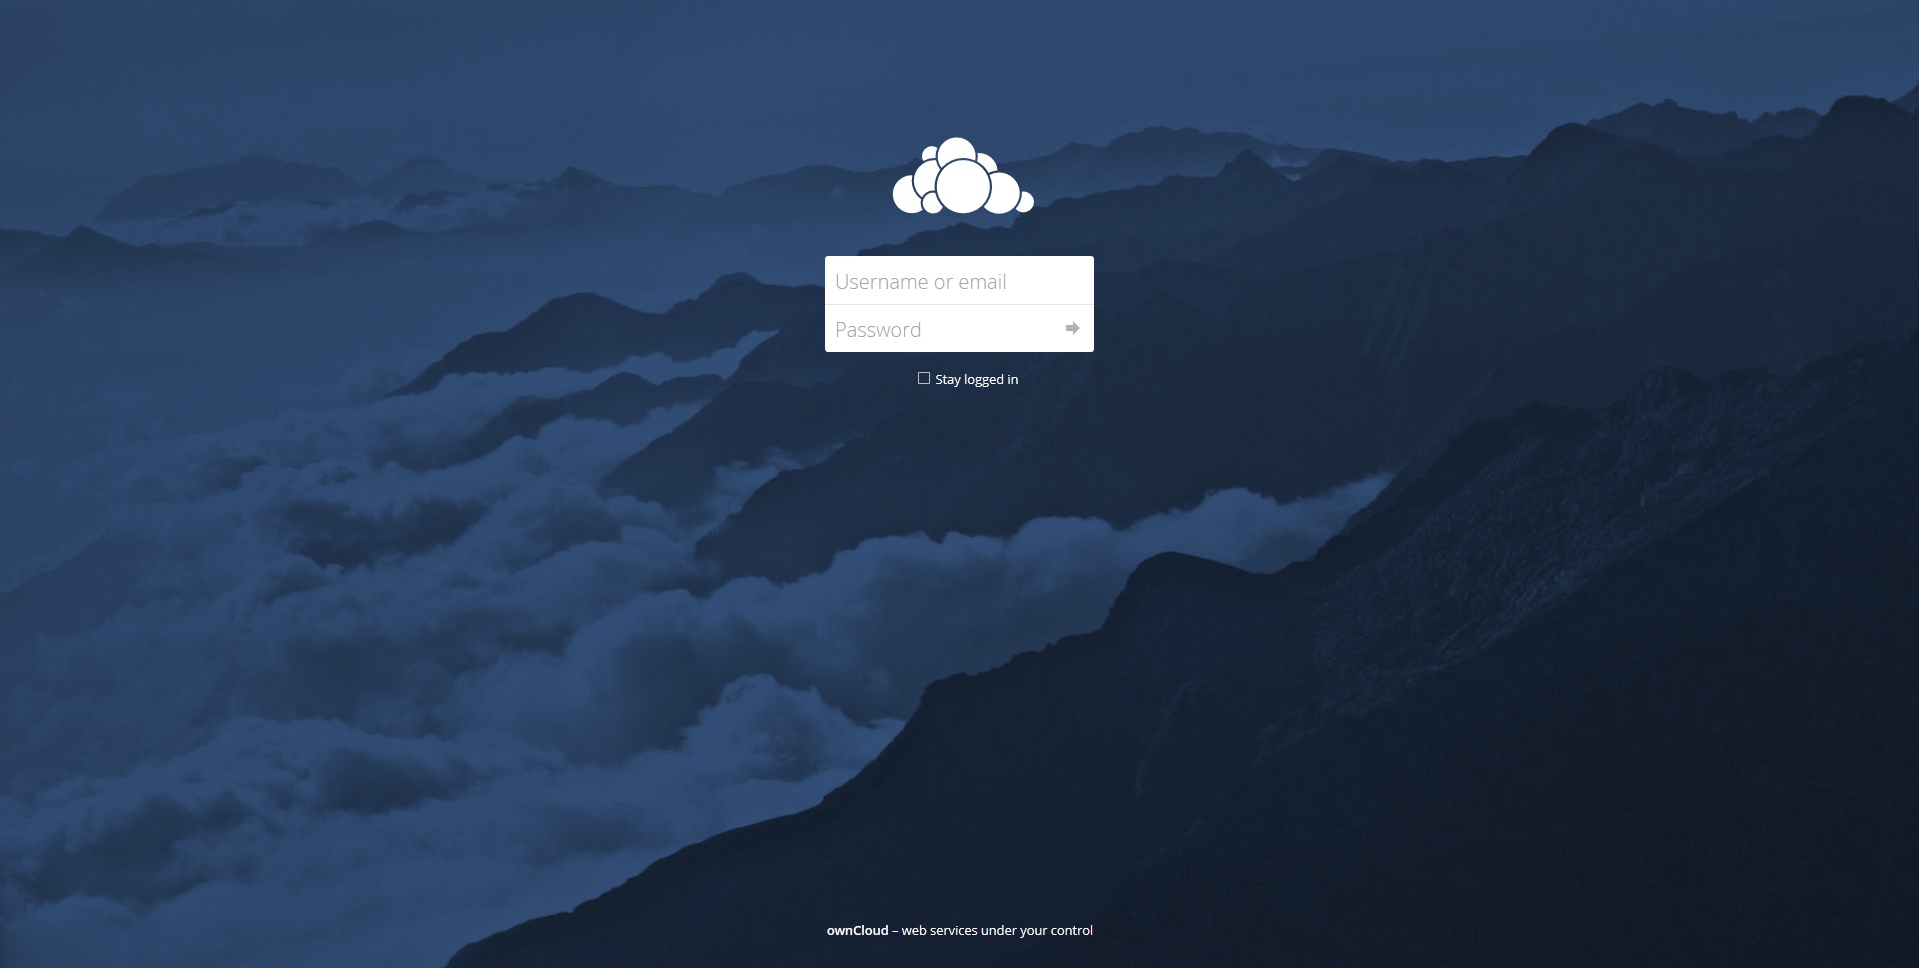
Access the Administrator Account. Do this utilizing the credentials received via the authorization email. You should land on the dashboard.
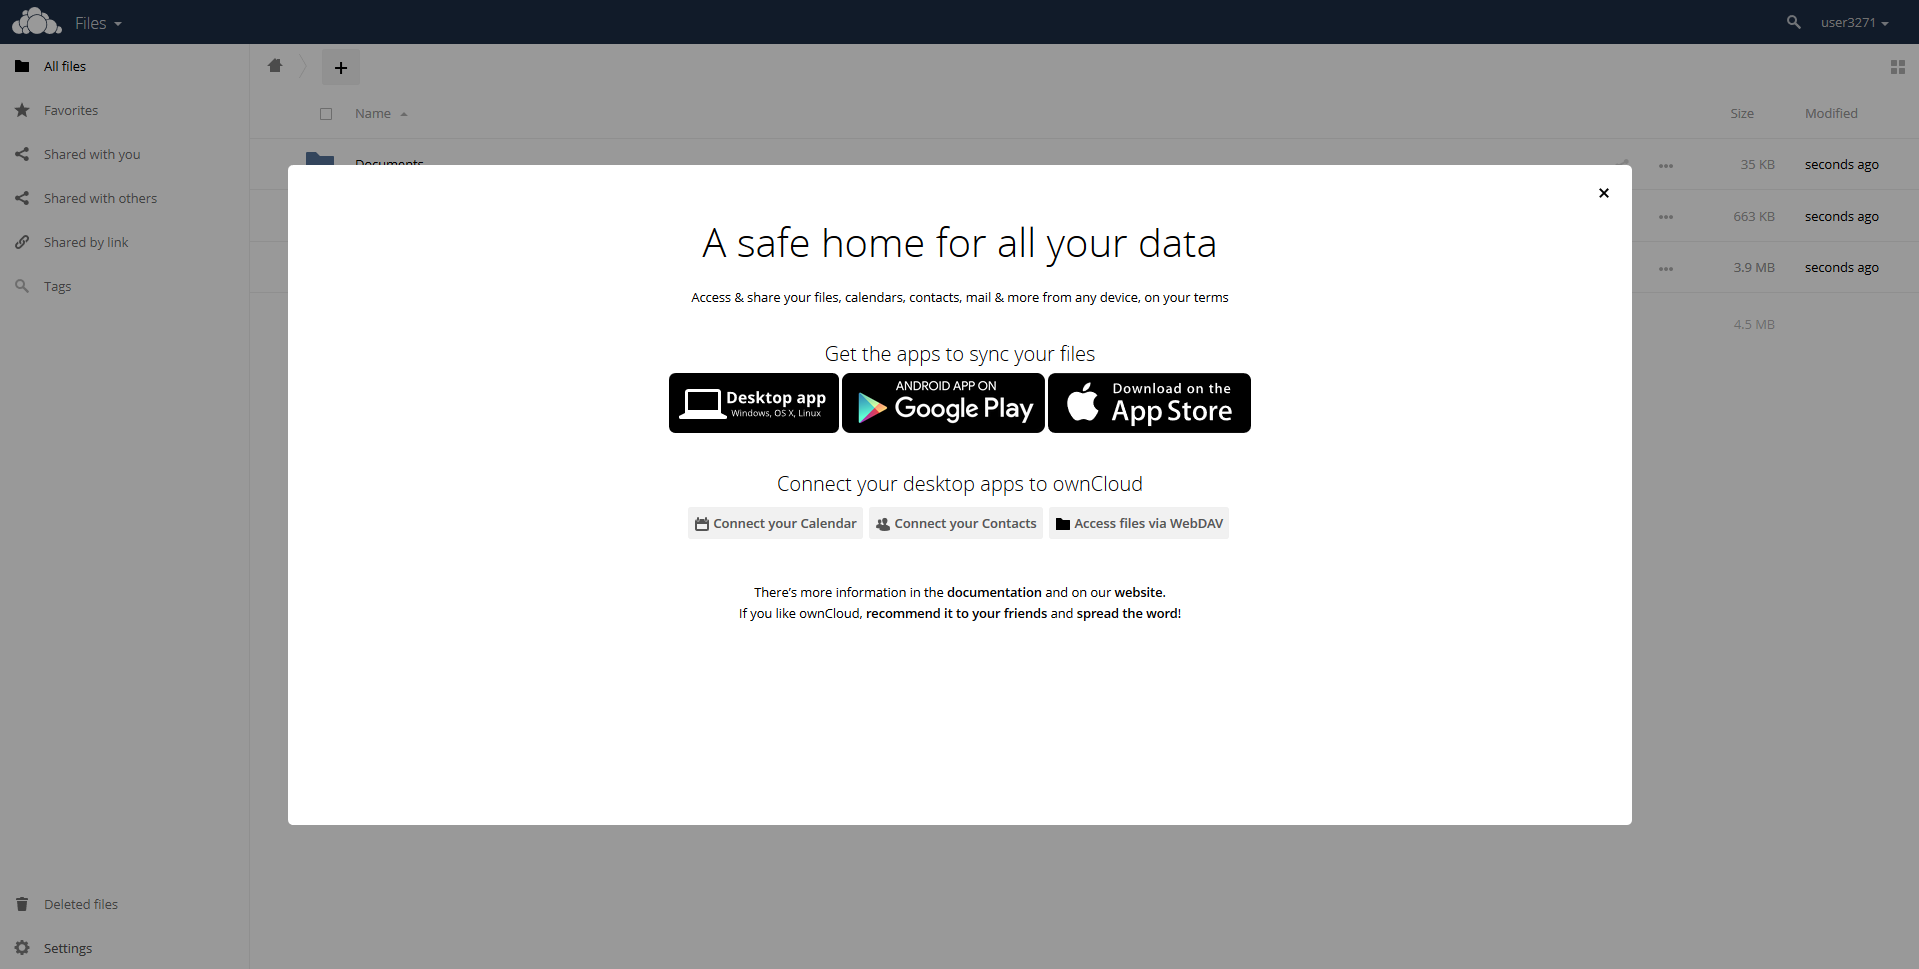
We will now confirm if your ownCloud Instance operates properly.
Let’s configure the Instance, adding content.
Your ownCloud Instance is going to need a domain and DNS records. This allows users to visit the site with the domain name as opposed to needing an IP address. If you have yet to do so, purchase a domain for the site. Ask the GloboTech team whose many services include the selling of domain names.
For now, use the domain “MySuperCloud.com.”
We’re going to create two “A” records. Both will point towards your website’s IP.
As providers can use varying interfaces, your domain may be hosted on separate DNS servers. If this is the case, skip this step. Just make sure both of the following records are available:
o mysupercloud.com to point towards 173.209.44.51
o www.mysupercloud.com to point towards 173.209.44.51
Give these records time to propagate to the Internet. Though many records only take a few hours, it should take no longer than 48.
While there is documentation on ways to do this, we’ll stick to the initial steps.
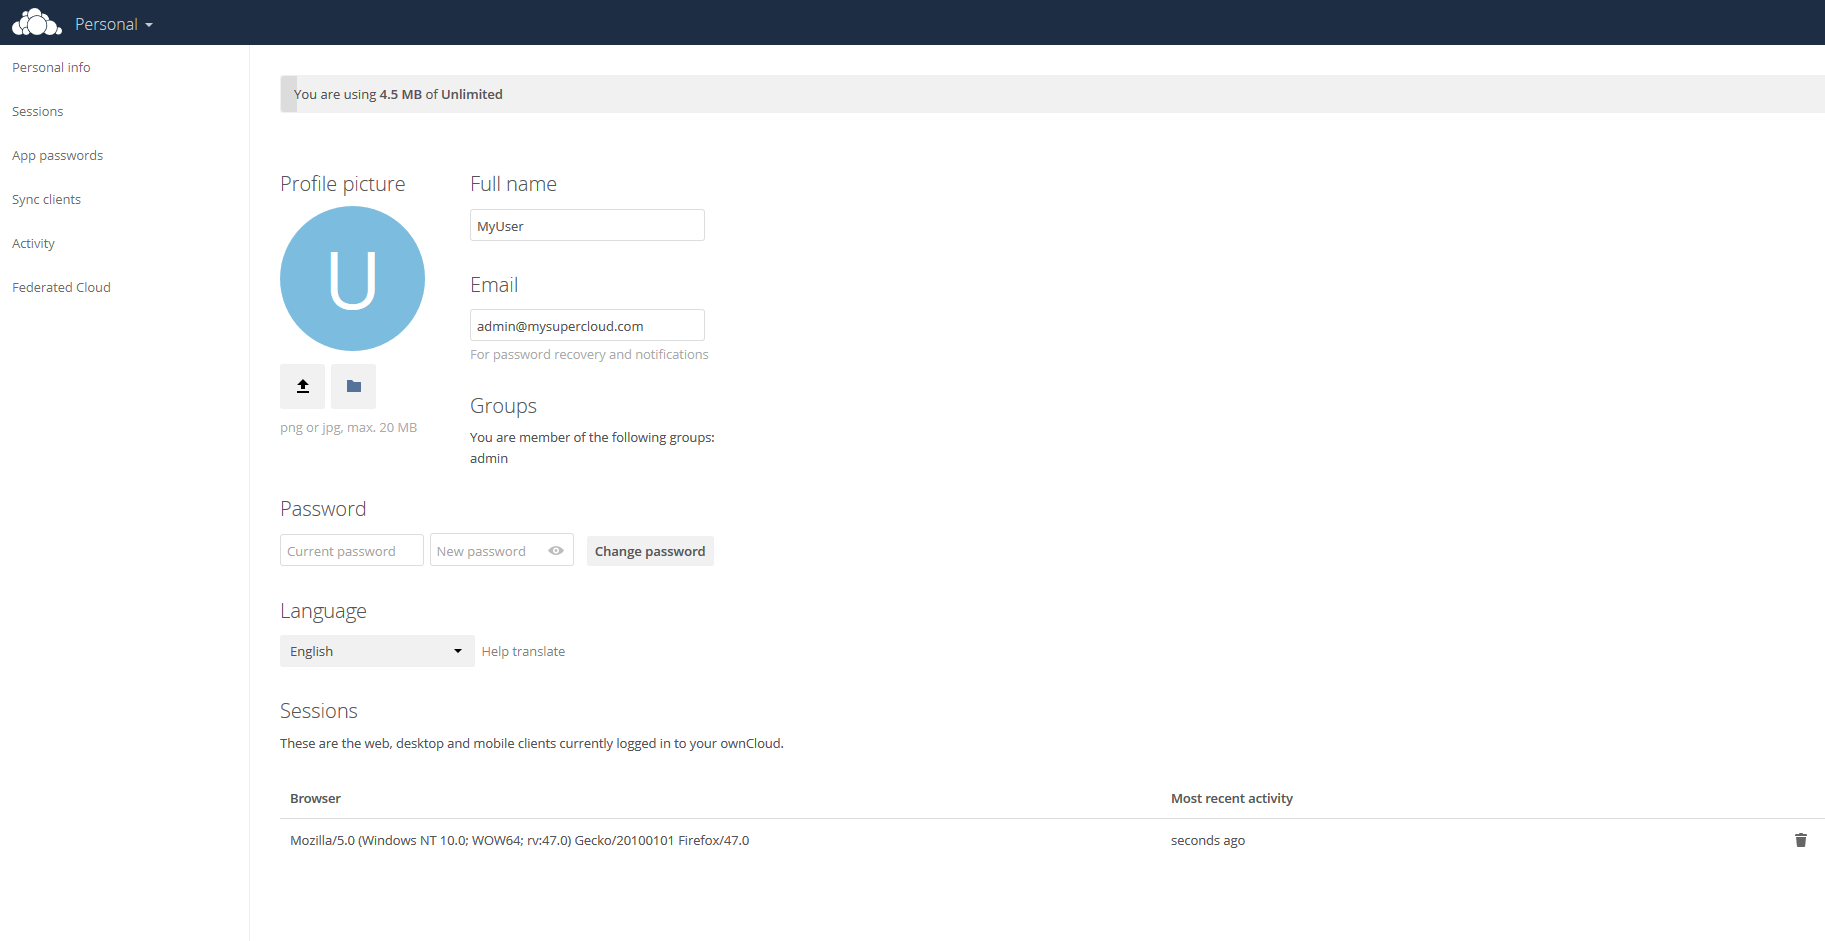
When generating an ownCloud One Click application, create an empty profile. Modify the profile by placing your mouse over the link “user3271” and click on Personal.
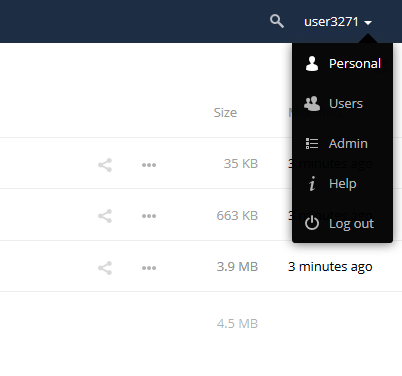
On this landing page, enter names, passwords, email addys, as well as notification settings.
You will now review the Admin page for the entire ownCloud Instance.
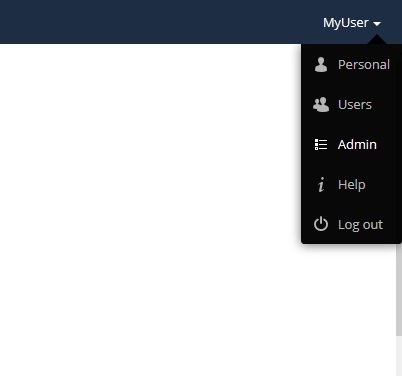
Go to the MyUser link at the top right. (It’s now MyUser as we changed the name in the last step.) Select Admin.
You are now at Main Admin. Here you have the option to establish numerous settings.
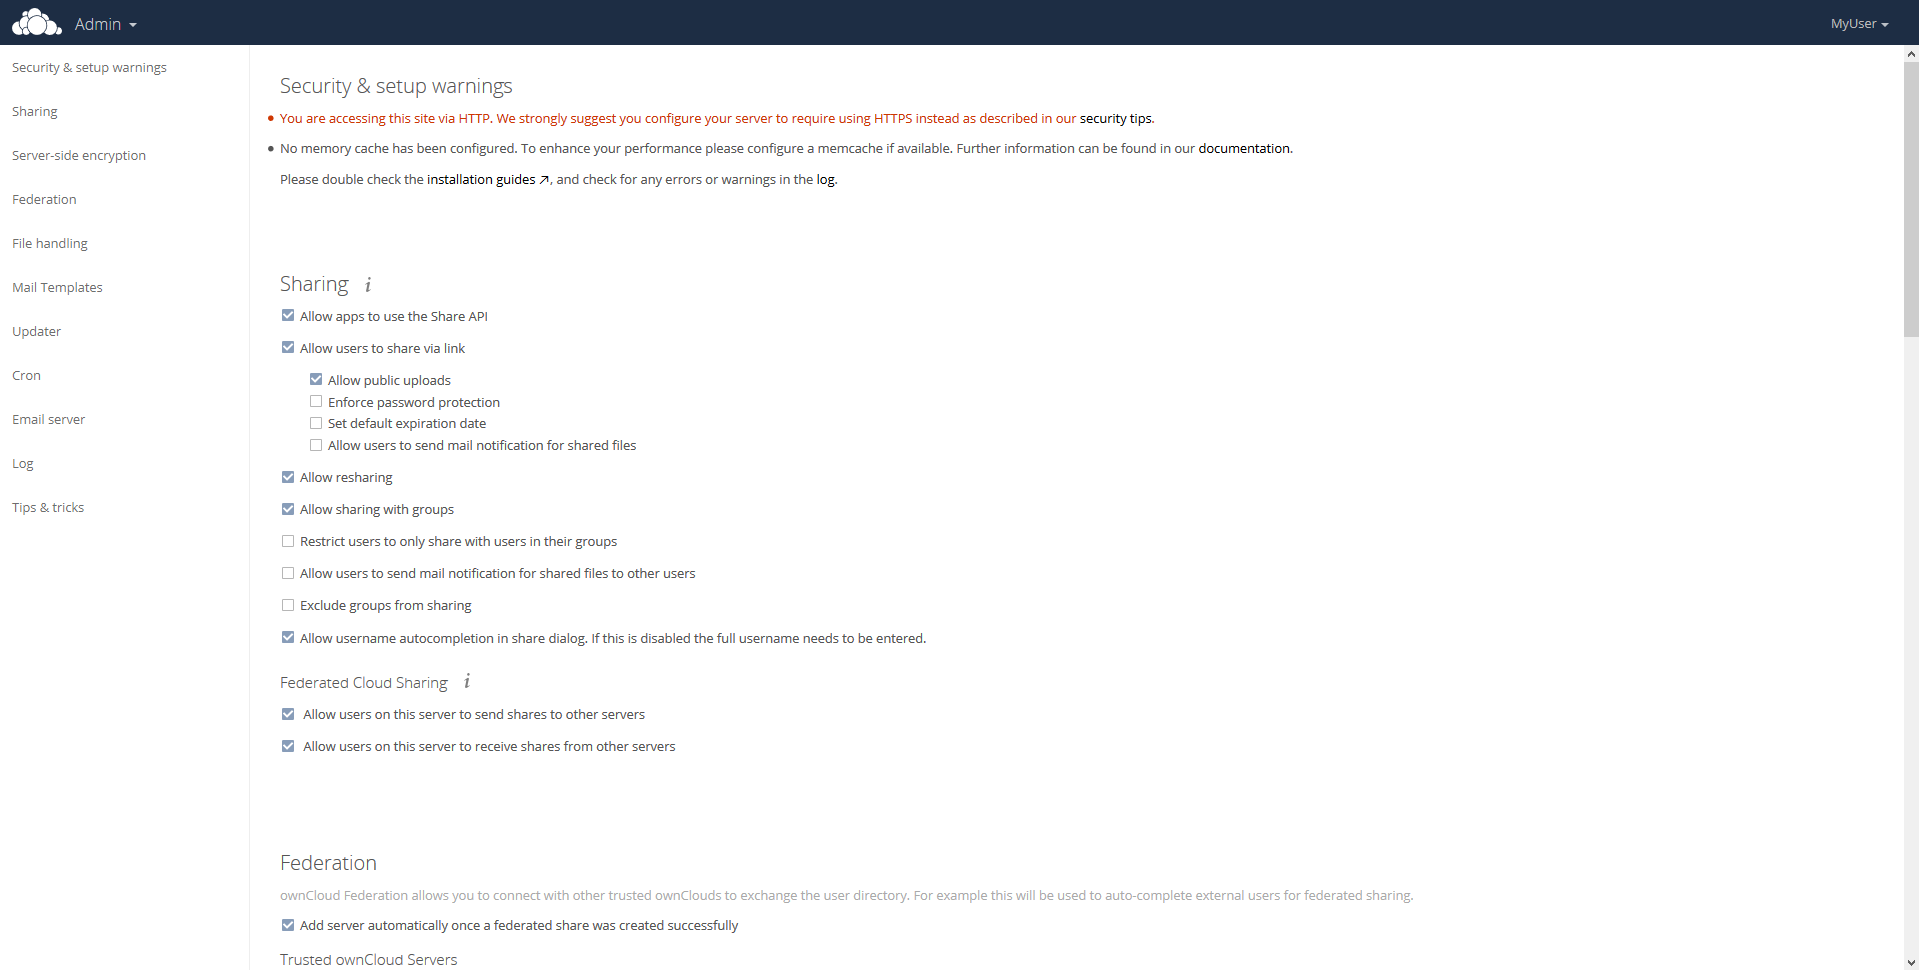
Your Instance is ready for production.
While installing Joomla isn’t too difficult, there is much more to setting up a website. Not only must you configure the operating system and set up all necessary dependencies, but you’ll also need to keep these components up-to-date. You’ll also be perpetually updating Joomla to avoid the latest security flaws. Fortunately, our One Click App process makes it easy to both install and maintain Joomla with all the latest security fixes.
Begin by accessing your account. Once you’re logged in, you’ll see our administrative portal.
What is an OCA?
Normally, installing Joomla involves setting up an operating system and securing it against intrusion. You’d also install a database, set up an HTTP server, configure that server to run PHP, and configure Joomla to connect to the database. Our One Click Apps perform all of these steps automatically. This has several benefits.
Most obviously, you’ll save time. Our OCA images do in seconds what might normally take minutes, or even hours. Further, our images set up all of Joomla’s PHP dependencies so you aren’t stuck installing modules and reconfiguring Apache by hand. After all, you’re not interested in maintaining a server. You just want a Joomla website, and our OCAs do just that.
For the purposes of this guide, we’ll be using our Joomla image. Start by clicking “Cloud Hosting” in the left navigation menu. Next, click “Instances.” Here you’ll see all OCA instances active on your account if any are present. Click “Create Instance” to begin setting up your Joomla site.
At this point, you’re on the instance creation page. We’ll explain the various fields below.
Start by setting an instance name.

Next, select a flavor. Many variables are involved in setting up a server for your website, and it can be difficult knowing how much RAM, disk space, and CPU power are needed for any given site. Flavors abstract all of that away, letting you instead describe performance in terms of how popular your site is. You can probably begin with a Popular 2, though you’ll likely want a Popular 3 if you already have an active site. Don’t worry, this choice isn’t final. You can change your flavor selection later. When you’ve chosen your flavor, click “GET IT” and we’ll set everything up.
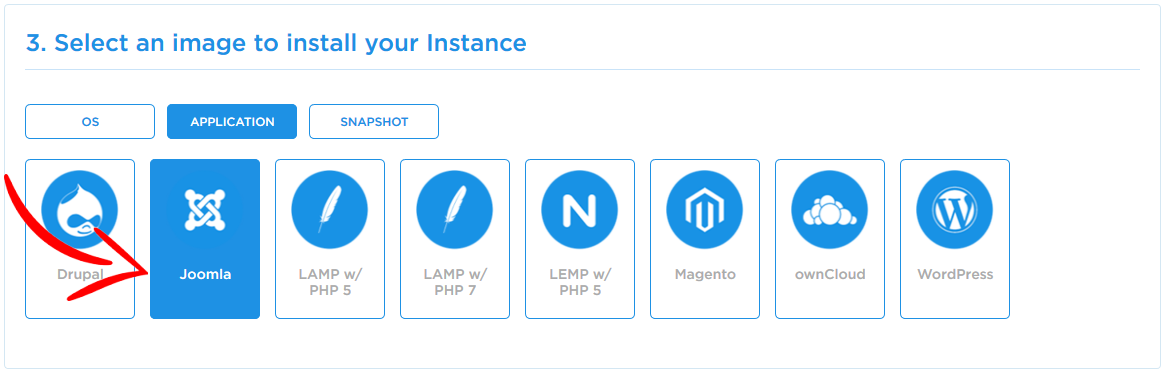
Next you’ll select the image that will be applied to your server. Since we’re using Joomla, start by selecting the Application tab. Then click Joomla.
This screen determines whether your instance will be accessed via password, or with an SSH key. For this guide, we’ll select Password.
Here we choose whether to use security groups. Security groups are outside the scope of this guide–we have another article on those–so here we’ll choose to not use them. Once security groups are disabled, click “Create Instance” to continue.
We’ve created your server, and have emailed access credentials to your address on file. Check your email for these. Save this message, as it contains all necessary details for accessing your new Joomla site.
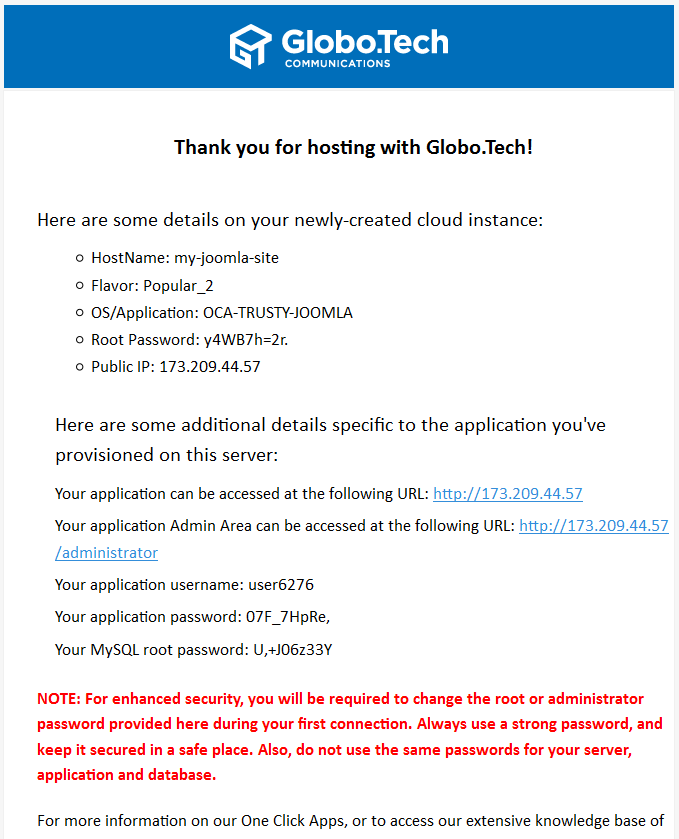
With these details in hand, let’s try connecting to your Joomla site.
Start by visiting your site’s main URL. In this example, the URL is http://173.209.44.57. It will, of course, be different for your own instance.

Next we’ll access Joomla’s administrative interface. Do this using the credentials you were emailed earlier.
In this example, the URL for the administrative interface is http://173.209.44.57/administrator, substituting your own IP address.
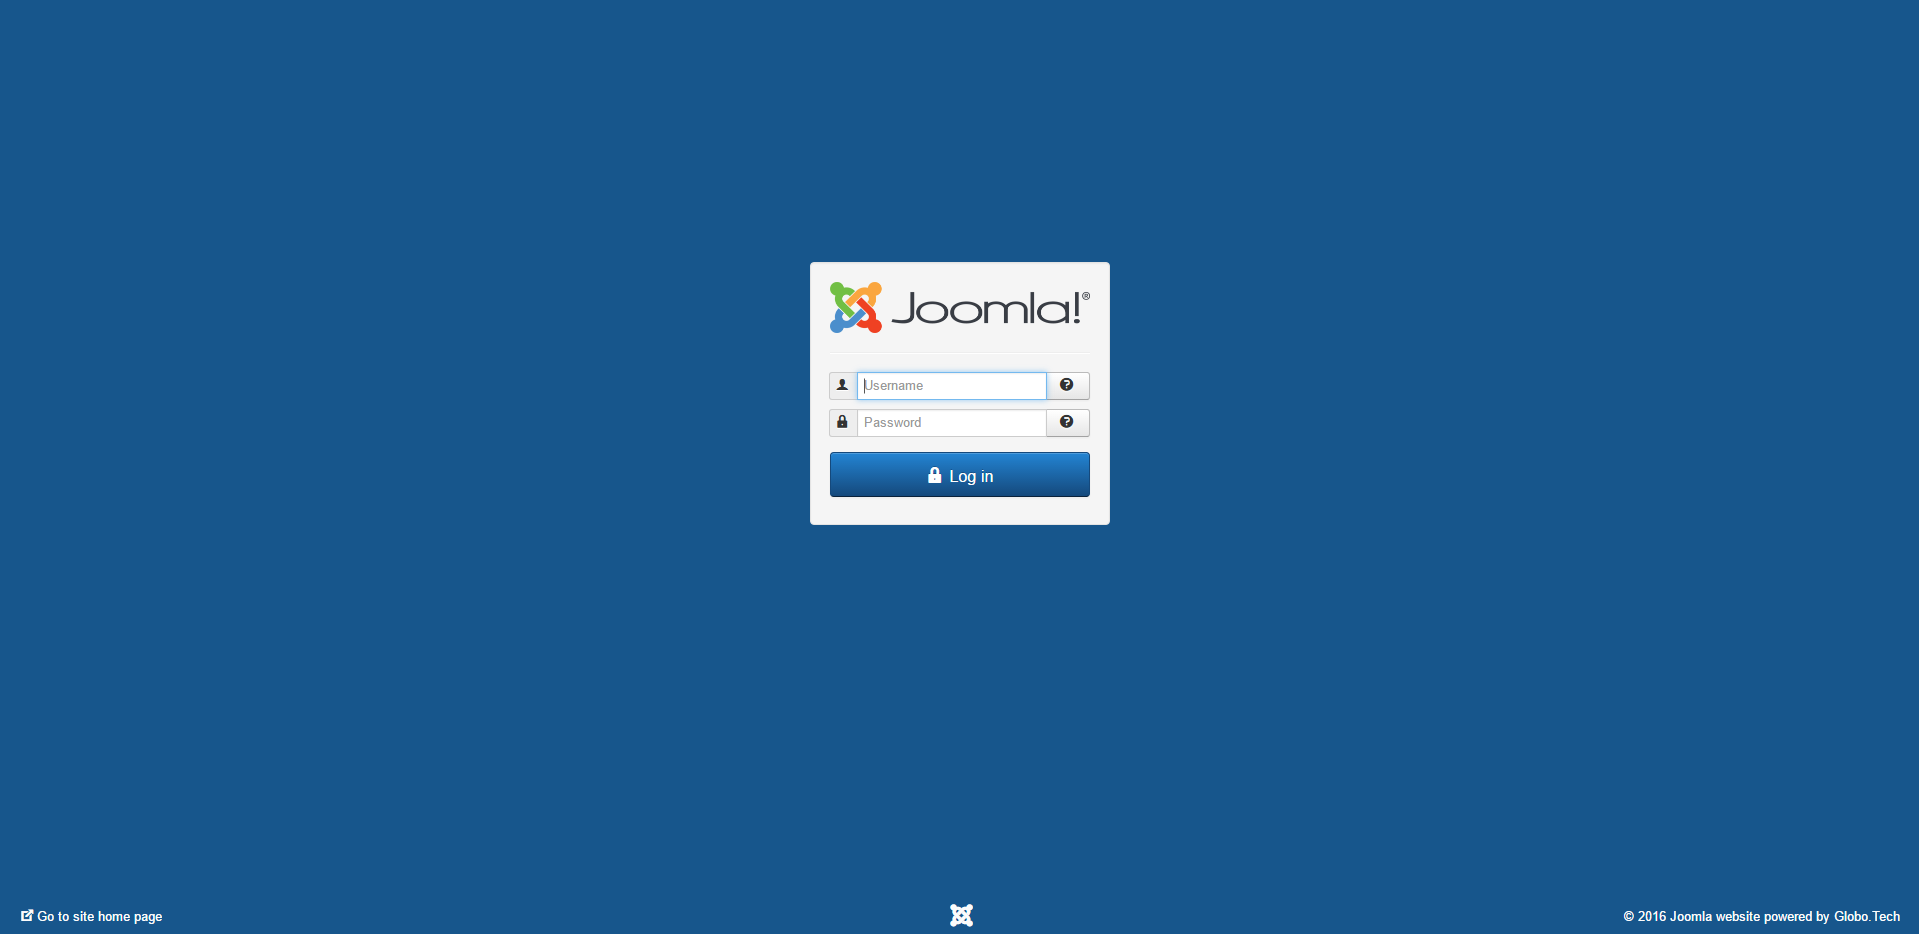
When you’ve entered your credentials and clicked “Log in,” you’ll be taken to Joomla’s administrative interface. Here is where you can publish content, configure your site, and change various aspects of how the site appears.
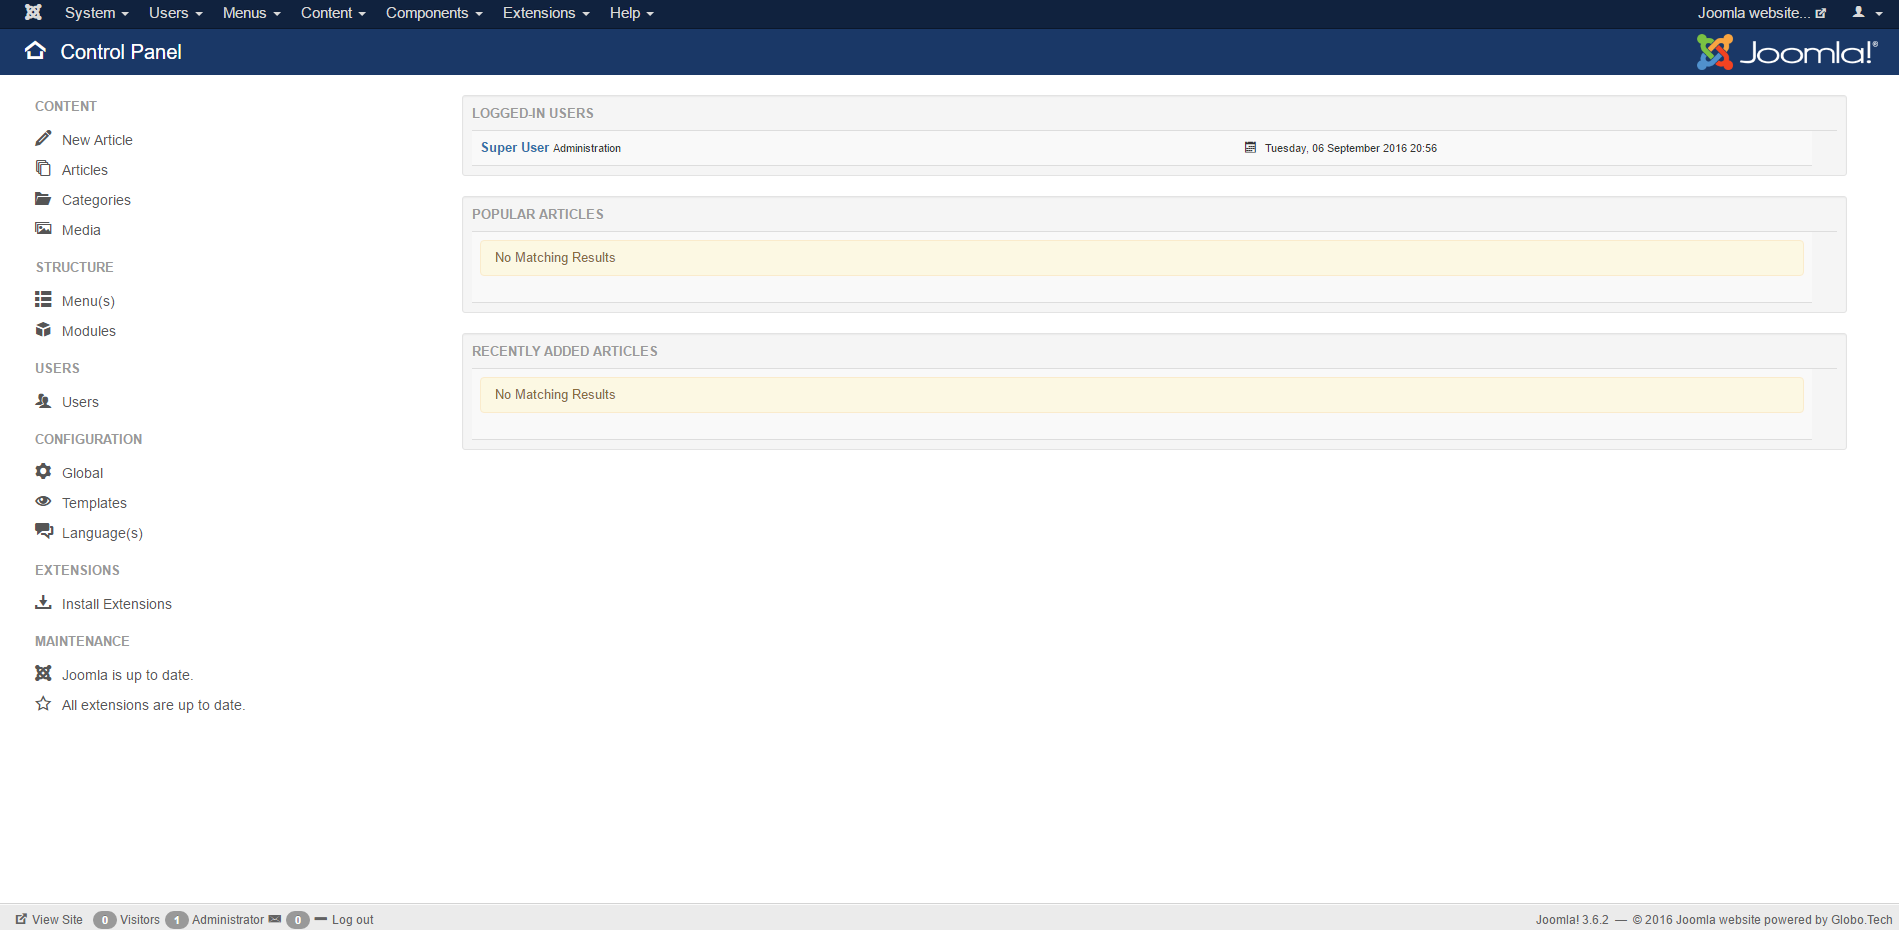
With this step complete, Joomla is up and running, and you can begin customizing your new website. Next you’ll want to configure Joomla and start adding content.
Ideally, your site will be reachable via a domain name so visitors don’t use your IP address directly.
You’ll need to purchase your own domain name before continuing. This can be accomplished either through a third party registrar, or directly from us. Get in touch and we can help with the process of acquiring and configuring your domain.
The screenshots in this guide will use the domain named MyJoomlaSite.com. Substitute your own when completing the following steps.
You will need two A records pointing at your IP address. Domain name registrars use different interfaces, so it is impossible to show exactly how this is done on every provider. You’ll need records for MyJoomlaSite.com and www.MyJoomlaSite.com set to the value of your IP address.
Unfortunately, DNS records take time to propagate throughout the internet. In some instances it can take as long as 48 hours, though records are generally available in only a few hours.
You’re now ready to configure your new Joomla site by installing themes and plugins. Details on doing so are beyond the scope of this tutorial, but Joomla’s own documentation is of great help with this stage. Visit it at https://docs.joomla.org/main_page.
We’ve achieved much in this guide, setting up an entire operating system and server stack for your Joomla website. Without our OCA system, you’d have had to do all of this from scratch, learning how to configure and maintain an entire operating system simply to run a Joomla site. Instead, you’re now up and running with one of the world’s best content management systems, and can instead focus on creating a great experience for your visitors.
In this article, you will learn how simple is to create a cloud instance using GloboTech’s Cloud Servers.
First login to GloboTech’s Customer Portal.
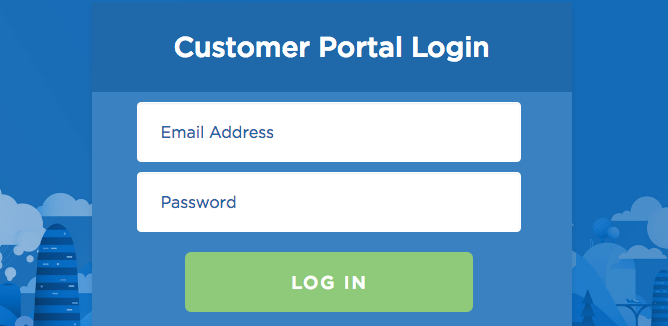
If you dont have an account yet, please visit this page to sign up: https://portal.globo.tech/access/signup
Once logged in, navigate to the “Cloud Hosting” section on the side menu and click on “Create New Instance”.

Simply complete the following 5 steps to launch your first Cloud Instance.
Enter the name that represent most the use of your Cloud Server.
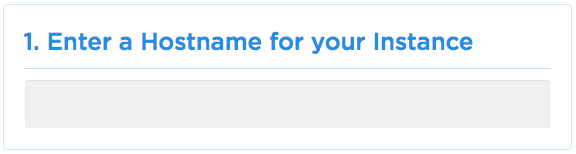
Pick a Cloud Flavor that would match the most your usage. Keep in mind that you can always scale your instance in the future if your project needs it.
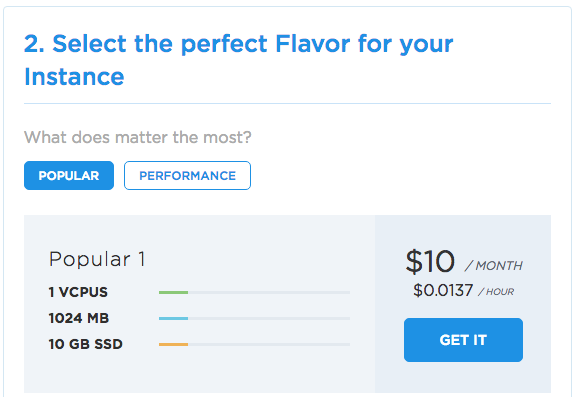
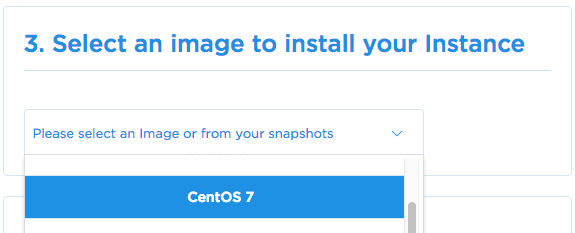
Select your favorite Operating System (OS) or use a snapshot from a previous or current Cloud Server.
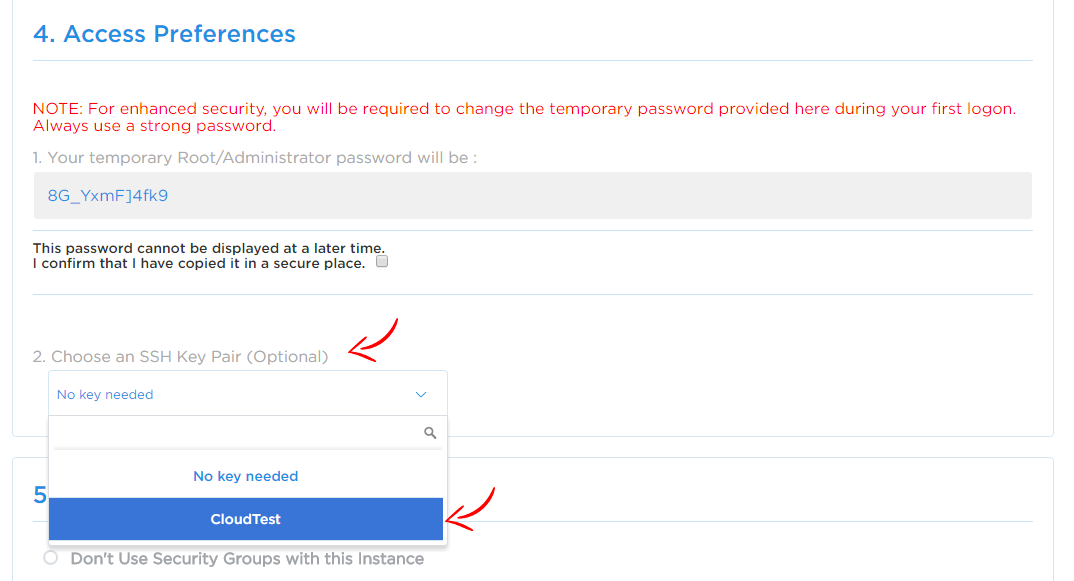
1. In this section, you will be provided with the root (Linux) or administrator (Windows) password that you can use once your Cloud Server is booted. Please make sure you write down this password since it wont be provided again. Once you have wrote down the password, check the box to confirm it.
(On your first login, you will be ask to select a new password.)
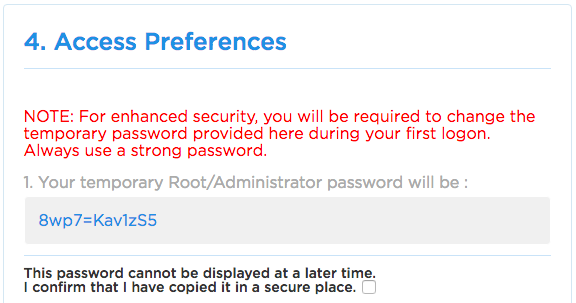
2. If you want to use a SSH Key (Only available on Linux Cloud Servers), please select a SSH Key previously created using our Customer Portal.

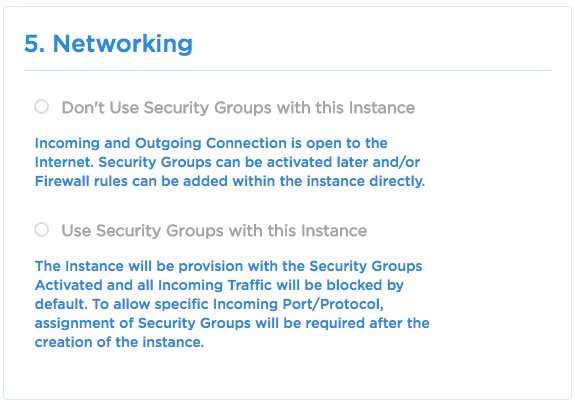
In the Networking section, you will be able to active or deactivate the use of Security Groups. Security Groups allow you to set custom firewall rules in front of your Cloud Instances. Security Groups can be activated and deactivated at any time.
1. Don’t Use Security Groups with this Instance – Select this option to have your Cloud Server without any firewall or restriction setup.
2. Use Security Groups with this Instance – Select this option to have the Security Groups activated. By default all incoming traffic will be block and you will need to add security groups to allow incoming traffic (UDP/TCP/ICMP)
Once satisfy with your selection, simply click on “Create Your Instance” and voila. Enjoy your new GloboTech’s Cloud Server
